Essentials
Grants allow one subaccount to get access to the instances in another subaccount that is not directly related to it (has no parent-child relation with it).
How grants work
Grant can be issued for ALL instances of a given type (e.g. channels, devices, etc.) as well as for specific instances only. By default, access allows viewing and using the instance (read-only).
For example, if one account (grantor) gives access to the calculator to another account (grantee), the grantee will be able to assign its devices to this calculator. And no matter what other devices are assigned to the calculator, the grantee will only see the devices he has access to and the intervals generated for them.
Read-only access does not allow access to logs for calculators, plugins, streams, and groups.
Other levels of access include:
- edit — change instance configuration
- delete — remove an instance from account
- command (for devices only) — send command or setting to device, disconnect device connections
It is also possible to grant access to the subaccount(s) as a whole. Read-only access allows viewing all instances except tokens, oauth, and grants. The topics of such granted subaccount are available by its original subscription as well as when filtering by "cid".
You can extend access to the subaccount by adding the following possibilities: create-devices, create-channels, create-plugins, create-streams, create-calcs, create-groups.
It is also possible to grant FULL access to the grantor's account or its subaccount by specifying the “operate-as” access level. In such case, the grantee will be able to execute ANY REST requests specifying the x-flespi-cid header and publish to topics on its behalf specifying the cid field.
Access to the group only gives the possibility to add instances to the group but does not give access to all instances in it
How to create a grant?
- Log in to the flespi panel
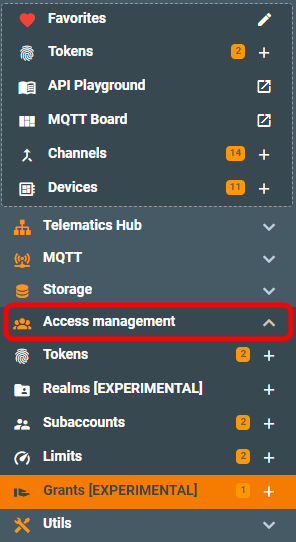
- Grants section can be found in the Access Management in the left-side menu:
- Click the green “+” (plus) button in the bottom right corner to create a new grant. Then we need to configure who grants access, to whom, and for what set of items:
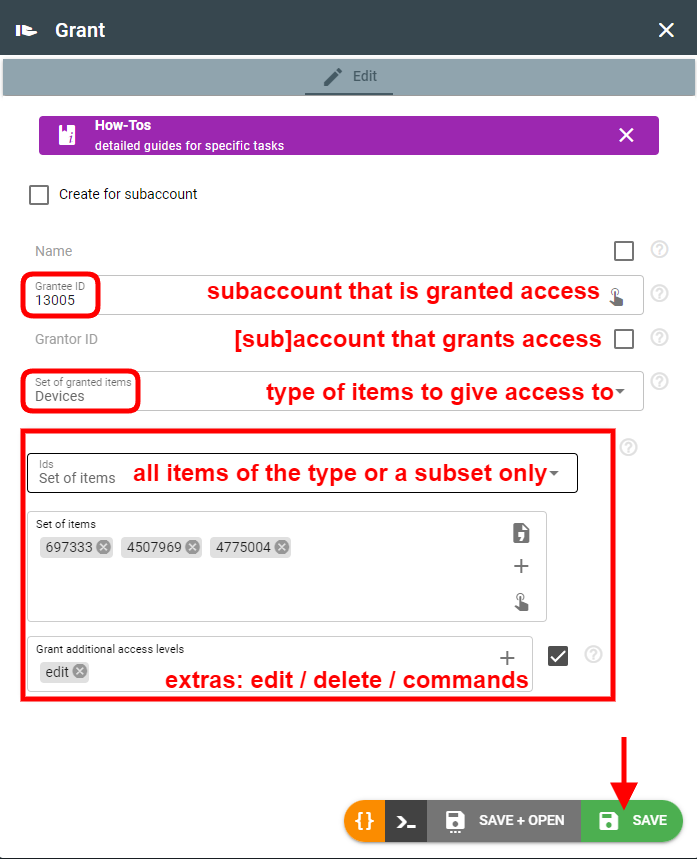
Grants use cases
Provide access to item from higher subaccount
Usually, subaccounts follow the top-down access permissions concept — higher-level subaccounts have access to items in subordinate (lower-level) subaccounts, but not vice versa.
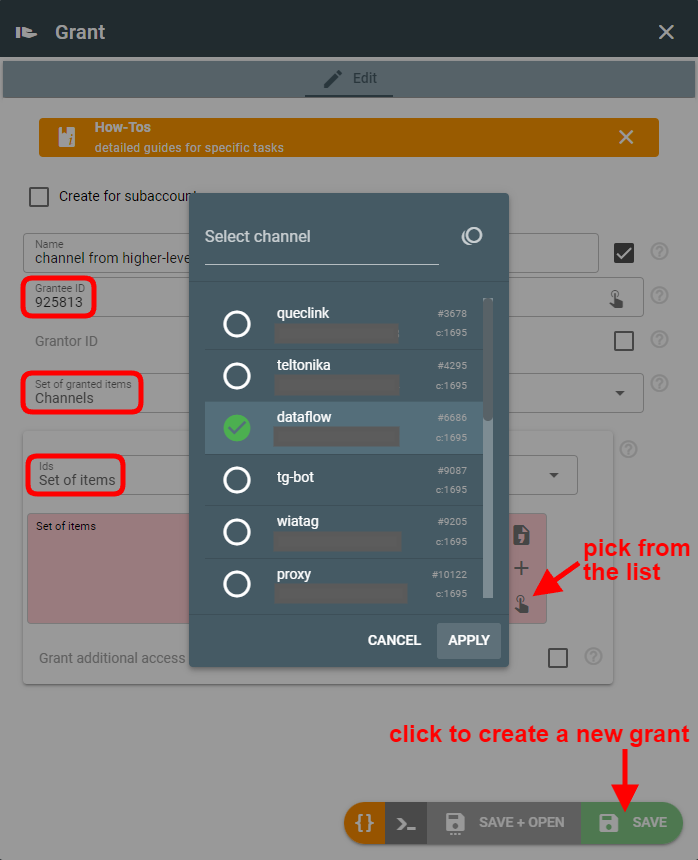
However, sometimes it may be necessary (or convenient) to let the device from the lower-level subaccount access channel, stream, plugin, or calculator from the higher-level subaccount. You can achieve this with grants. For example, let’s grant access to a specific channel for the specific subaccount (grantee):
Note that default (read-only) access is sufficient here, since it already gives the possibility to use the channel.
Give supporter access for debugging and troubleshooting
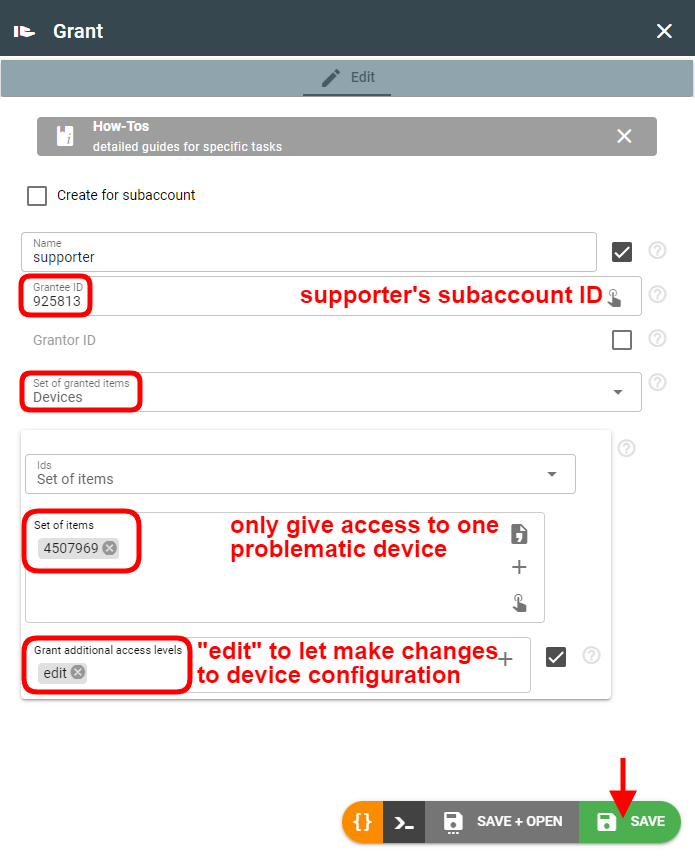
Usually, supporters are given access to specific client subaccounts or items within clients’ subaccounts. Most likely, the supporter will need read + edit permissions that will also give access to the logs:
Implement complex telematics project
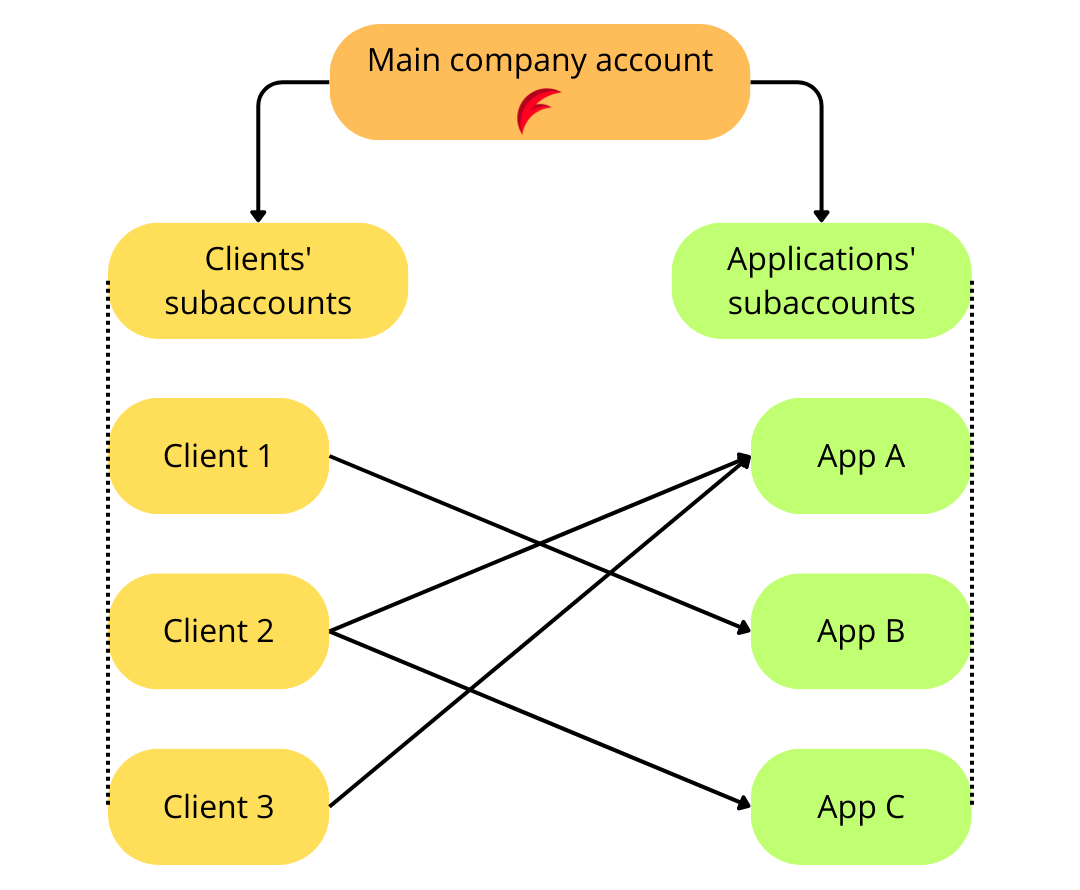
If a company owns a flespi account, it can have separate subaccounts for its different projects (or applications). Additionally, this same company can create subaccounts for its clients (users of their applications). The specific client should be given access to the specific application(s) — the one(s) they subscribe to or pay for. Since the hierarchy of clients subaccounts and applications subaccounts are unrelated, it’s convenient to use grants to give proper access.
Grants API
To perform any operations with the grants, use the grants API.
Troubleshooting
You can find all log records related to the grant in the Logs tab on the grant screen.
