In our tech support, we are often asked questions about how to connect Teltonika routers to flespi. The company produces more than 50 different models of routers, switches, access points, gateways, and modems. Some of them are designed to be installed in moving environments, enabling them to detect the position and report it, along with other telemetry, to remote servers where flespi steps in.
So, in this article, we’ll give an overview of how to obtain data from these devices to flespi, focusing solely on communication with our platform.
Exploring the Web UI
Who reads manuals first? :) Of course not me, and I believe you don't do it as well. As an advanced user, I go straight to exploring the web UI.
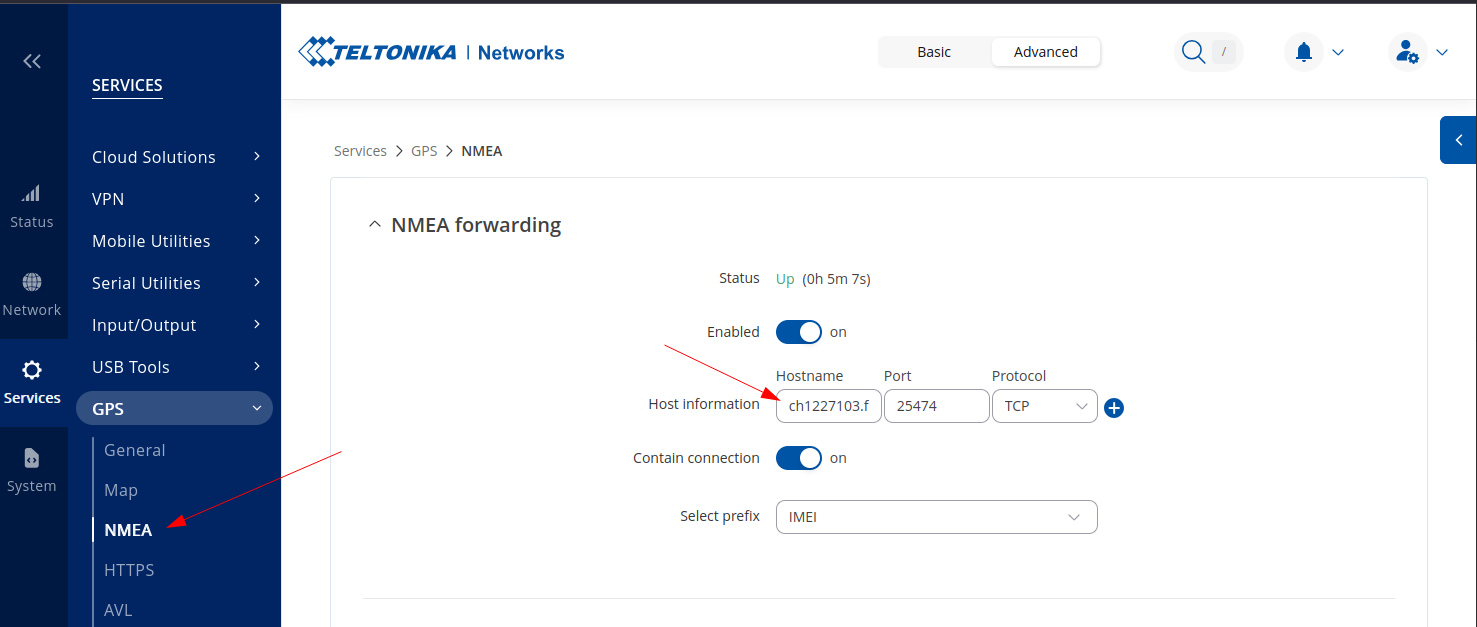
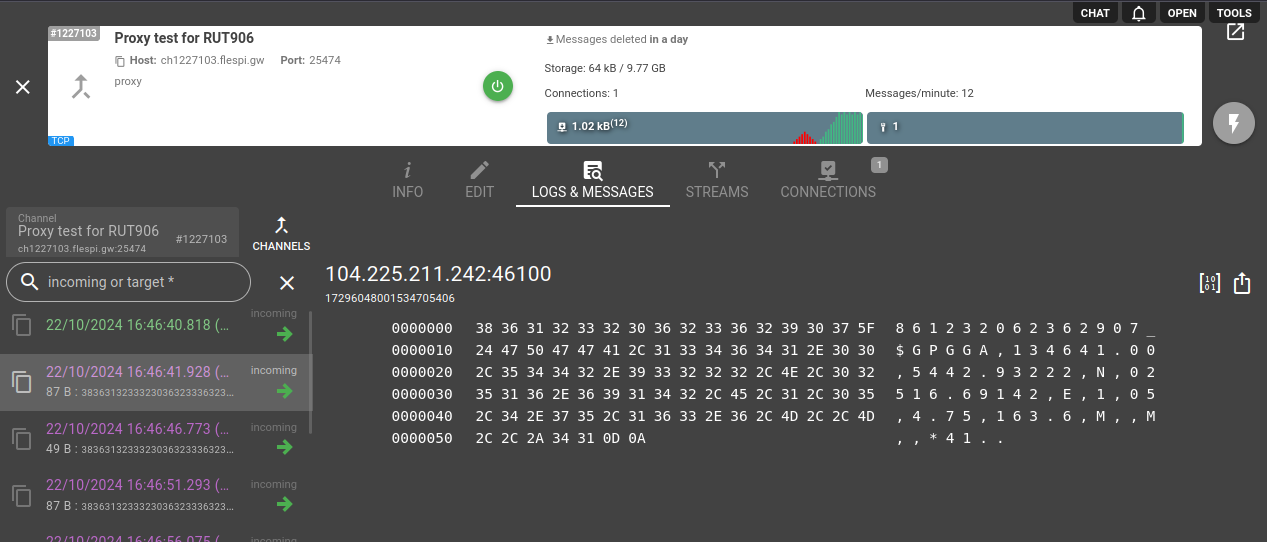
The first tab I opened? Naturally, Services > GPS since flespi is central to GPS monitoring platforms. I first spotted the field to enter the server address under NMEA Forwarding. NMEA (National Marine Electronics Association) is a standardized GPS format for data transfer. But in our niche of vehicle GPS tracking, we had no integrated devices that reported data in NMEA format, so it is not natively supported on flespi. That's why I created a proxy channel and pointed the device there.
Here’s the unsupported data format:
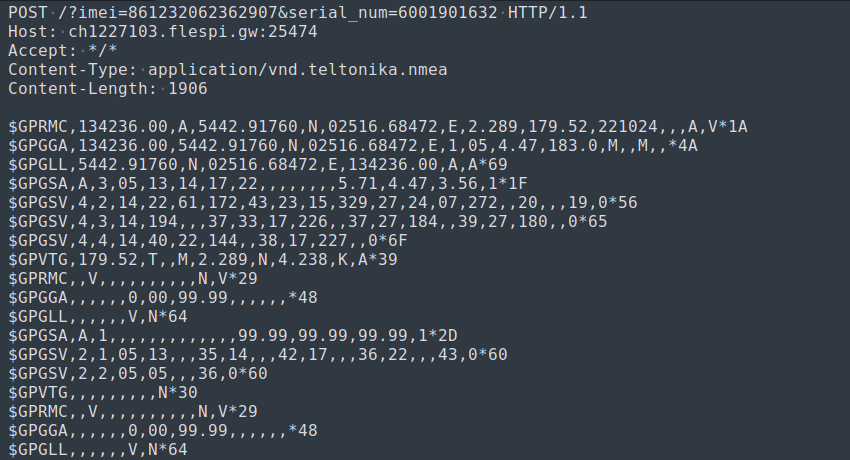
Next tab: HTTPS. We can accept HTTP requests, but flespi requires the data to be structured as JSON. Here we see NMEA format encapsulated in HTTP, which doesn’t work with flespi. No problem, here’s an example of HTTP payload full of plain NMEA strings.
Next, try the AVL tab. This looks promising, as AVL stands for Automatic Vehicle Location, where Teltonika codecs are used and fully supported by flespi in the Teltonika protocol.
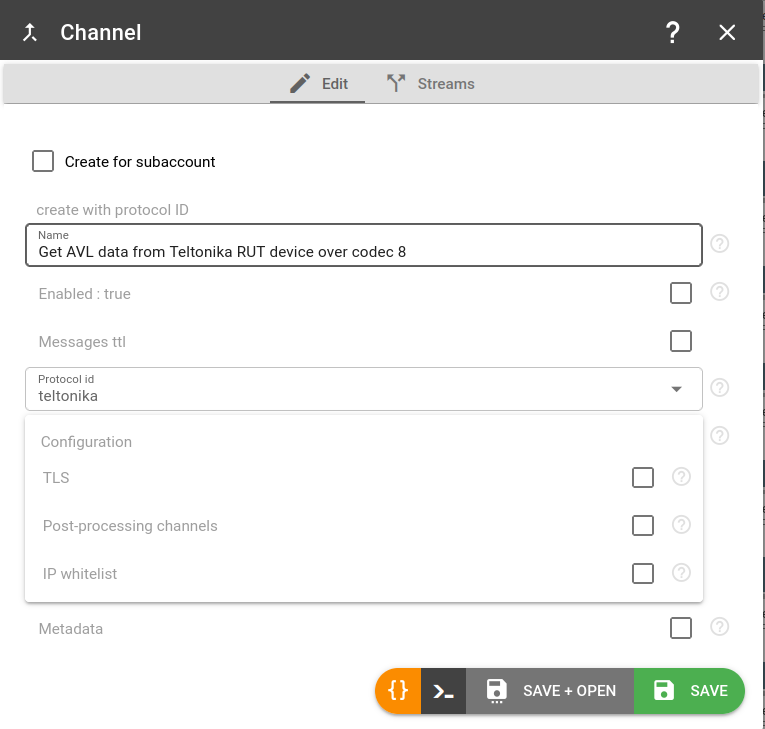
Success! The device connects and sends all available telemetry:
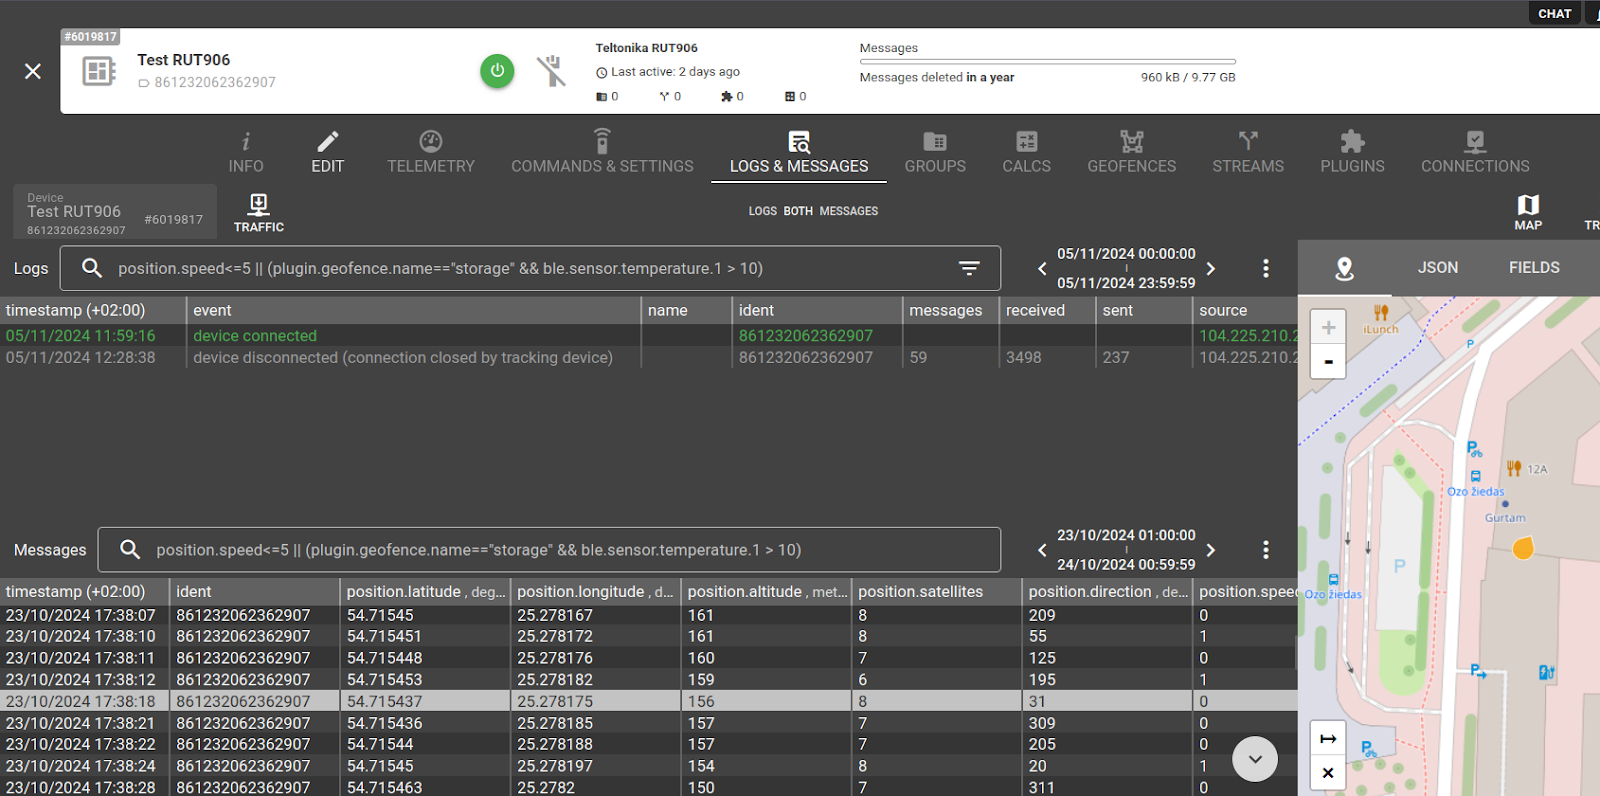
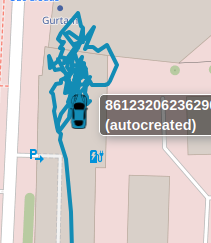
Hmm, though stationary, the position jumped:
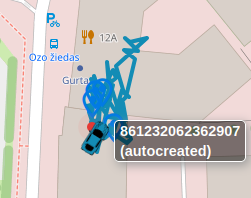
I enabled the Static Navigation feature, but it didn’t stabilize. Here’s the track after enabling it:
The data flowed in the correct direction, so I explored remote control of the built-in relay or digital output. Unfortunately, no info confirmed the device supports codec12 commands, so remote control via flespi remains unsolved for now. I found a guide to switch the relay via HTTP in my local network; to use it remotely, I needed a static IP and port forwarding. As a request for the Teltonika team, I’d suggest enabling codec12 commands via AVL.
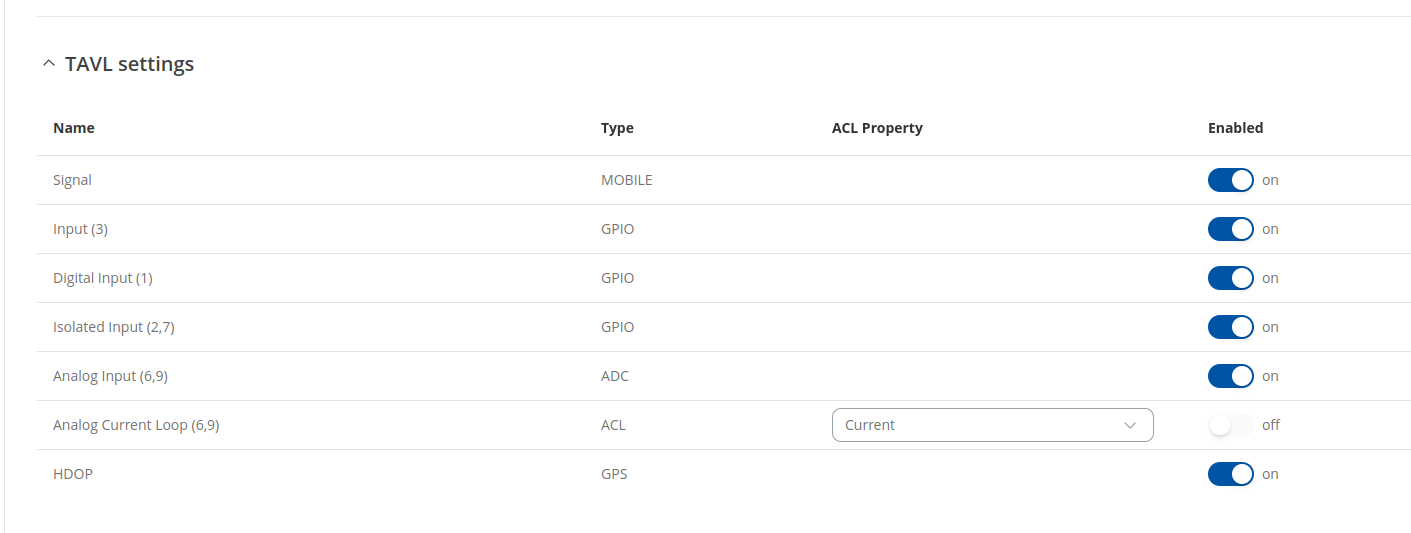
Other parameters obtainable include:
With all enabled, the flespi message (excluding flespi-related entries and position) looks like this:
{
    "ain.1":0.007,
    "custom.param.182":0,
    "custom.param.3":0,
    "din.1":false,
    "din.2":false,
    "gsm.signal.level":60
}
Likely, 'custom.param.182' is HDOP, and 'custom.param.3' is digital input 3. Unfortunately, no Wiki table links IDs with parameter names, so I began exploring...
Exploring Wiki
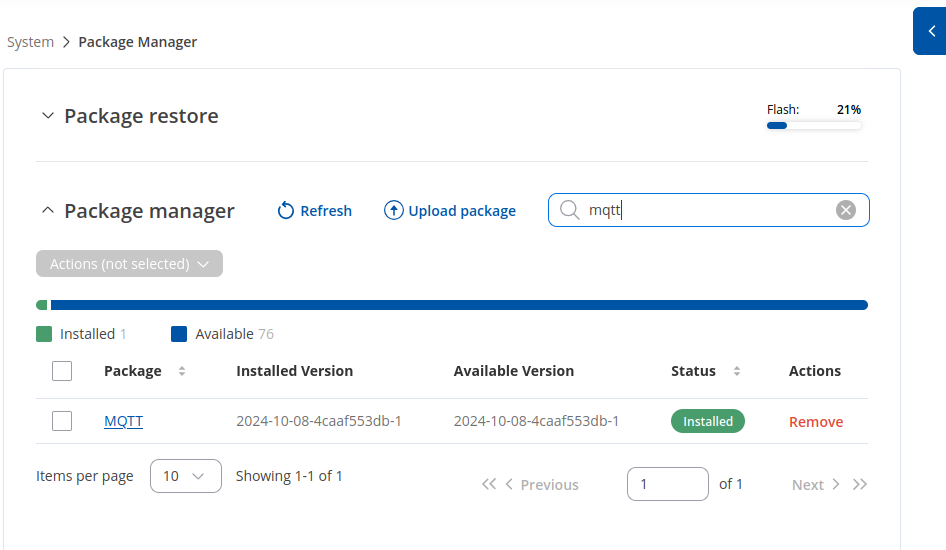
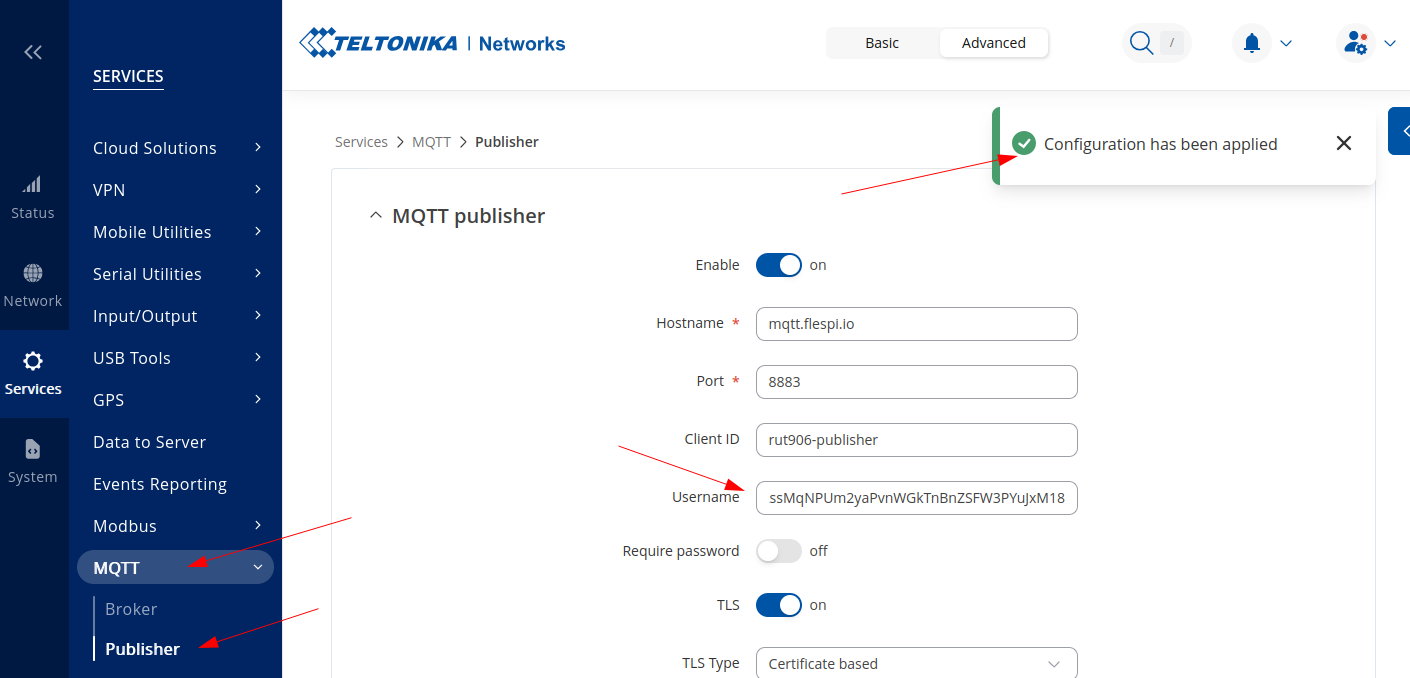
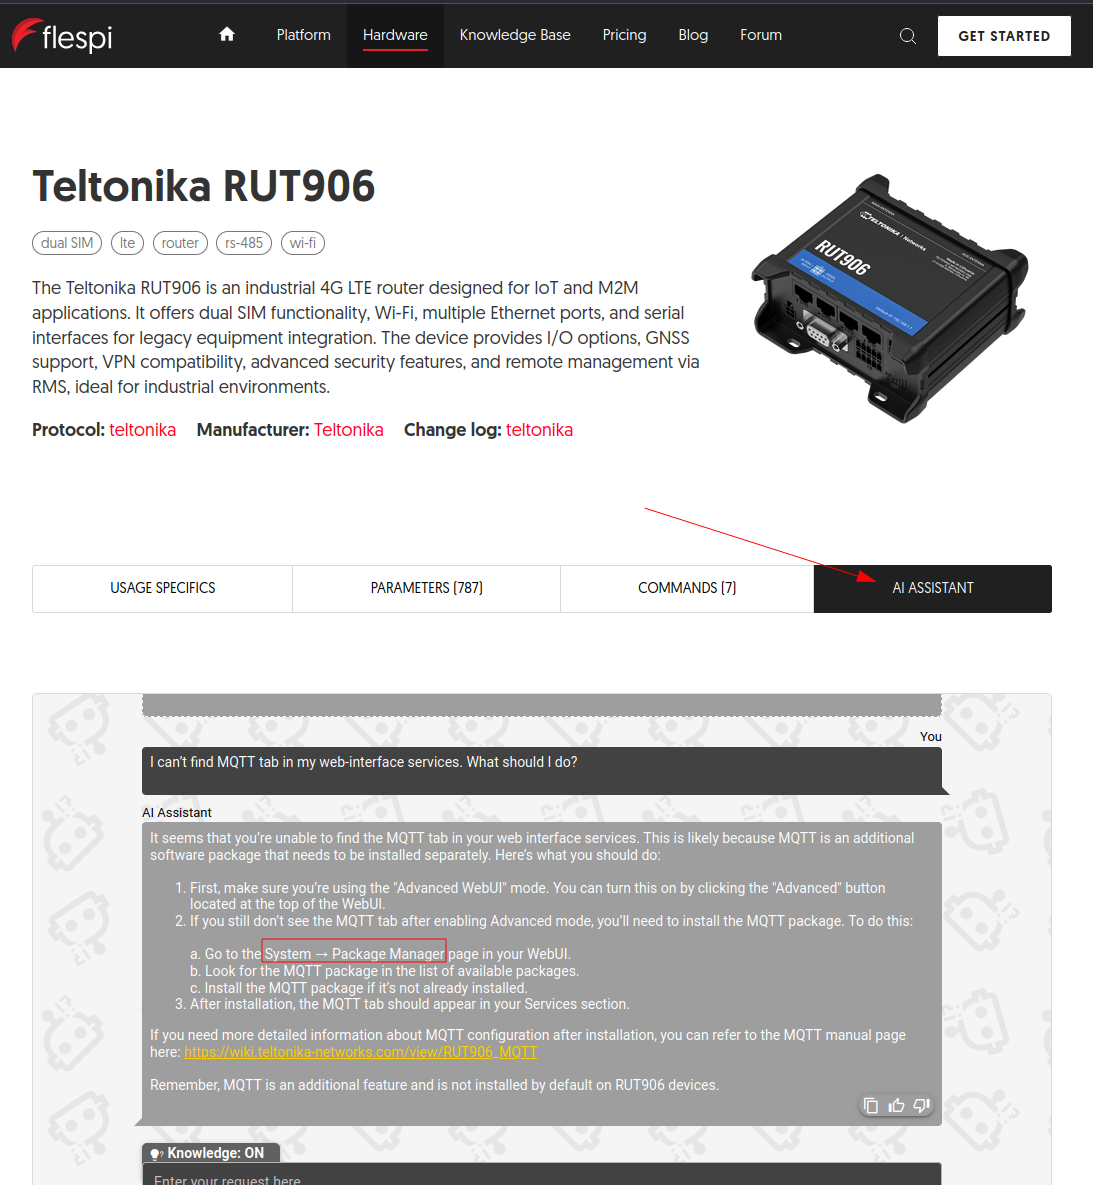
To find flespi data retrieval methods, I turned to the device Wiki pages. First, the Configuration Examples page, where the Monitoring via MQTT section caught my eye. It explains device communication over MQTT and includes screenshots to tune the MQTT Broker (unnecessary, as flespi has its own) and MQTT Publisher, exactly what’s needed to connect to flespi. However, the article didn’t clarify where to locate this in the UI; searching “MQTT” yielded nothing. Finally, the answer appeared under RUT906 > Manual > Services > MQTT: MQTT requires separate installation in the package manager. So, don’t panic if it’s absent in the default setup. :)
I installed it and connected the Publisher to the flespi MQTT Broker. There was one small obstacle: the default authorization for the flespi MQTT broker is done by the flespi token, which is 64 characters long.
When I put it in the username field and saved the configuration like this, I saw a notification that “Configuration has been applied,” but no MQTT session was established.
After some research, I figured out that my username was too long. There is an alternative authorization method for the flespi MQTT broker, where the username is the token ID, and the password is the first 16 characters of the token. After I used this method, the session was established. Just note that it works with ACL tokens only. :) A feature request: allow 64-character usernames or generate a clear error explaining why they’re invalid.
Notably, the article states that the Publisher subscribes to the commands topic:
I thought this might enable relay or digital output control remotely, without static IP or port forwarding. However, it only subscribed to the /get topic, responding correctly to /get requests.
Another intriguing example was Monitoring with ThingsBoard IoT Platform. This method involves creating a Modbus server that listens on a local port, then a Modbus client pushes data to the server. Each telemetry entry has a Modbus register, address, and data type. Once the server receives an event, it can trigger actions like HTTP requests or MQTT publish. For this setup, these articles show how to connect this custom data source:
The MQTT username limitation applies here too, so the ACL Token auth method should be used. However, customized HTTP requests would simplify the process.
Summary
Pros
- Solid, fast, responsive, versatile device. Immediate remote platform visibility when configured properly; misconfiguration is the only delay.
- Numerous configuration options, extendable via packet management. Complexity here means comprehensive solutions, and Wiki pages covered all my questions.
- Web UI is neat and functional. Reliable connectivity, easily retrieved data points, and platform compatibility.
Cons
- Static navigation didn’t work.
- The lack of internal logs meant I had to troubleshoot MQTT connection issues without much info.
- Built-in relay control via MQTT wasn’t possible.
- Pretty annoying notification to update firmware even though I did it at the very beginning.
Big thanks to Teltonika for providing a RUT906 sample for tests! :) And to flespi MQTT Broker for flexibility with short usernames that made everything possible without hassles.
Bonus
We've added AI Assistant for Teltonika RUT devices. I would not had spent much time in finding MQTT tab. Give it a try!

