The letter “S” in the word “IoT” stands for “Security”. Flespi together with Teltonika does their best to make this joke genuinely funny :).
Why does traffic encryption matter?
a) It prevents a man-in-the-middle attack. Most IoT/telematics devices have a publicly open communication protocol (e.g. this is Teltonika protocol specs). TLS encryption turns structured data into randomized noise which makes it impossible to pull anything usable out of it.
b) It prevents data injection. We’ve already described that every flespi channel has a unique hostname and port pair, and a user can specify whitelisted IP addresses to accept data from. TLS connection implies an initial handshake so the connection will be closed if certificates mismatch.
c) Well, I am not good at hacking. I just know that traffic encryption is better than no traffic encryption. Trust me, I’m an engineer.
This article will show you step-by-step how to:
generate a certificate chain
load a certificate to the device and enable TLS mode
Requirements: Teltonika device with TLS capable FW installed (03.27.00 or later), flespi account with Teltonika protocol channel created (if you don’t know what it is, see steps 1-2 here).
1. How to generate a certificate chain
This guide is written for the Linux command line. (Windows guide is available here)
Install prerequisites:
apt install easy-rsaCreate PKI directory:
make-cadir cert_chaincd cert_chainInitialize PKI:
./easyrsa init-pkiGenerate a root certificate and private key pair:
./easyrsa build-ca nopassGenerate a server certificate and private key pair for the Telematic platform:
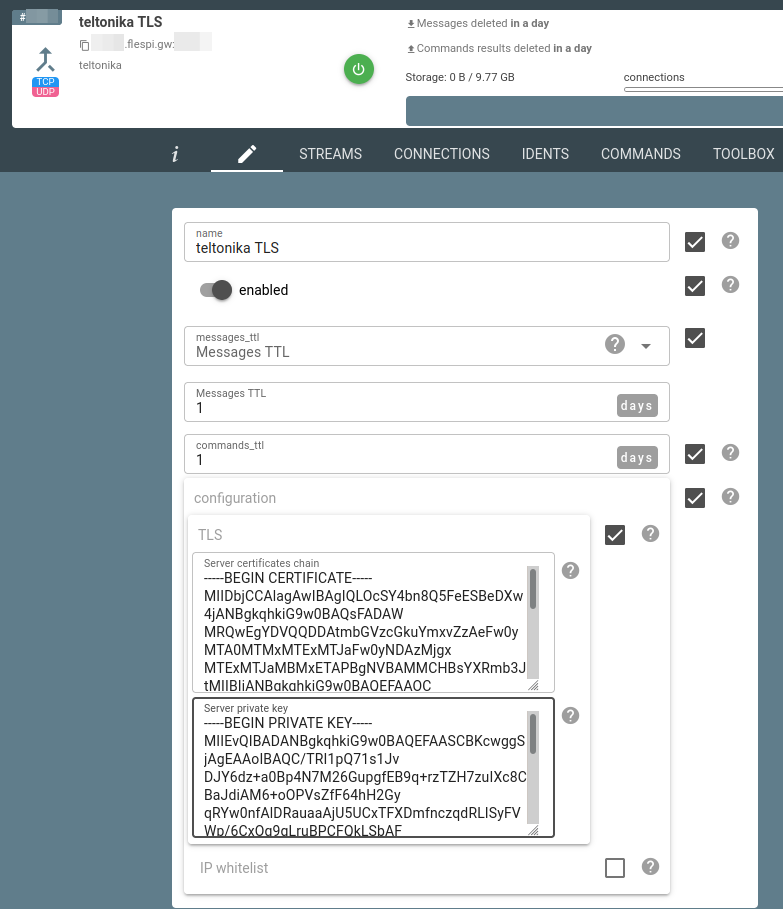
./easyrsa --subject-alt-name="DNS:*.flespi.gw" build-server-full platform nopassEnable TLS in Teltonika channel configuration and upload the pki/issued/platform.crt as a server certificates chain and pki/private/platform.key as a server private key:
2. How to load certificate to the device
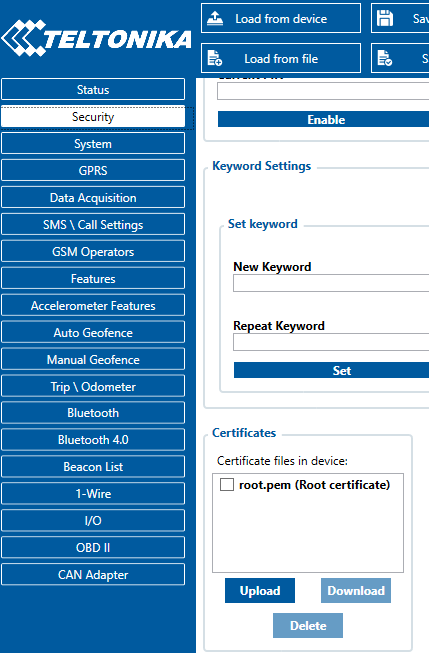
Get the file pki/ca.crt to the Teltonika device via USB configuration tool (hint: rename ca.crt to root.pem to make it visible for the tool).
Go to Security tab -> Certificates section -> Upload and select the recently created root.pem:
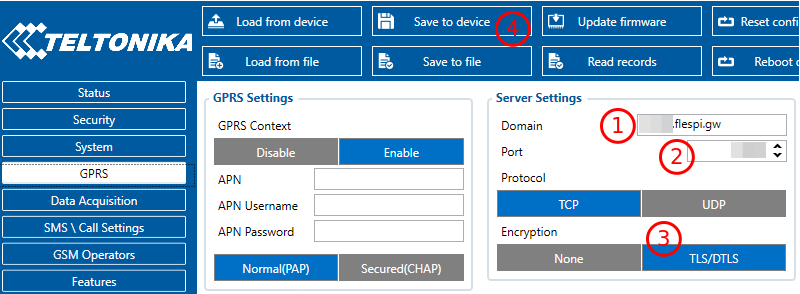
Then go to the GPRS section, switch the device to the new channel with TLS configured, enable TLS, save new settings to the device, and reboot it.
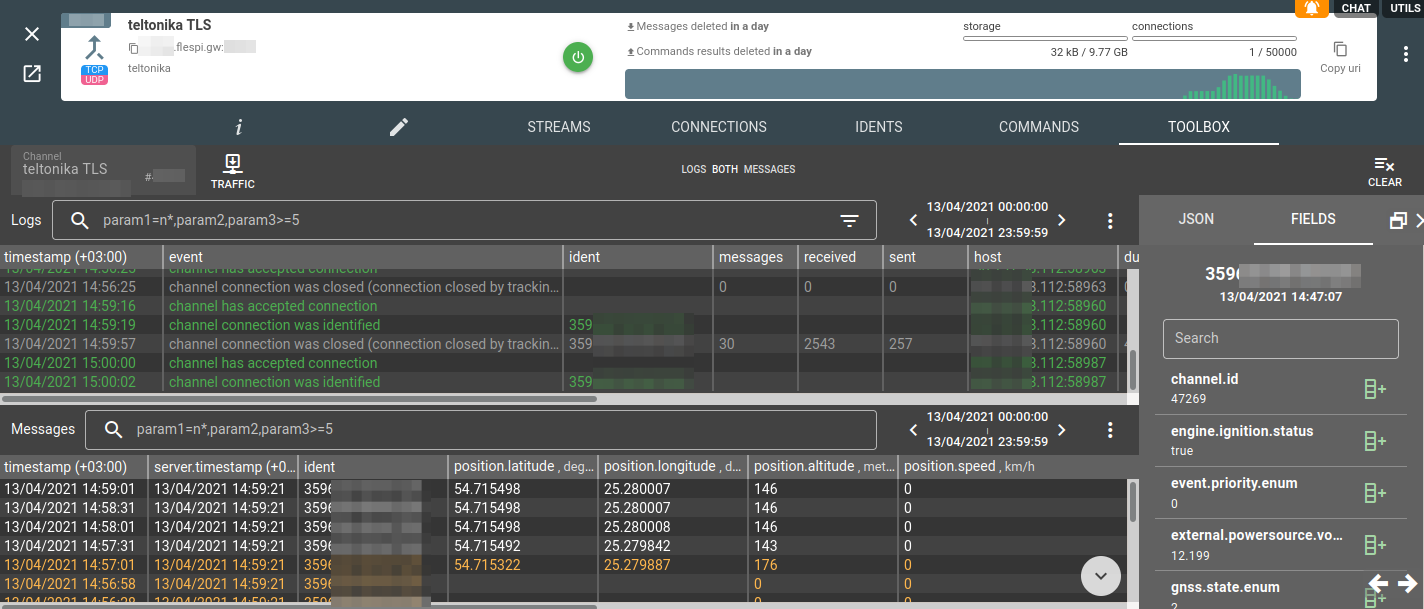
What you’ll be happy to see in the channel’s Toolbox is the log records about successful connection and parsed data!
We understand that connecting to each and every device via USB cable might be at least challenging. Well, it is super-safe as (I hope) nobody can act as a man-in-the-middle in a USB cable. If you can’t physically connect to a device, you can load the certificate via FOTA Desktop. Teltonika plans to enable communication between their devices and FOTA WEB service over encrypted communication. This will allow Teltonika customers to load certificates and other valuable data safely and automate certificate loading tasks for big fleets. What’s more, Teltonika customers can order the following services to be provided right at the factory (before shipment): loading required firmware, configuration, and certificates, as well as installing SIM cards!
***
Security is often a critical component that may determine the approach and solution providers to choose for an IoT infrastructure. Flespi partnered with Teltonika to ensure secure communication between Teltonika IoT/telematics devices and the flespi gateway. Security at the next step — between flespi and the downstream platforms or applications — is guaranteed by SSL/TLS encryption. Keep your solutions safe and contact us or Teltonika with any questions.