Google SSO simplifies access to multiple applications using a single Google account, offering familiarity, easy integration, robust security measures, and cross-platform compatibility. Compared to SSO methods from other providers, Google SSO leverages existing Google account familiarity, simplifying user adoption. In this article, we'll explain how to make it work moving step by step.
Note: SSO user authentication is tied to realms concept, so we recommend this article as a starting point as long as you need to have at least one realm set up.
- Configure your Google Cloud project
- Set up an Identity Provider on flespi
- How to authenticate users with a link
Configure your Google Cloud project
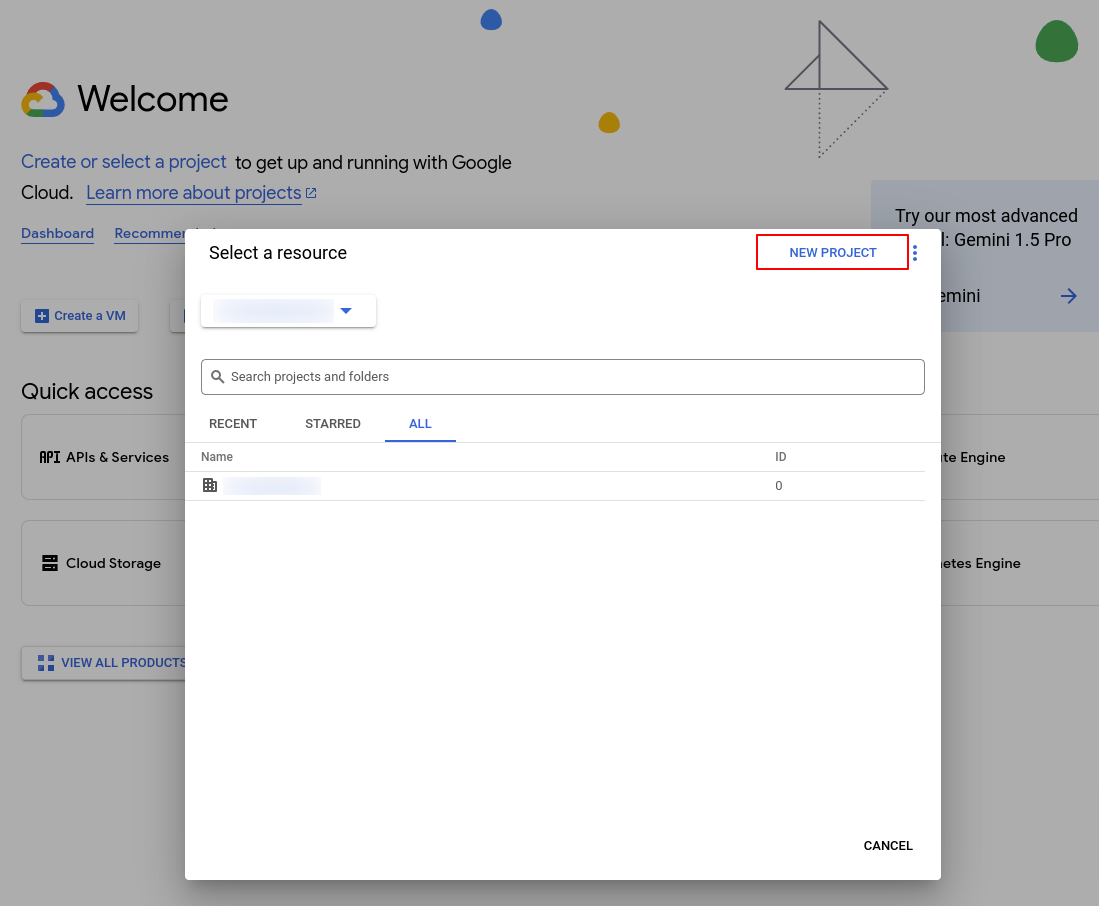
So, first, we need to log in to the Google Cloud Console to create a new project.
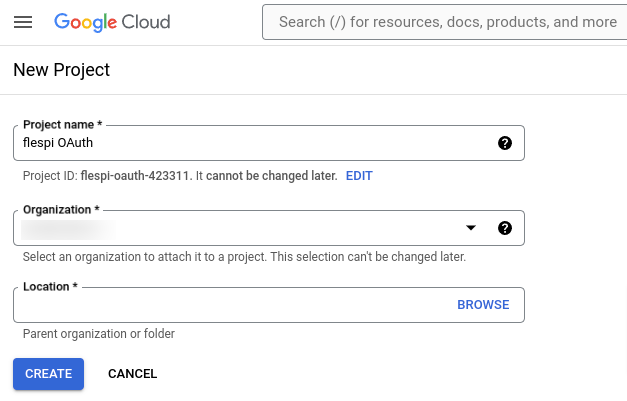
Specify a project name, organization, and location. Click the 'Create' button to confrim.
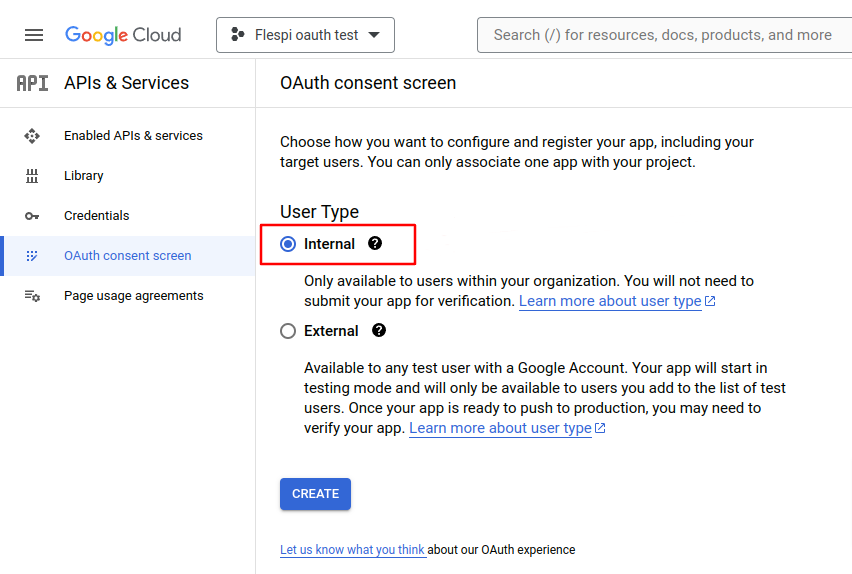
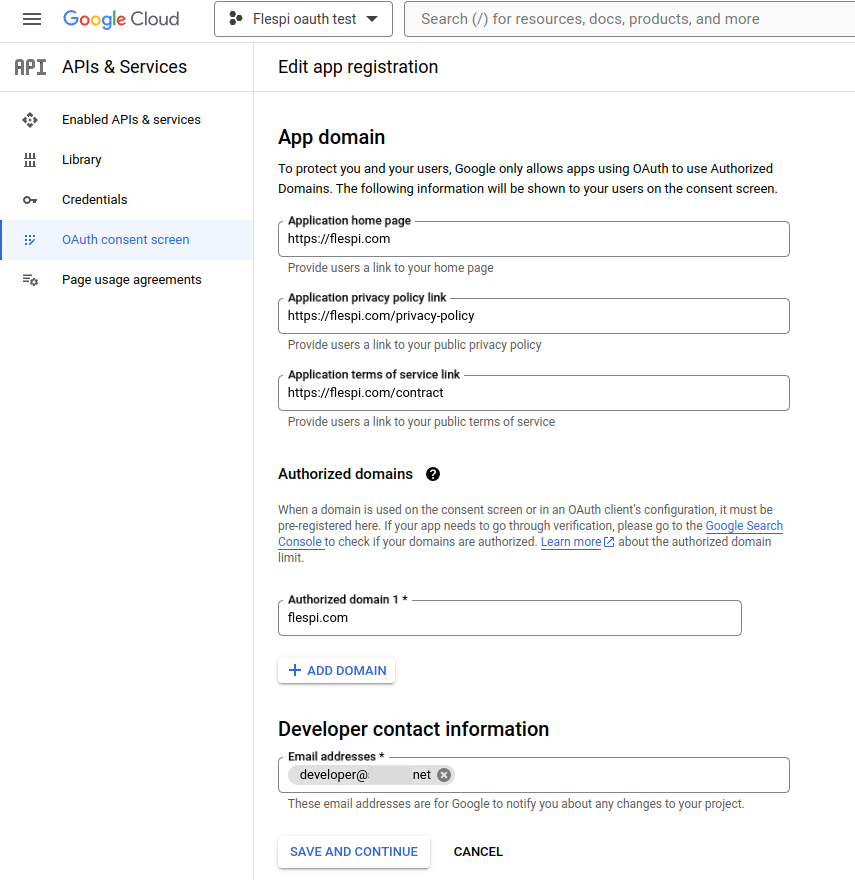
As the project is created, choose the OAuth consent screen from the main menu and set 'Internal' as the User Type. Then click the 'Create' button.
In the next step, you will be asked to provide the following information:
- app name, user support email, logo (if you've got one);
- application home page;
- application privacy policy and terms of service links;
- authorized domain and email as a developer contact.
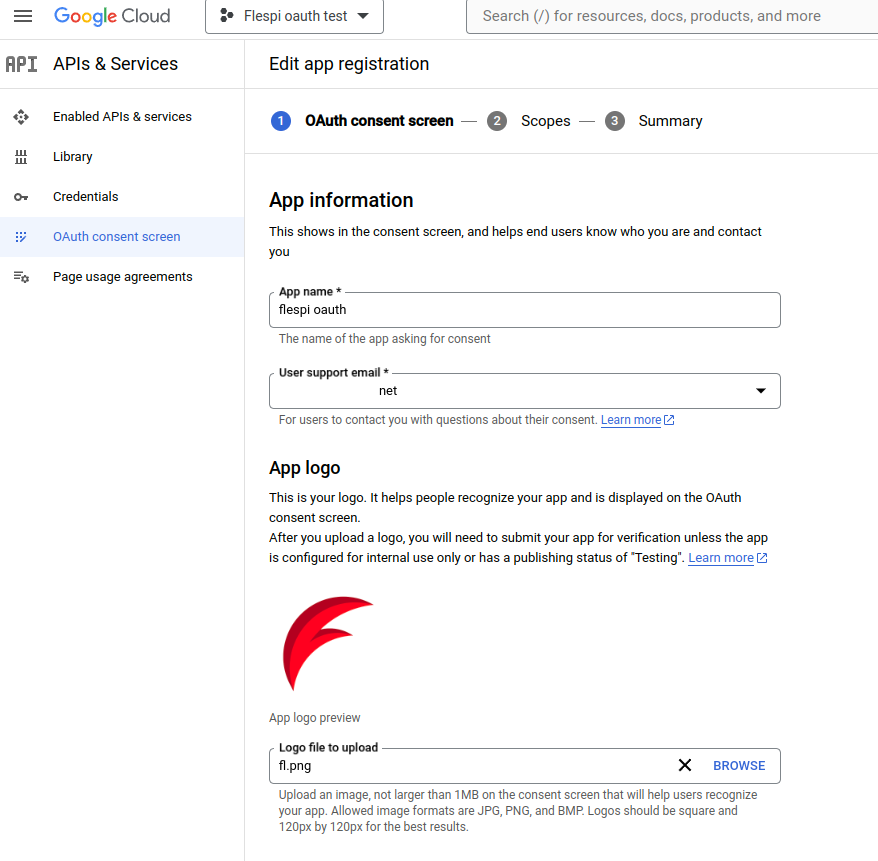
The following fields refer to the data being disposed to your users, so please double-check the values. Click on 'Save and continue' when you're done.
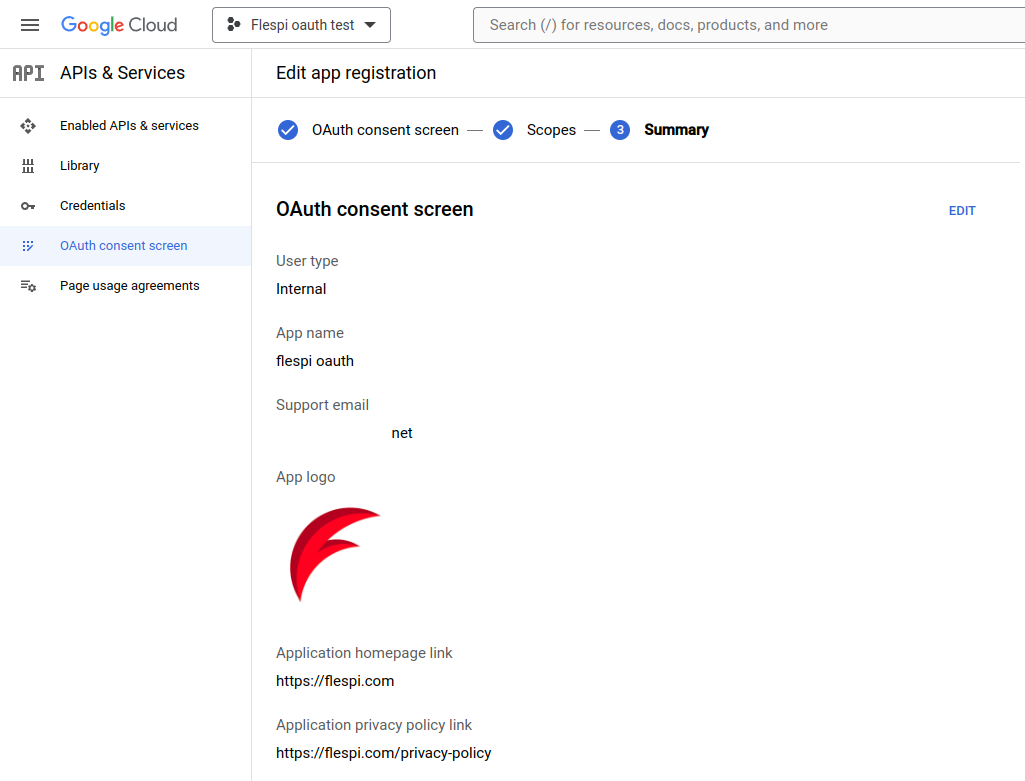
You may now review the project summary.
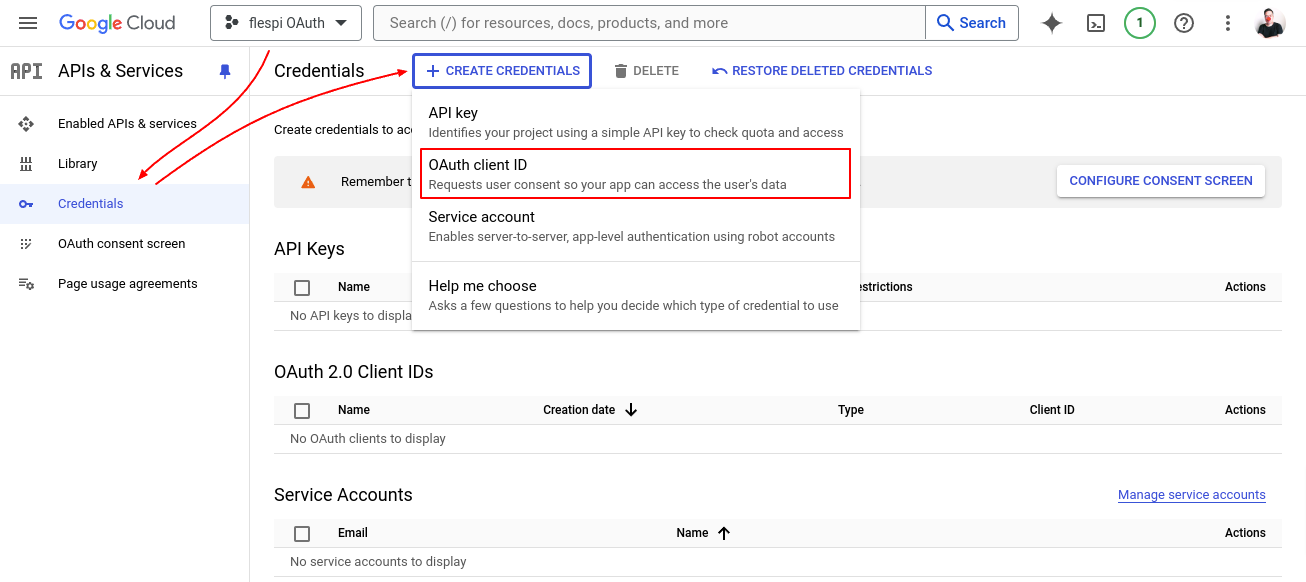
Now proceed to the Credentials section in the main menu, choose OAuth client ID under the Create credentials option.
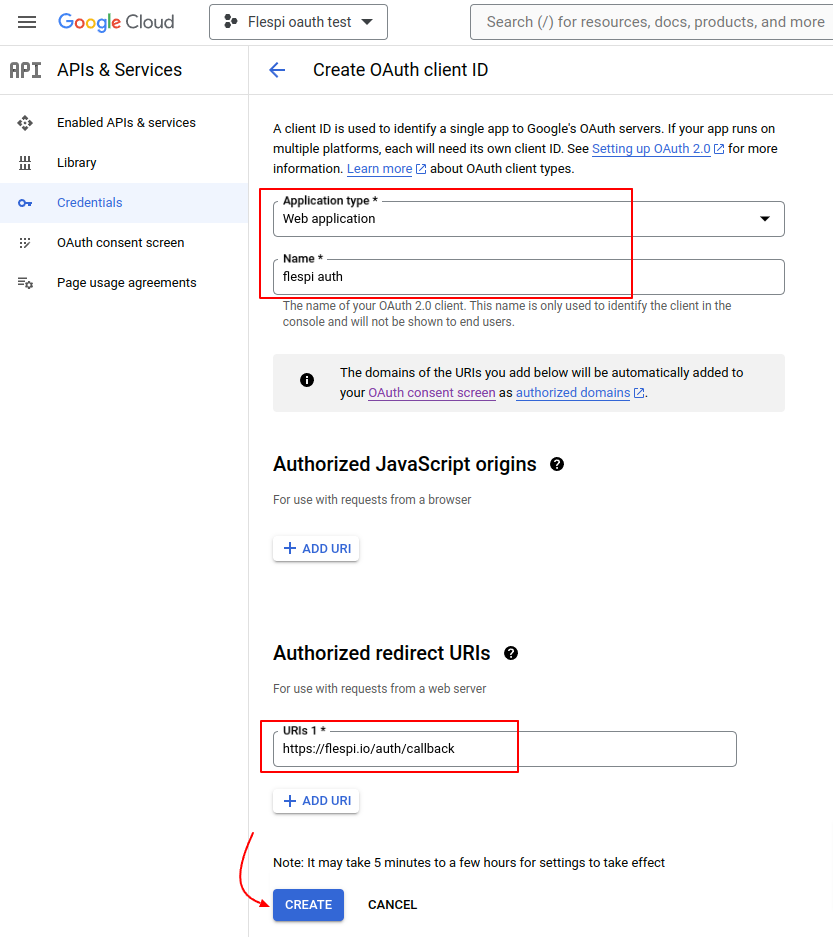
On this screen, select Web application for Application type, specify its name, and provide 'https://flespi.io/auth/callback' for the Authorized redirect URI. Click the 'Create' button.
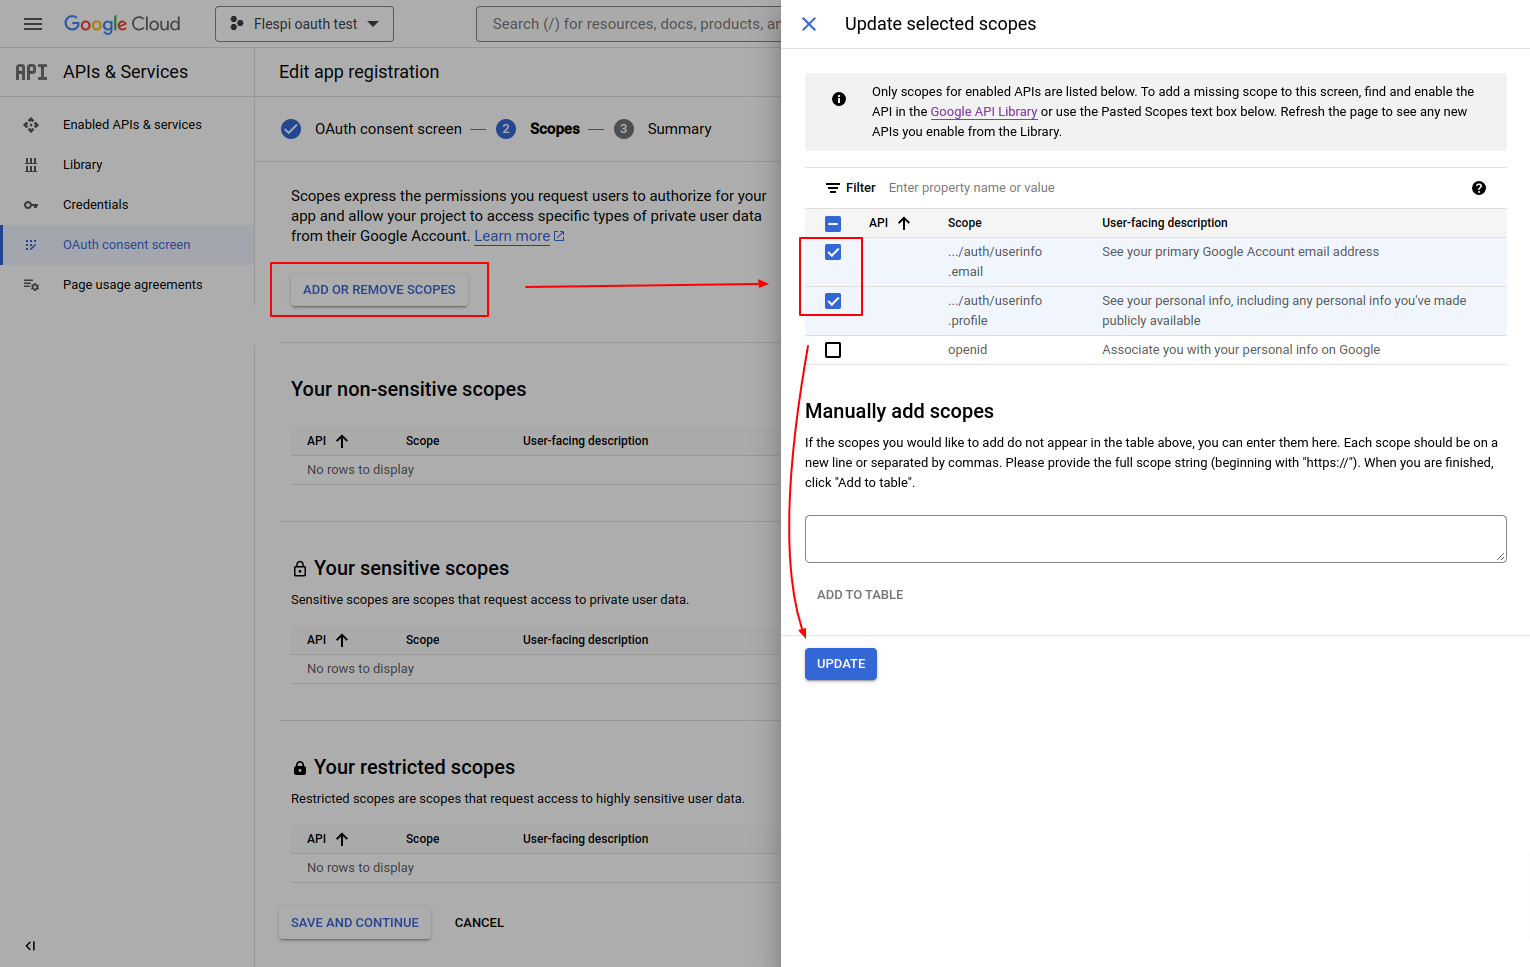
In the next step, you will be prompted to add or remove scopes. Mark checkboxes for:
- .../auth/userinfo.email
- .../auth/userinfo.profile
...and click 'Update'.
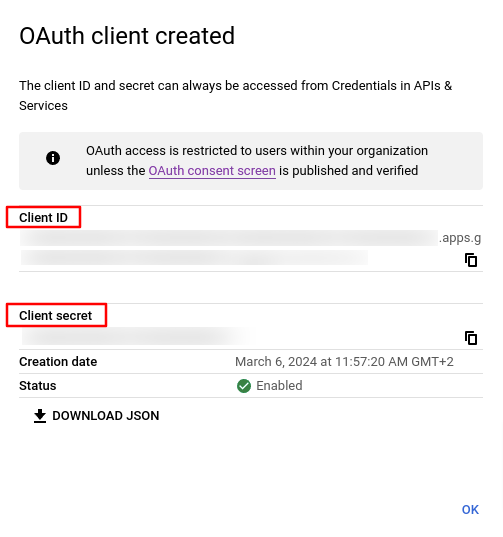
The 'OAuth client created' window will show up with the Client ID and Client secret - they will be required for OpenID provider setup in flespi.
Set up Identity Provider in flespi
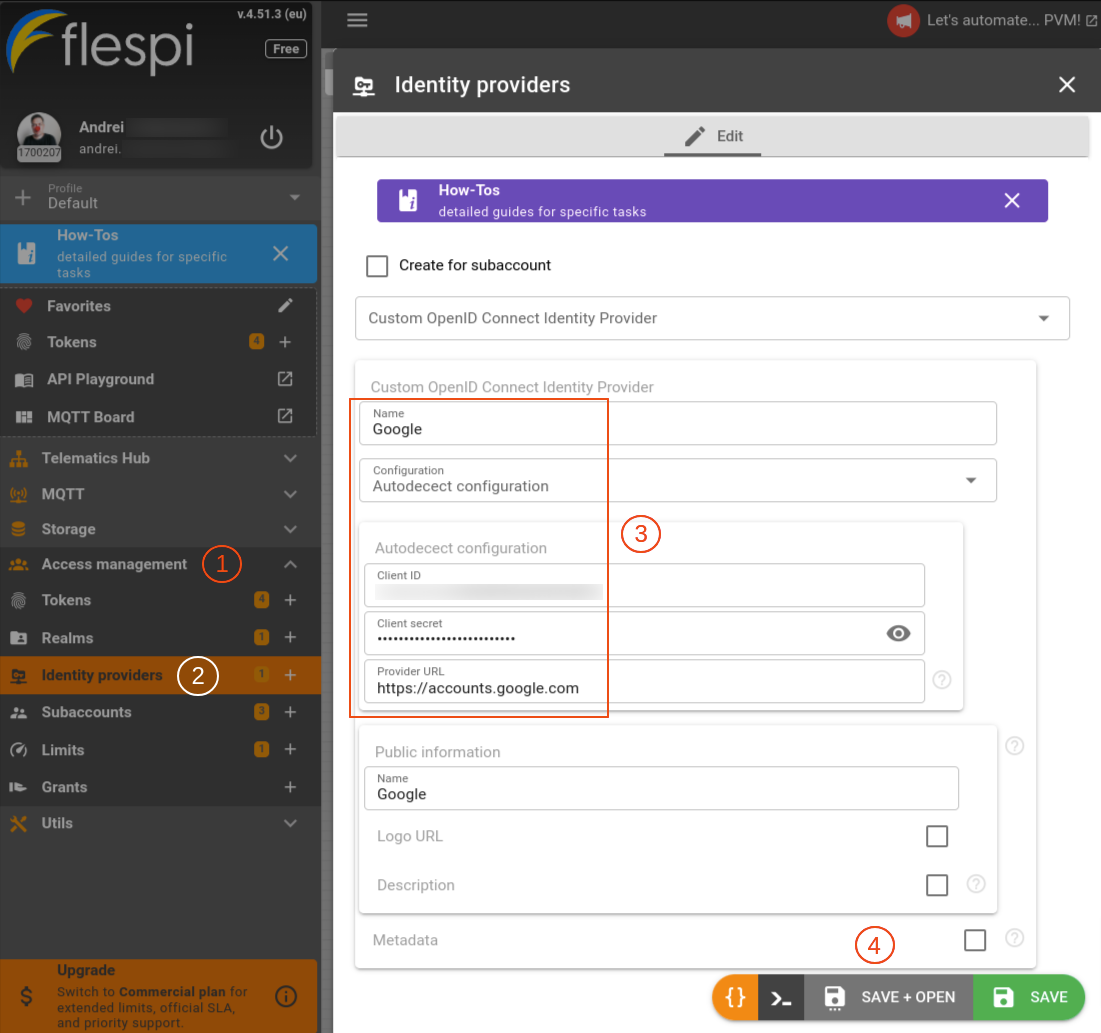
Proceed to the Access management section in the main menu. Click on the Identity providers to create a new one. Select Custom OpenID Connect Identity Provider from the dropdown menu, specify a name (e.g. Google), and select Autodetect configuration.
Paste Client ID and Client Secret values from the previous step and fill in the Provider URL field with the full address: https://accounts.google.com.
Also, add at least a name in the 'Public information' section if you don’t want to use a logo or make up a description right now. Click ‘Save+Open’.
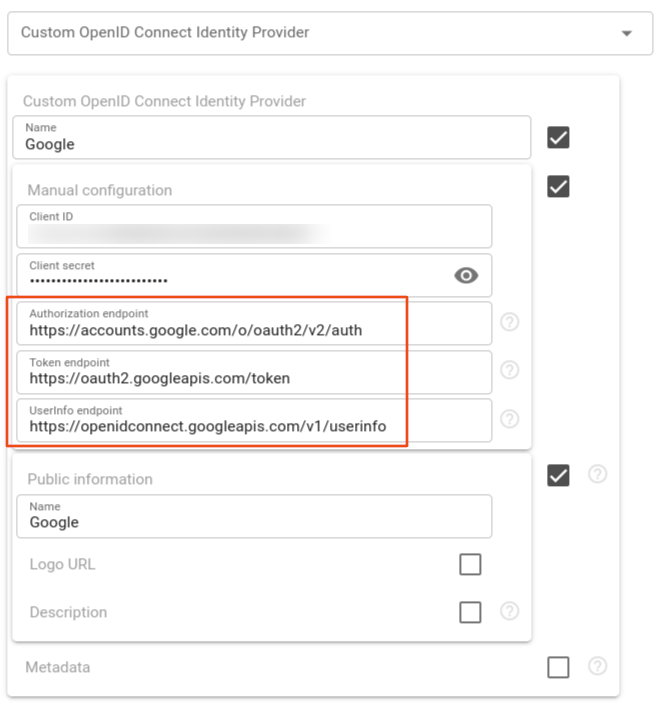
You will notice that URLs for Authorization, Token, and UserInfo endpoints are filled in automatically. Complete the setup by clicking the 'Save' button.
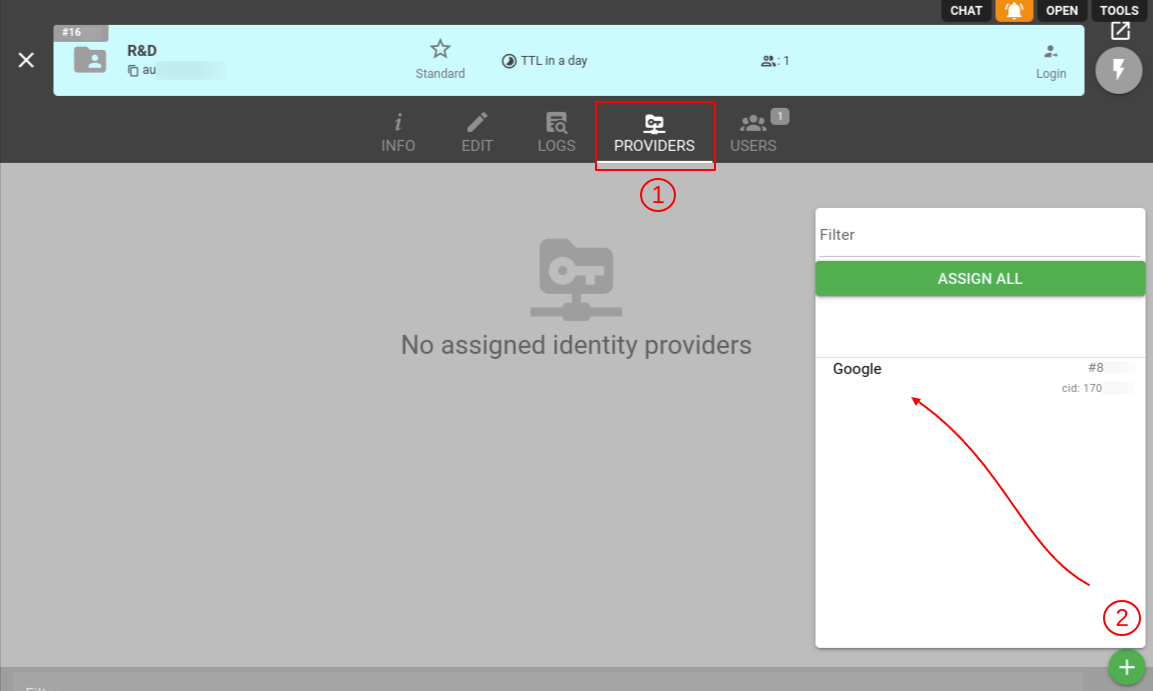
To assign any Identity Provider you need a realm with standard access to the root account. To link your realm with an Identity Provider navigate to Access management > Realms > 'Your realm' > Providers tab, then click the ‘+’ button, and select Google from the list.
How to authenticate users with a link
If you want to allow user registration or login for the Identity Provider, make sure its 'power' button lights green. Then, you can enable/disable automatic registration by clicking on the ‘shield’ sign (green means registration is allowed, and red means it is prohibited).

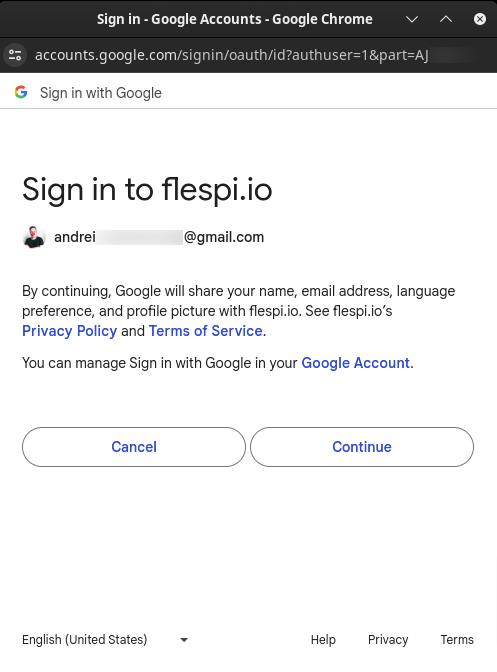
To provide users with a login/registration link, click on the Login in the top-right or use https://flespi.io/#/realm/{public_realm_id}. Now, if the user follows the link, the realm login page will show up - users can authenticate using the configured Identity Provider and save the realm for future use.

Clicking Google will lead the user to the Google authorization page requesting permission to access the account.
Upon authorization, the user will be redirected back to the realm login page and offered to save the token for future use. Done!