Probing the ground and picking the path
A lot of people want to make their home smart. A lot of companies produce DIY smart home automation kits. Other companies offer turn-key solutions. Another category includes enthusiasts (like me) who create smart home solutions themselves. To meet the demand, a bunch of smart home management platforms popped up on the market, e.g. ioBroker, MajorDoMo, Domoticz, Homekit, OpenHAB, Home Assistant. I tested a few of these options and picked Domoticz as the most independent and customizable.
I started building my smart home from Xiaomi devices. And it did work straight away. But… I faced some issues (who wouldn’t?). The thing is that Xiaomi produces most of its Mijia devices (smart home series) for the Chinese market only meaning that the closest server sits in China which adds significant delay to all manipulations with devices. For example, the light switch can operate in two modes: direct and configurable. In direct mode, the switch will turn on the light instantly. However, when you enable the configurable mode, in which you can assign any additional action to the click on the switch, it lags since all commands get executed on the Xiaomi servers in China. I decided not to put up with that...
Local Domoticz
And decided to move the logic processing closer. Locally deployed Domoticz will immediately respond to user-initiated actions, unlike the Chinese servers. In addition to the quick response, we get a highly customizable system with nearly unlimited capabilities for smart home management.
It takes one line in the command prompt to deploy Domoticz on RaspberryPi powered by the Raspbian system (deploys similarly on any Ubuntu-powered device):
sudo curl -L install.domoticz.com | bash
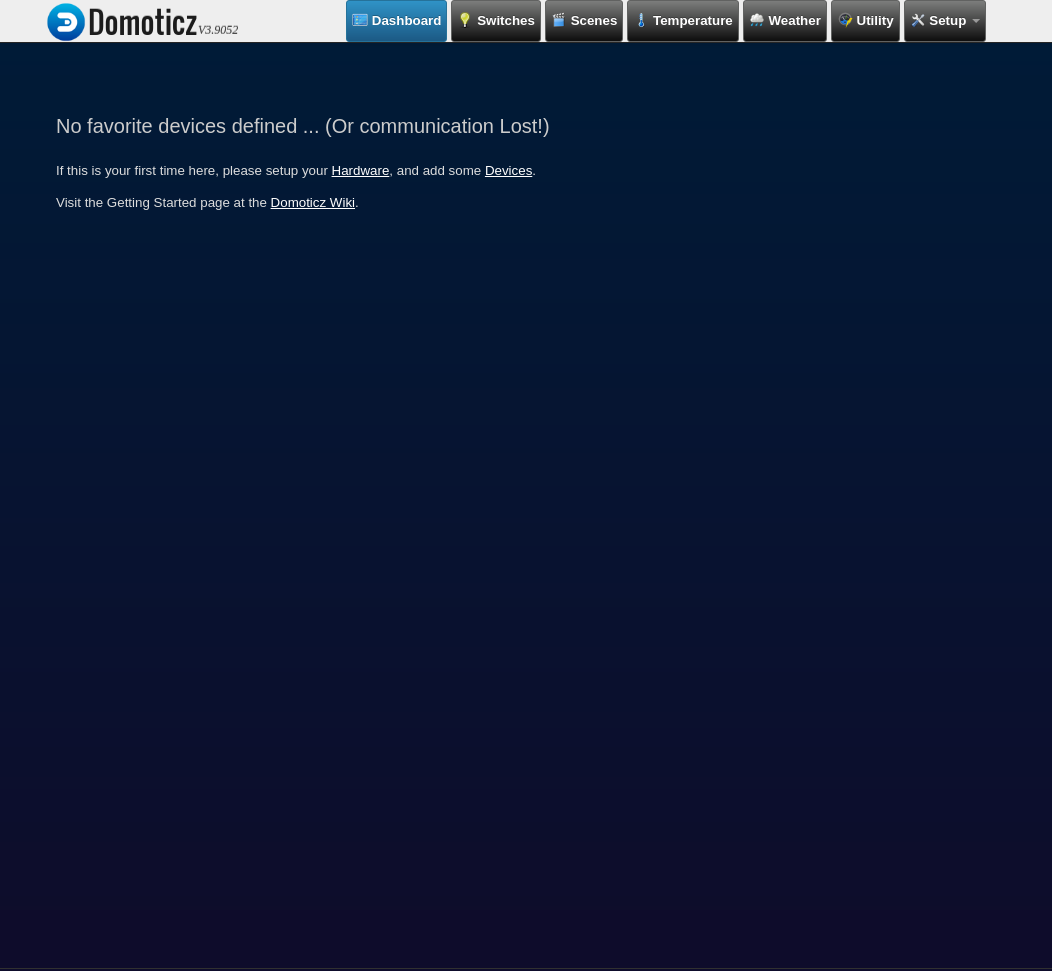
Upon installation, you will see the screen requesting you to add devices. Go to Setup -> Hardware to start adding:
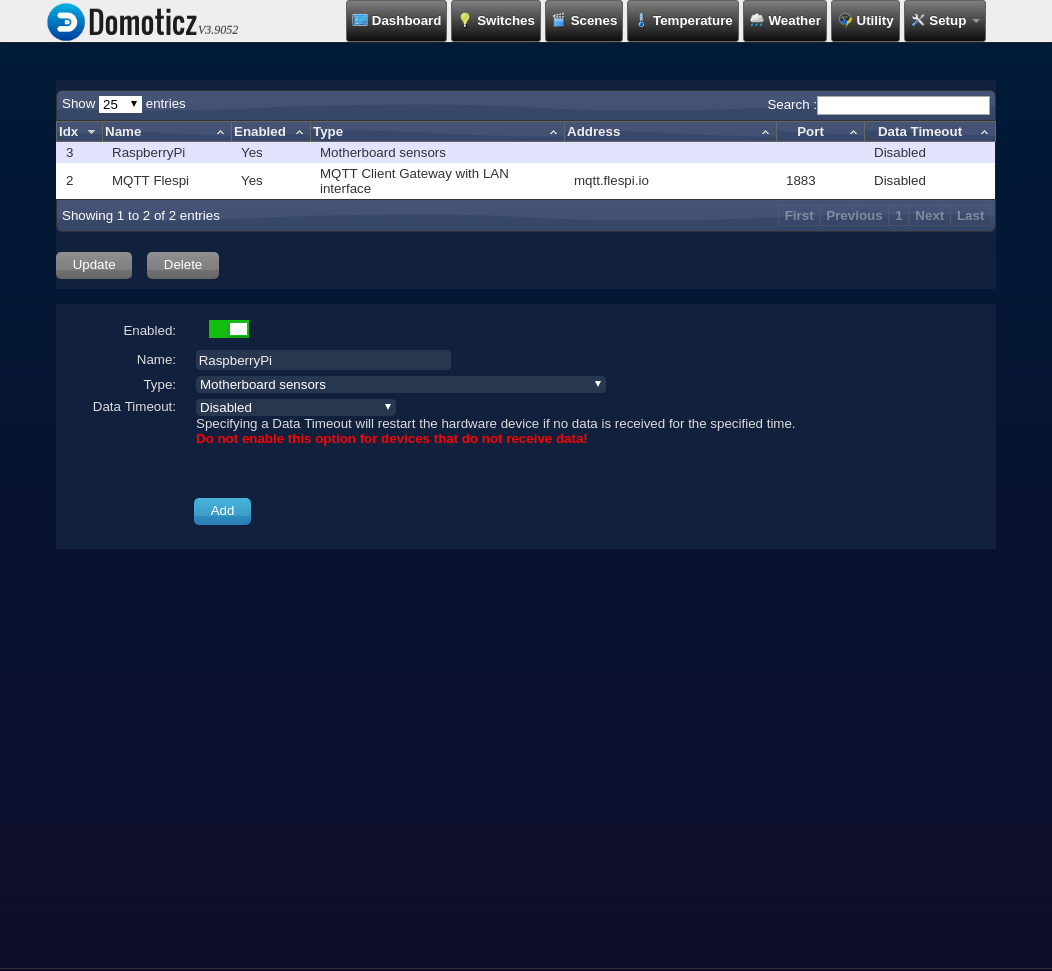
We will add the sensors embedded into RaspberryPi. To do so, specify the name and pick the Motherboard Sensors type in the form:
In just a minute you will see the list of all available devices (sensors) on the Setup -> Devices page:

This is already a fully functional solution and I could stop here, but it’s one thing to monitor and manage the smart home in the local network, and totally another thing to do this from anywhere in the world where you have the Internet connection. I wanted the second option so Domoticz had to go online (I won’t mess around telling you about dyndns). Plus I needed a fast and reliable MQTT broker, like the one by flespi.
Going online with flespi MQTT broker
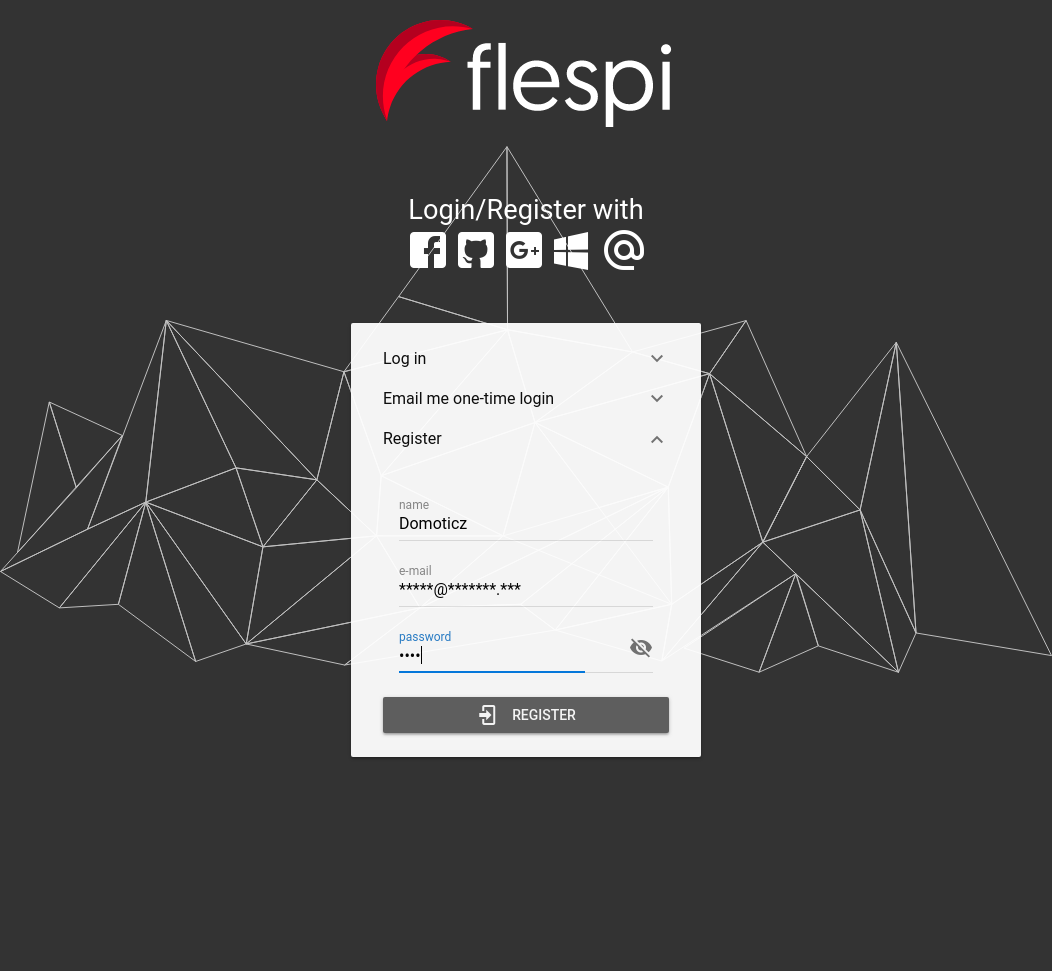
Suppose you have already set up your router to make Domoticz available at your external IP or dyndns. Now it’s time to configure flespi to receive data over MQTT. To make flespi MQTT broker work you just need to register at flespi.io with any supported social network account or email and password:
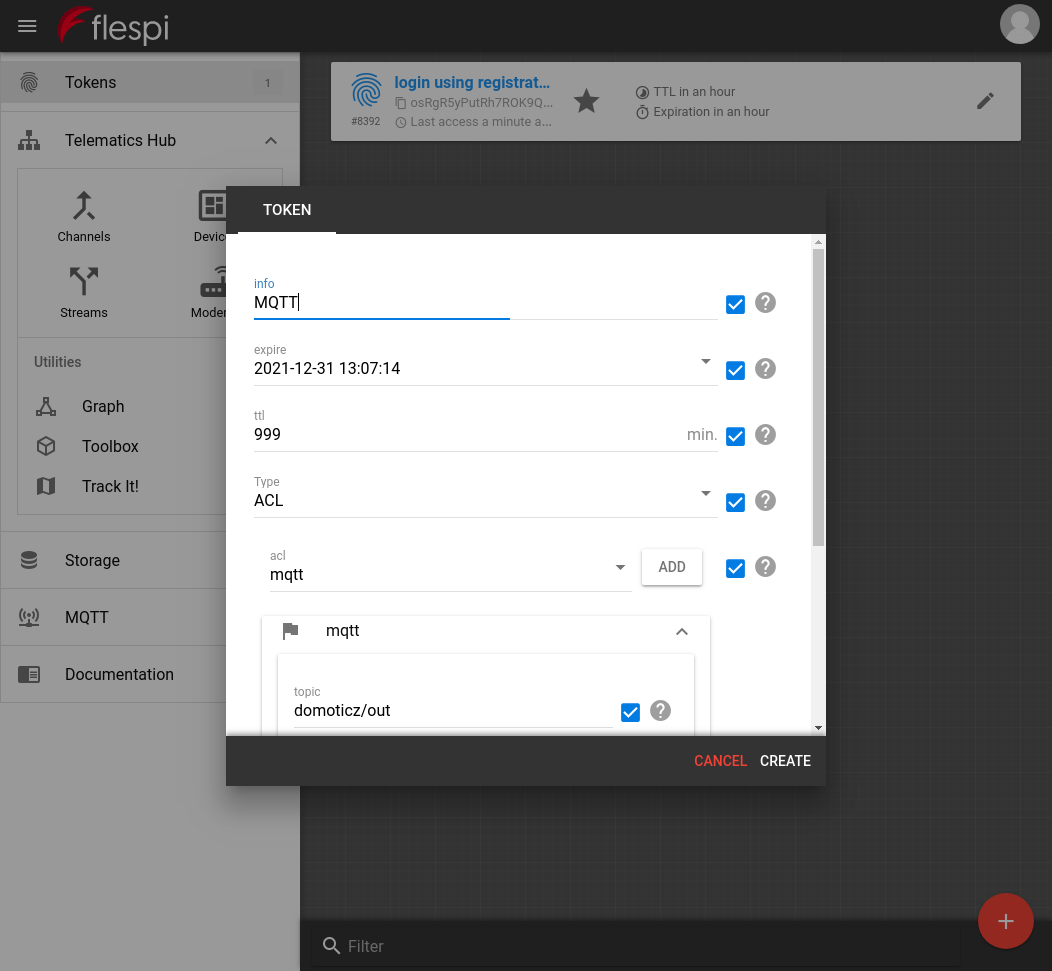
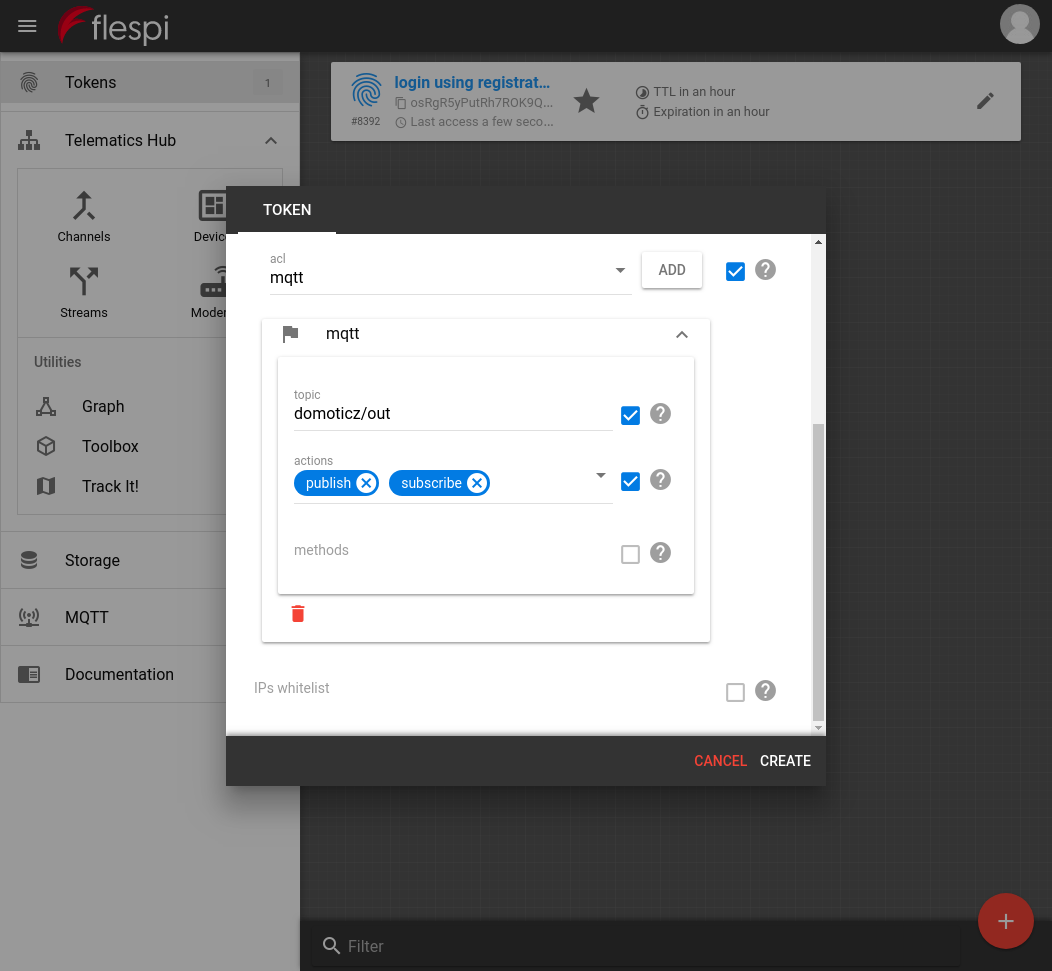
Upon registration go to the Tokens page and create a new token. Set the type parameter to ACL and the acl parameter to mqtt (publish, subscribe) for Domoticz to use this token as a login for the MQTT client:
Now let’s go back to the Domoticz interface. Go to Setup -> Hardware and add MQTT Flespi with the following settings:
Remote address: mqtt.flespi.io
Port: 1883
Username: <Your flespi token>
Password: 1
Publish Topic: out

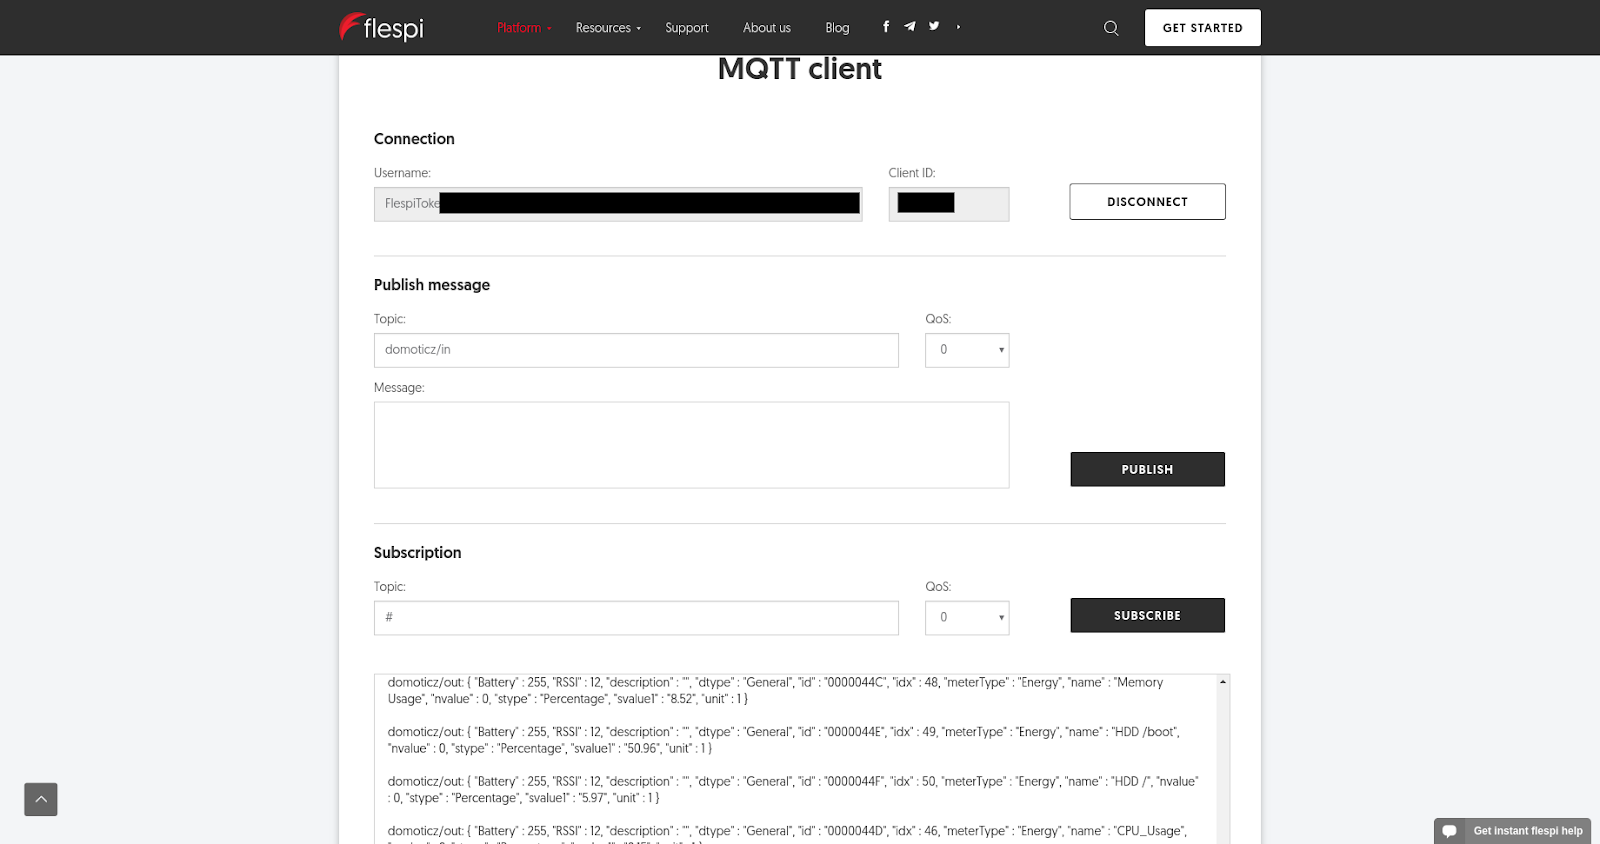
To make sure that the data transfer works go to the MQTT client page, paste your token into the Username field, click Connect, and check the Subscription area — it should get populated with the messages from the domoticz/out topic.
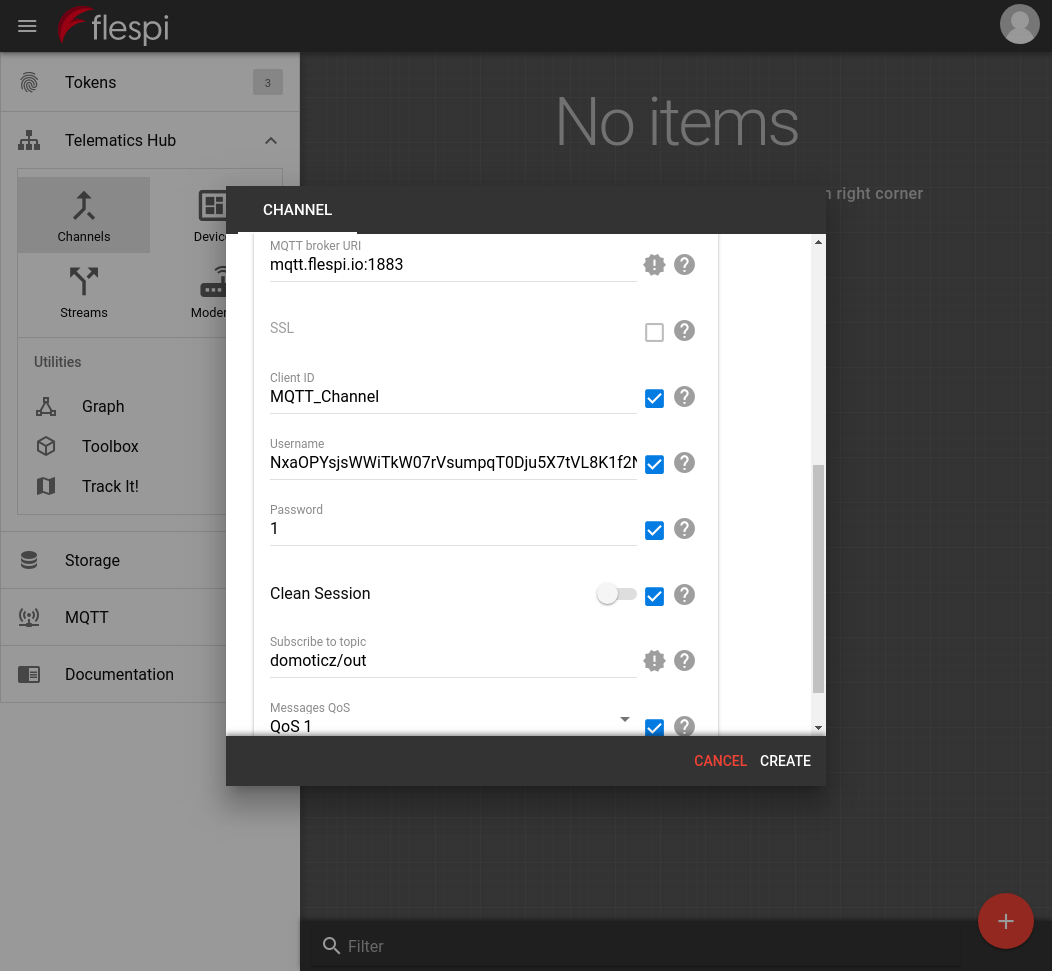
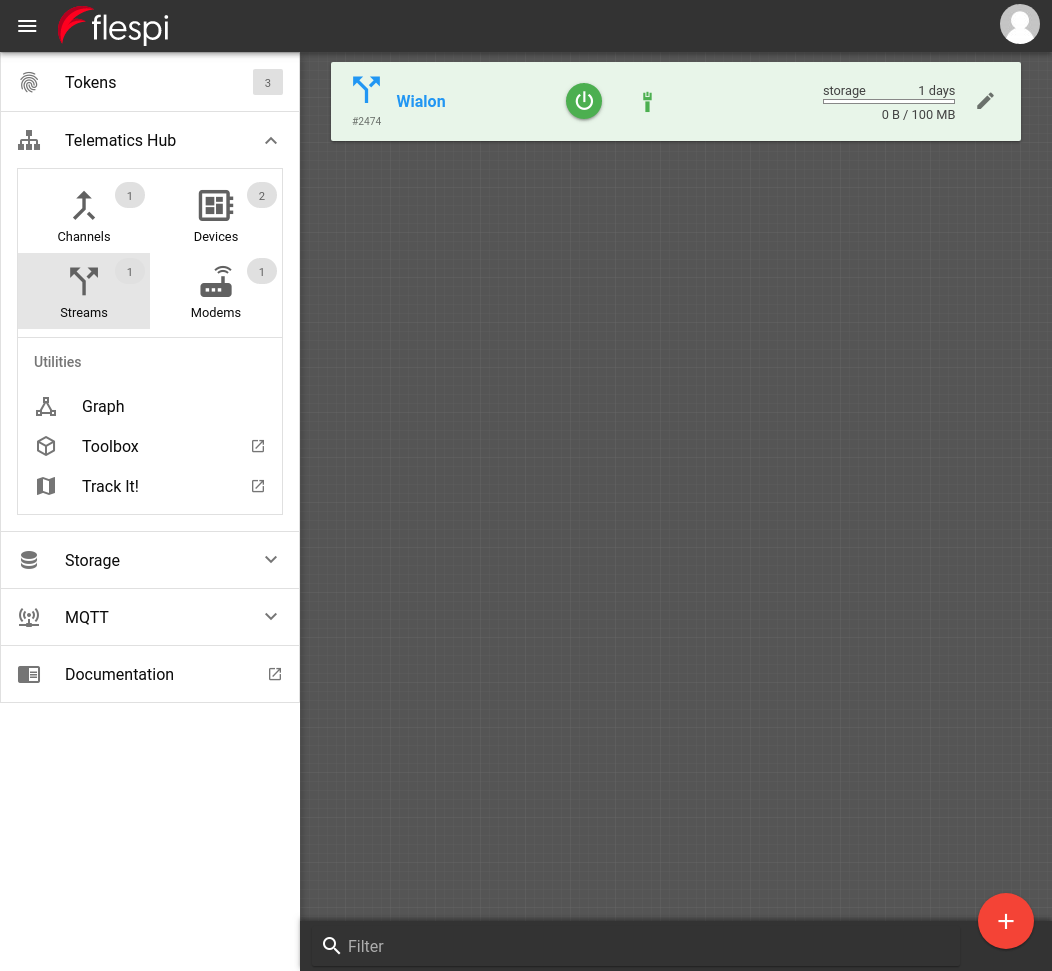
Besides sending messages to the broker we will also configure a flespi channel to receive messages from Domoticz over MQTT protocol. Let’s create a channel for that by going to Telematics Hub -> Channels, clicking the plus button, and setting the parameters as shown in the screenshots:

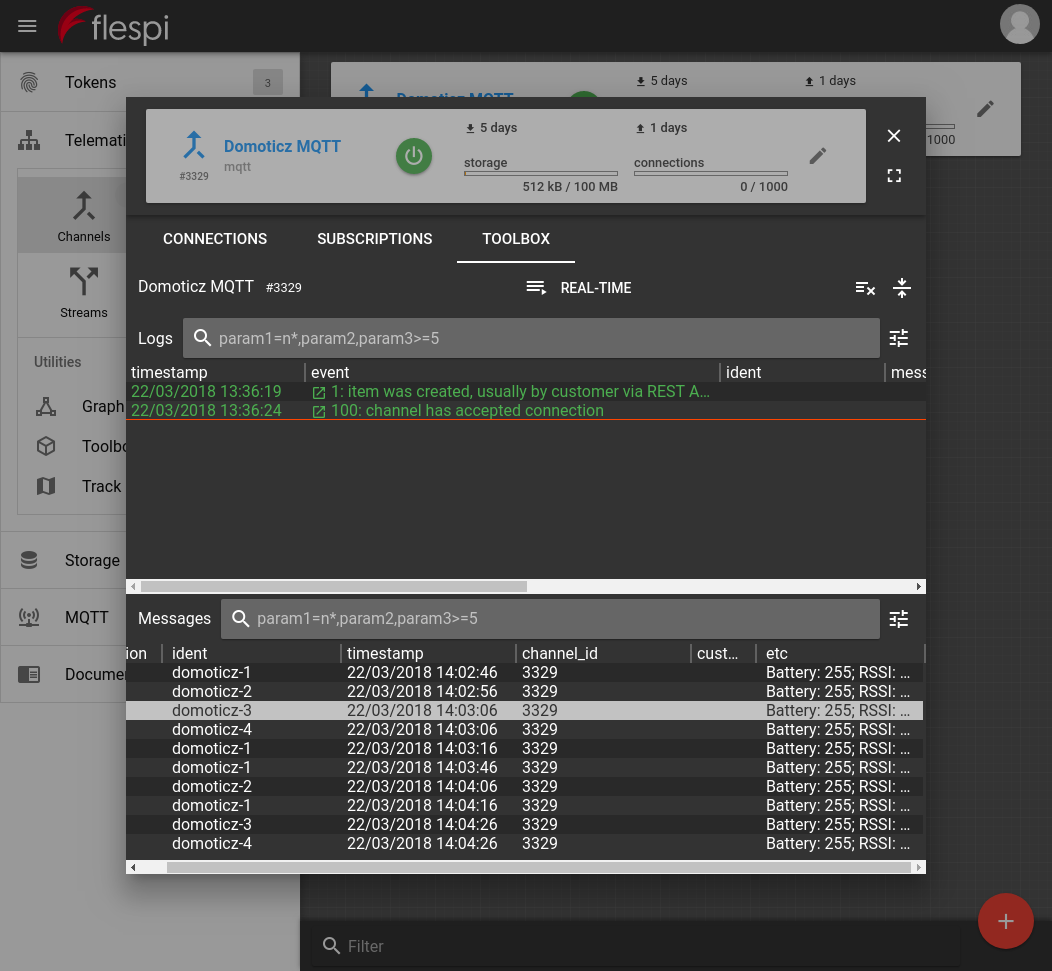
By clicking the channel card you can see the incoming messages in the Toolbox tab:
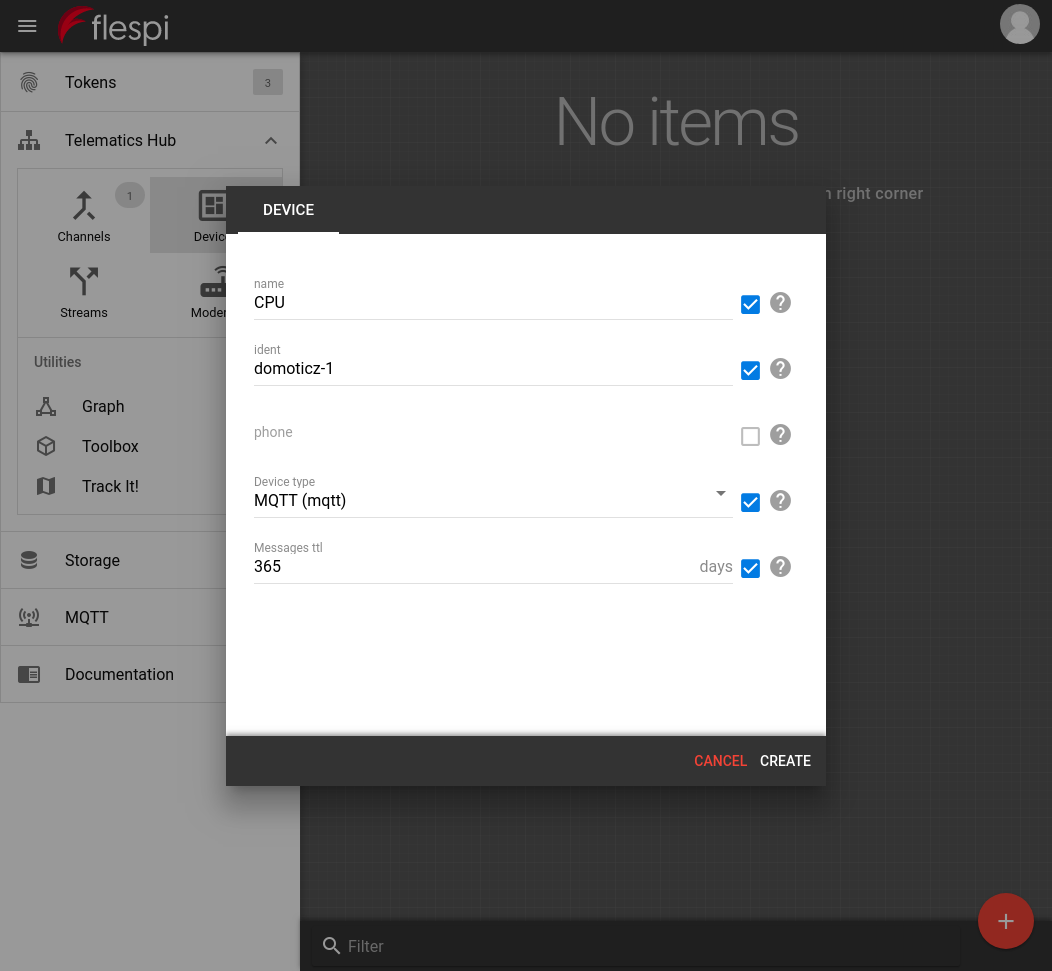
Wouldn’t it be nice to store the history of the smart home actions on a per-device basis? Let’s do it with flespi devices. Go to Telematics hub -> Devices, click the plus button to create a new device, specify the ident from the messages arriving at Toolbox and set the device type to MQTT:
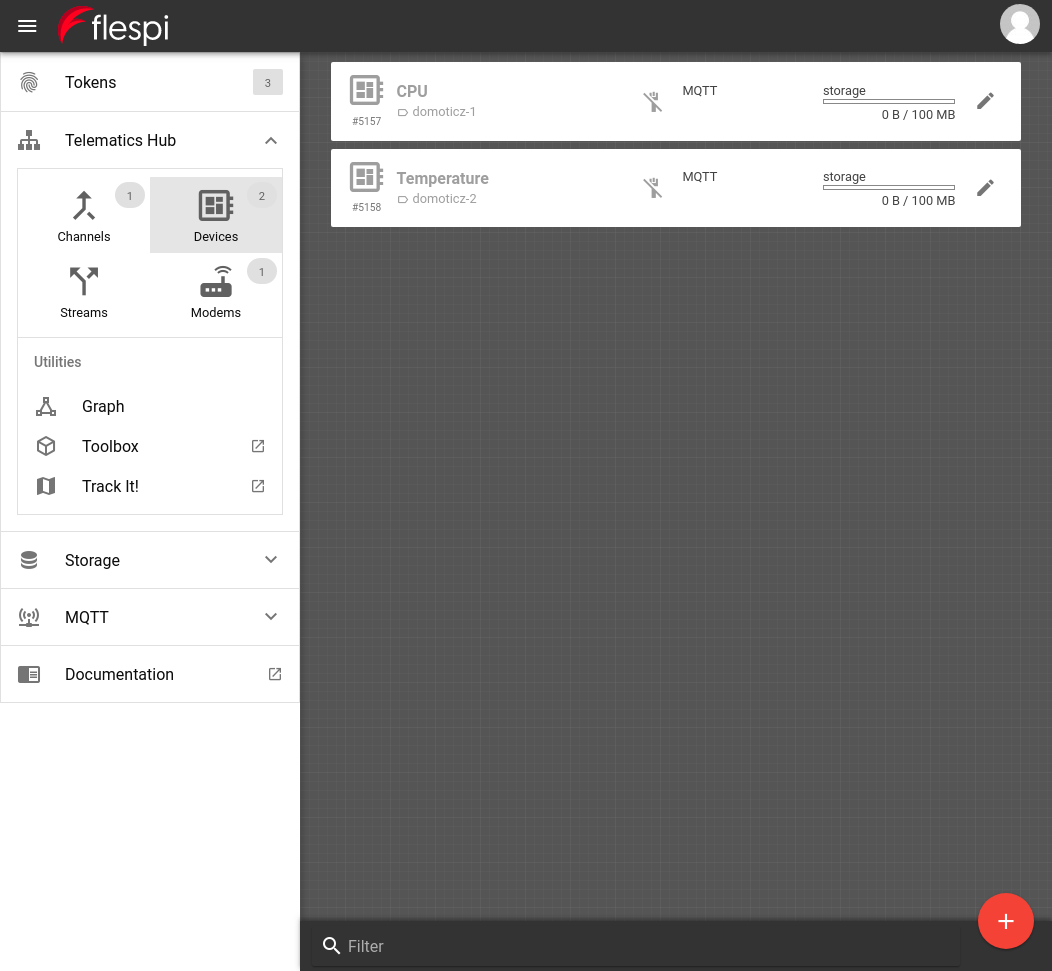
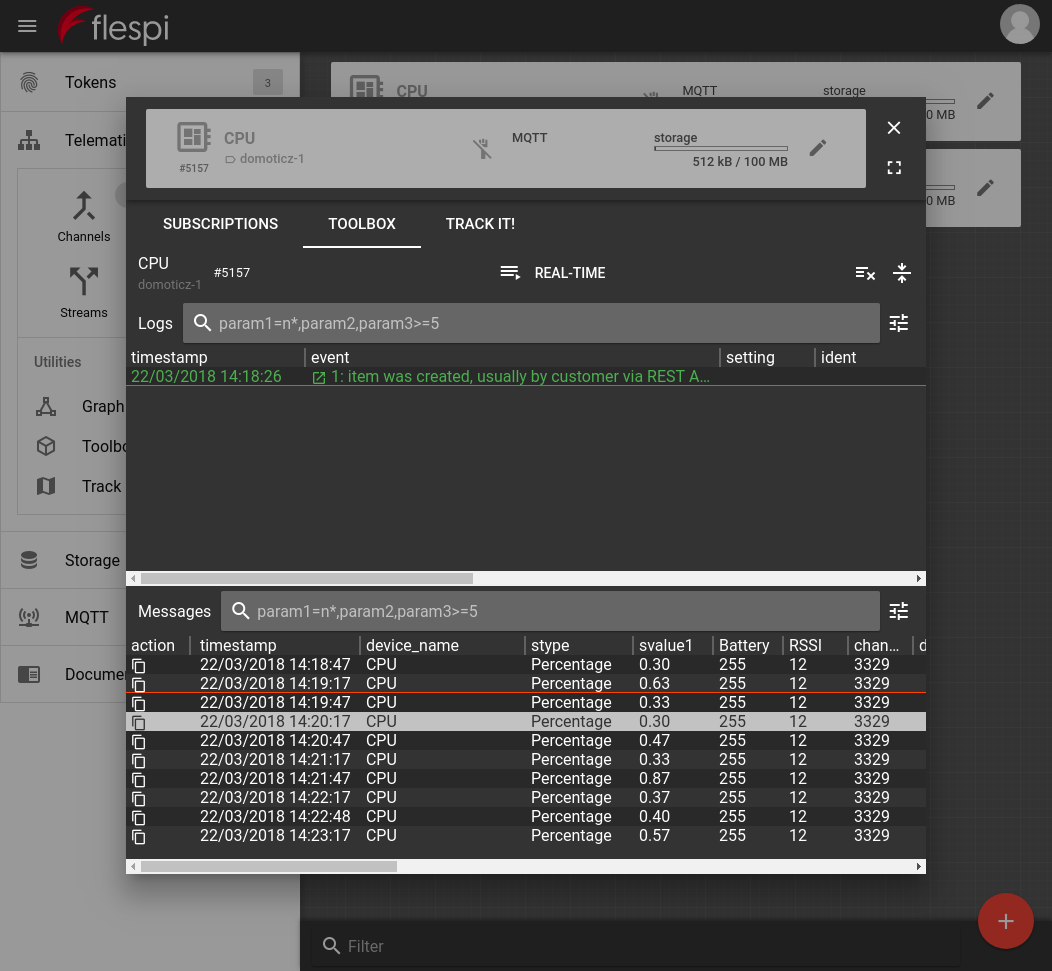
Click on the device card, go to the Toolbox tab and you should see the messages for the corresponding sensor/device:
Looks nice, isn’t it? How about we attach a dashboard for easier management. Say, Reacticz.
Following the manual:
git clone https://github.com/domoticz/Reacticz.git
cd Reacticz
npm install
npm run
Open localhost:3000 in the browser and you will see the settings screen:
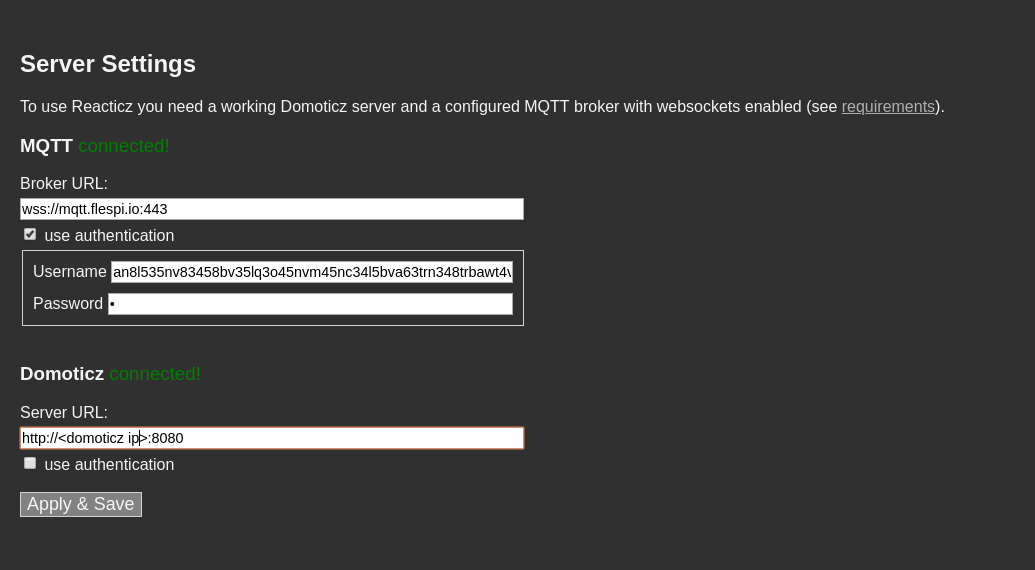
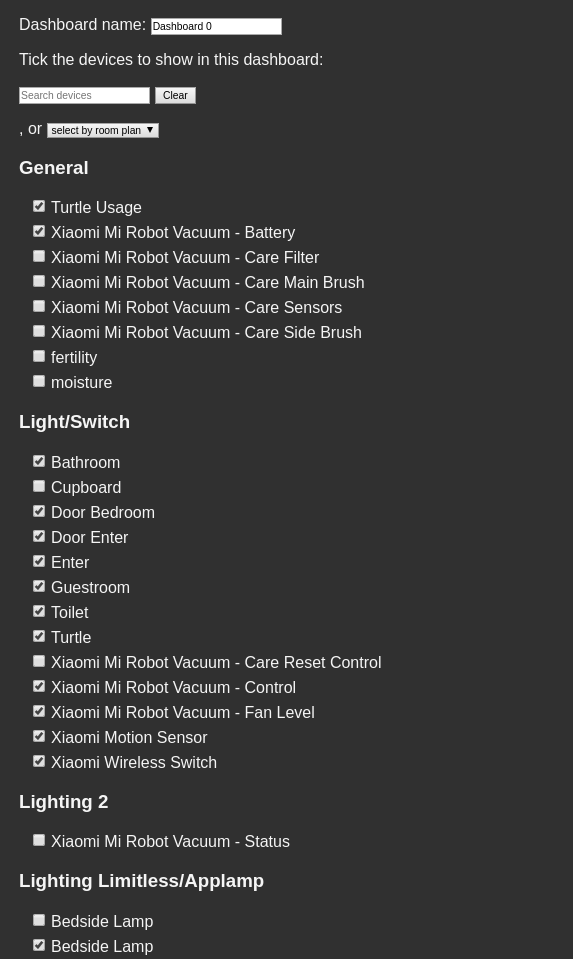
Navigate to the dashboard settings and pick the Domoticz devices you want to manage:
Now customize the dashboard layout, grouping, and color scheme at your discretion:
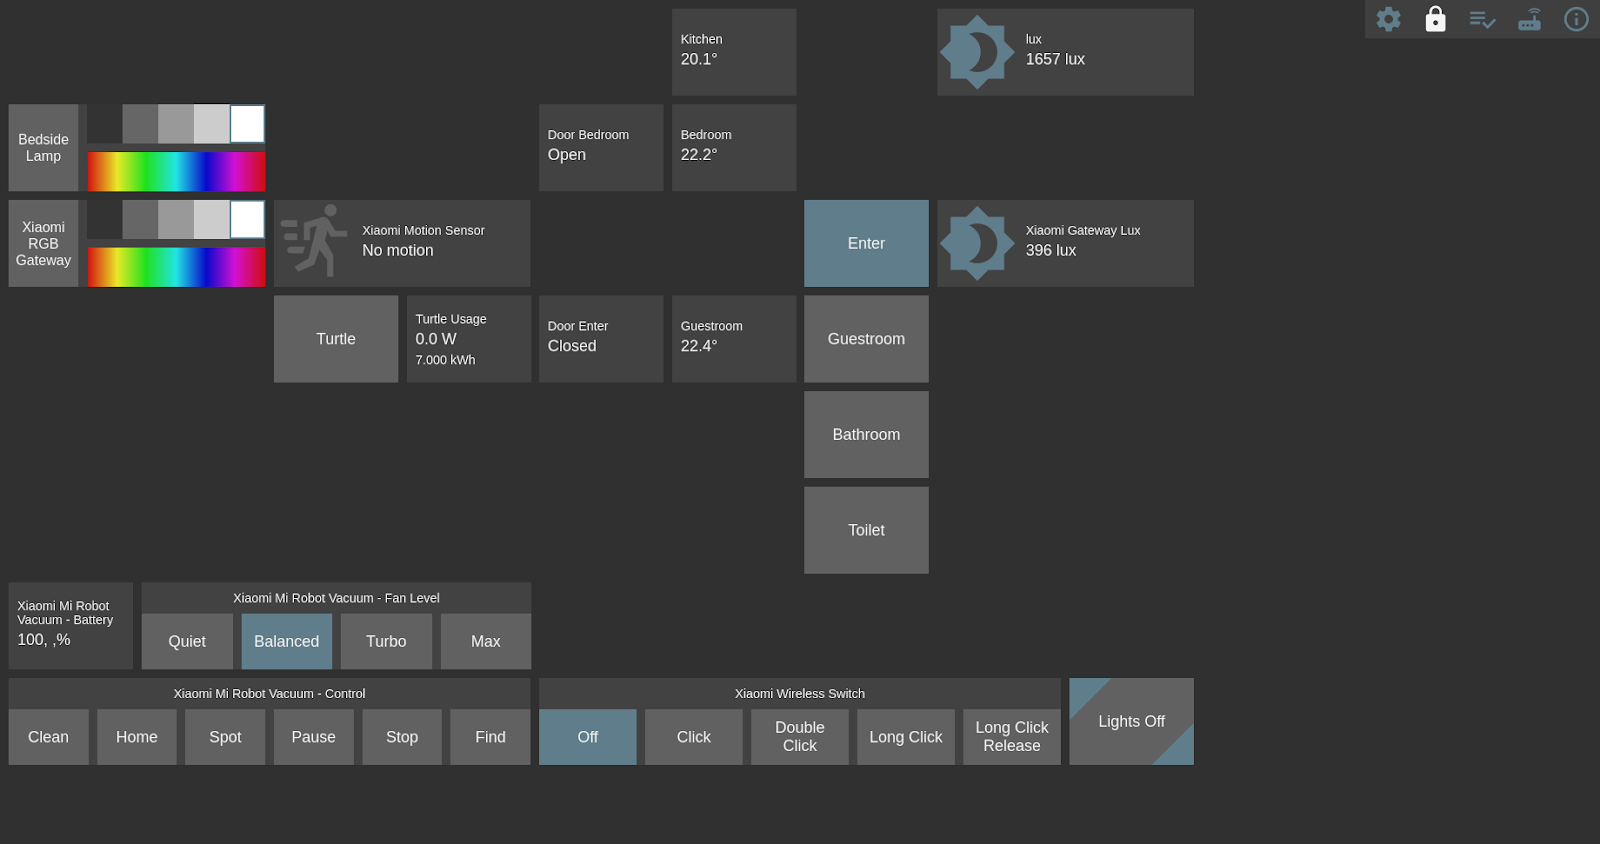
Above is the look of my dashboard, but my smart home is not complete and keeps expanding.
A few additional commands in the RaspberryPi console can make your Xiaomi smart home work with Domoticz and automatically send data to flespi. You can easily find the steps on the dedicated forums.
Bonus 1: sending data to Wialon/Sensolator
As a bonus, let’s figure out how to send the data to Wialon/Sensolator and visualize it (we have already told how to connect a tracker to Wialon via flespi).
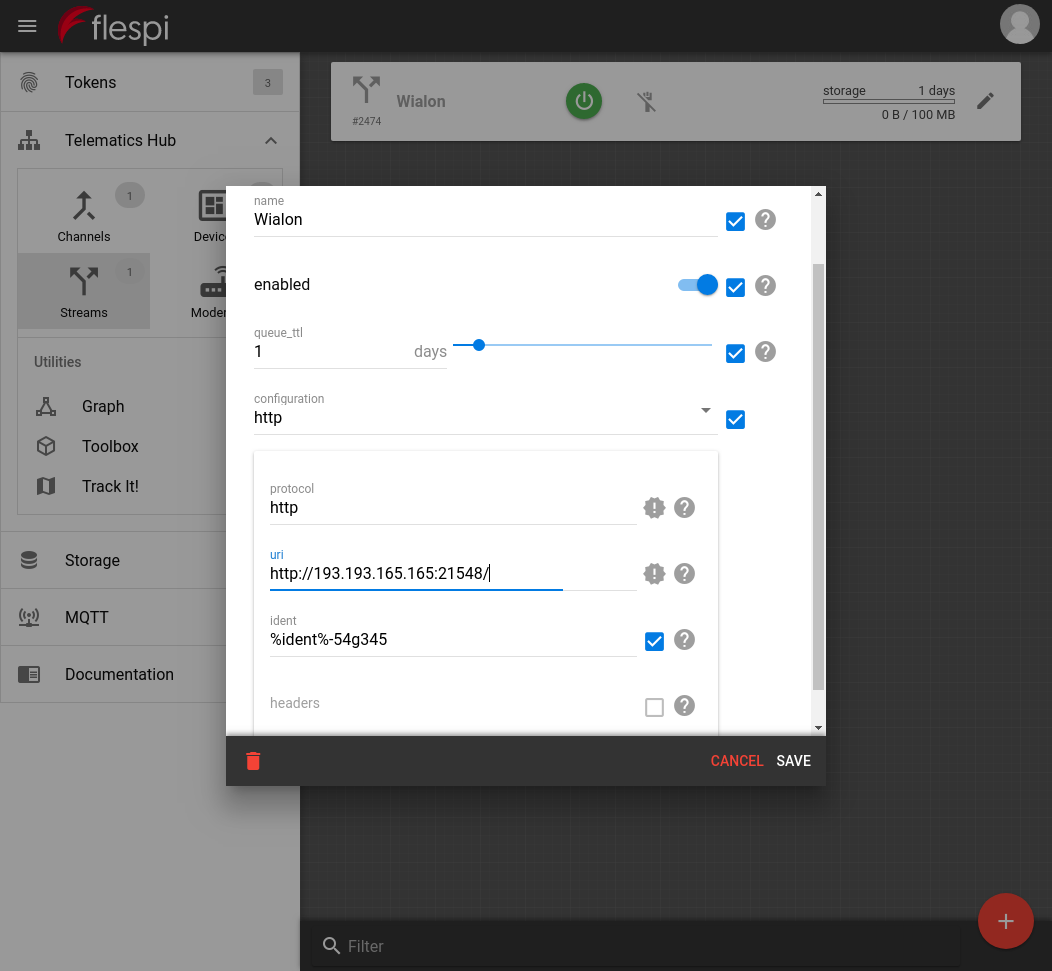
We’ll need an outgoing stream. Go to Telematics hub -> Streams and create a new stream with the following settings:
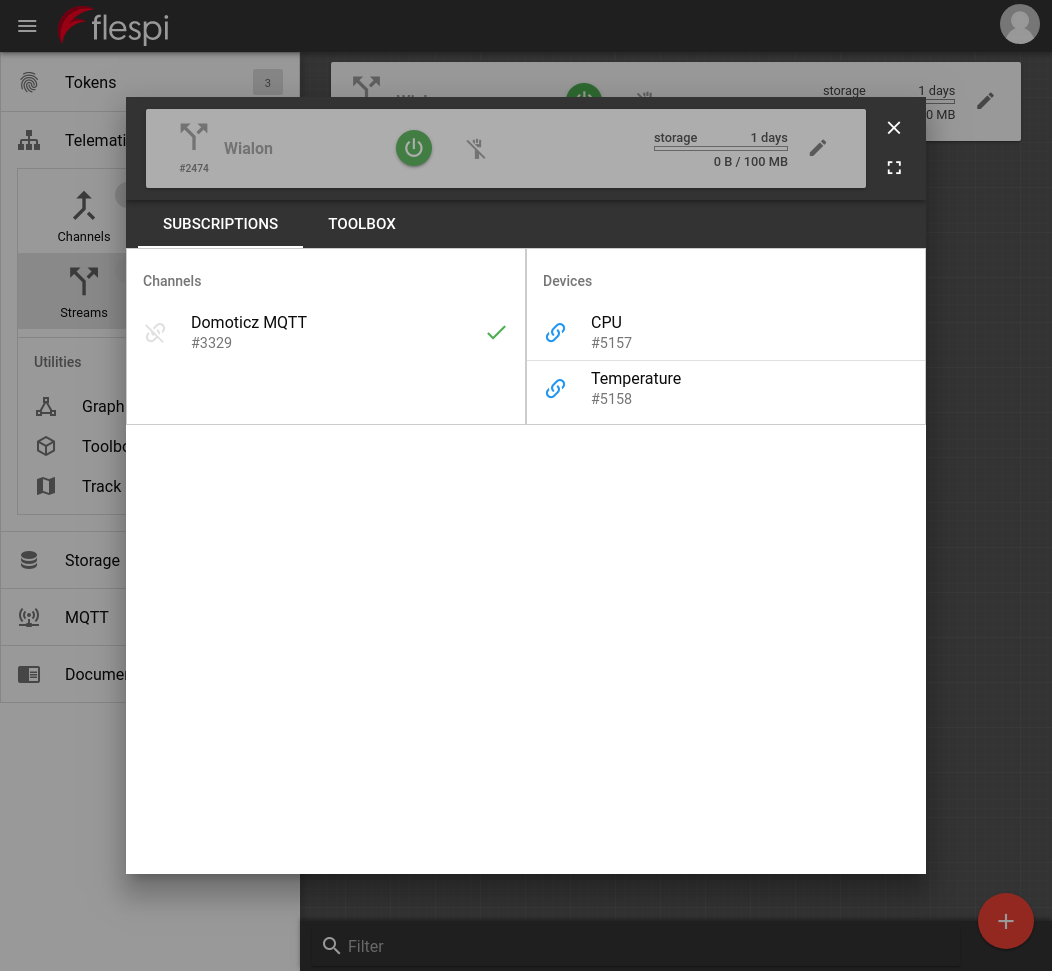
Click on the stream card to open stream subscriptions and subscribe to necessary devices:
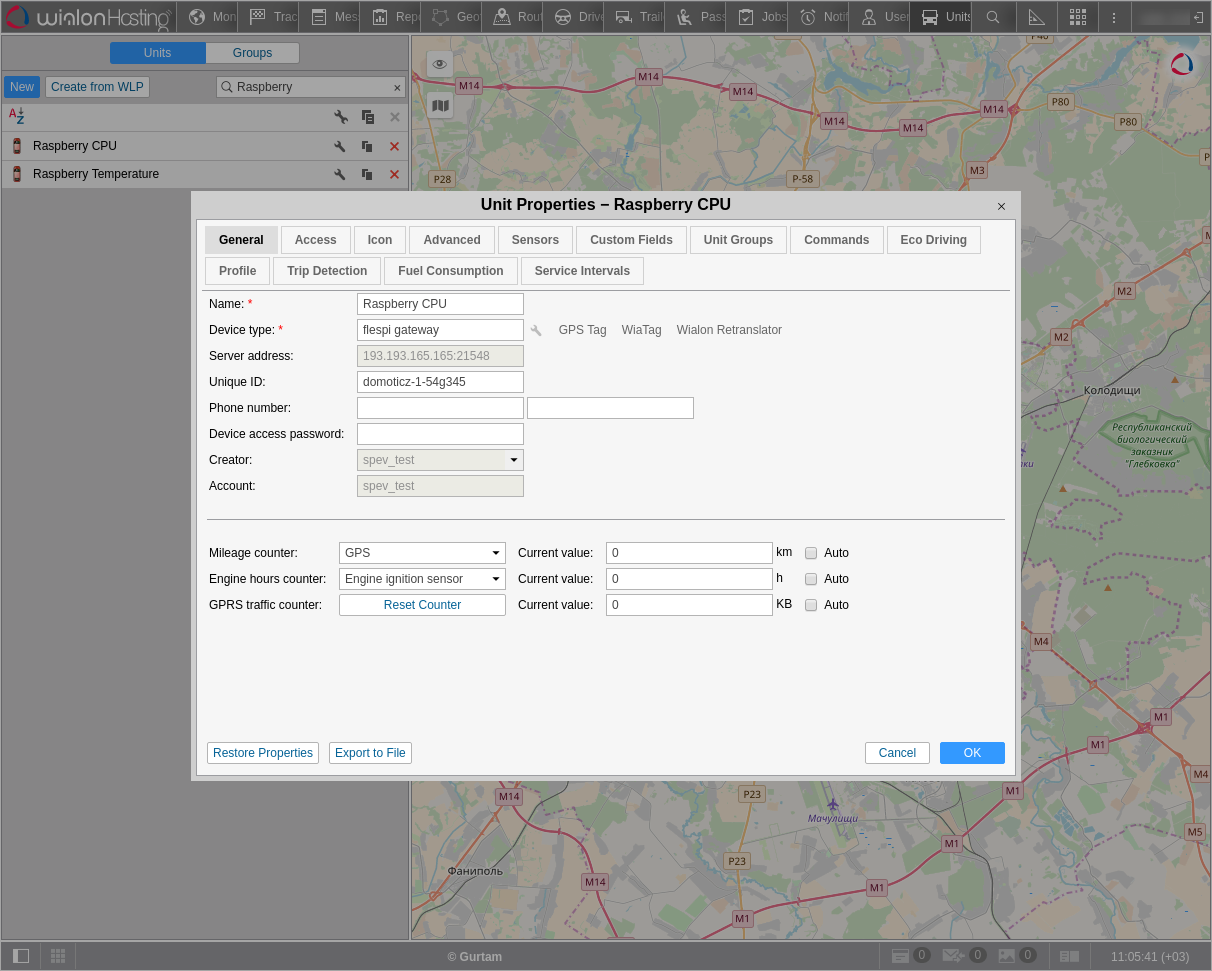
Now create the units in Wialon with the given ident and device type values:
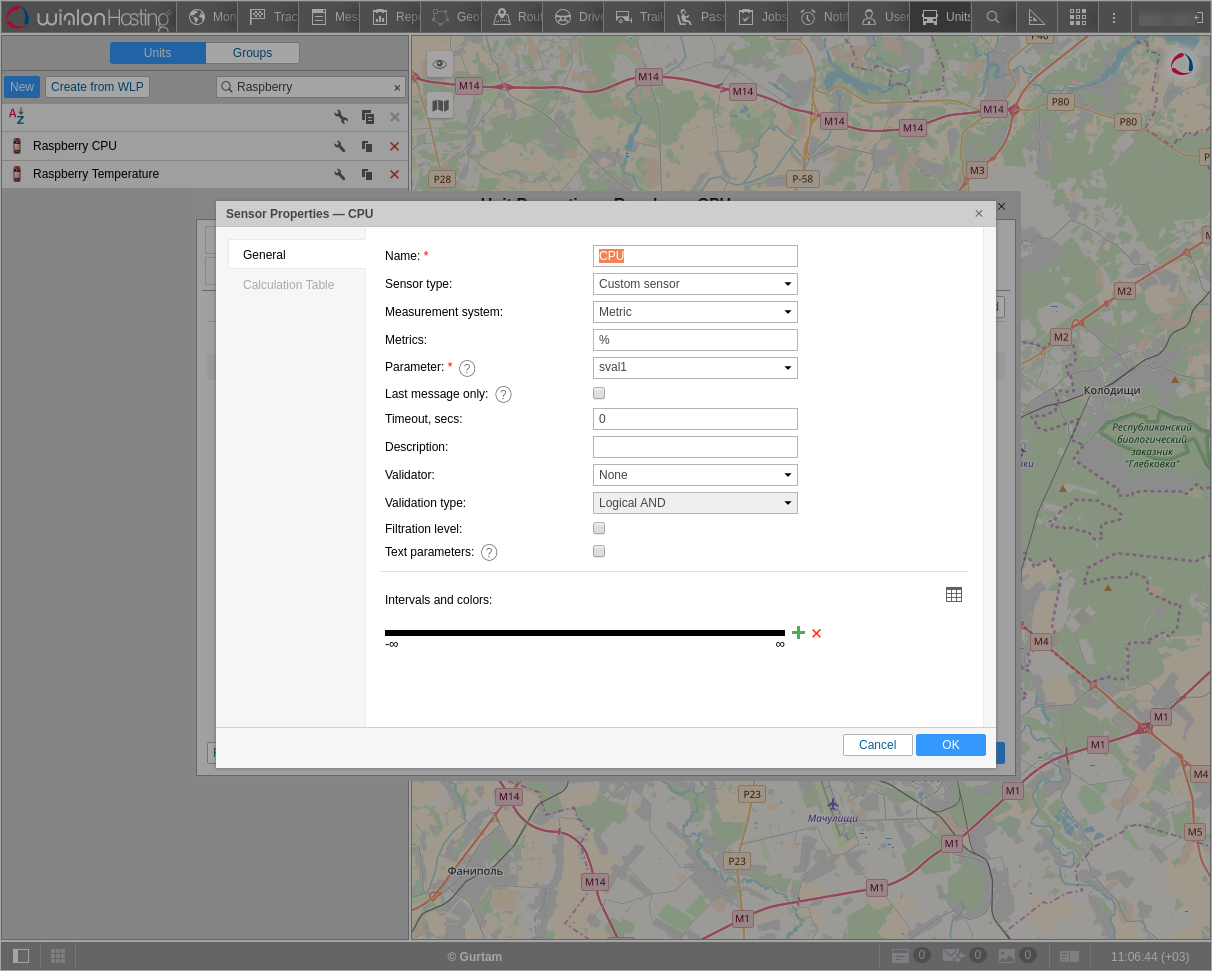
And set up the sensors:
Now open Sensolator and add these sensors:
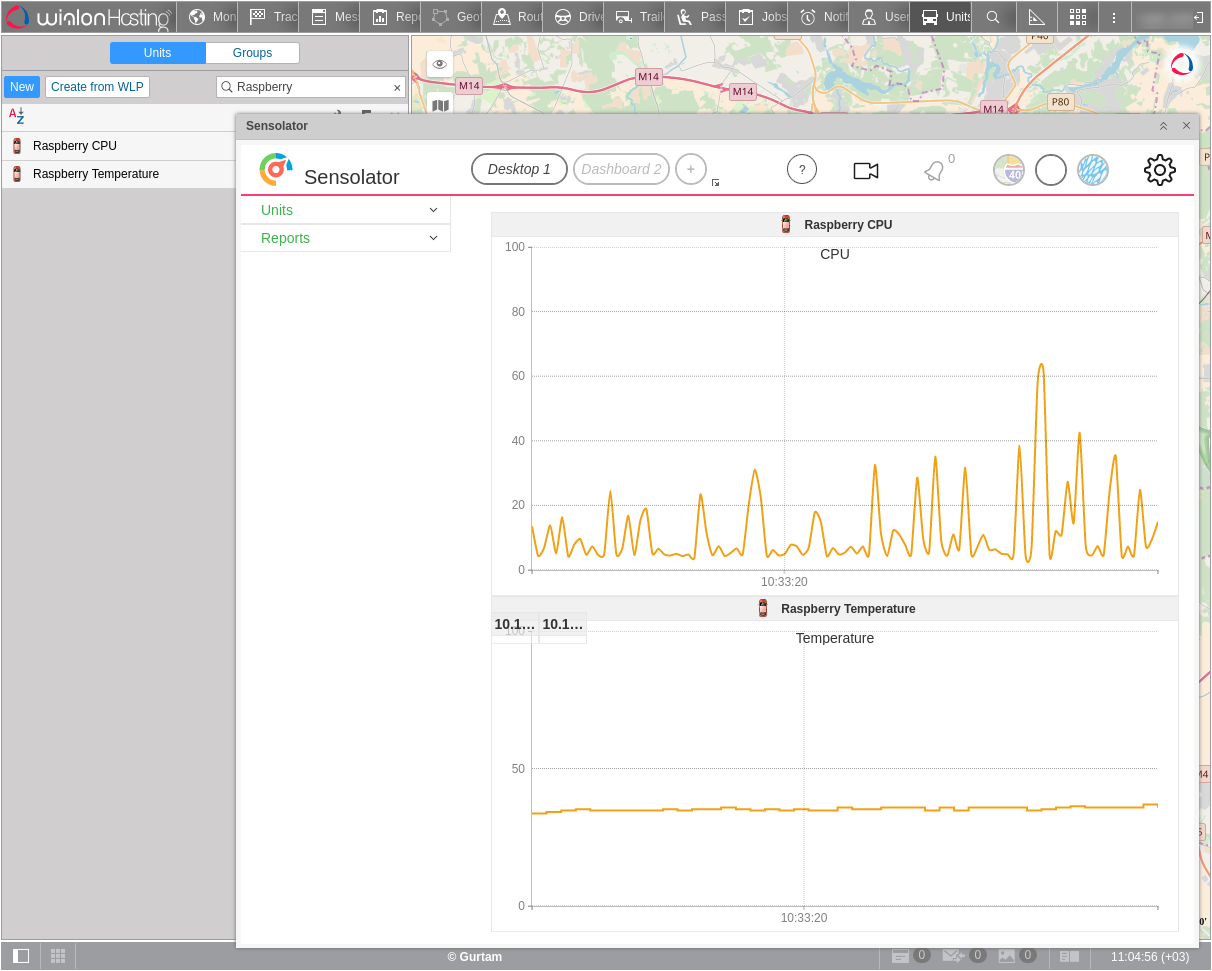
Done.
Bonus 2: using RaspberryPi as a camera
How about we convert RaspberryPi into a surveillance camera that will save a picture (or a video clip) on the flespi servers upon movement detection? To start, we need a Linux-compatible camera. I found a Logitech C270 (720p).
Go to Storage -> CDN and create a storage:
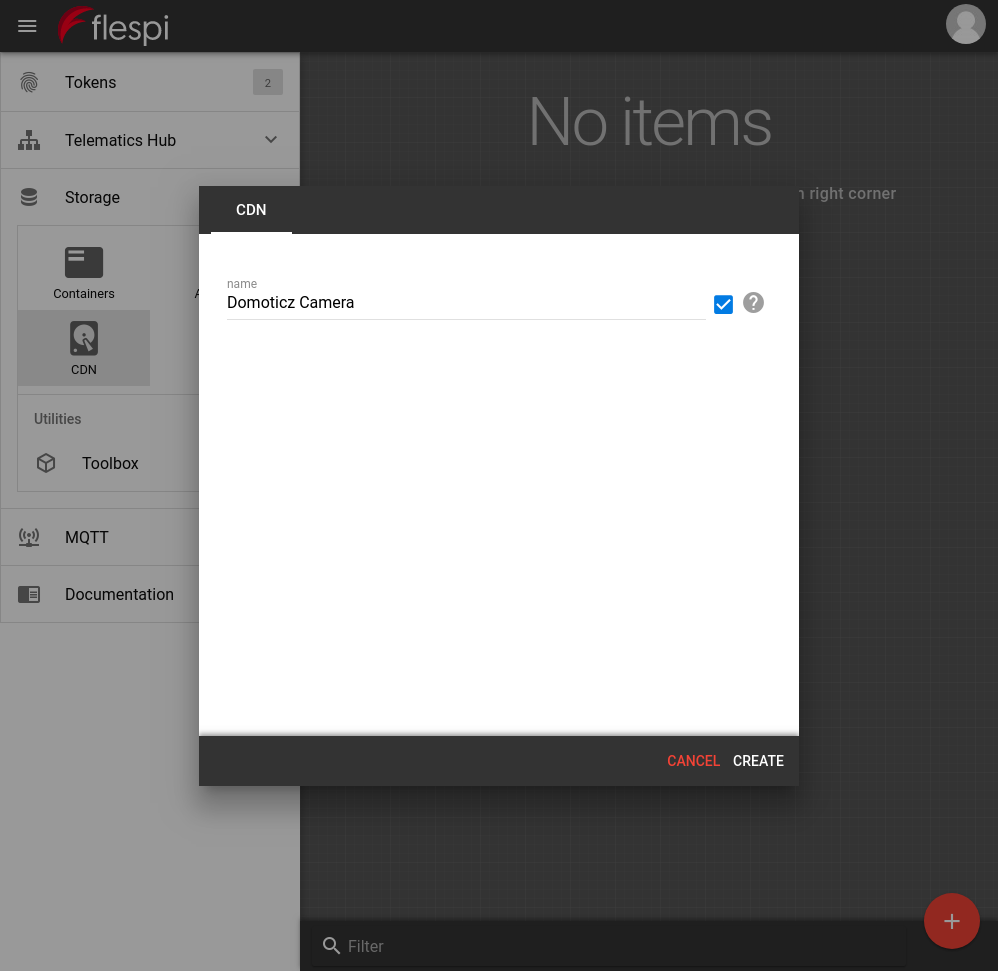
Remember the id of your CDN — you’ll need it soon.
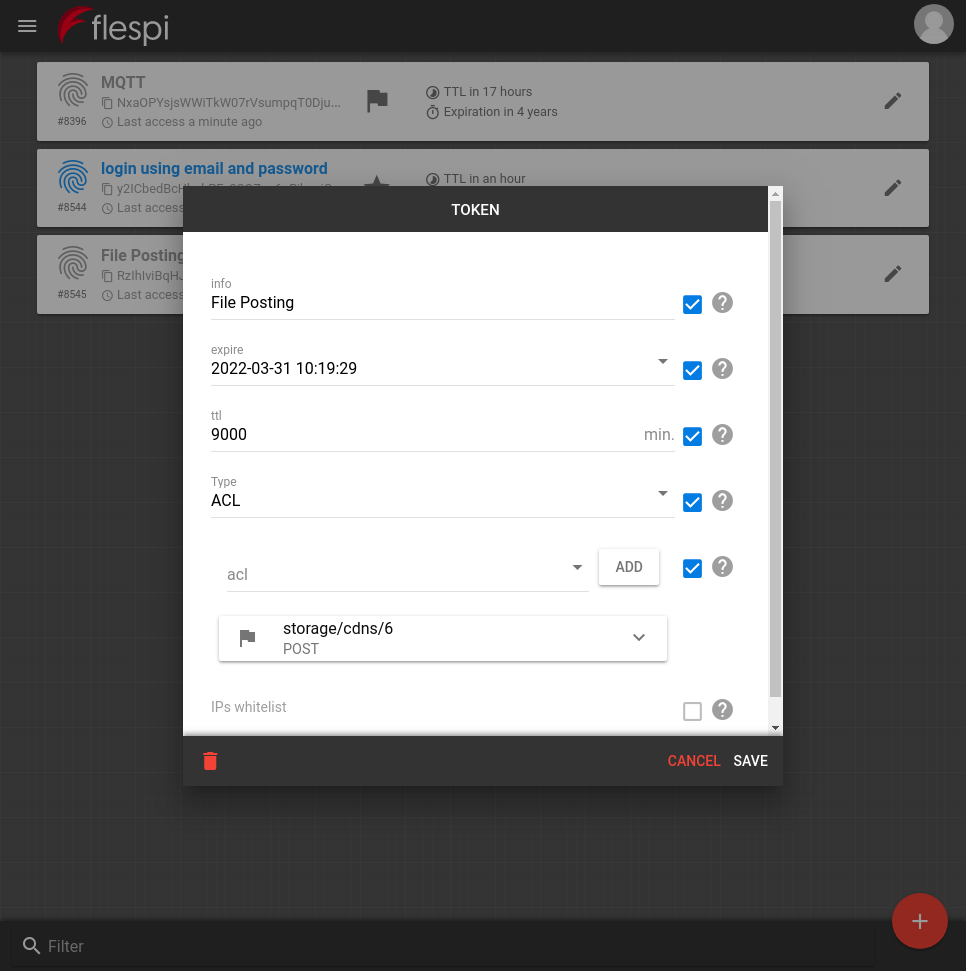
Now we need a token for saving pictures and videos to flespi:
Plug the camera into the USB port of your RaspberryPi and proceed to console.
Install the motion package:
sudo apt-get install motion
Set up the motion package.
Edit the motion file:
sudo nano /etc/default/motion
- set “yes” in the following line:
start_motion_daemon=yes
Now edit the motion.conf:
sudo nano /etc/motion/motion.conf
Paste the following parameters:
output_pictures on
ffmpeg_output_movies on
target_dir /var/lib/motion
stream_port 8081
stream_motion off
stream_localhost off
on_picture_save /home/pi/motion.sh %f
on_movie_end  /home/pi/motion.sh %f
Create the file /home/pi/motion.sh:
nano /home/pi/motion.sh
Add the following (replace <flespi_token> and <cdn_id> with the respective values):
#!/bin/bash
curl -X POST --header 'Content-Type: multipart/form-data' -F file=@$1 -F 'data={"auto_ttl":99999}' --header 'Authorization: FlespiToken <your_token>' 'https://flespi.io/storage/cdns/<cdn_id>/files'
rm $1
Give this file execution permissions:
chmod +x /home/pi/motion.sh
And restart motion:
sudo /etc/init.d/motion restart
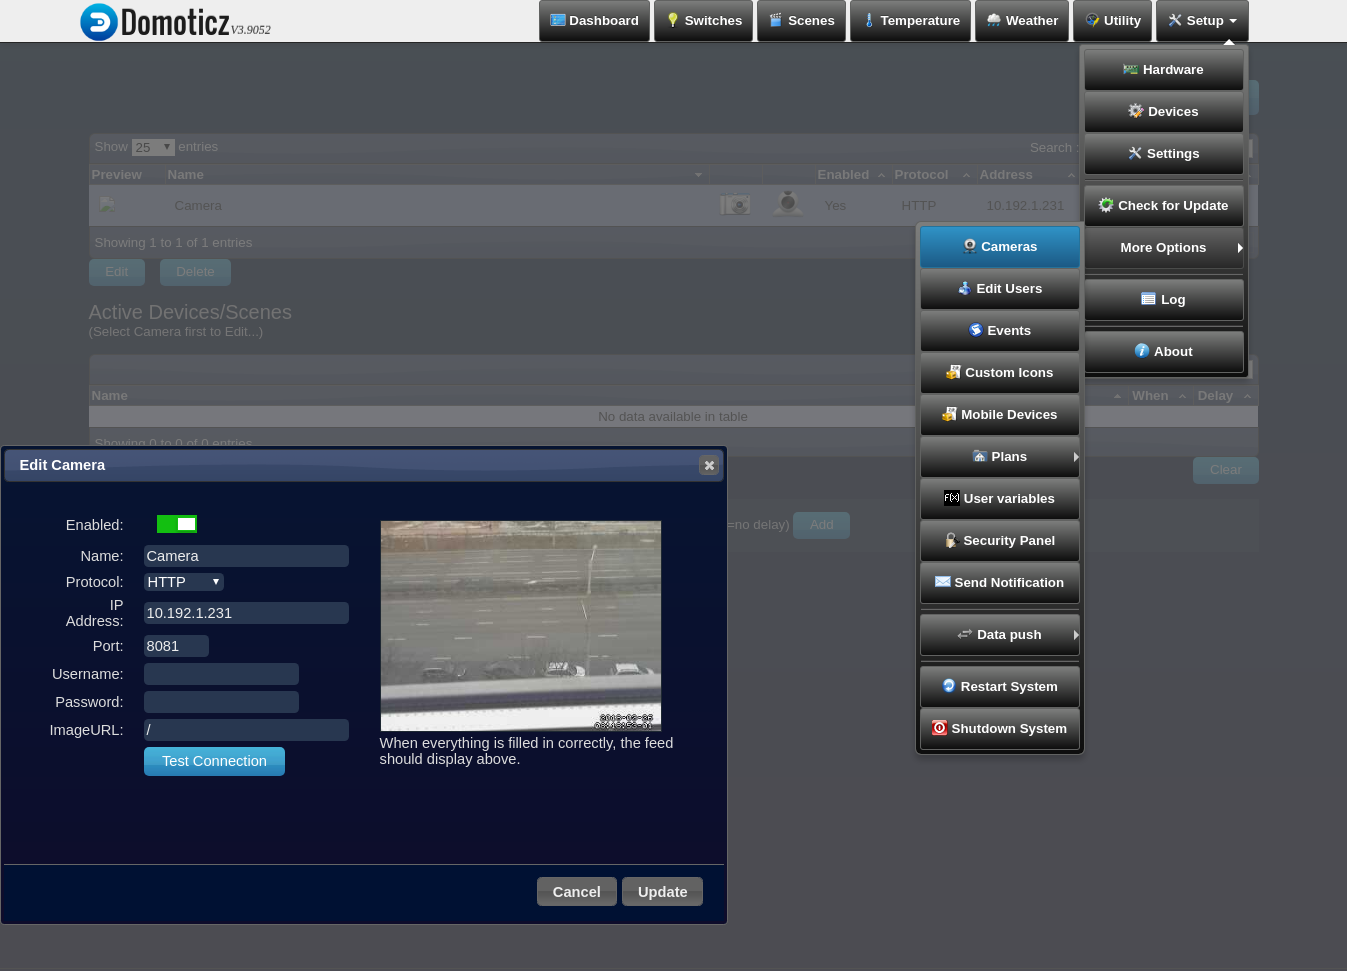
We are now ready to add the camera to Domoticz. Go to Setup -> More Options -> Cameras and add the camera:
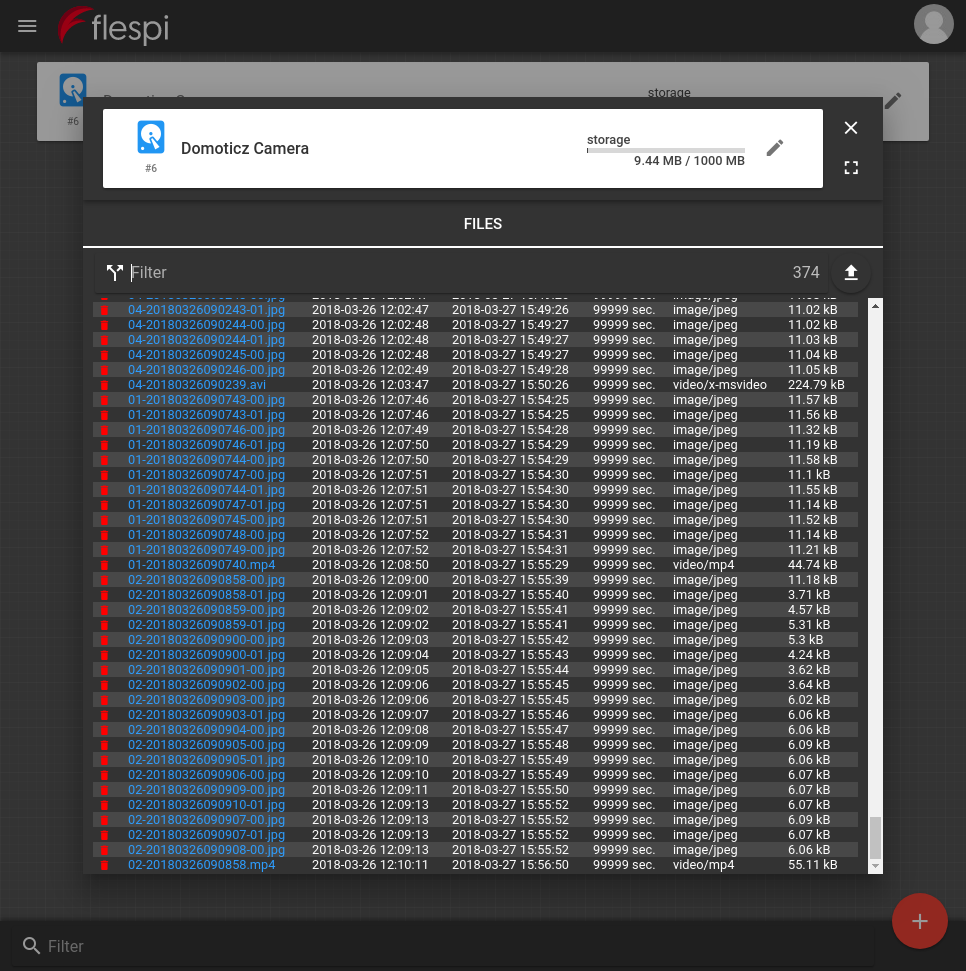
It works! And saves pictures and videos to flespi CDN too:
This was a long read, wasn’t it? How about we stop here and I’ll go work on improving the flespi panel interface as it’s never good enough ;)