Microcontrollers have spread everywhere sometimes even without us realizing that. Fridges, kettles, toys, smart sockets and switches, automatic gates — all of them are operated with the help of microcontrollers. As technologies develop, microcontrollers get cheaper and more affordable for the public.
Today I want to show how to work with ESP32-CAM board using flespi.

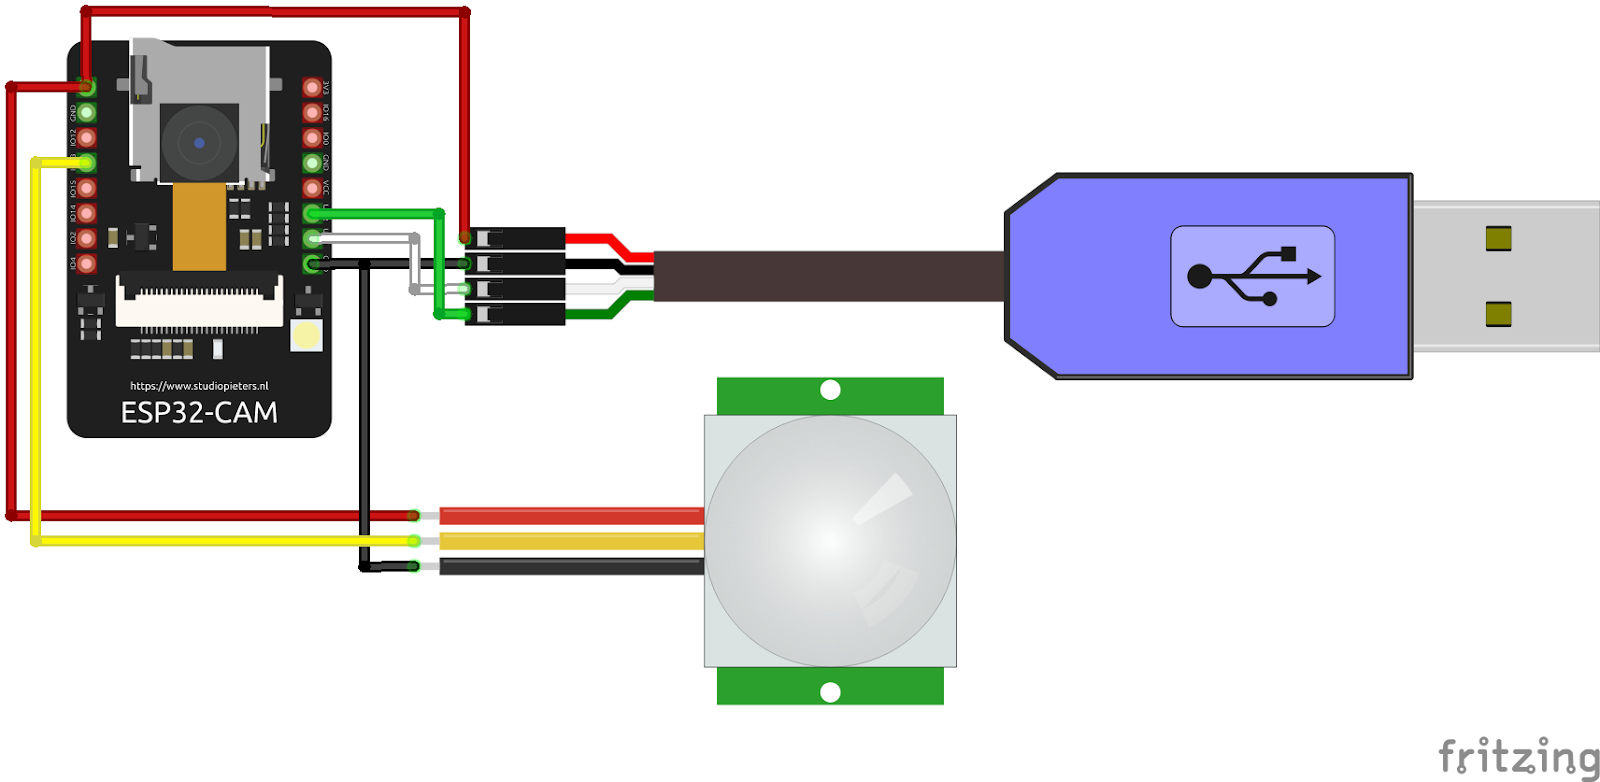
The ESP32-CAM board carries a camera, a LED flash, a microSD card slot, and a ESP32 microcontroller itself.
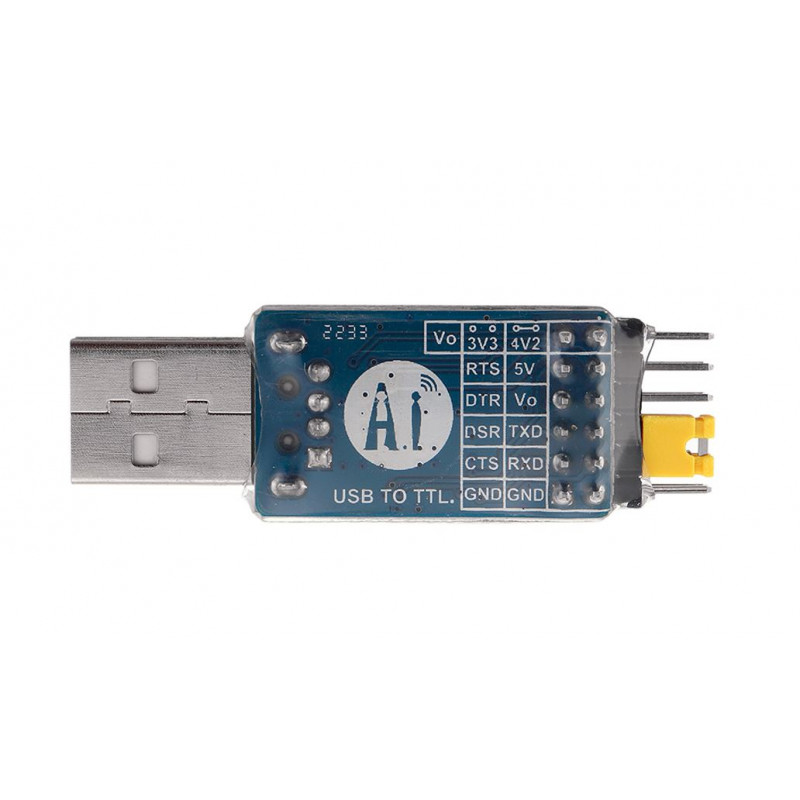

For the firmware upgrade we need the USB to TTL adapter, for example by AI thinker or FTDI, however, you are free to use any other USB to UART adapter.
Since the ESR32-CAM board features a microSD card slot, we only have two free gpio’s left — gpio12 and gpio13. Luckily, this will suffice for our needs.
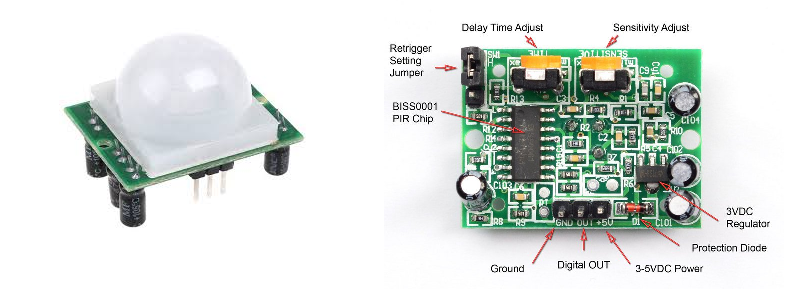
In our demo we will use the PIR motion sensor module that will occupy gpio13.
Task
The scenario I would like to implement is as follows:
the ESP32-CAM module connects to Wi-Fi and falls into deep sleep
the PIR motion sensor serves as an “alarm” that wakes the board when the motion is detected
the board connects to flespi via MQTT, takes a shot, publishes the shot as an MQTT message
and falls asleep again.
I will use Arduino IDE but you can also try PlatformIO — a comprehensive development environment as a plugin to VSCode.
Configure Arduino IDE
Let’s start by configuring Arduino IDE. Download the latest version form https://www.arduino.cc/en/software.
Install the specific package of libraries to make Arduino IDE work with ESP32:
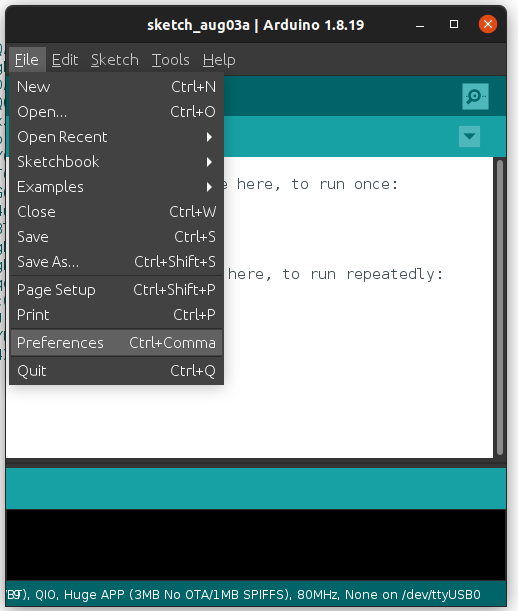
Go to File -> Preferences
- Add the following URL https://raw.githubusercontent.com/espressif/arduino-esp32/gh-pages/package_esp32_index.json into the “Additional Boards Manager URLs” field.
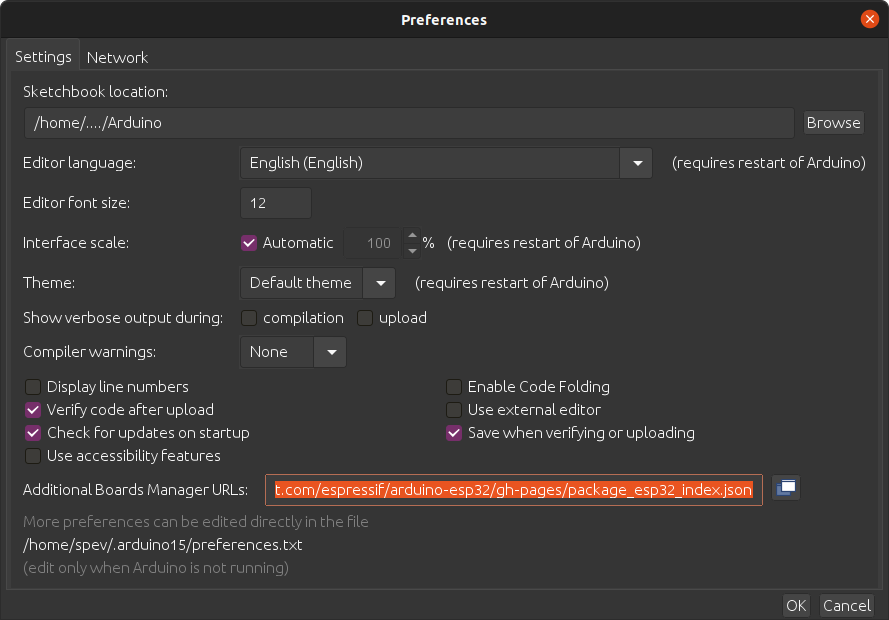
Press OK.
- Now go to Tools -> Board -> Boards Manager and type “esp32” in the filter box:
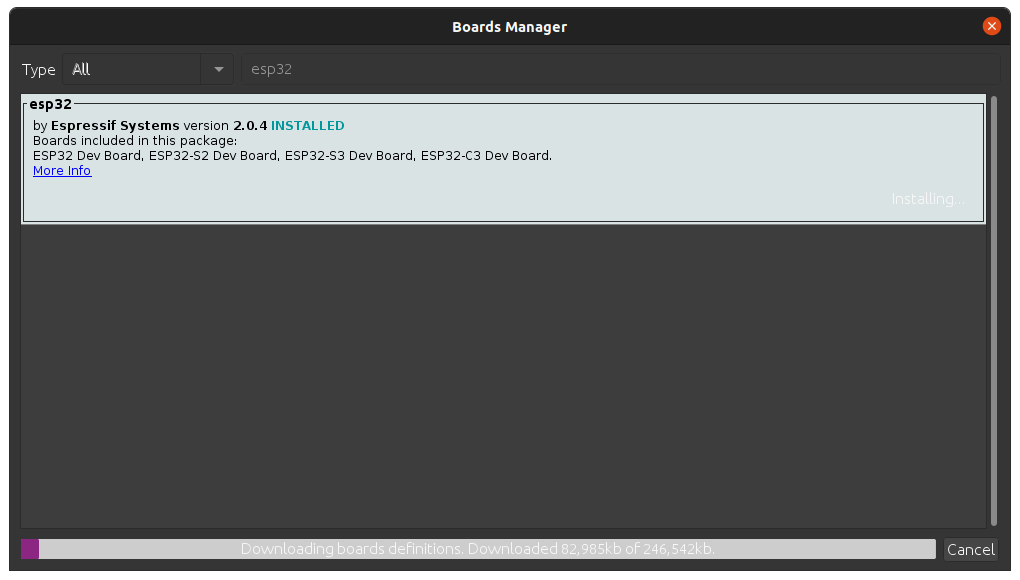
- Install the “esp32 by Espressif Systems” packet.
- Open Tools -> Board -> ESP32 Arduino -> AiThinker ESP32-CAM:
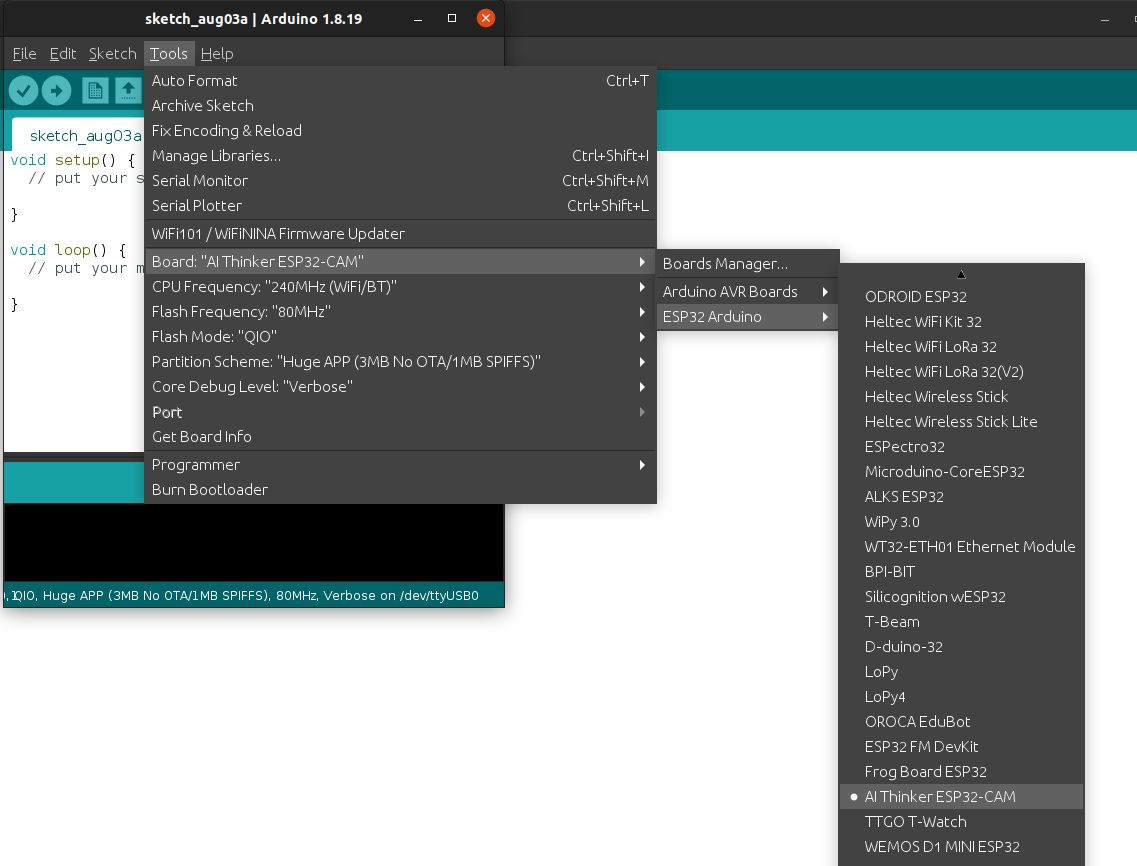
We are almost ready to upload the firmware to the ESP32 microcontroller.
Upload the firmware to ESP32-CAM
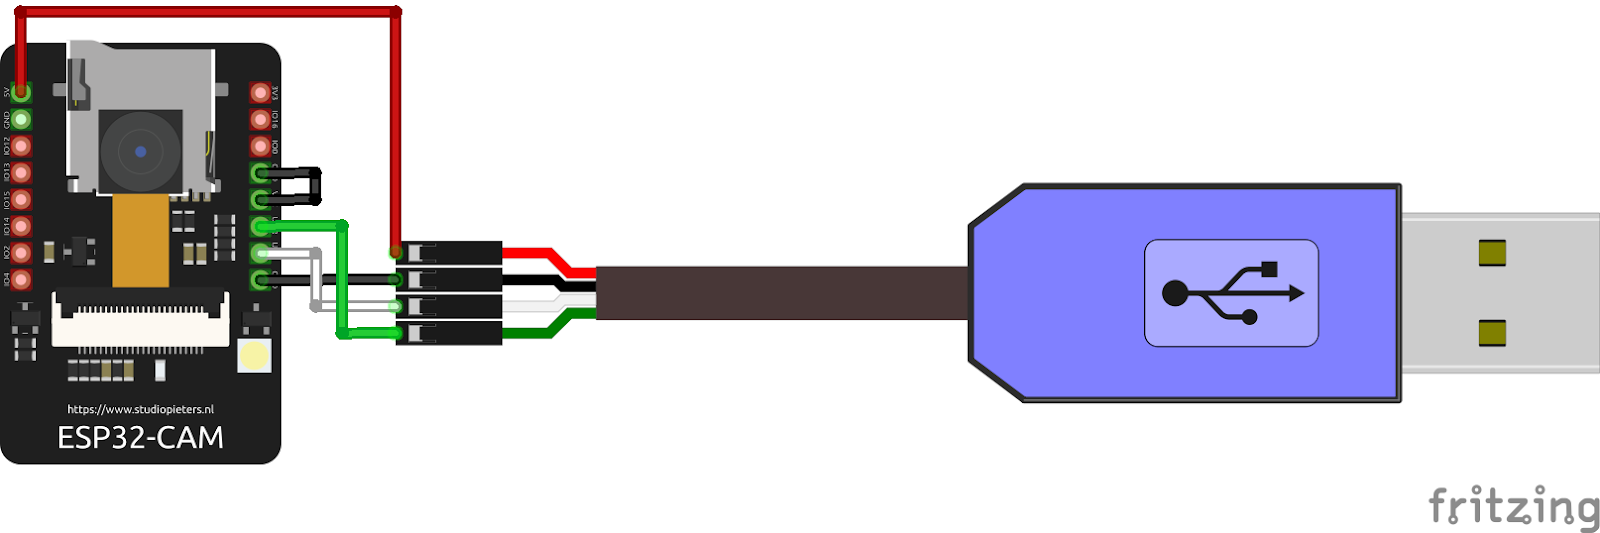
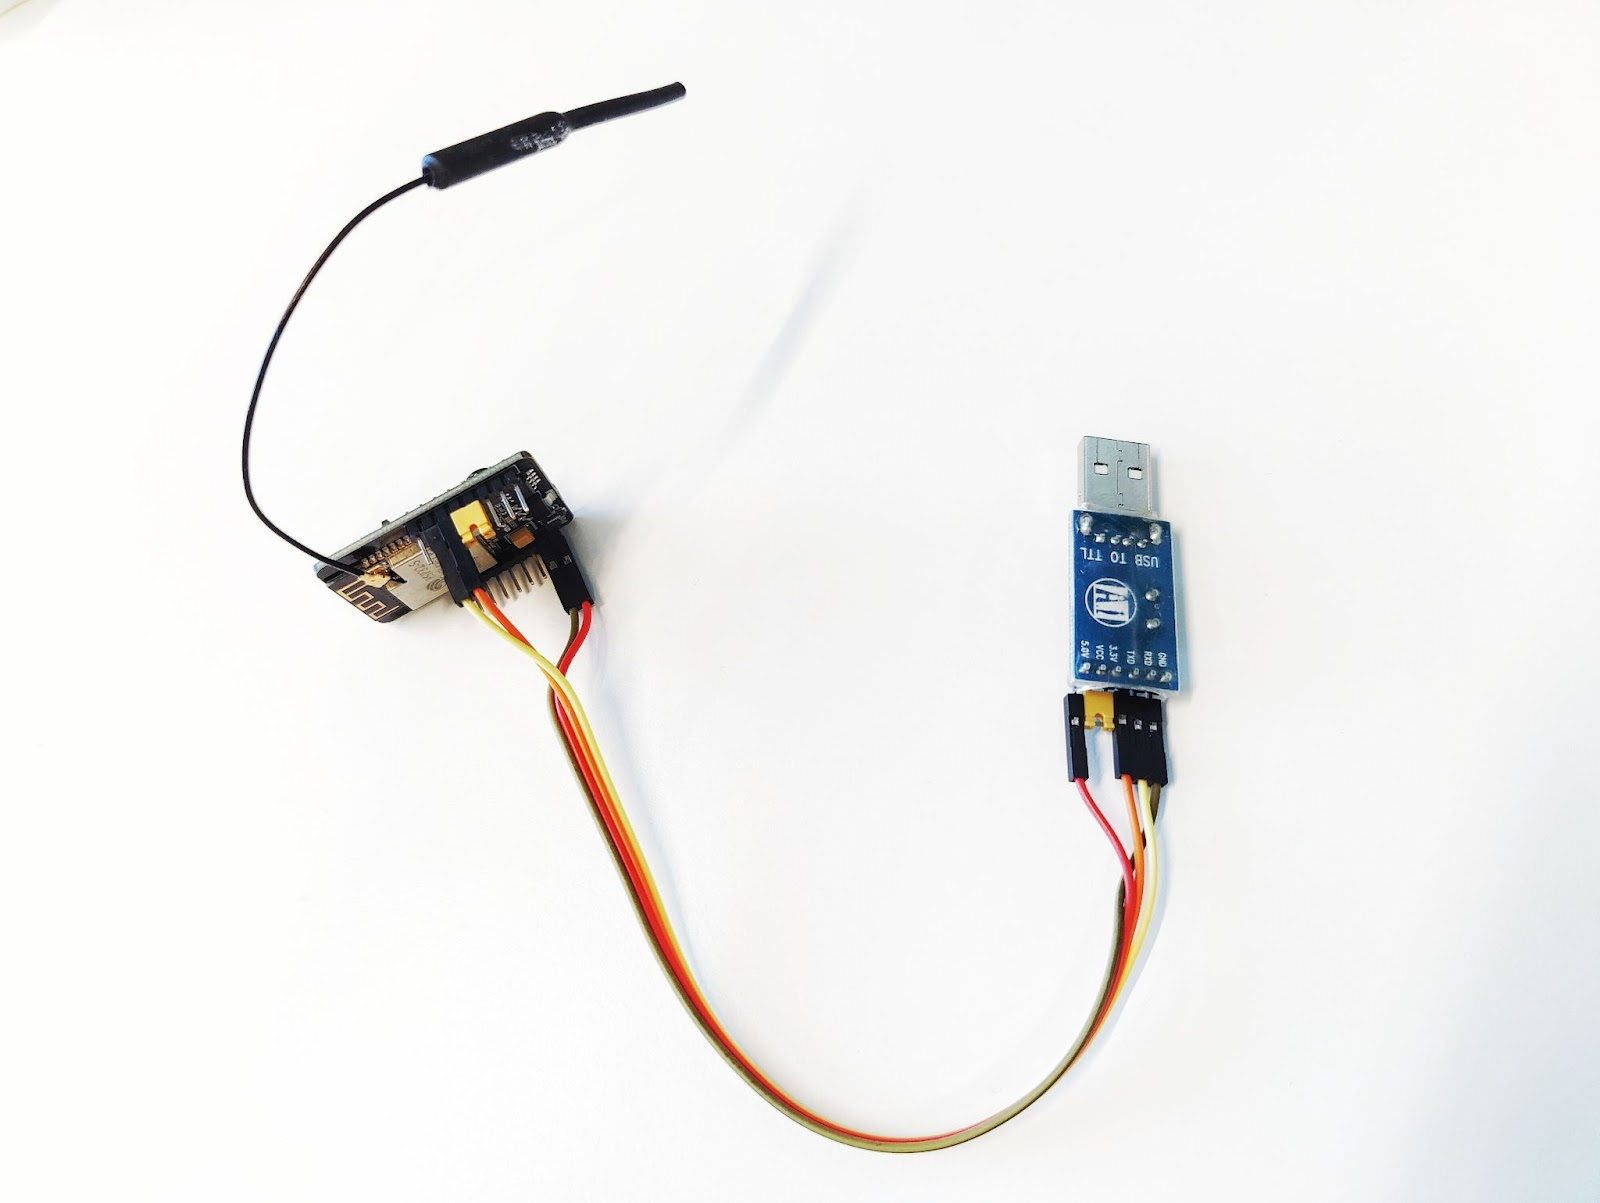
Connect the board to the computer — match the pins on the ESP32-CAM board and on the USB to TTL adapter in the following sequence:
ESP32-CAM pins | USB to TTL pins |
GND | GND |
5V | VCC (5V) |
U0R | TX |
U0T | RX |
GPIO 0 to GND |
Now download the project source code to your computer from https://github.com/flespi-software/ESP32-CAM.
To make the code work you need to specify your personalized data for some parameters:
Wi-Fi hotspot access credentials:
const char* ssid = "YOUR_WIFI_SSID";
const char* password = "YOUR_WIFI_PASSWORD";
Where to send the shots from the ESP32-CAM:
We use the flespi MQTT broker with the following config:
const char* mqtt_server = "mqtt.flespi.io";
const int mqtt_port = 1883;
const char* mqtt_user = "YOUR_FLESPI_TOKEN";
const char* mqtt_password = "";
In our case the token configuration should look like this:
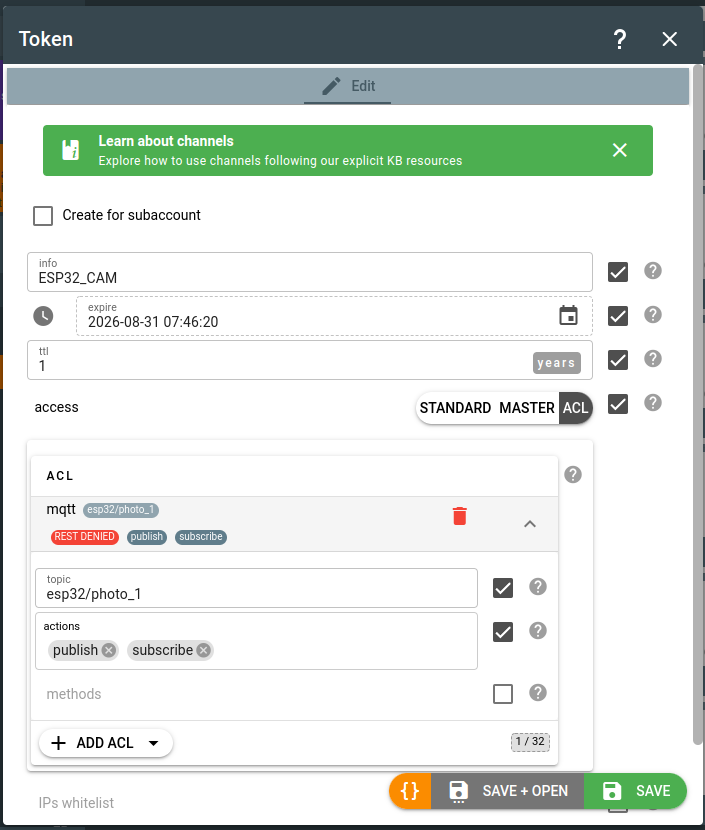
The token configuration JSON looks as follows:
{
  "access": {
    "acl": [
      {
        "uri": "mqtt",
        "topic": "esp32/photo_1",
        "actions": [
          "publish",
          "subscribe"
        ]
      }
    ],
    "type": 2
  },
  "info": "ESP32_CAM",
  "expire": 1788151580,
  "ttl": 31536000
}
Learn more about advanced tokens configuration here.
We should also specify the topic to which the shots will be published (I typed it in the token configuration):
const char* mqtt_TopicName = "esp32/photo_1";
The ESP32-CAM can work in two modes — periodic photo capture every N seconds or motion-triggered photo capture with the help of the PIR sensor connected as shown below:
If you want a motion-triggered mode, change the value in the following line to 0:
#define SLEEP_DELAY 60000 //Delay for 60 Sec
Once all the configuration is complete, we can connect the ESP32-CAM to the computer and start the firmware upgrade.
Important! Don’t forget to put the jumper between GPIO 0 and GND, otherwise the firmware upgrade won’t succeed.

Bragging note: I use Flipper Zero instead of traditional USB to TTL:
ESP32-CAM | Flipper Zero pins |
GND | 8 (GND) |
5V | 1 (5V) |
U0R | 13 (TX) |
U0T | 14 (RX) |
GPIO 0 to GND |
“Flipper Zero is a versatile tool for hardware exploration, firmware flashing, debugging, and fuzzing. It can be connected to any piece of hardware using GPIO to control it with buttons, run your own code and print debug messages to the LCD display. It can also be used as a regular USB to UART/SPI/I2C/etc adapter.”
 Connect esp32-cam to flipper zero
When the hardware is connected, in Arduino IDE select the port for the firmware upgrade and click the button with the right arrow (->) or CTRL+U:
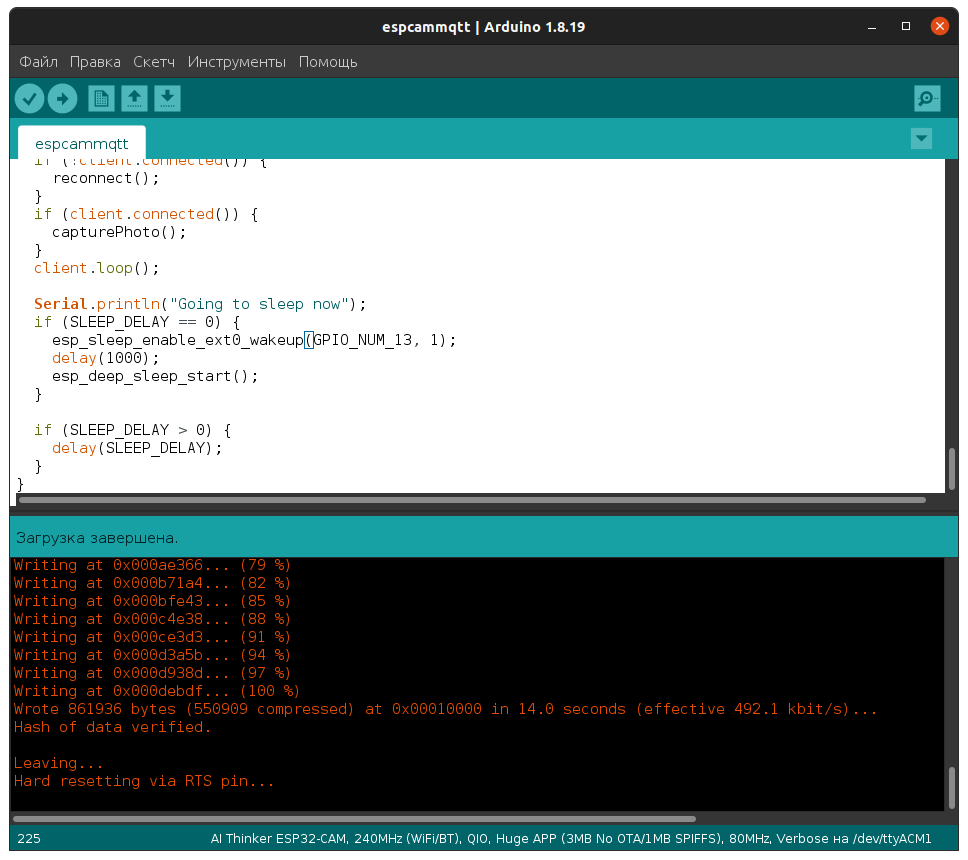
Firmware upgrade is complete and we can run the port monitor to see what’s happening to the device:
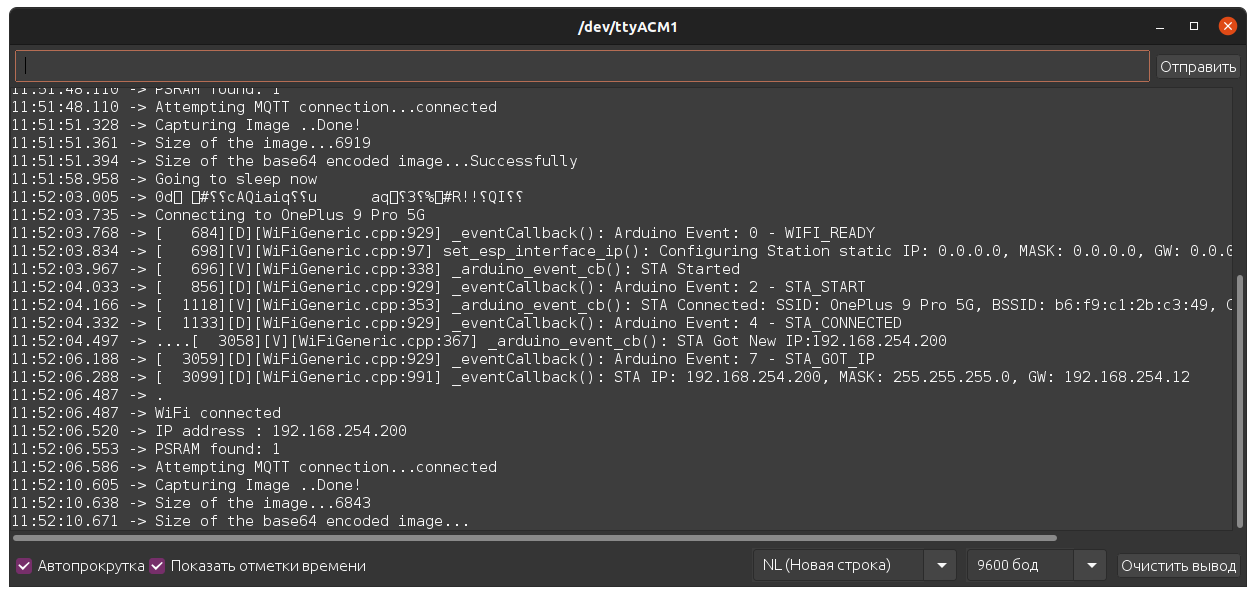
If everything went smoothly, you will see the records saying that device successfully connected to Wi-Fi, took a shot, sent it over MQTT, and fell asleep.
If you installed the PIR motion sensor and set SLEEP_DELAY to 0, then the ESP32-CAM will react to the motion around it and perform all the actions above.
Flespi configuration
We will be using flespi to save and store the captured photo shots in JSON messages.
First, we need an MQTT channel to receive data from the MQTT broker and generate messages (use the token we created above in the Flespi Token field):
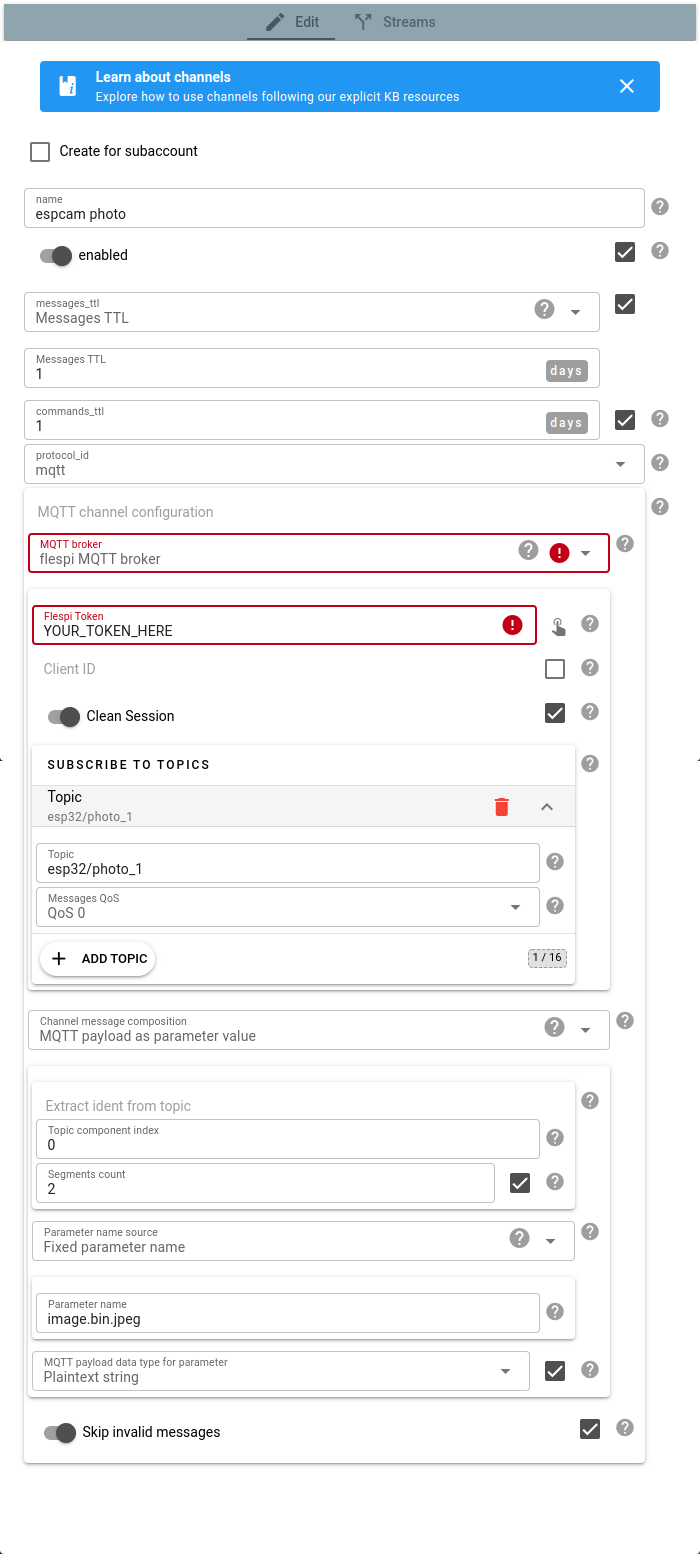
The MQTT channel configuration in JSON:
{
  "messages_ttl": 86400,
  "protocol_id": 39,
  "enabled": true,
  "name": "espcam photo",
  "configuration": {
    "broker": {
      "clean_session": true,
      "subscribe": [
        {
          "qos": 0,
          "retain_handling": 1,
          "topic": "esp32/photo_1"
        }
      ],
      "token": "YOUR_TOKEN_HERE",
      "type": "flespi"
    },
    "message": {
      "ident": {
        "index": 0,
        "segments": 2,
        "source": "topic"
      },
      "parameter_name": {
        "name": "image.bin.jpeg",
        "source": "fixed"
      },
      "payload_data": "string",
      "payload_type": "parameter"
    },
    "skip_invalid": true
  },
  "commands_ttl": 86400
}
Next, we create a device that will store the messages with the photo shots:
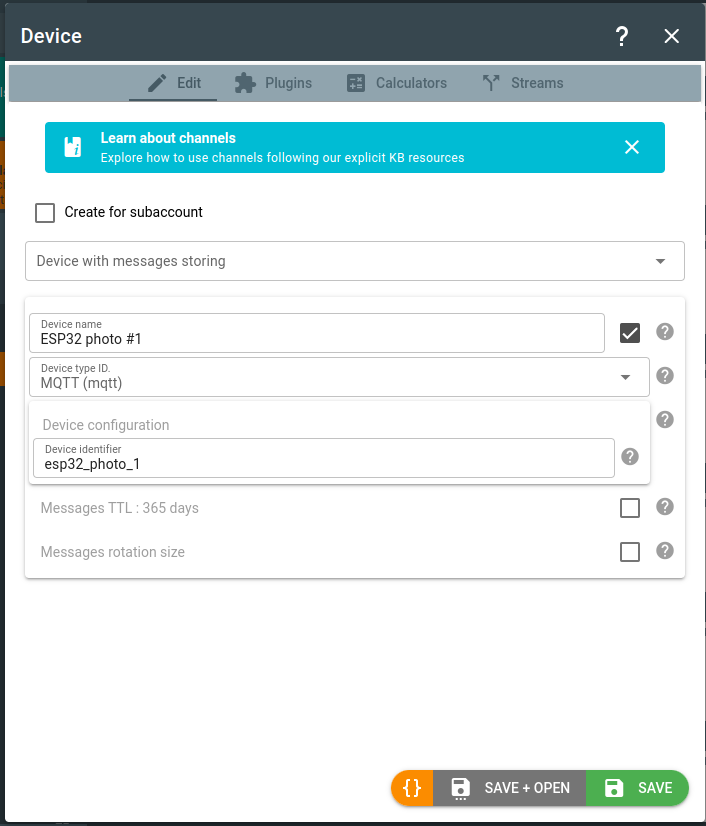
The MQTT device configuration in JSON:
{
"configuration": {
"ident": "esp32_photo_1"
},
"device_type_id": 172,
"name": "ESP32 photo #1"
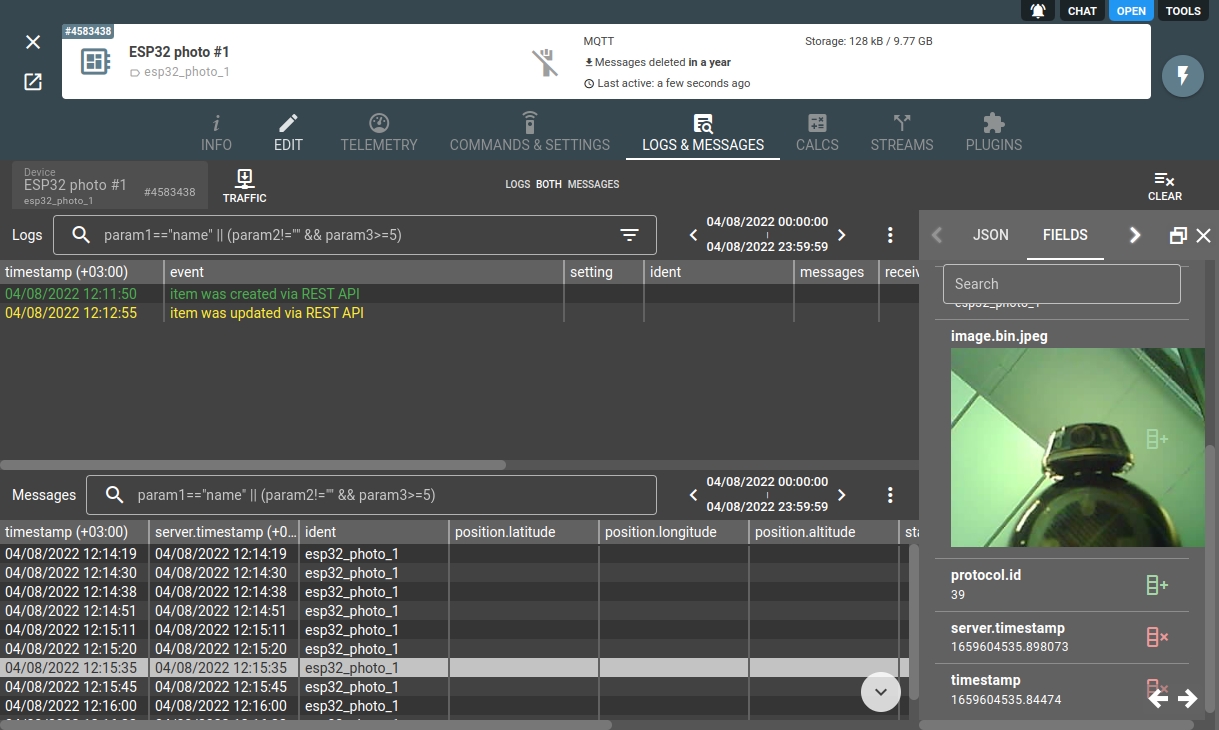
}Results
There we go — we get the messages with our pictures saved in the created device:
Possible practical applications
You can invent hundreds of applications aligned with your needs and imagination; here are some that I came up with:
Example 1. You own a bus fleet equipped with Wi-Fi and want to know what’s going on in each bus while it’s following the route.

It’s not even close to replacing a fully-fledged video monitoring, but rather a super-cheap alternative to it.
Example 2. There is a place (warehouse, garage, apartment, etc.) and you want to know that no deers or raccoons got in uninvited.

***
ESP32-CAM with a PIR sensor is a functional device that can serve a variety of purposes. MQTT is a convenient IoT transport that allows building efficient event-based solutions. flespi is the middleman that facilitates communication of ESP32-CAM via MQTT and enables convenient photos storage in JSON messages and access to them via API.