Catalyst by Zoho is a service that enables developers to deploy their Node.js and Java microservices in a few clicks without the complexities of server configuration. In this guide we will show how to forward the data you collected in flespi to your Zoho Catalyst project.
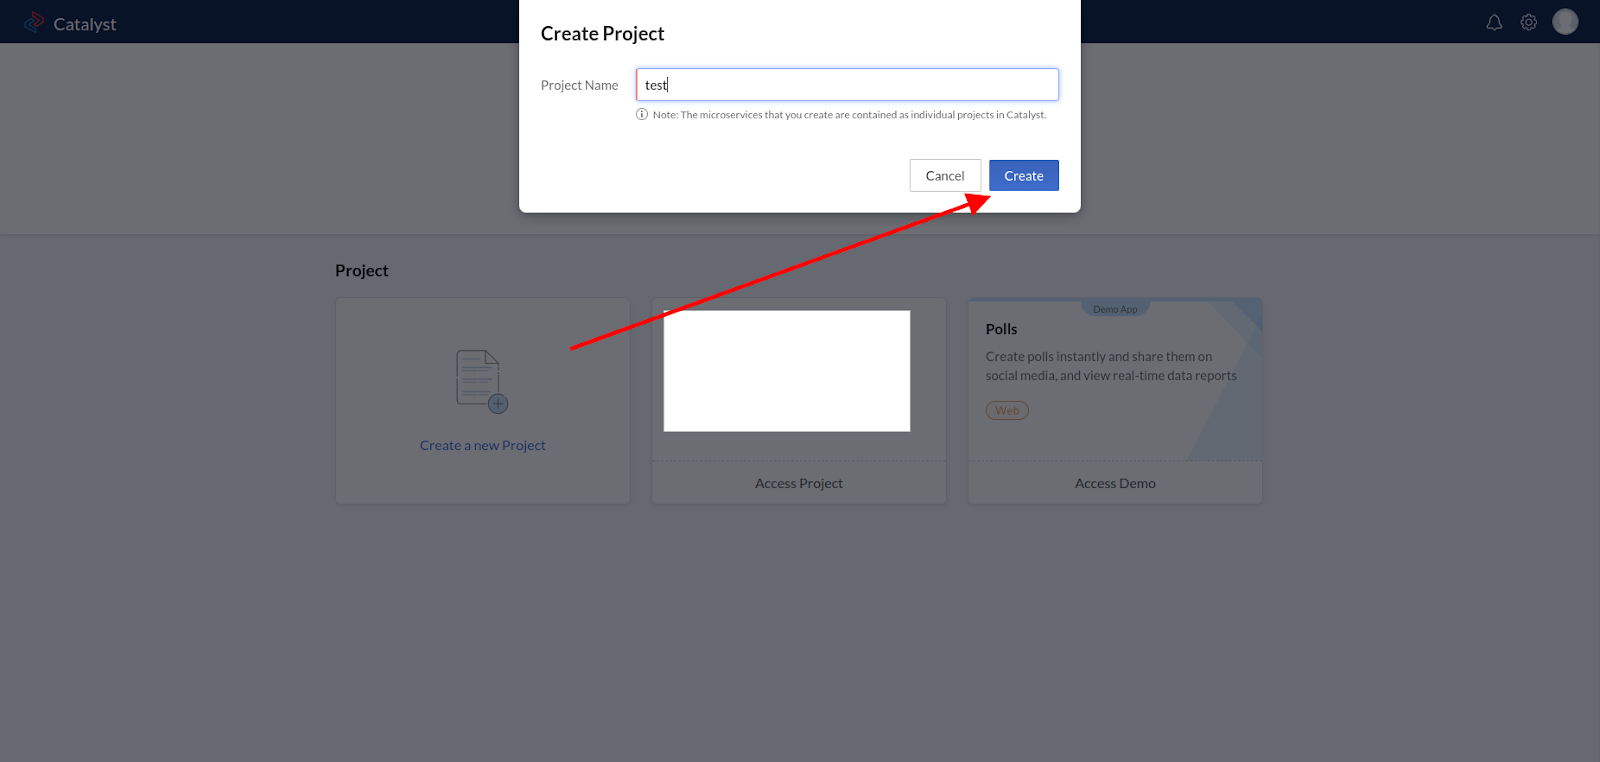
Let’s create a new project in Zoho Catalyst first.
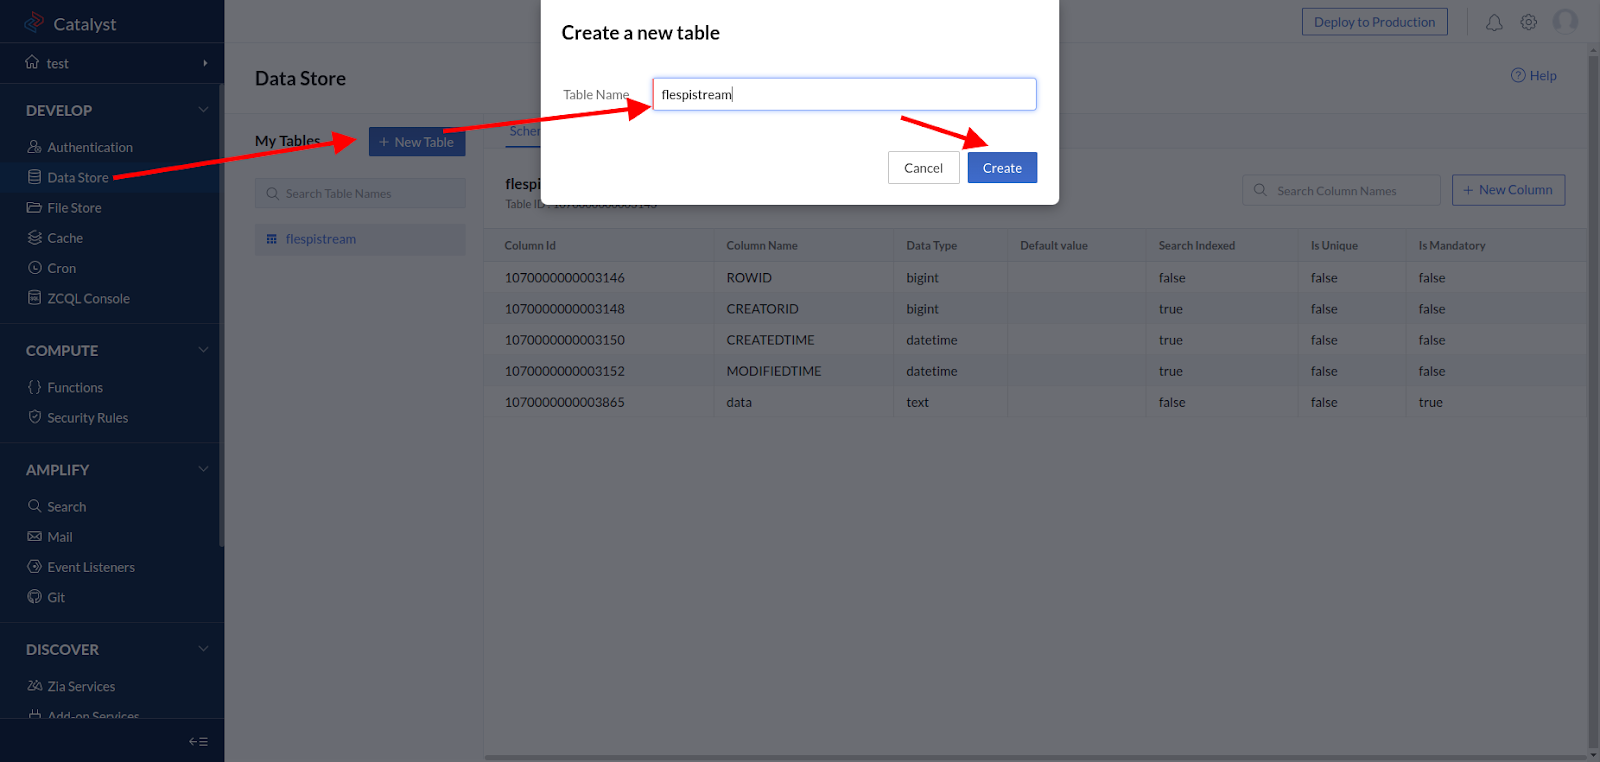
Then let’s take care of where we will store the received data. Open Data Store and create a table (we named it "flespistream").
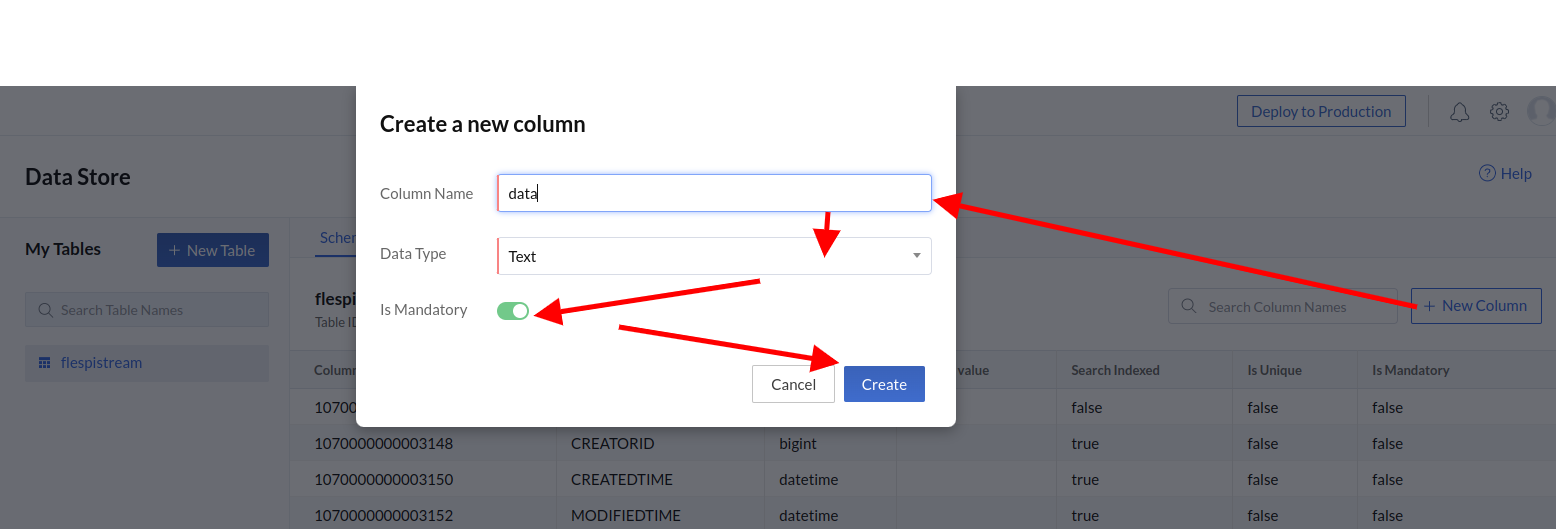
By default the table has four standard service columns, so let’s add one more column, name it “data” and make it a "text” type. (in reality, you want to create columns for all the fields you intend to store; we simplify for demonstration purposes only).
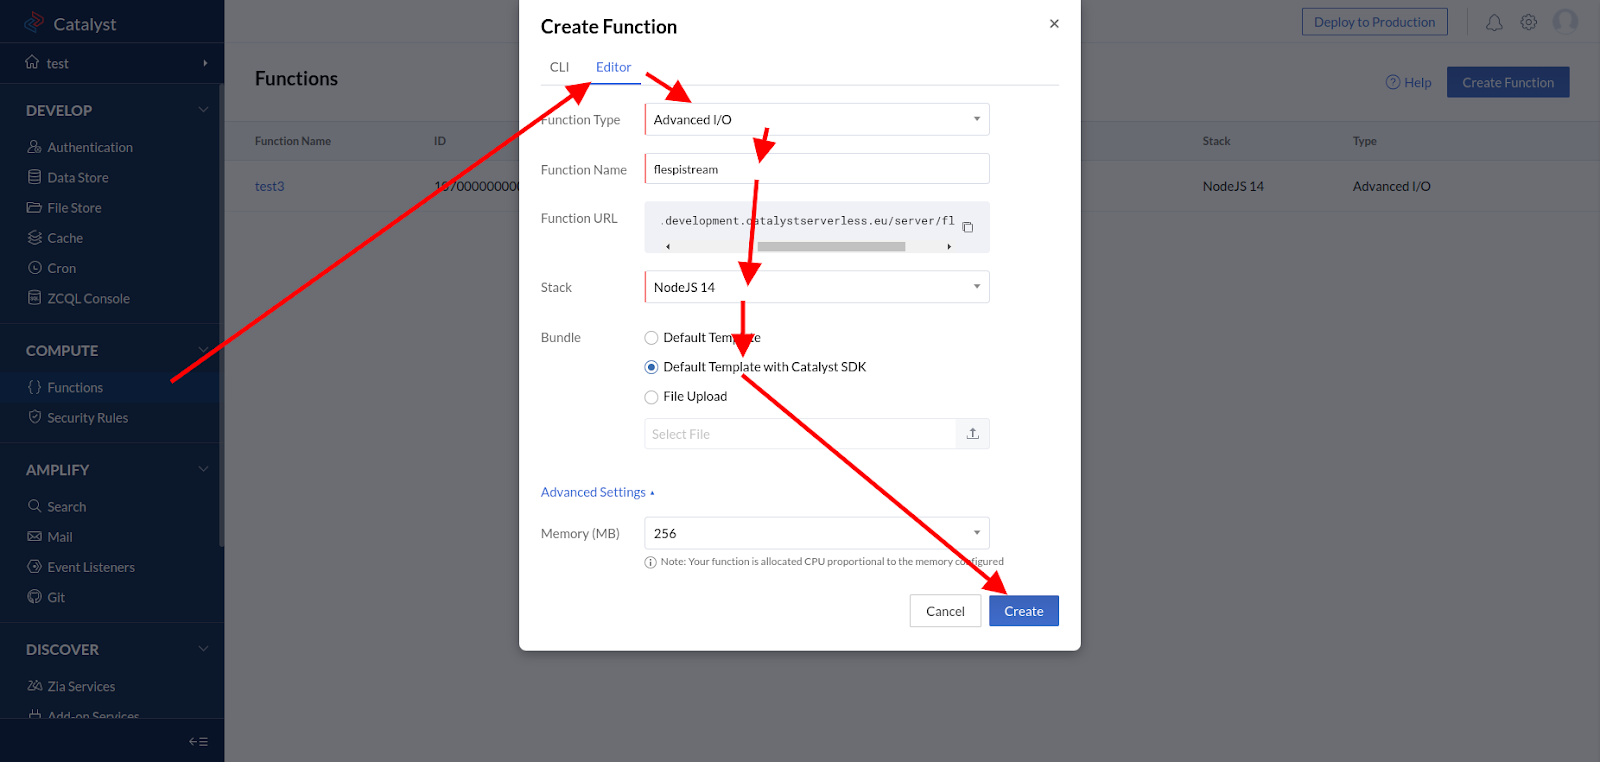
Now that our basic storage is ready, we should create a function (we named it “flespistream”) that will save the data coming from the stream. Let’s select the “Advanced IO” type to be able to use advanced data reception methods. Then select “Default template with Catalyst SDK” to be able to save data into the table.
We need to fix the code a little bit to have the incoming data (from the /stream request) saved to the proper table field.
Note: if you created several table columns to save several fields separately, you will need to write additional code to parse the incoming data and distribute it properly among the columns. We go a simple way for demonstration and save all incoming data into the “data” column with one request.
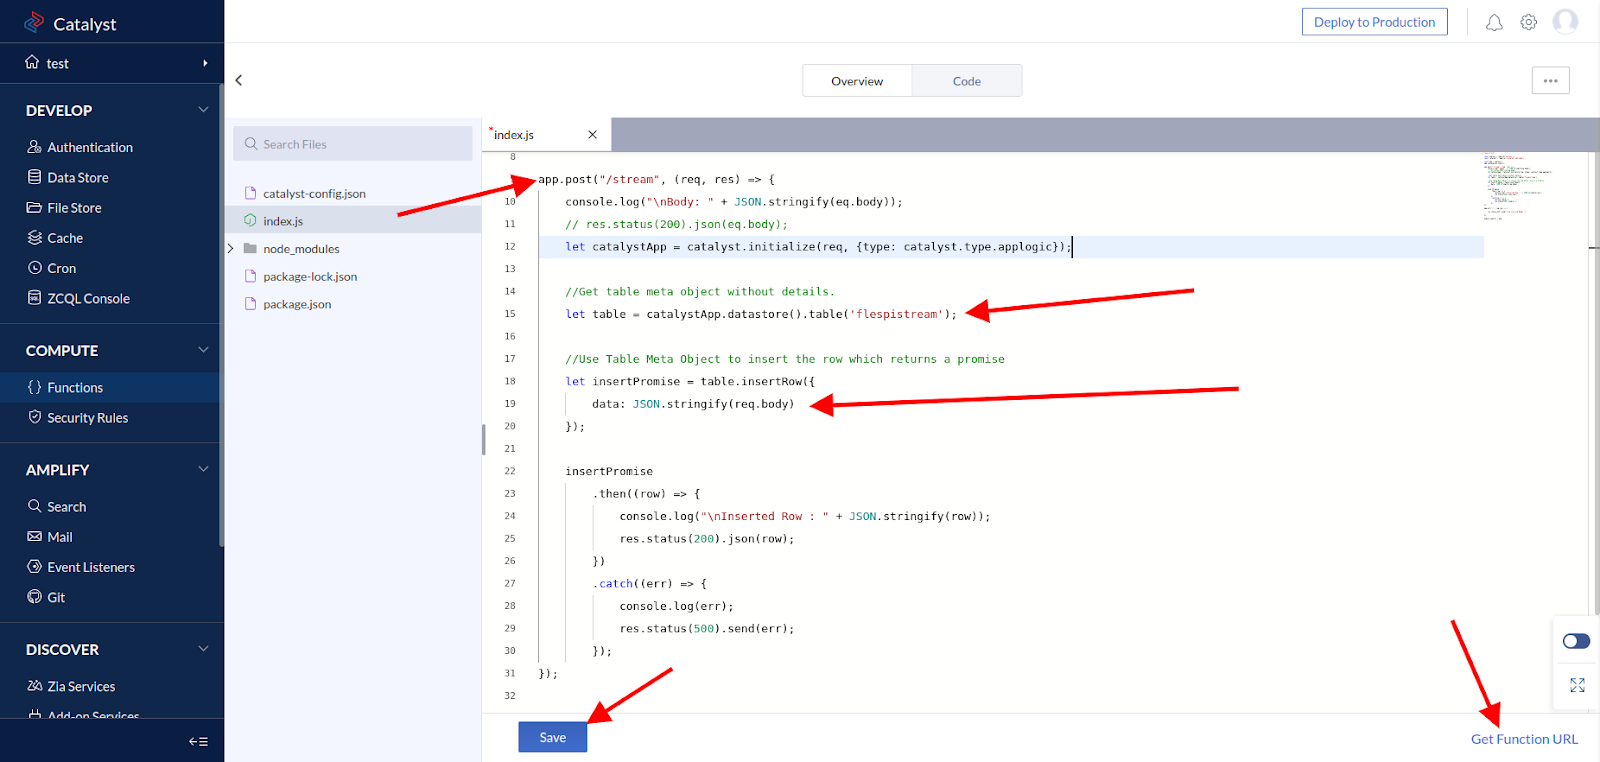
You can take our sample code from GitHub as the basis and customize it to your needs.
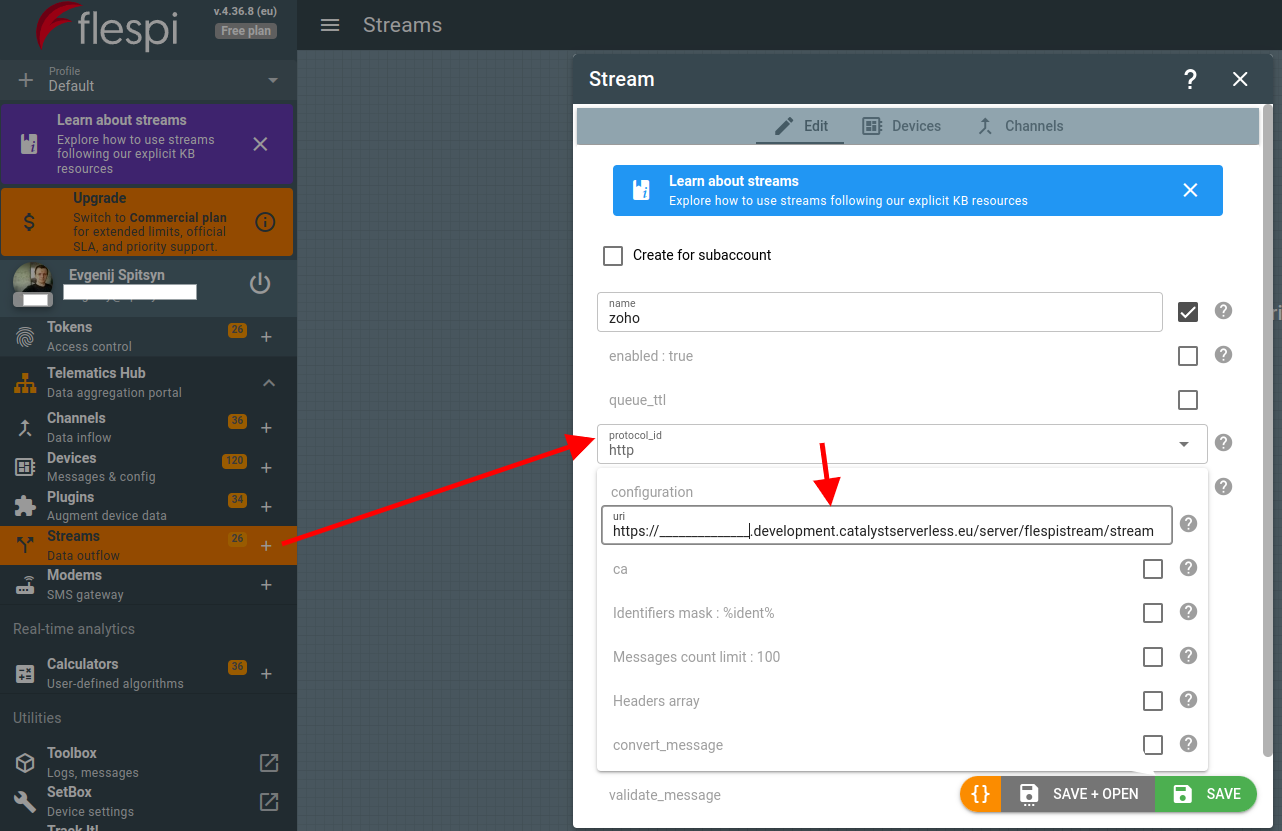
It’s time to create a stream in flespi. Before switching to flespi.io, copy the URL in the bottom right corner of the Catalyst page with the code. Then in the flespi panel, navigate to Telematics hub -> Streams -> “+” button. Select the “http” protocol and paste the copied URL with the “/stream” part added to the end.
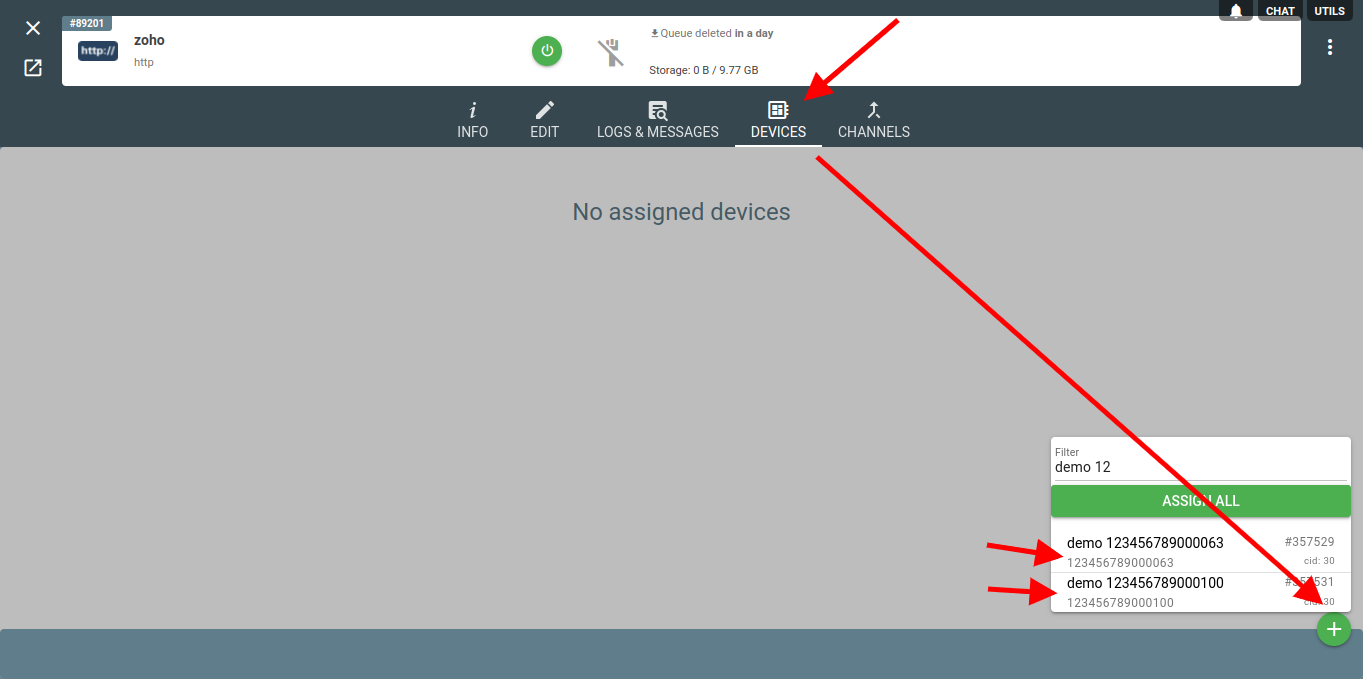
Once you save the stream, you need to assign devices the data from which will be streamed to Zoho Catalyst.
Let’s get back to Zoho Catalyst and check the logs to make sure the data started to flow in without errors. Go to Logs, select Log Type: Application and Function: flespistream (or the name of your function).
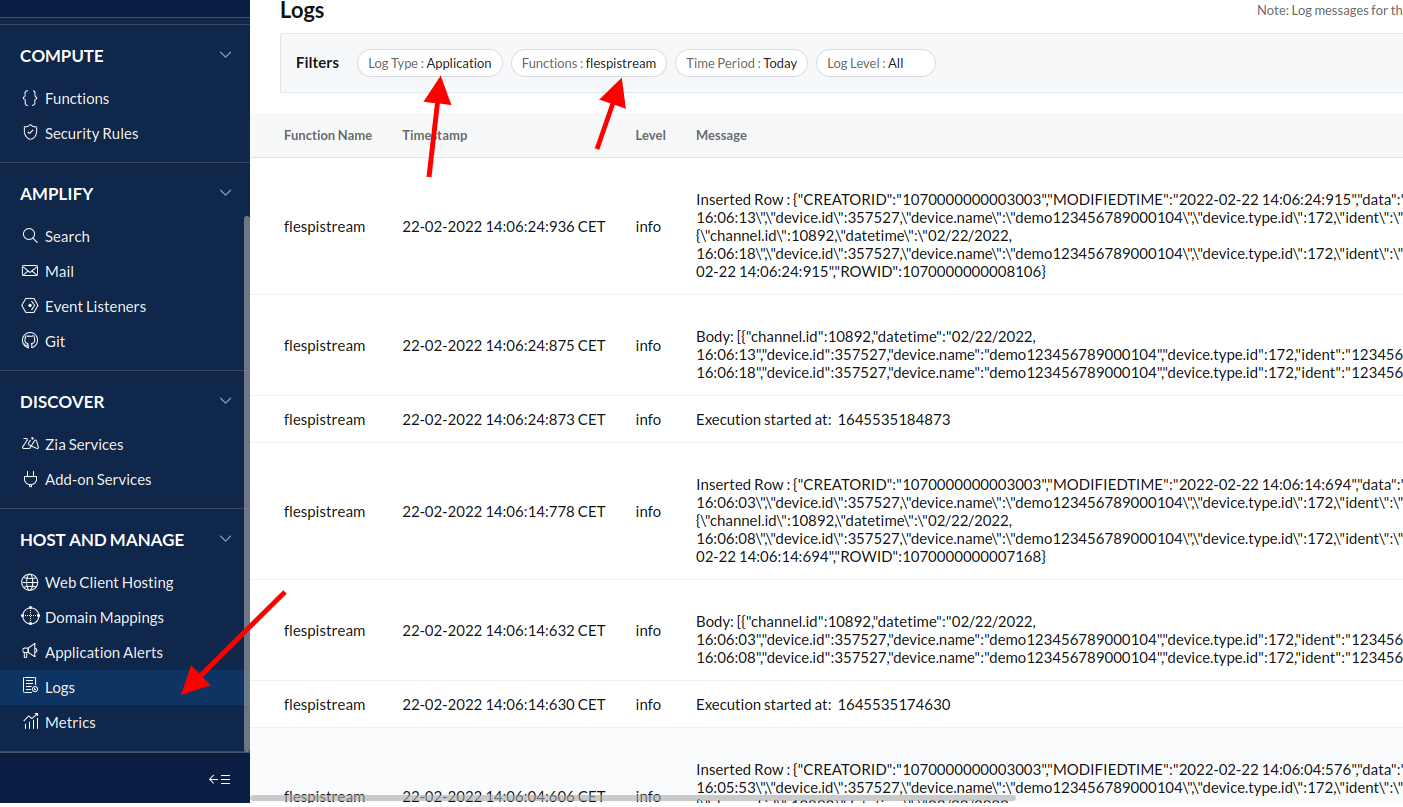
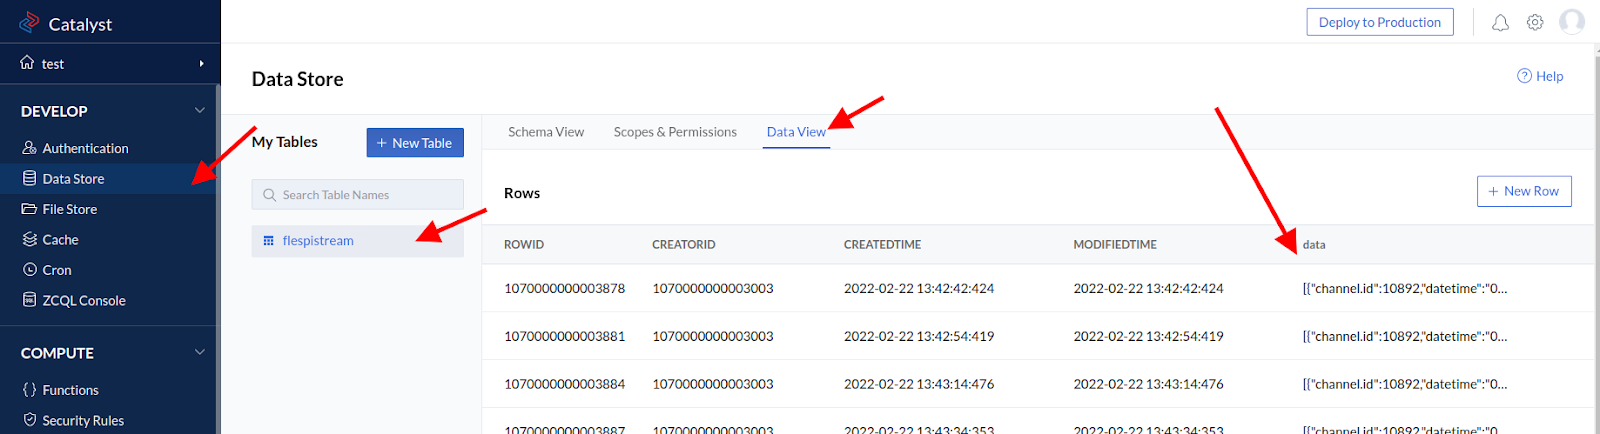
If logs show no errors, we should now see the actual data saved in the table. Go to Data Store -> flespistream - > DataView to see how the table is populated with streamed data.
***
We have just set up forwarding and saving data in the Zoho Catalyst service. You can tweak the code to spread the data between multiple columns or add some data processing, e.g. sending notifications based on specific parameter values. Now that you get the data in Catalyst, you decide how to apply its functionality to your tasks.