Last week we started looking scrupulously at the flespi analytics capabilities and tried splitting messages into trips and detecting stops. This time we will be experimenting with geofences. When geofences are involved, there’s usually a check if the vehicle is inside or outside of the zone, a check of specific criteria, and an action triggered when the criteria are met/not met.
The exact task we are going to solve today is: detect overspeeding within the city limits.
First, we need to create a calculator of the geofence type. Navigate to Telematics hub -> Calculators and click “+”.
For demonstration, we’ll define a circular geofence around Minsk (BTW, the beltway surrounding it does have a near-circular shape). You need to specify the coordinates of the central point and the radius:
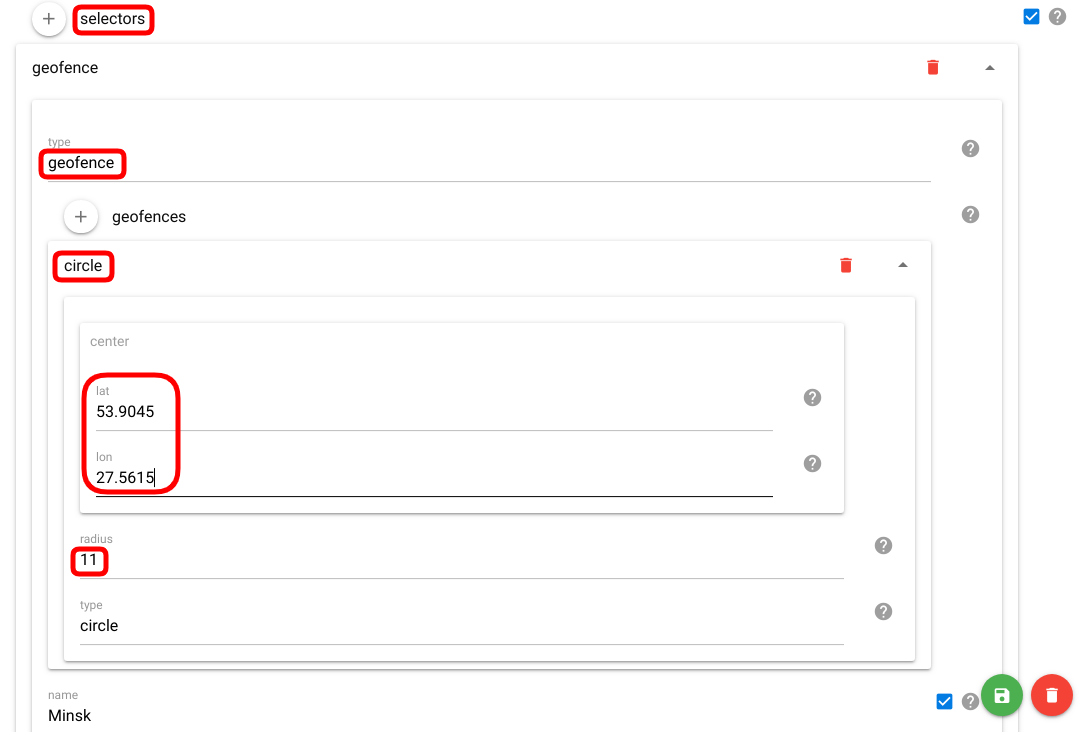
Note: for simplicity, we created circular geofences in this article. However, for a more precise drawing of irregularly shaped zones, it’s more efficient to use the polygon type of geofence.
Another condition we want to observe is getting the intervals with exceeded speed only. So we add the second selector that will be checking the logical expression position.speed>60:
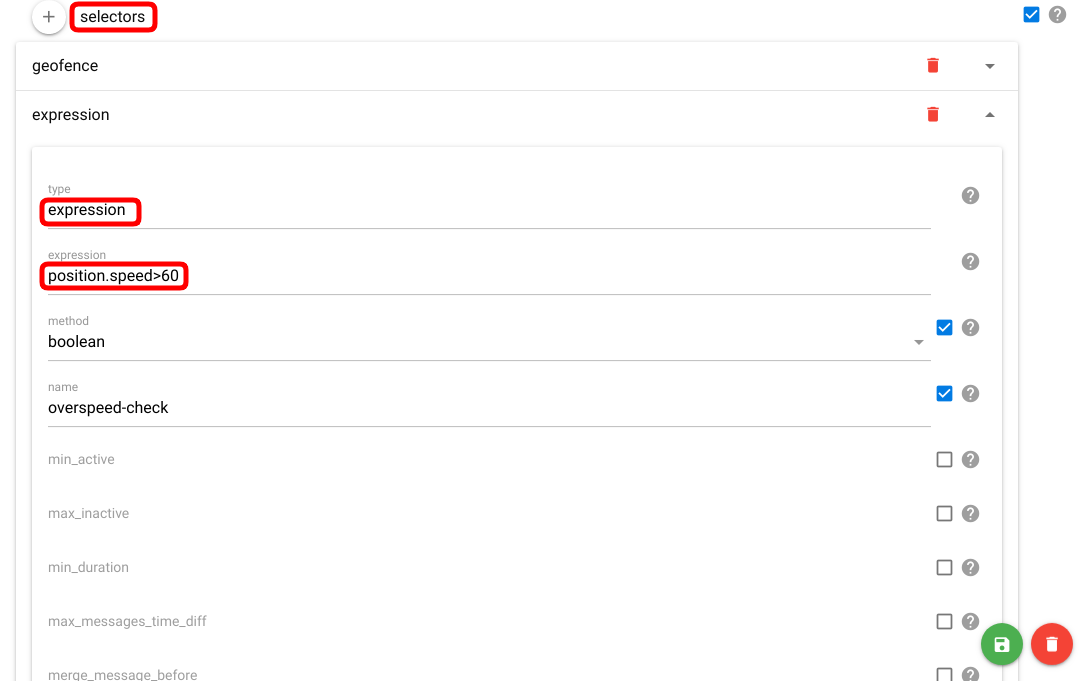
Since selectors in a calculator are merged based on the AND logic, the resulting intervals will be the ones inside the geofence AND with speed over 60kmh.
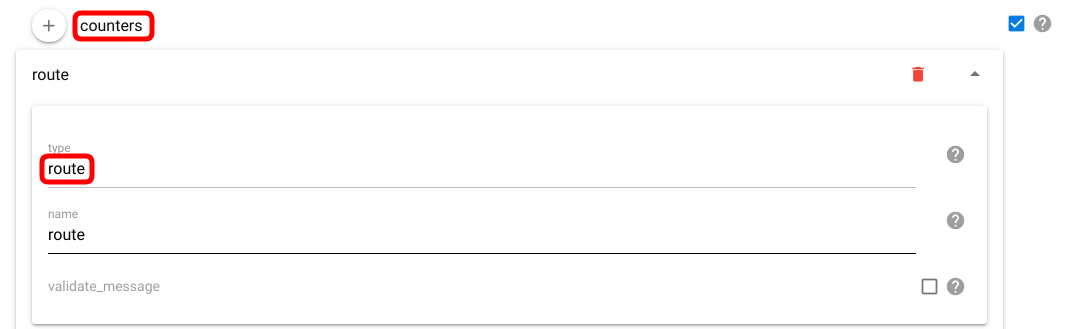
Now let’s configure what data we want to get for each of the generated intervals. We do this with the help of counters.
I suggest creating one route counter — it will create Google-encoded routes for segments with an exceeded speed limit.
And the dataset counter will put together an array of coordinate pairs (latitude and longitude):

Save the calculator by clicking the green Save button. Then click on the newly created calculator card and go to the Devices tab to assign the device(s) to perform calculations for:
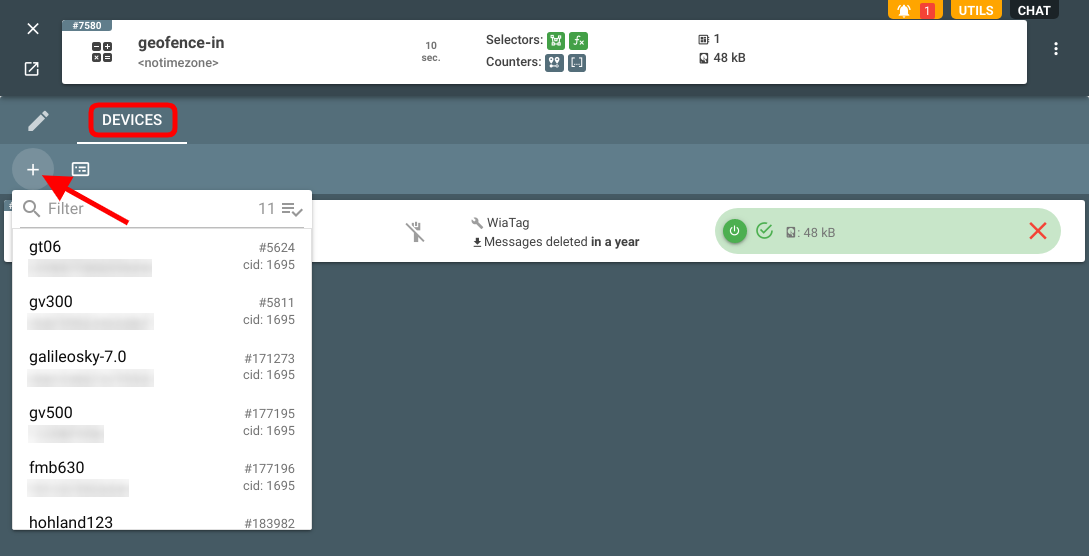
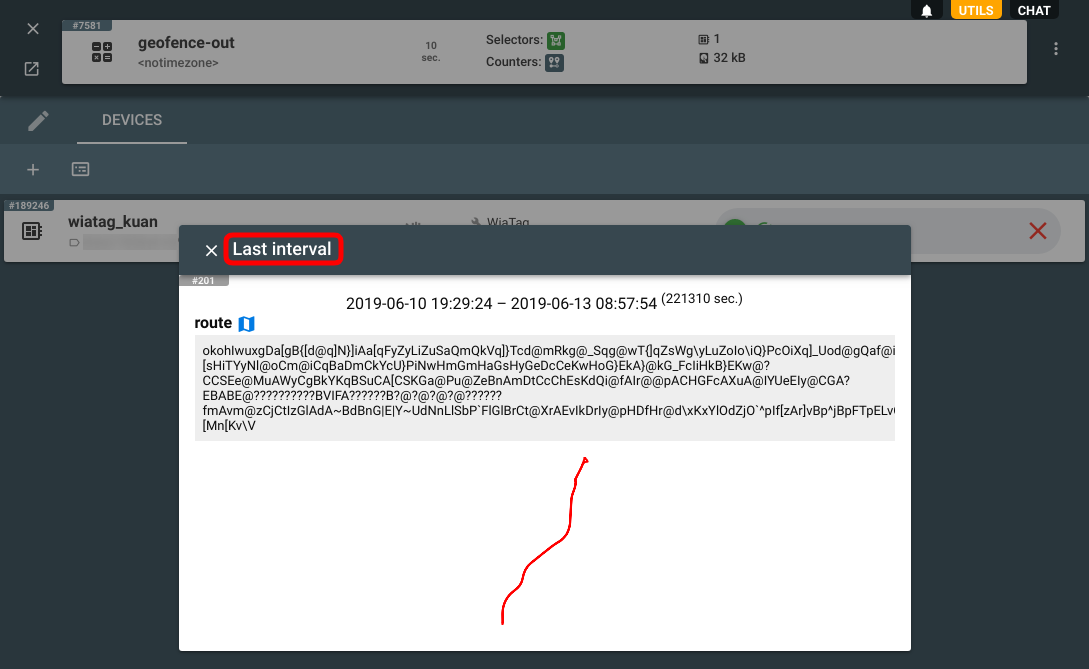
Once the assigned device is synced (green check icon appears), you can see the last calculated interval by clicking on the device card.
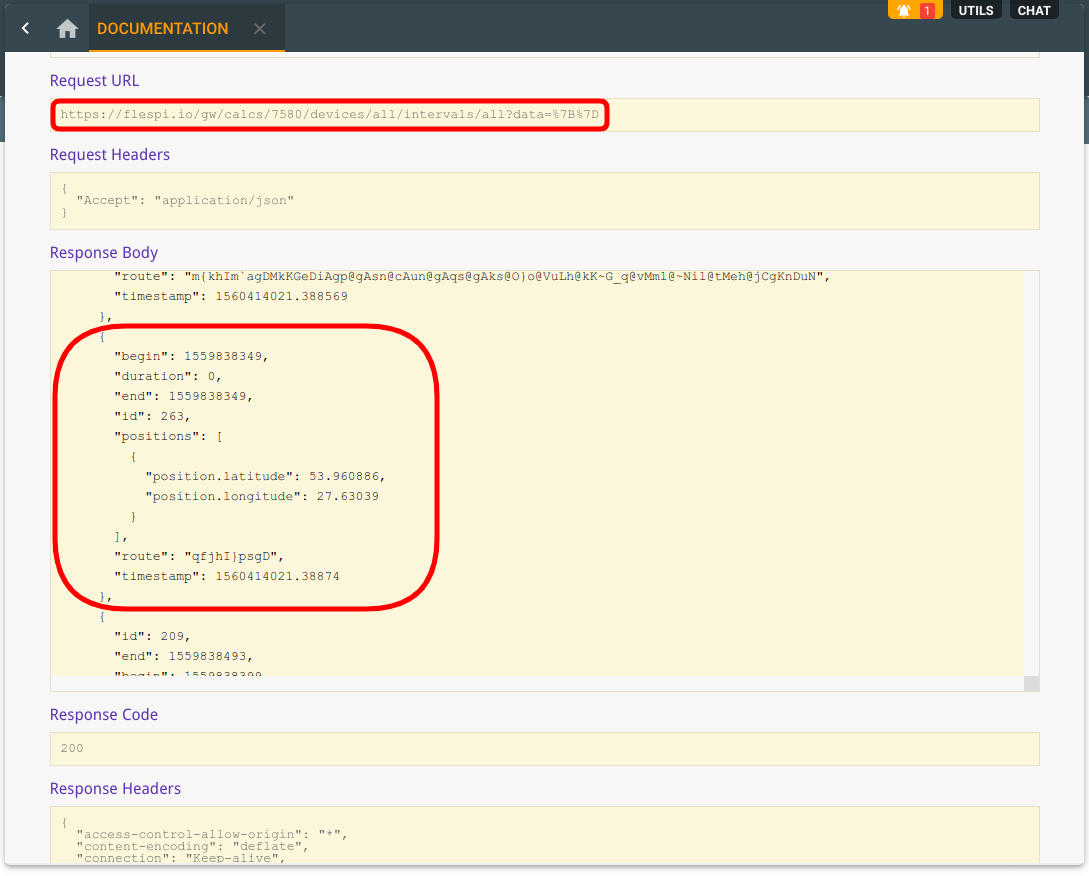
To get all results, use flespi REST API:
Let’s do another trick now. For convenience, we can put all intervals with overspeeding into a single interval and immediately check what’s inside.
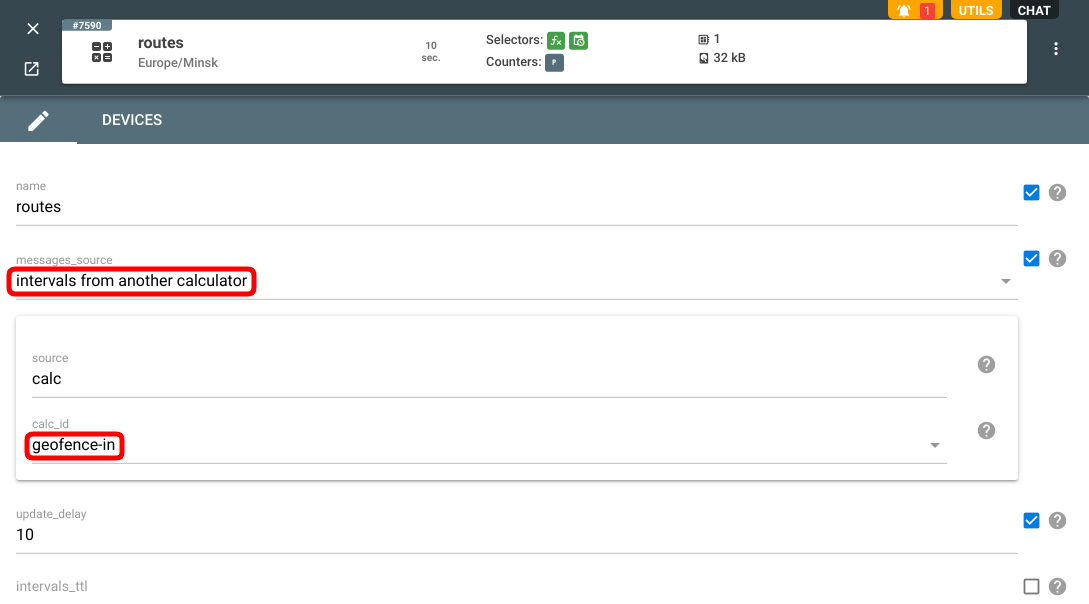
To do so, we need one more calculator that will use our first calculator as a source of data:
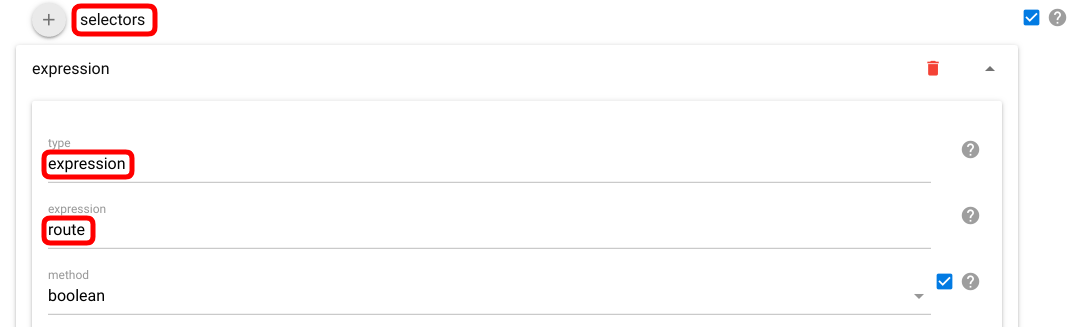
Here we will need an expression selector that will pick the route from the incoming data:
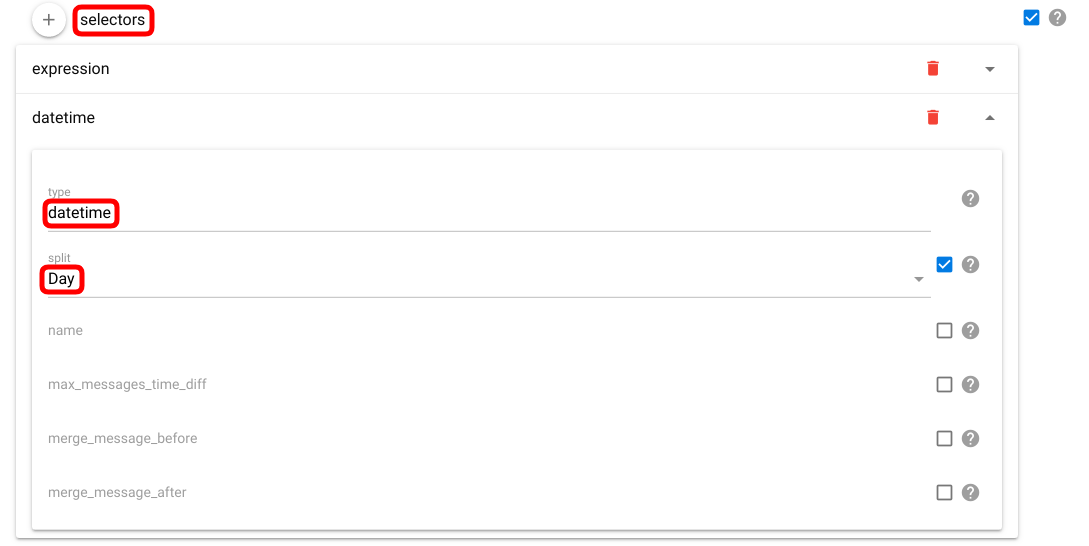
We will also add a datetime selector to split the intervals by day:
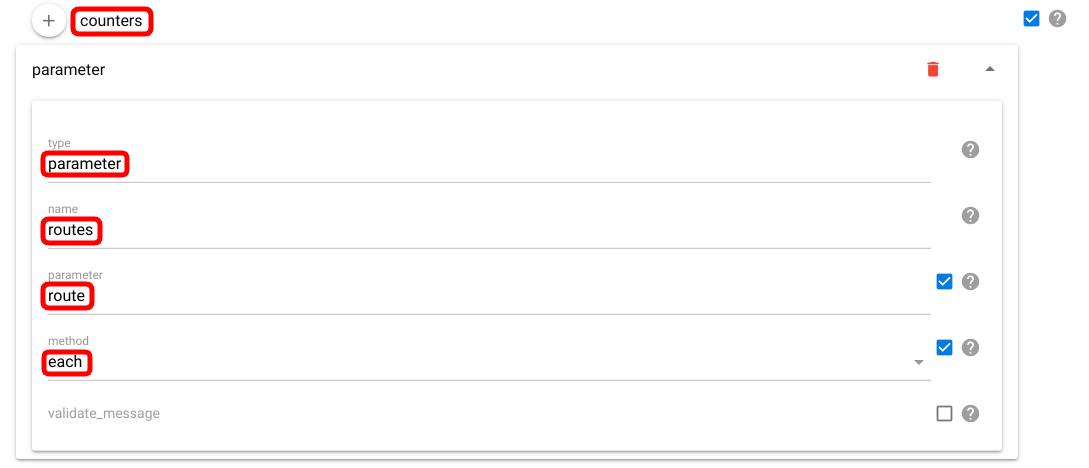
And we’ll need one counter that will take each parameter route and add it to the resulting interval:
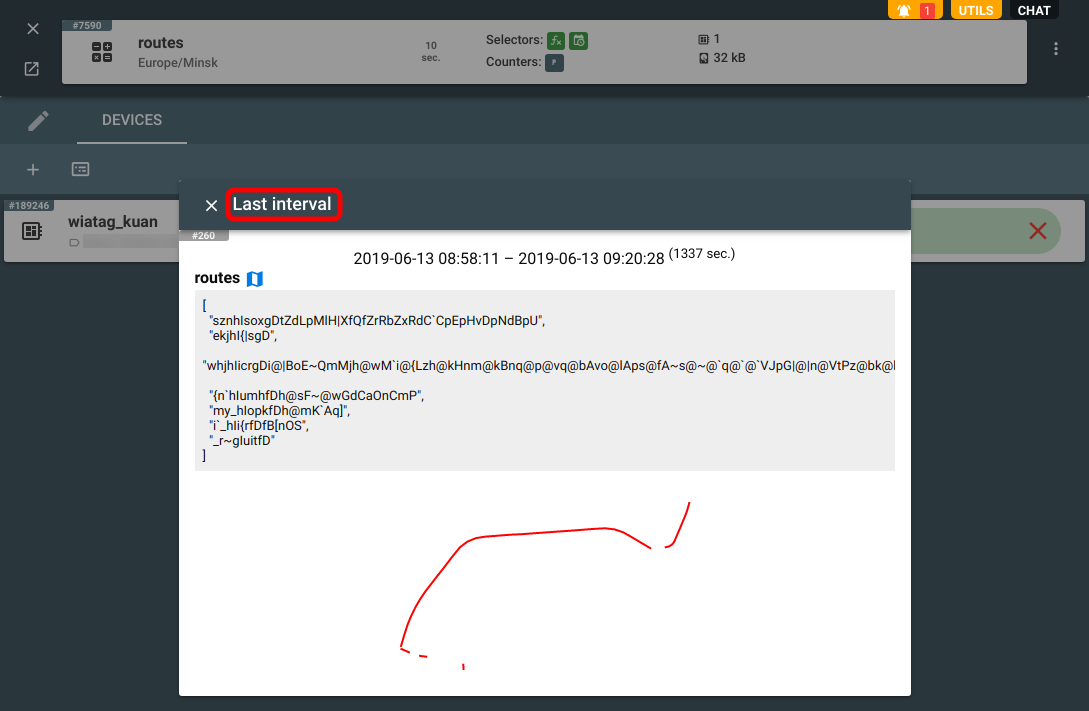
Now when we assign the same device to this calculator and click on the card we will see all segments inside the geofence with speed limit violation for the given day in a single interval:
Wow, there’s quite a lot of overspeeding! Done for the demonstration purposes only :) Do not reproduce in real life.
Bonus: inverted geofence
We’ve been dealing with the geofence around Mink in the previous examples. What if we want to create a geofence for “everywhere except Minsk”? Easy. Configure the new geofence in the same way as the one for Minsk and enable the invert parameter:

Done. Now we can see the trips outside of the city and add different conditions and counters to this calculator:
Tip: holes in a geofence

Sometimes you may want not a solid geofence but a bagel-like one — with a hole in the middle. To define such geofence you should create one usual geofence selector with the outer radius, and one inverted geofence selector with the inner radius. The resulting geofence will be the intersection of these two, which is exactly what we need.
***
Geofences are widely used in tracking solutions, and now you are equipped to handle them with ease and flexibility.
Remember, that you can start testing flespi analytics in seconds by creating a free account using your social network profile. And feel free to reach out to us with questions via the built-in chat.