Very many flespi users use various AI systems in their daily work. Some even copy their messages to our Helpbox and communicate with codi this way. But wouldn’t it be even more convenient to simply ask Claude, for example: “What is happening in my account?” or “Could you create a new device?”
Recently, we took another step to make connecting flespi MCP server easier – with the help of Realms. Below is a short step-by-step guide for quick setup.
Technical intro
Realms now support an OAuth server through Client ID Metadata Documents (CIMD). This means that modern MCP connectors/plugins can connect to flespi via realm public endpoints. There is no need to provide a dedicated flespi token anymore – all authentication and authorization are performed under the hood when using Realms. The complete setup and troubleshooting reference lives in the connect AI agents to flespi through a realm KB article.
Prerequisite: an account with an existing realm and users there.
Automatic configuration
So far, only Claude is supported. Among web-accessible AI assistants, the others are native apps. If the realm uses ACL, enable POST ai/mcp access. Go to the realm Info page and click the Claude button for the selected MCP server. Done.
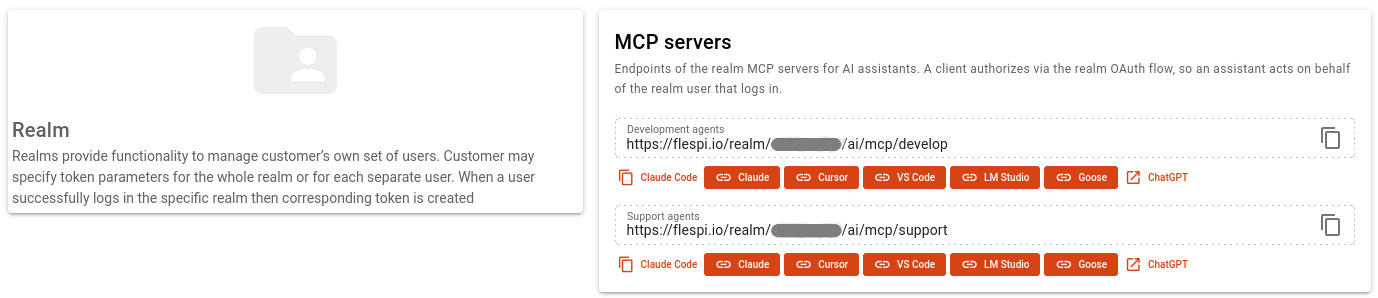
Manual configuration
Common setup
The OAuth server in the realm must be enabled (it is disabled by default). You can also fill in the realm public information if you want to customize the public login pages a bit. If you are using ACL, make sure you provide access to POST ai/mcp.
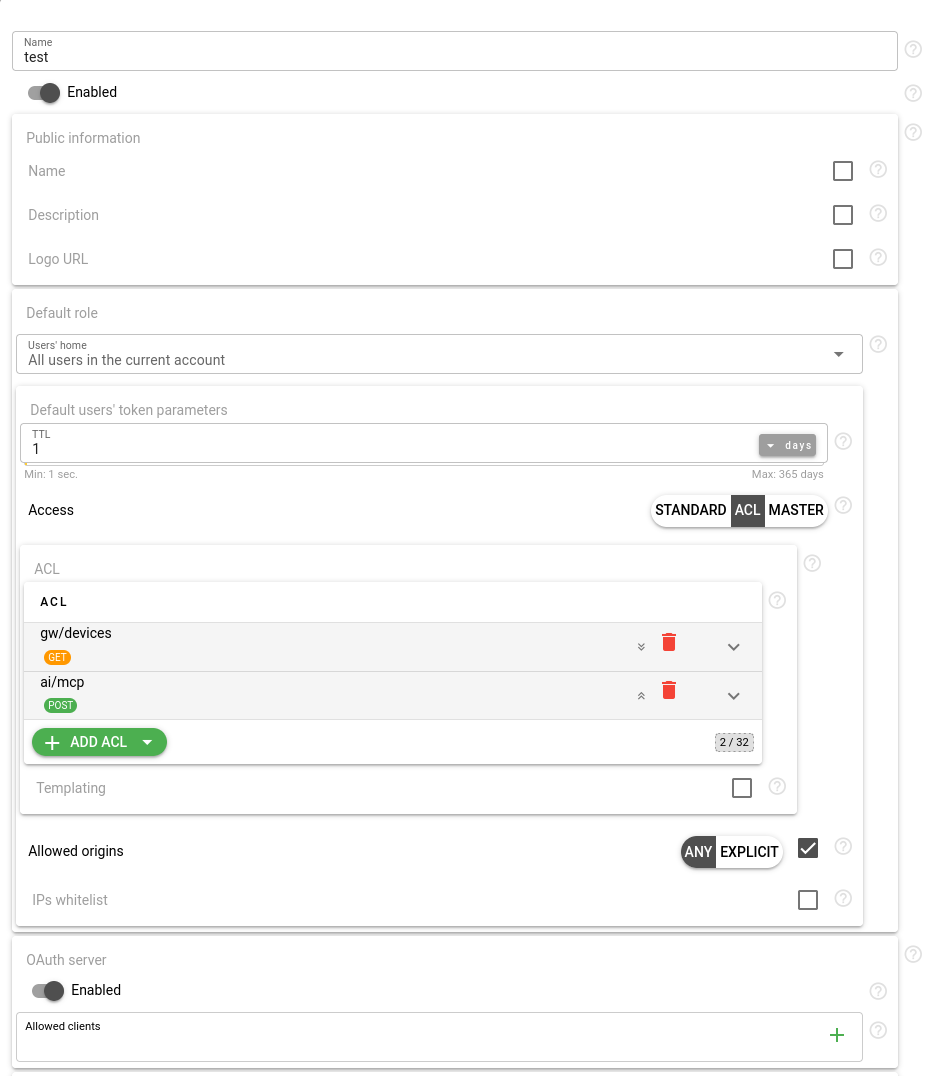
Connect Claude
Add the following URL to the list of allowed clients in the realm OAuth server configuration: https://claude.ai/oauth/mcp-oauth-client-metadata

Go to the Info realm tab and copy the link to the desired MCP server endpoint (development or support).
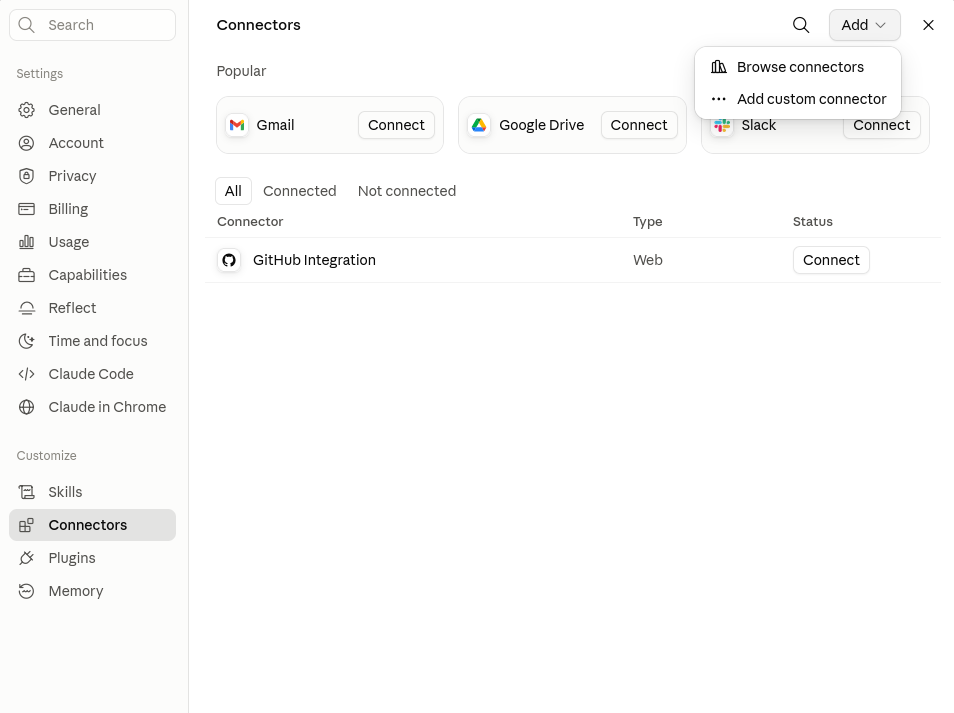
Next, proceed to your Claude account settings to create a new connector by clicking the bottom-left icon, then Settings → Connectors → Add → Add custom connector.
Give your connector a name and insert the previously copied MCP server URL.
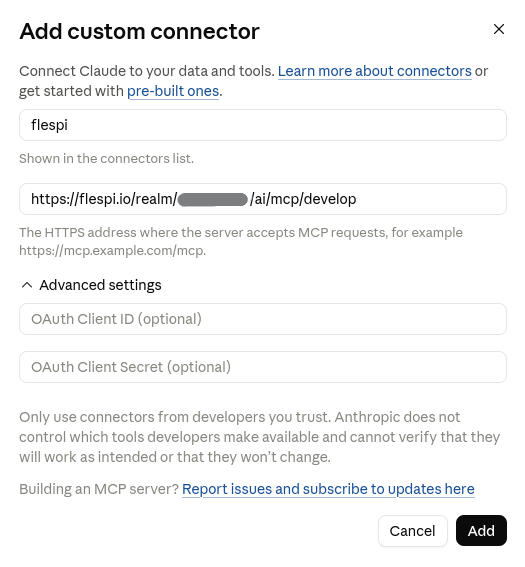
Click Add and then Connect. After the login and consent screens, your connector will be ready.
Connect ChatGPT
Unfortunately, ChatGPT does not provide a generic OAuth Client ID URL for now, so its setup requires more manual actions than usual. This limitation also means that it is not easy to share a single flespi realm between multiple ChatGPT accounts if those accounts are not part of a Team or Enterprise tier.
Go to the Info realm tab and copy the link to the desired MCP server endpoint (development or support).
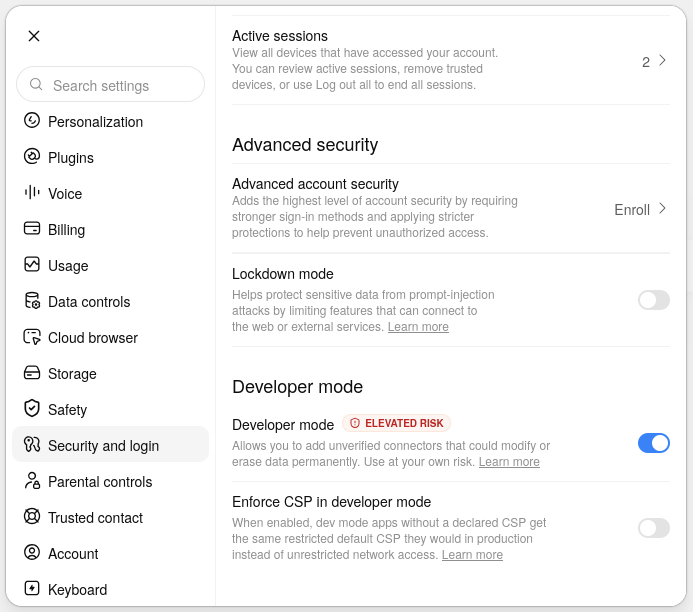
Proceed to your ChatGPT account settings: bottom-left icon, then Settings. First, you need to enable Developer mode (go to the Security and login tab).
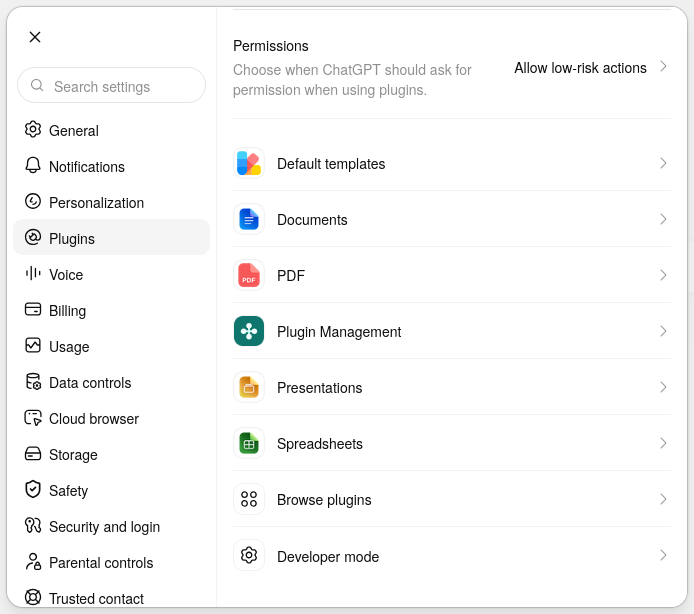
Then go to Plugins → Browse plugins.
Create a new plugin (bottom-right “+” button). Fill in the Name and Connection fields using the previously copied MCP server URL. Then expand Advanced OAuth Settings. From there, copy the CIMD client metadata URL and insert it into the list of allowed client IDs in the flespi realm.
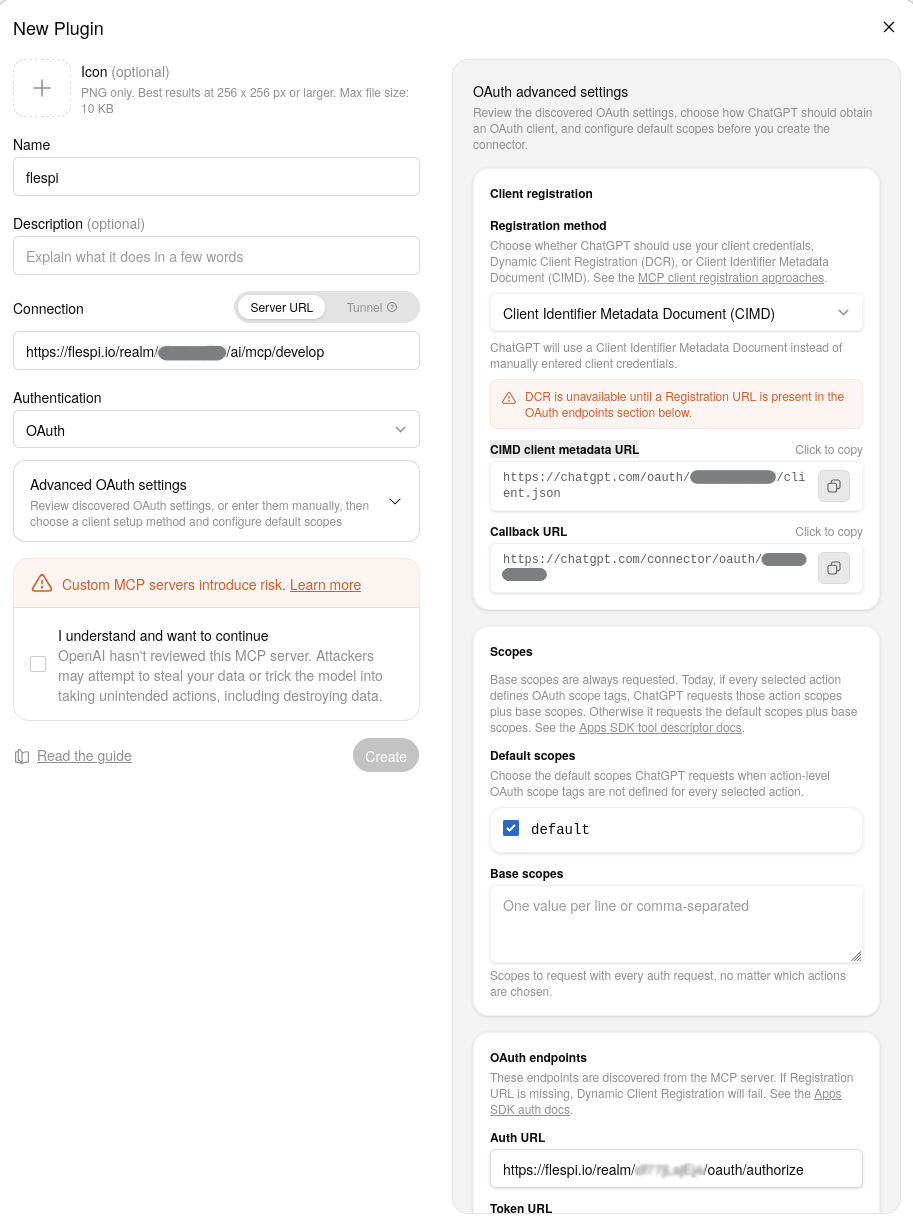

After that, save both the flespi realm settings and the ChatGPT plugin (the latter requires you to tick the “I understand and want to continue” checkbox).
After signing in to flespi, your plugin is ready.