Hello friends! I haven’t been active here on the blog for quite a while and finally decided to contribute again.
If you’ve read my previous articles, you should know that I’m a smart-home enthusiast. Today I want to talk about a super-handy tool mostly used to configure smart home automation but which can actually have a much wider scope of applications.
It’s called Node-RED.
Node-RED overview
Node-RED is a flow-based development tool originally developed by the IBM Emerging Technology Services team which is now a part of the JS Foundation.
The idea of flow-based programming was invented and described by J. Paul Morrison in the 1960s. FBP defines applications as networks of "black box" processes, or nodes, which communicate via data chunks traveling across predefined connections. Each node performs a simple task somehow converting the incoming data and sending it to the next node over the user-defined connections.
Node-RED offers a convenient interface for easy flow management in the browser. You can drag and connect the nodes using the mouse as well as set up their behavior. At the moment, Node-RED features 42 types of standard nodes that allow receiving, transforming, sending, and saving the data.
The options for sending and receiving data include MQTT, HTTP, Web Socket, TCP, UDP.
Some standard nodes allow describing custom data processing logic using JS or, for instance, executing a system command call. Thus, Node-RED allows describing a rather complex data processing logic while also providing you with a visual representation of the flow.
Node-RED became open-source in 2013. Since then, the project attracted a huge community of professionals who contribute countless additional nodes that can be easily integrated into the Node-RED palette and used in your flows.
The above facts evidence that Node-RED is well-suited for quick prototyping of applications. In addition, you can always save your flow in the JSON file and upload it to other Node-RED installations or share your work with others.
Node-RED + flespi
Preparation
Now let me show you where using Node-RED together with flespi can be beneficial.
For starters, let’s install Node-RED (I assume that you are using Debian with nodejs installed). To do so, you should execute just one command:
sudo npm install -g --unsafe-perm node-red
And then run:
node-red
Now open the browser. The user interface is usually available at the following address:
The main screen includes the nodes palette (left panel), flow editor (central part), and auxiliary informational panel (on the right).
That’s it. We are ready to start. Just drag the nodes from the palette into the flow editor. After adding the node to the flow (e.g. “mqtt in”) it’s usually necessary to configure it; to do so double-click on the node and fill in the configuration in the right-side panel. You can also delete the node from the same panel. Once you add several nodes, you can connect them — just use the mouse to tie the output on one mode with the input of another node. When you finish constructing your flow, you can deploy it to make it work.
The basic theoretic part is over and we can move straight to practice.
Action
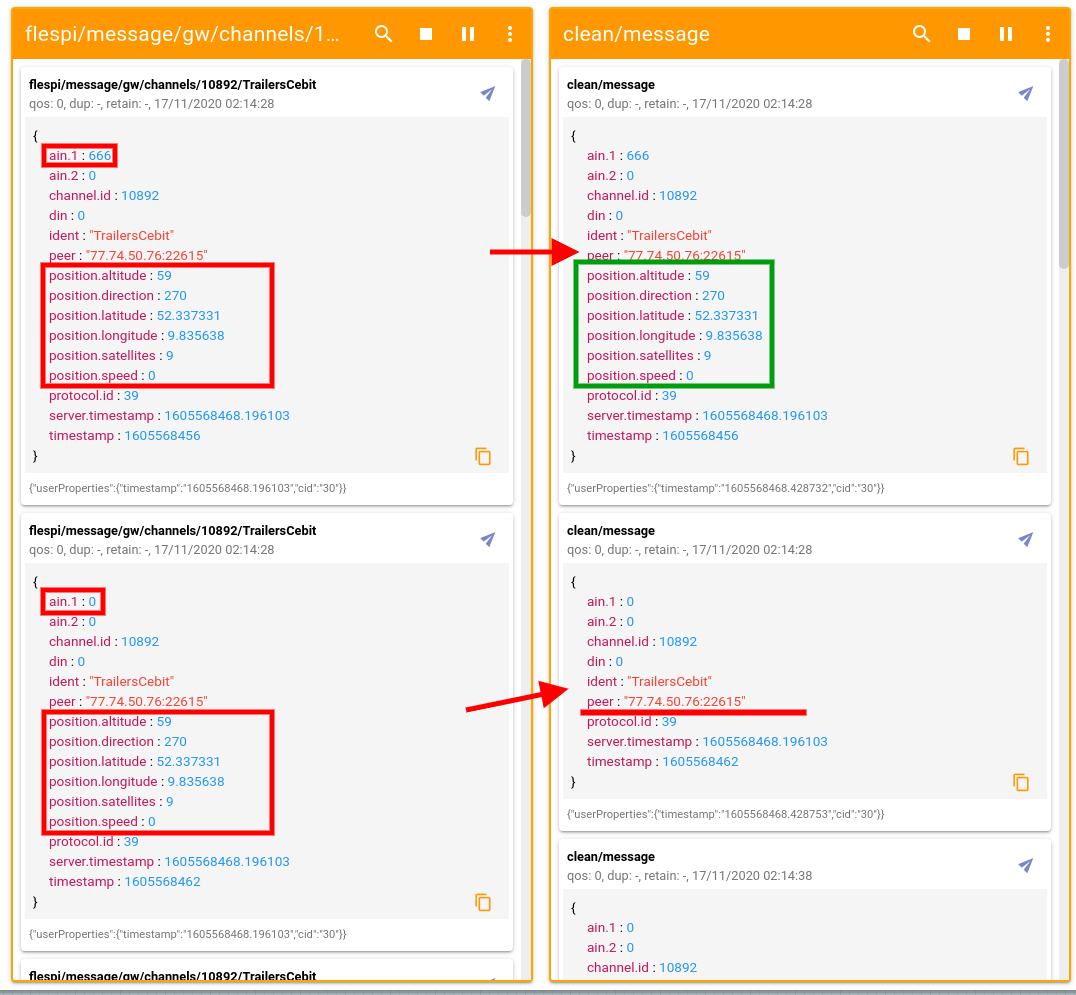
What can we use Node-RED for? For instance, to cut out the unnecessary parameters from the message or add the necessary parameters to the message.
Well, let’s start eliminating the unwanted parameters from the messages.
Say, you have a flespi channel that received and parses original device messages.
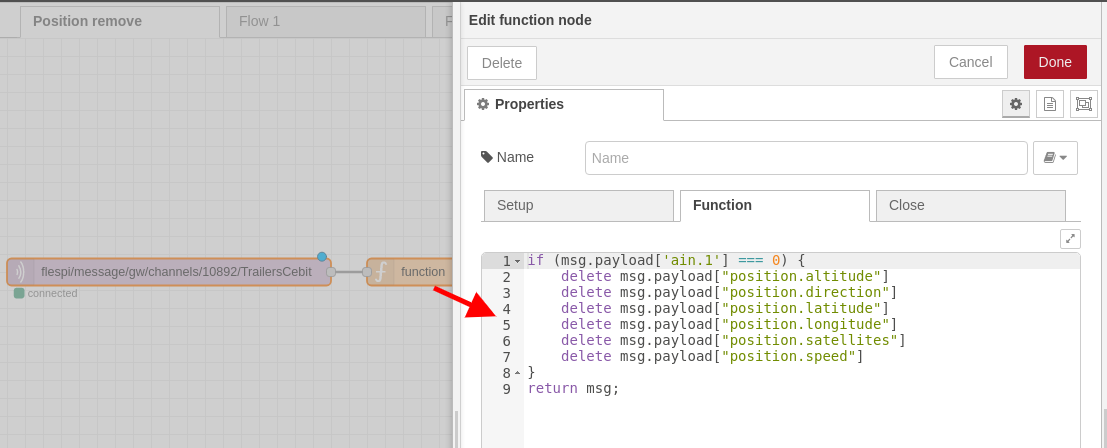
The message contains the “ain.1” parameter that we will use as a flag to decide whether to remove parameters or not.
Let’s assume we need the device position data for messages with ain.1 > 0 while leaving all other parameters intact.
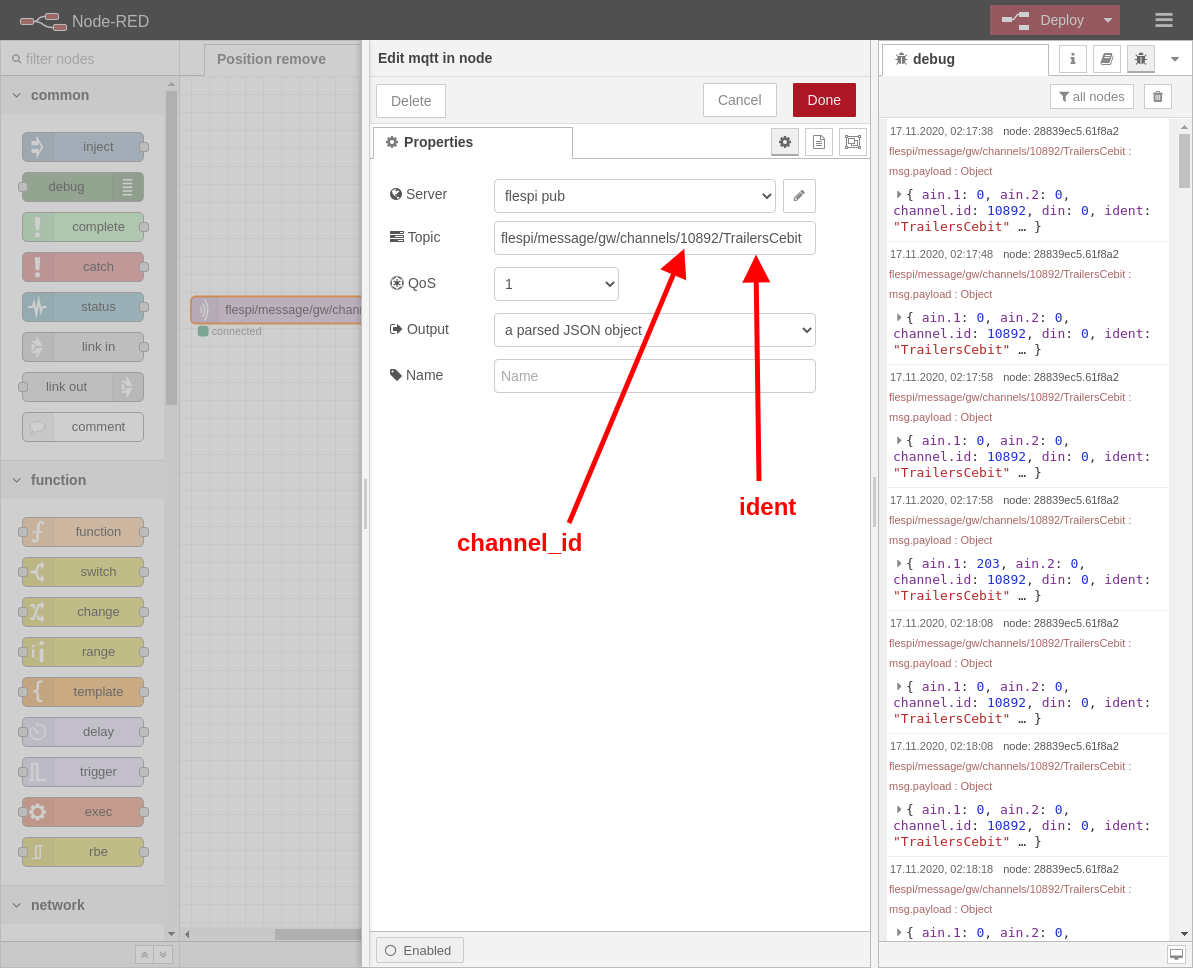
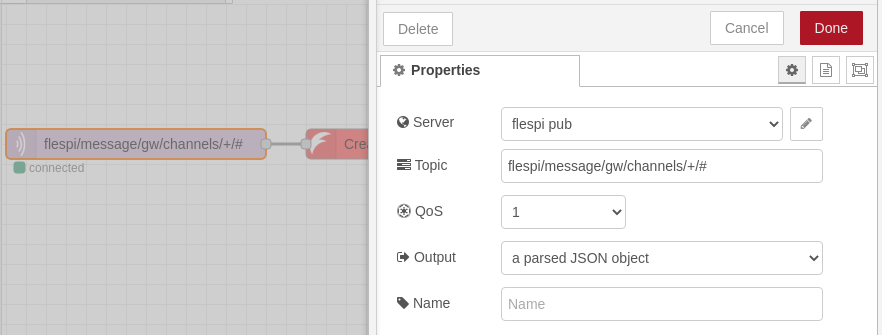
We will start by subscribing to the messages from the target device arriving at the respective channel.
To achieve that, we add the “mqtt in” node and configure it.
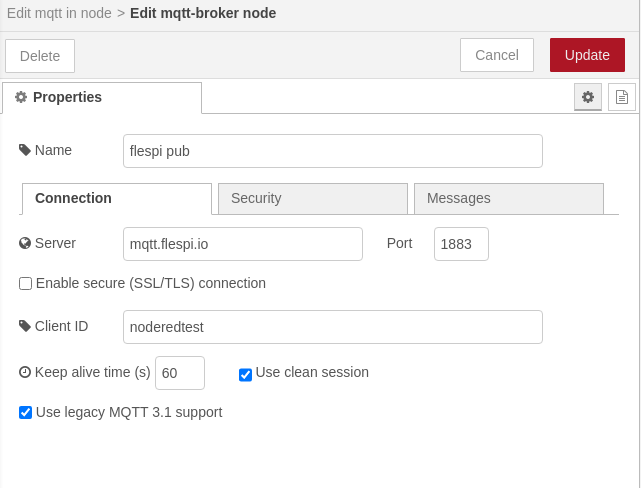
Then we configure the connection to the flespi MQTT broker:

Now let’s configure data transformation — add the “function” node and specify the condition for deleting the parameters from the message. Then link the two nodes.
What’s left is to publish the resulting message into the dedicated topic. Add the “mqtt out” node, configure it, and connect with the “function” node.
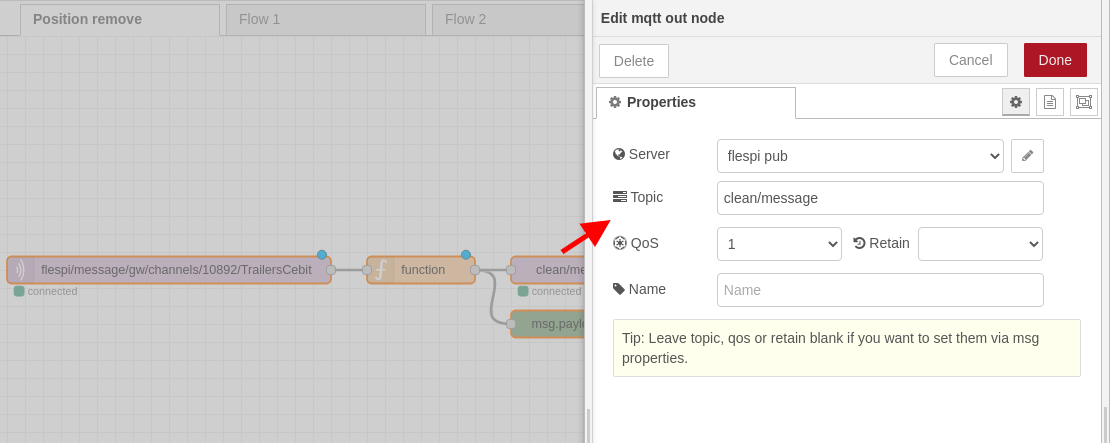
You can also add the “debug” node in a similar way as “mqtt out” to see the transformed data directly in Node-RED.
Effect
With the config in Node-RED finished, we can now open the MQTT Board tool and subscribe to these two topics — this way we will see the initially arriving messages and the processed ones.
What’s left is to create an mqtt channel and subscribe it to the topic with resulting messages.
Action 2
In the same way as we removed parameters, we can also add extra parameters or modify the existing ones.
For example, we have can add the parameter “check: true” for messages with ain.1 not equal to zero.

Automatic flespi device creation
Here I want to tell you how to set up automatic flespi device creation upon the receipt of the first message.
This will require installing additional nodes that we developed to simplify interaction with the flespi API. Now the packet only contains two nodes but we intend to add more nodes for convenient communication with the flespi entities.
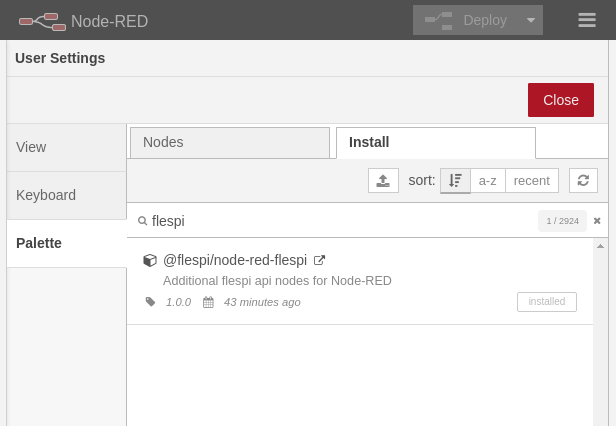
So, we need to install the package containing the extra flespi nodes to Node-RED. To do that, open Settings -> Palette -> Install, type "flespi" in the search bar, and install the node-red-flespi package:
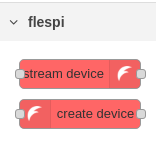
After installation, you will see the newly added nodes in the palette:
Then we can create a new simple flow of 3-4 nodes.
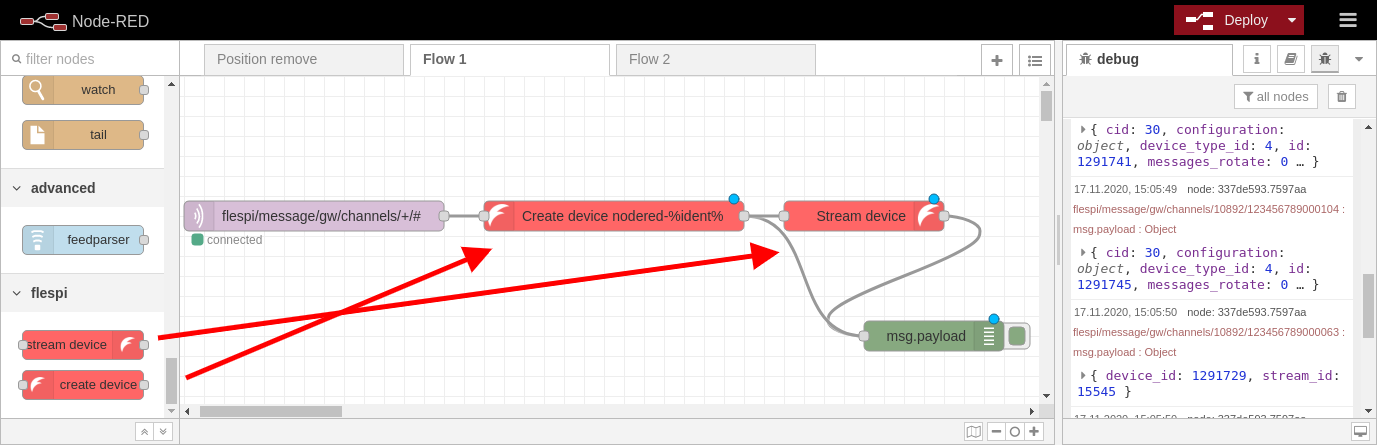
Subscribe the first node “mqtt in” to all channel messages. It’s possible to use wildcards to subscribe the node to several channels.
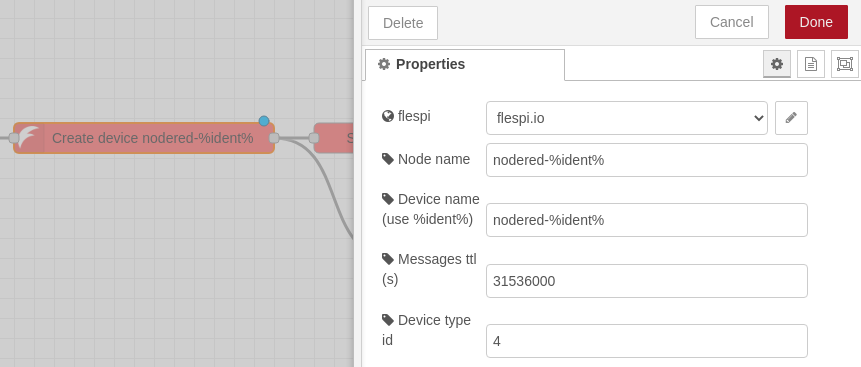
Now add and configure the “flespi create device” node — specify the flespi authentication credentials, device name template, messages TTL, and device_type_id (compulsory to ensure correct data parsing).
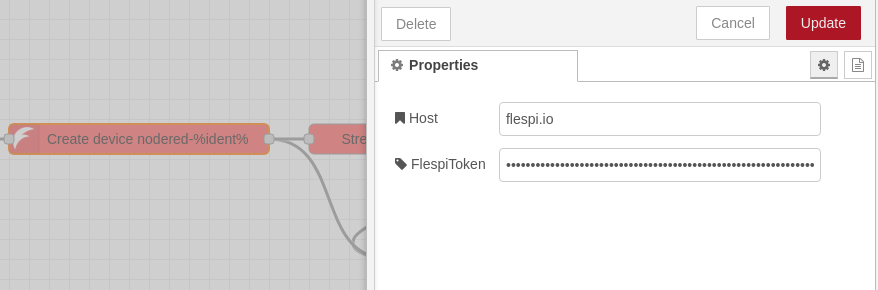
The authentication details should look like this:
Next, we will set up the automatic assignment of the created flespi device to the stream for further transfer of data to other platforms. Simply specify the id of the stream that should listen to the device messages:
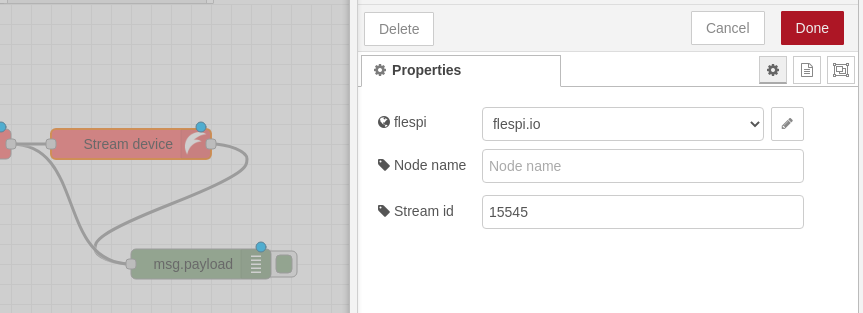
In our sample flow above you can also notice the “debug” node that allows to easily monitor how nodes process data.
Extras
Here are some more use cases of joint use of flespi and Node-RED:
***
Node-RED is a powerful tool for the automation of prototyping, data processing, and other tasks. Visual programming facilitates the understanding of the logic behind each node (handler). Node-RED is easily extendable by own nodes or by the ones created by others, thus the sky is the limit to what you can do with it. Hope this article helps in solving some of your tasks in an elegant and convenient way.