Many enterprise companies use SSO (single sign-on) to manage employees' access to internal and external resources. Flespi offers a variety of options for user login and registration, we've implemented the possibility to connect flespi to any custom OAuth2/OpenID provider. Managing users inside your flespi account is based on realms.
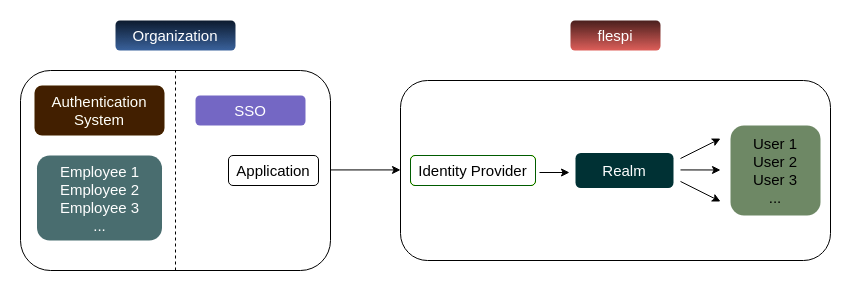
SSO connects to the realm using the link between the SSO application (on the organization side) with Identity Provider (on the flespi side).
In this article, we’ll describe the whole process by adding an Identity Provider that allows users to log in with a GitLab account. The setup process includes the following steps:
- Configure your SSO provider as an Identity Provider
- Create a realm in flespi
- Share the link for user authentication
Configure Identity Provider
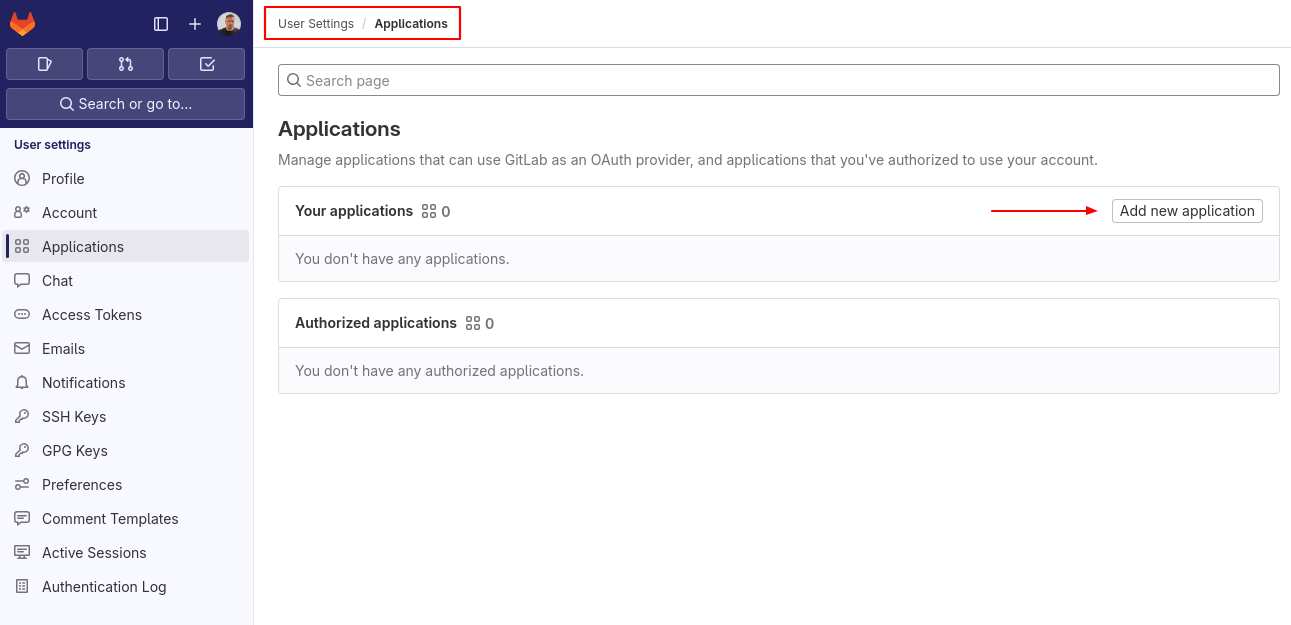
To use Gitlab as an OAuth provider you need to set up an application that would allow it to connect to flespi. Click on the user icon and follow to Preferences > Applications, then click on ‘Add new application’.
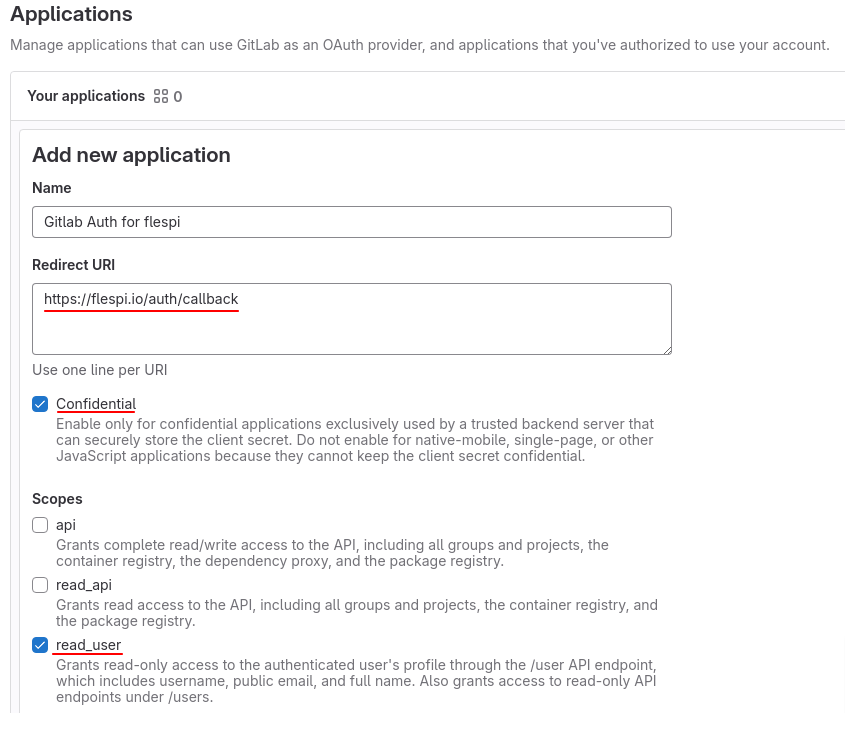
Now you need to specify a preferable name (e.g. ‘Gitlab Auth for flespi’), redirect URI https://flespi.io/auth/callback, and also mark ‘Confidential’ and ‘read_user’ checkboxes.
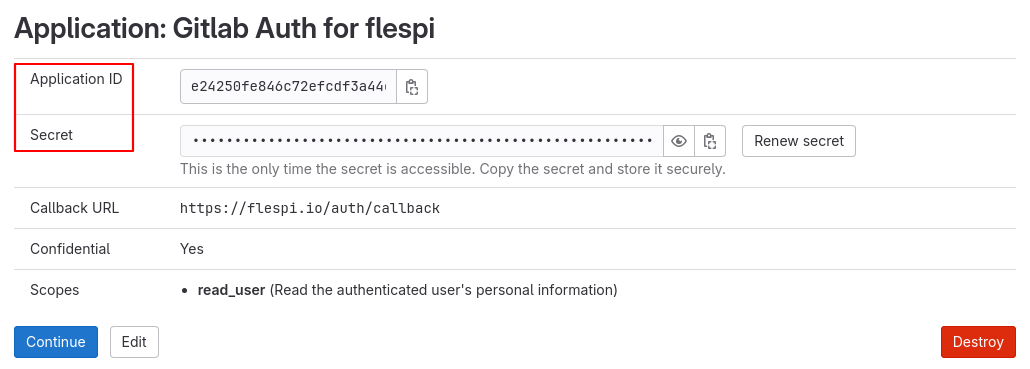
After filling out this information, GitLab will prompt you to copy the Application ID and Secret values (we will need them for configuring Identity Provider on the flespi side). Don’t forget to click on ‘Continue’ to save the application.
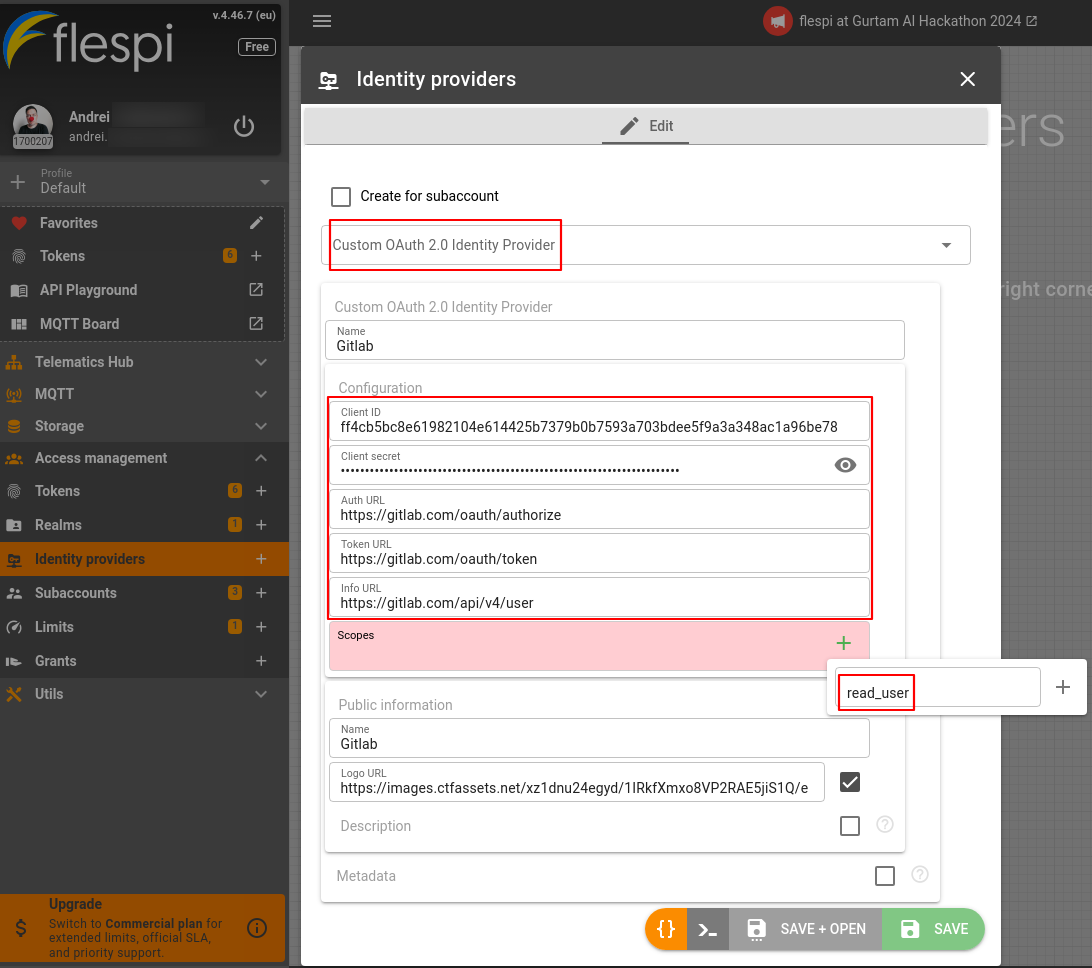
Now we get back to the flespi panel. Proceed to the Access management section in the main menu. Click on the Identity providers to create a new one. Select Custom OAuth 2.0 Identity Provider from the dropdown menu, choose a name (e.g. Gitlab), and paste in the corresponding values from the previous step for the ‘Client ID’ and ‘Client secret’ fields. The next URLs are taken from GitLab (you can find them listed here):
- Auth URL: https://gitlab.com/oauth/authorize
- Token URL: https://gitlab.com/oauth/token
- Info URL: https://gitlab.com/api/v4/user
Add the ‘read_user’ scope as configured previously in the GitLab application. Also, make sure to provide at least a name in the 'Public information' section if you don’t want to use a logo or make up a description right now. Click ‘Save’.
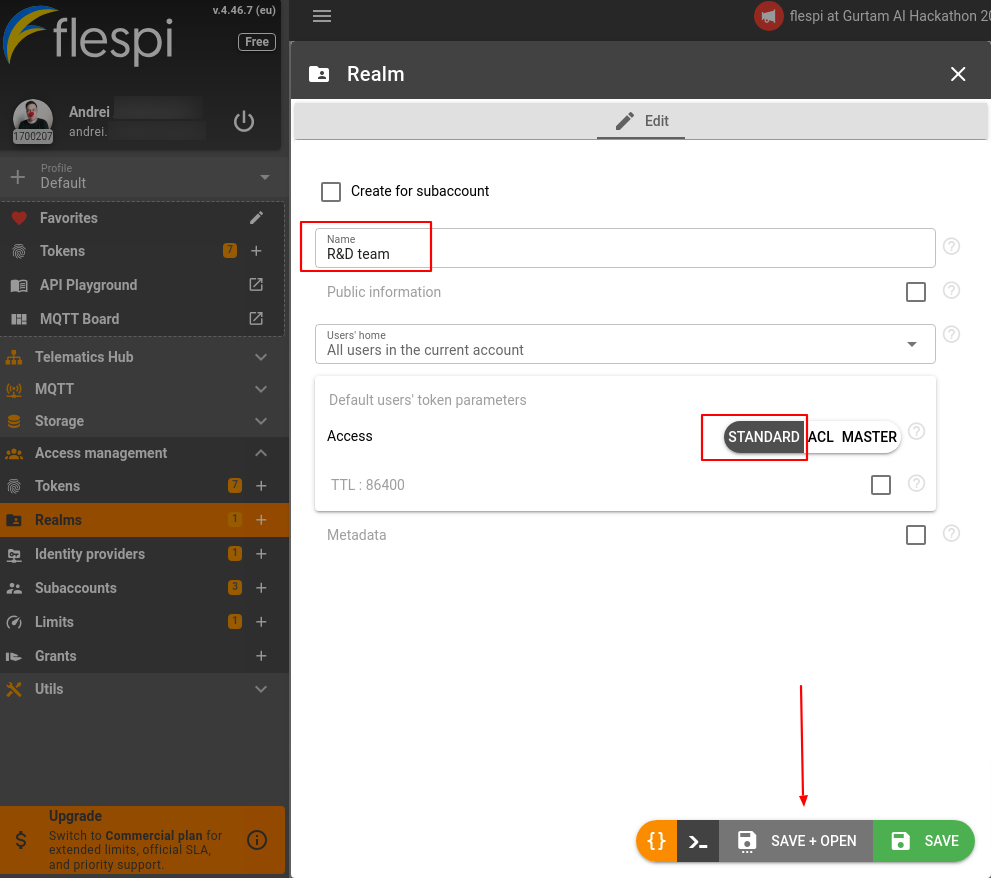
Create a realm on flespi
To assign any Identity Provider you need to configure a realm first. To make it easier to understand, let's create one granting standard access to the root account (here’s the link if you want to get deeper into realms usage). Name the realm and click on ‘Save+Open’.
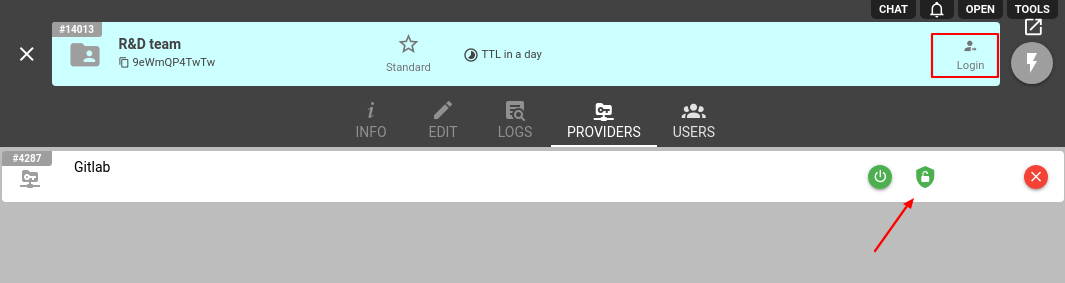
Now click on the Providers tab, then on the ‘+’ button, and select our Gitlab to assign it as an Identity Provider.

Authenticate users with a link
If you want to allow users to log in or register with a specific Identity Provider, enable this option by clicking on the ‘shield’ sign (green means registration is allowed, and red - is prohibited).
To provide users with a login/registration link, click on the Login in the top-right or use https://flespi.io/#/realm/{public_realm_id}. Now, if the user follows the link, the realm authentication page will show up and users will be able to authenticate using the configured Identity Provider and save the realm for future use.
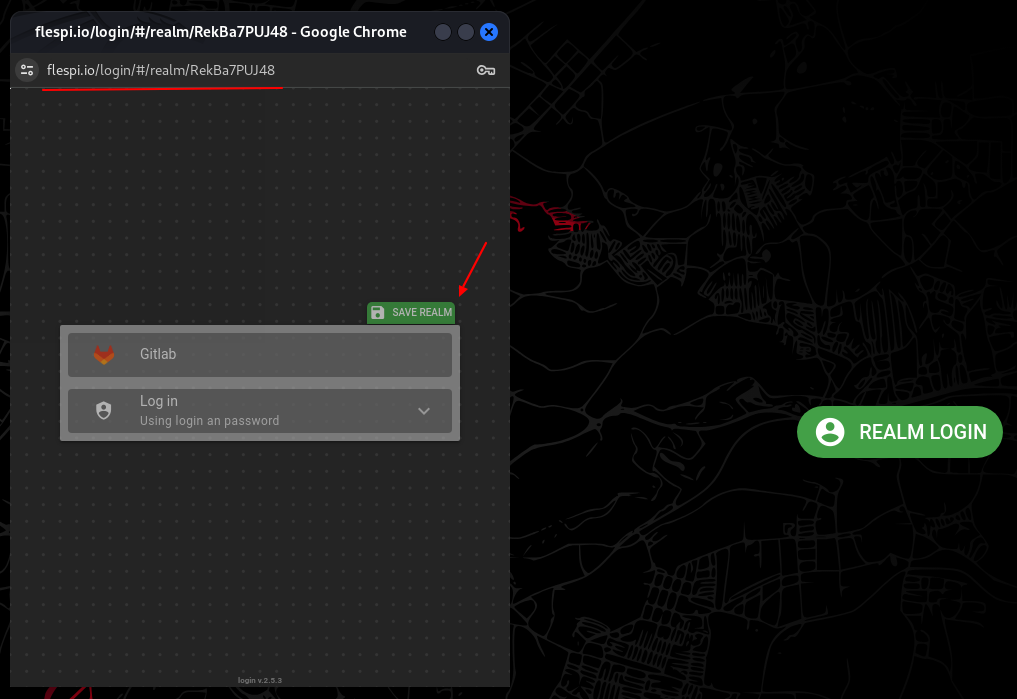
Clicking on Gitlab will lead to the GitLab authorization page requesting user permission to access their account.
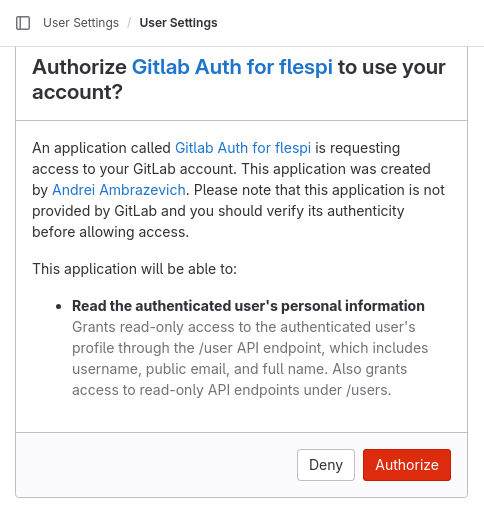
Upon the authorization, the user will be redirected to your realm login page and offered to save the token for future use. Done!
Soon we’ll share how to authenticate users with other OAuth2.0/OpenID Identity Providers like Google, Microsoft, etc. Stay tuned!