If you just want to access messages with MQTT client you do not have to use MQTT stream as flespi already provides you MQTT Broker service with hundreds of different topics already available for subscription including device messages topic. You may need to use MQTT stream only for one reason - to publish channel/device messages to a 3rd party MQTT Broker outside of flespi.
Flespi offers a number of ways to deliver your data to the destination platform. Here we will look at the push-based MQTT stream. In essence, the stream will publish the incoming messages into the specified topic(s) on the MQTT broker; the consuming party should run the MQTT client that will subscribe to the needed topics and get the updates.
The conceptual scheme having a physical device on one end and the destination platform or application on another end looks like this:
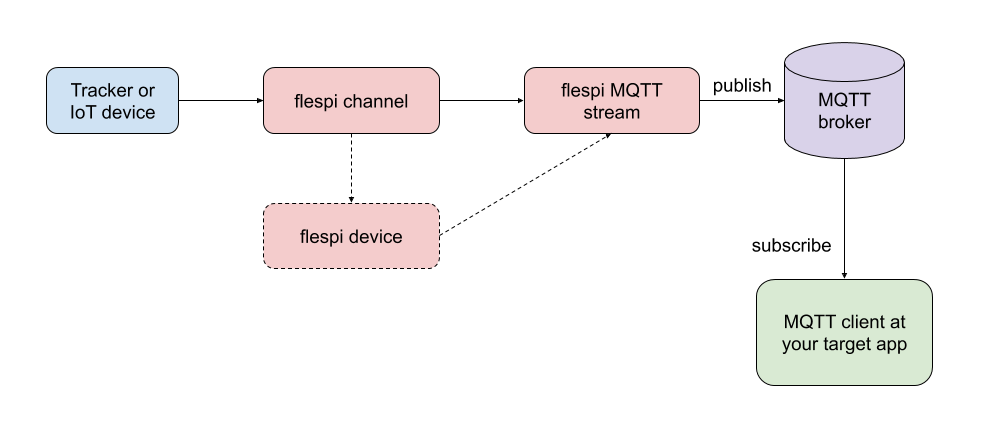
We assume that you already have the tracker reporting to the appropriate flespi channel and optionally to the dedicated flespi device.
Let’s configure the MQTT stream to publish the data to the flespi MQTT broker (even though you can pick any broker you prefer).
First, you go to the flespi.io -> Telematics hub -> Streams -> “+”. Then you select the “mqtt” option in the configuration drop-down and fill in the required fields with the proper values:
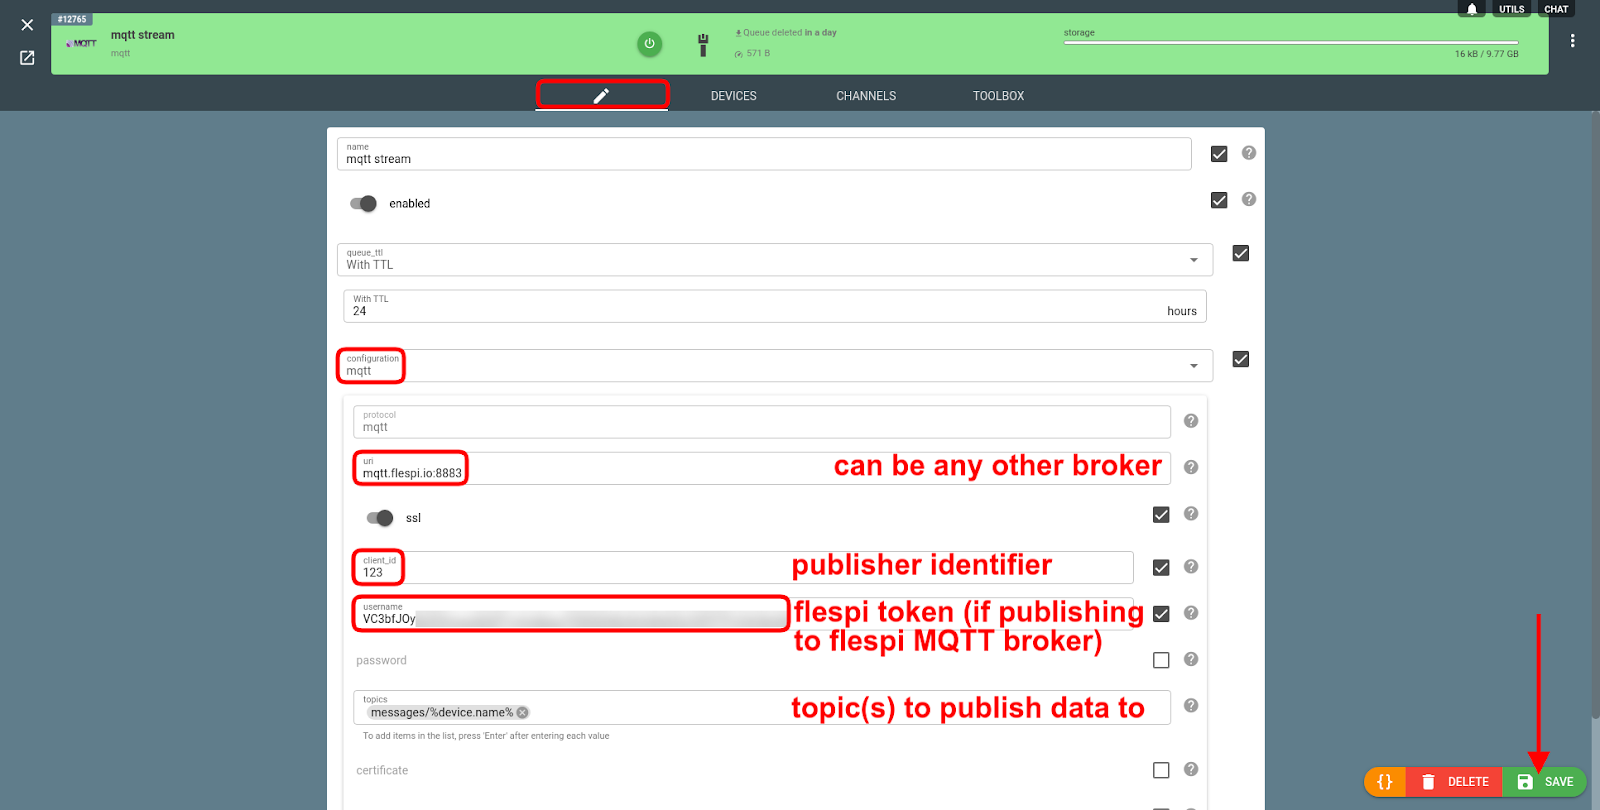
Host — the host:port for the chosen MQTT broker (correct values for flespi MQTT broker are provided here).
Client ID — any descriptive (or random) text that will identify the publisher.
Username — an identifier used to authorize with the broker (paste the valid flespi token here if using flespi MQTT broker). Some brokers may also require a password to authorize.
Topics — a list of MQTT topics where the data will be published. You can use the wildcards like %device.name%, %channel.id% and some other to force the creation of separate subtopics for each distinct value of the wildcard.
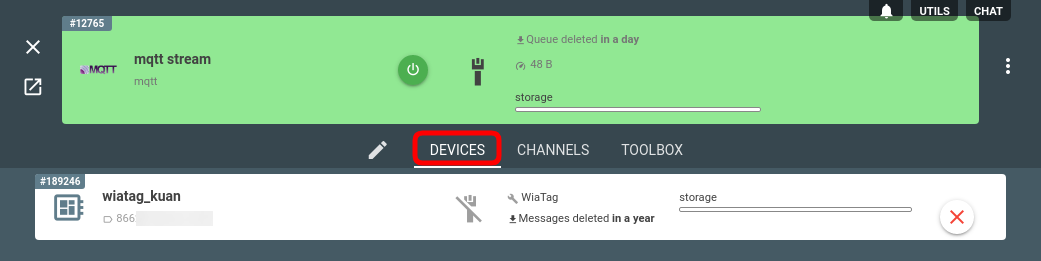
Once you click the Save button, your MQTT stream is ready. Now we need to specify the source of data — it can be any flespi channel or device. Navigate to the Devices or Channels tab on the stream card and add the proper entity. We added the WiaTag device here:
We are all set now. If everything is set up correctly, the stream will turn green and start sending messages to the broker. To check that, we can switch to the Toolbox tab and look at the logs:
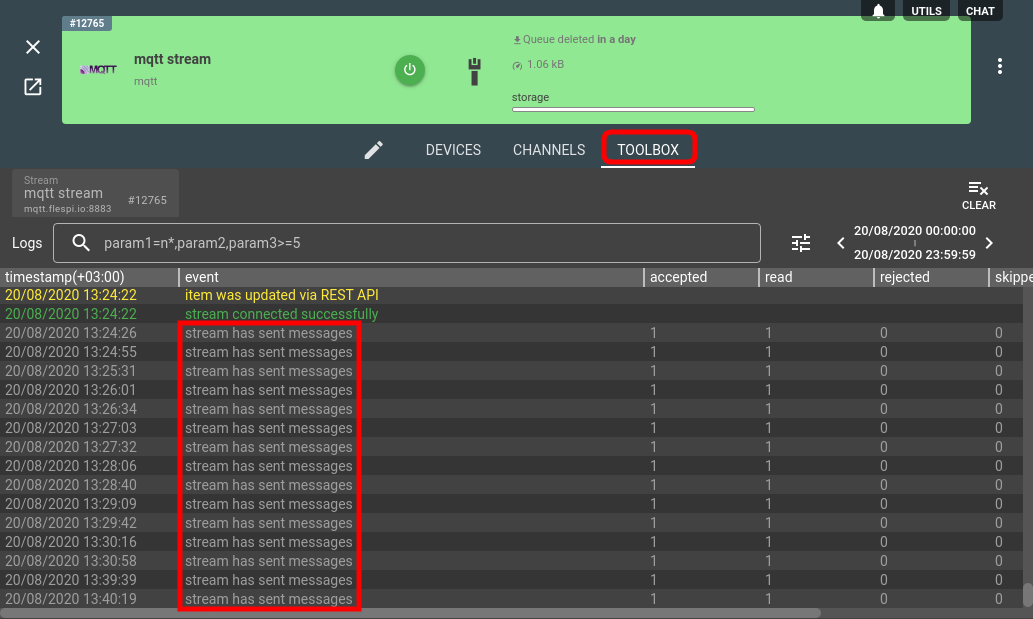
If you see the logs saying “stream has sent messages”, you’ve done everything right.
Note: MQTT stream uses QoS=1 to ensure that the message is removed from the stream buffer as soon as ACK from the broker is received.
To test the last part of the dataflow — getting the messages from the broker — we used the MQTT Board tool (you will most likely use one of the MQTT client libraries here). We will create a client connection and subscribe to the topic we specified in the stream configuration:
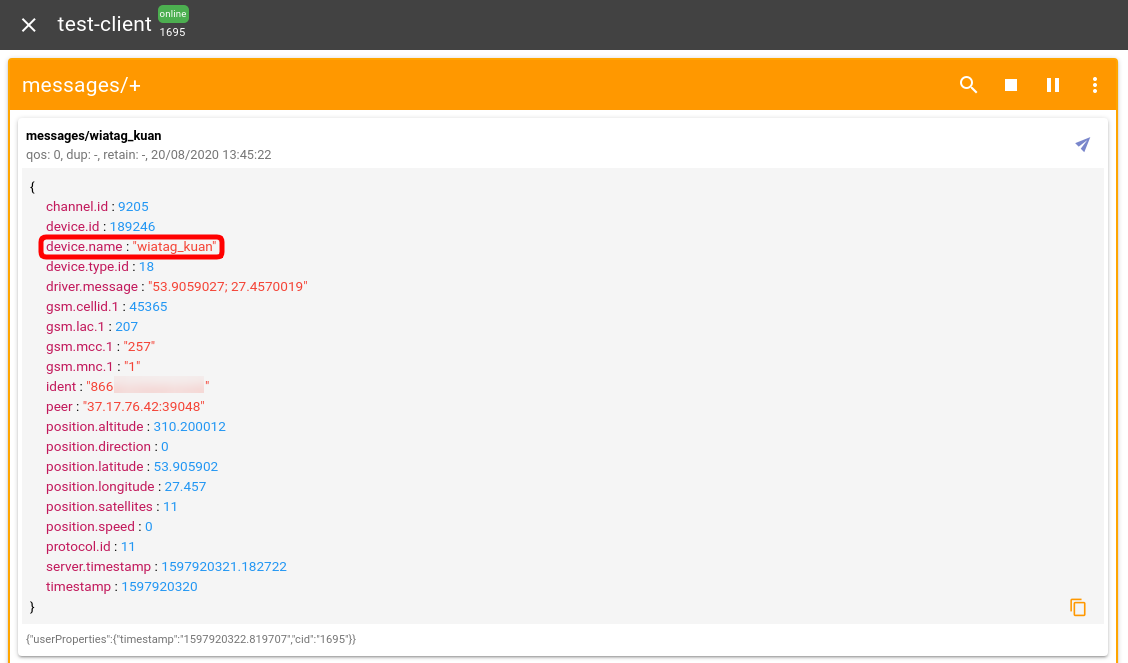
And here’s our message available on your side for further processing and analysis.