- How to register a flespi account?
- How to manage account settings?
- How to restore my flespi password?
- How to manage account access permissions via API?
- How to upgrade an account to Commercial plan?
- Where do I find the billing information and invoices?
- Why can my account be blocked?
- How to change to another plan?
- How to downgrade an account to Free plan?
- How to control account limitations?
How to register a flespi account?
Flespi is a Platform-as-a-Service (PaaS). You can create a free account by registering at https://flespi.io using one of the following options:
social account (Facebook, Github, Google, Microsoft, Bitbucket). Several social accounts can be tied to one flespi account. This way you can minimize the risk of losing access to your flespi account or share account access between several persons.
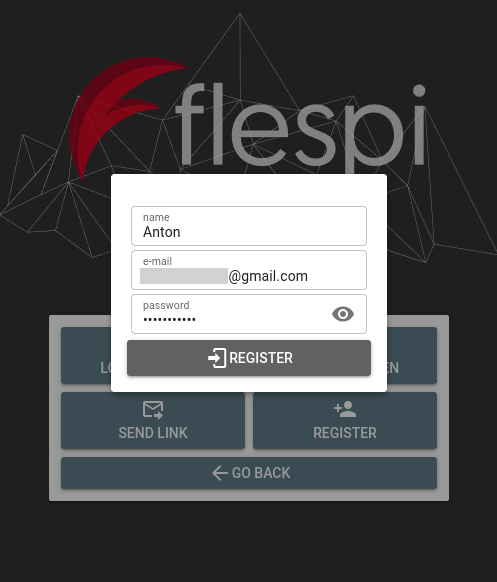
email/password
How to manage account settings?
In the bottom left corner, click on the Preferences item to open the settings tab. You can change the username seen in the support chat, set up the new email address and password for email authorization, subscribe to our monthly changelog, adjust the verbosity of the item lists to ensure comfortable webpage performance, and change the color scheme:
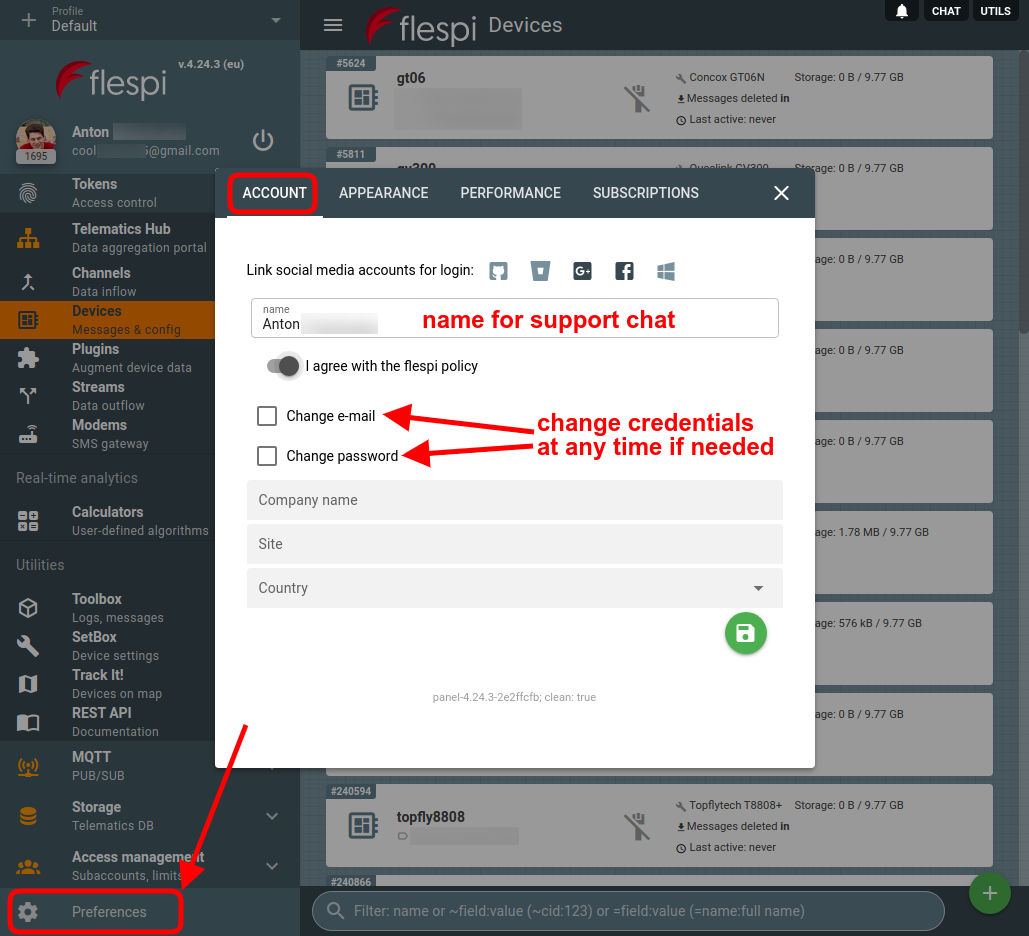
Important: if you change the email and password for your account, the existing tokens will remain valid.
How to restore my flespi password?
It may happen that you last logged in to the flespi panel a while ago and forgot your credentials. To perform a one-time login:
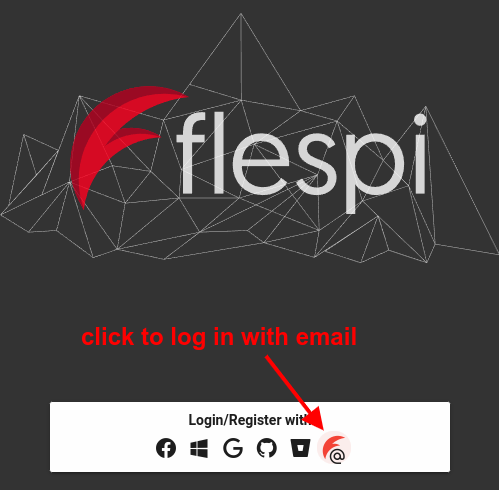
Go to https://flespi.io/, click the red Login/Register button
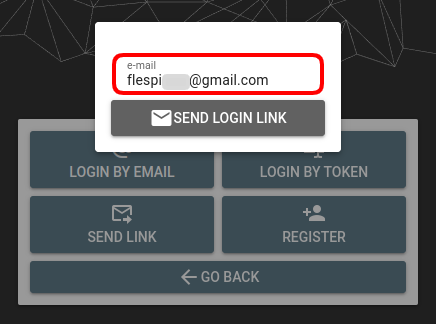
Click the email button:
Select the Send link option:
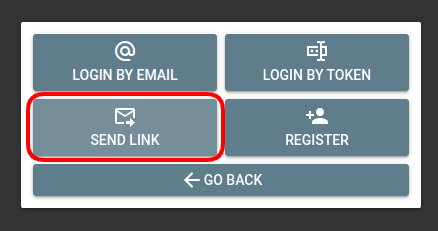
Type your email and click Send login link:
Follow the link in the email to log in (note that the link will work only once)
Once you get into the flespi panel via the link, open Preferences in the bottom left corner, navigate to the Account tab, and tick the Change password item. Set the new permanent password for your account and save it.

How to manage account access permissions via API?
In addition to UI mode at https://flespi.io, you can manipulate your account via API using HTTP REST requests or MQTT sessions. Both must be authorized with tokens. The flespi panel can be operated under Master, Standard, or ACL tokens. Learn more about tokens in a dedicated article.
With a Master token, you get admin access and full control over the flespi account.
With a Standard token, you can manage all the Telematics hub items but will not see the item counters, won’t be able to use the Helpbox chat, and won’t be able to control tokens/subaccounts/limits. The standard token should be enough for most users — they will be able to manage the account’s items, but not have the admin privileges to change permissions and subaccounts structure.
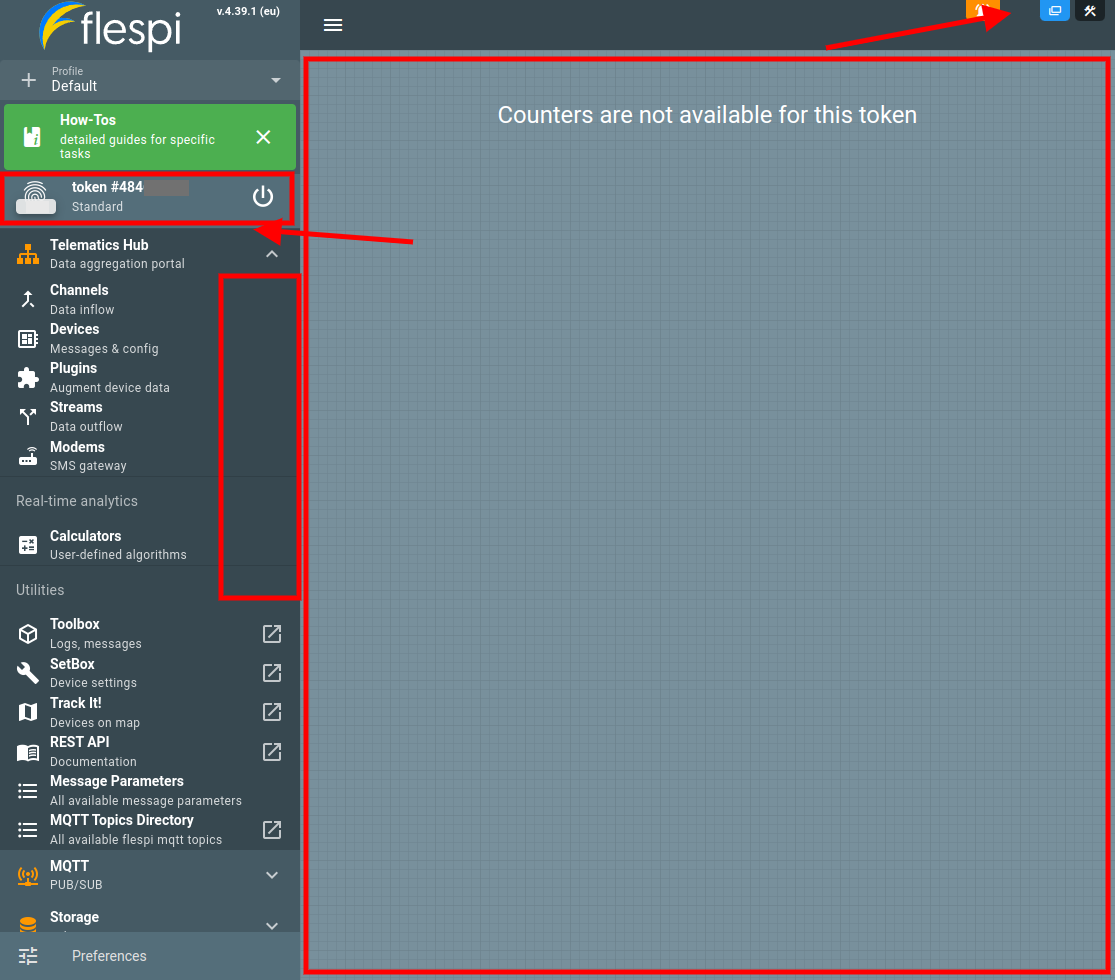
With an ACL token, you can customize which items will be allowed access and which not (this refers only to the items in the Telematics hub section).
How to upgrade an account to Commercial plan?
Open the flespi panel and log in to your Free account.
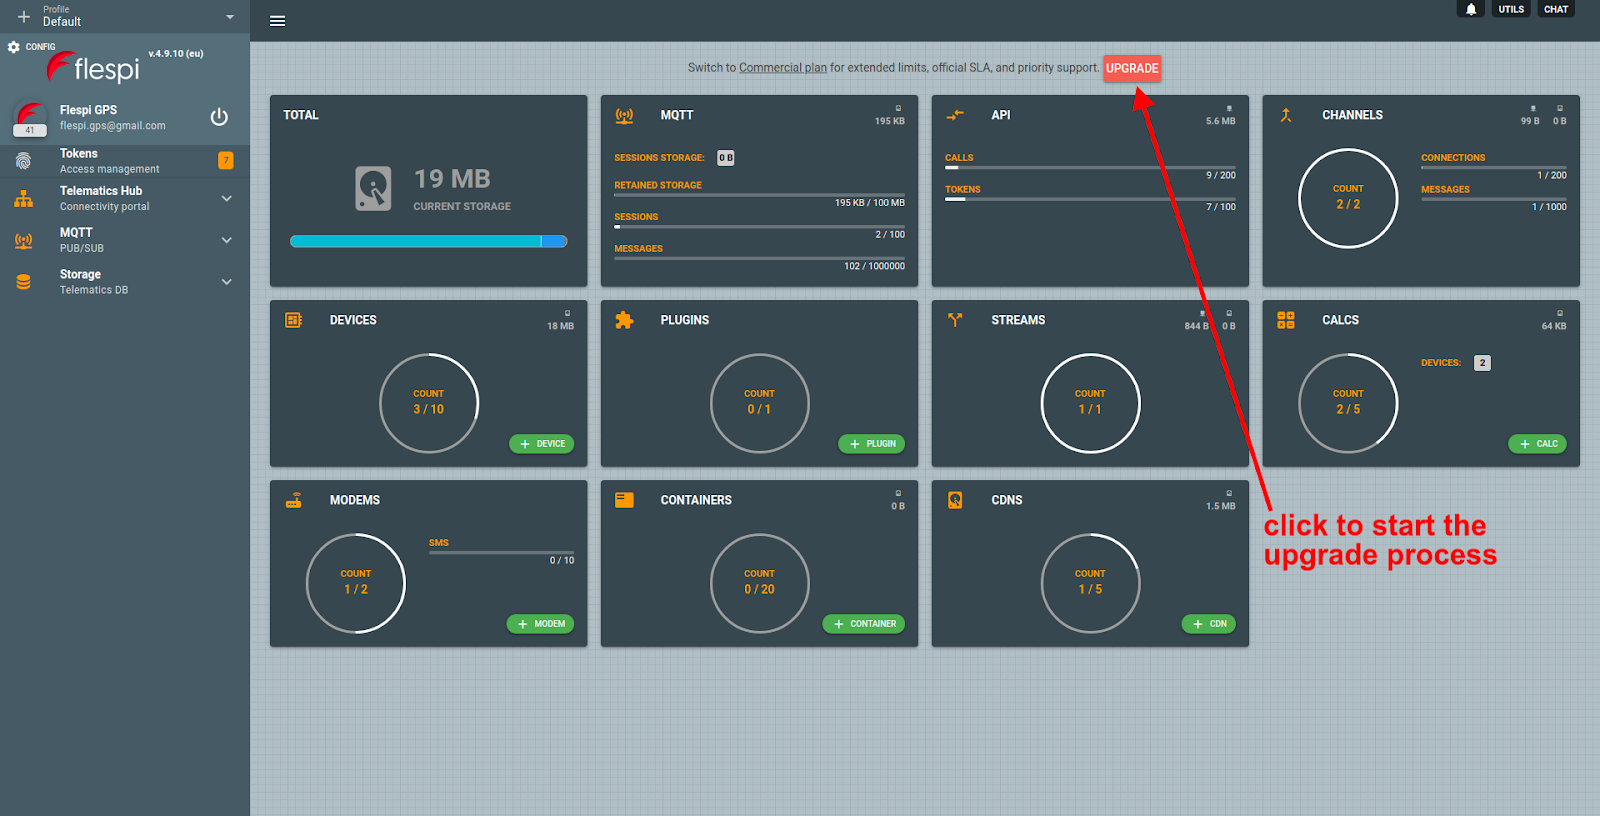
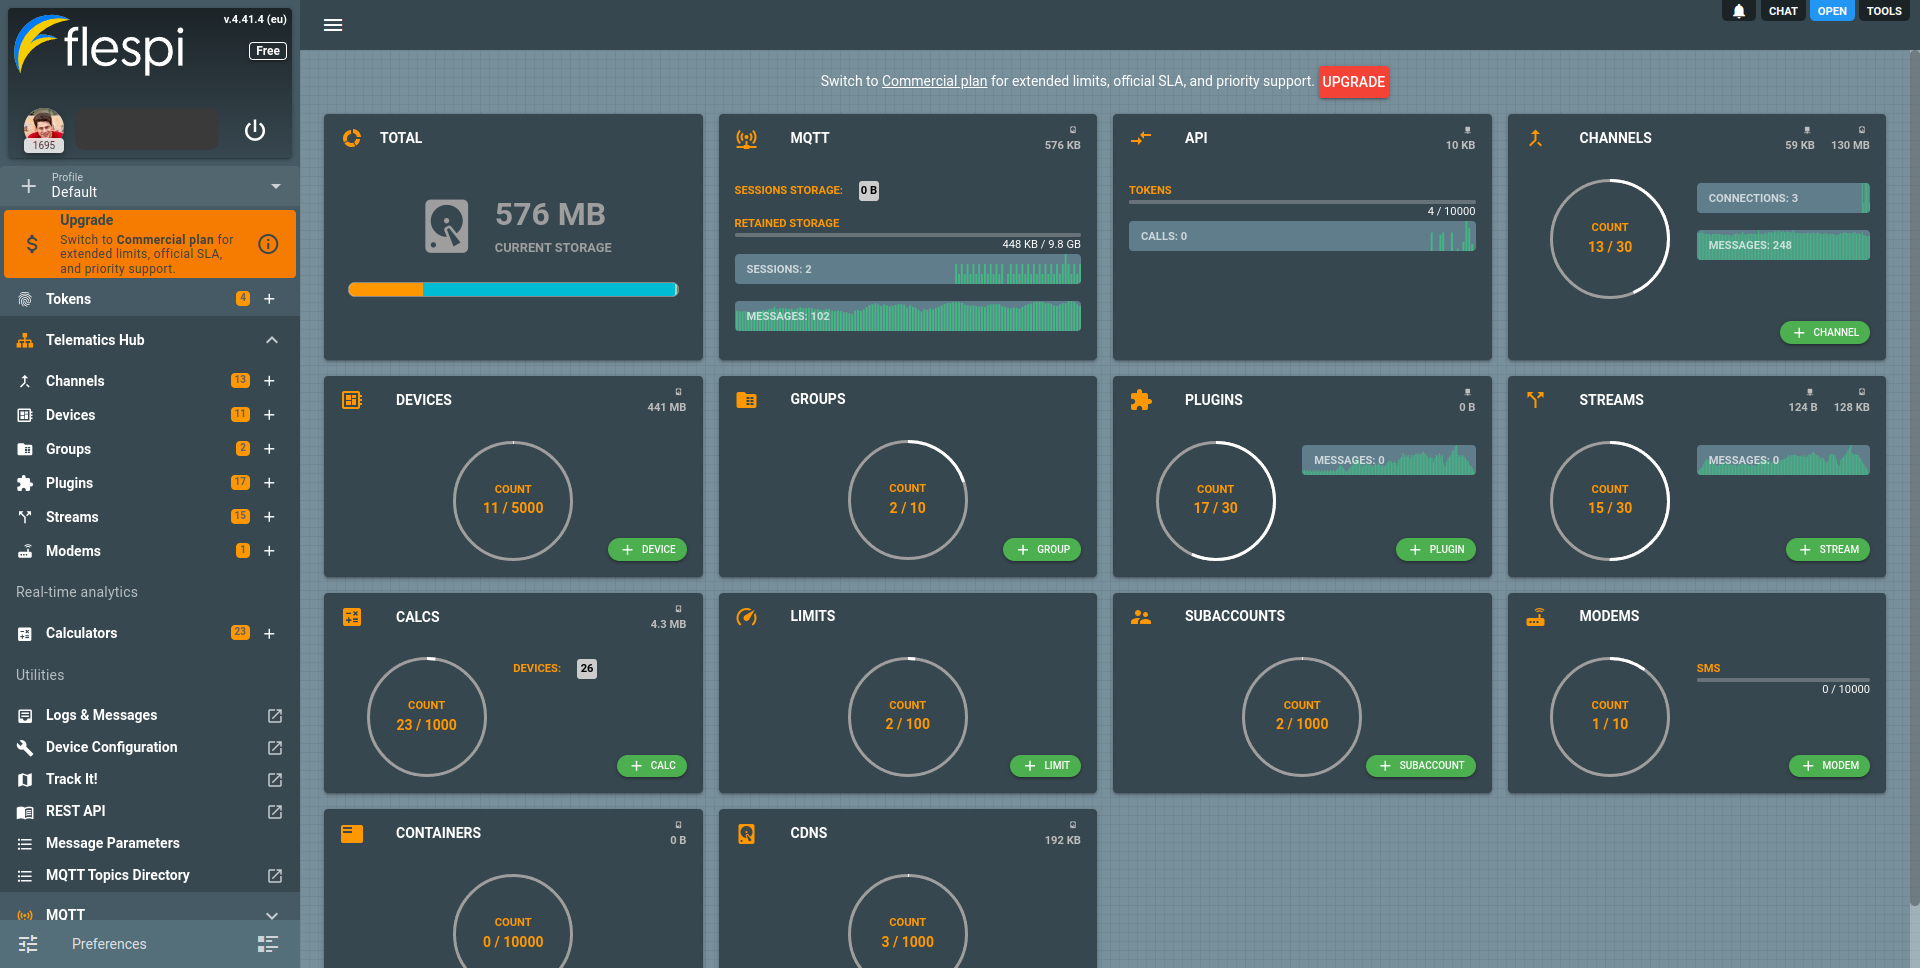
Click the red Upgrade button at the top of the dashboard screen:
Thoroughly fill in the information about your legal entity (company) and tell us how you will use flespi (we want to be sure flespi is a good fit):
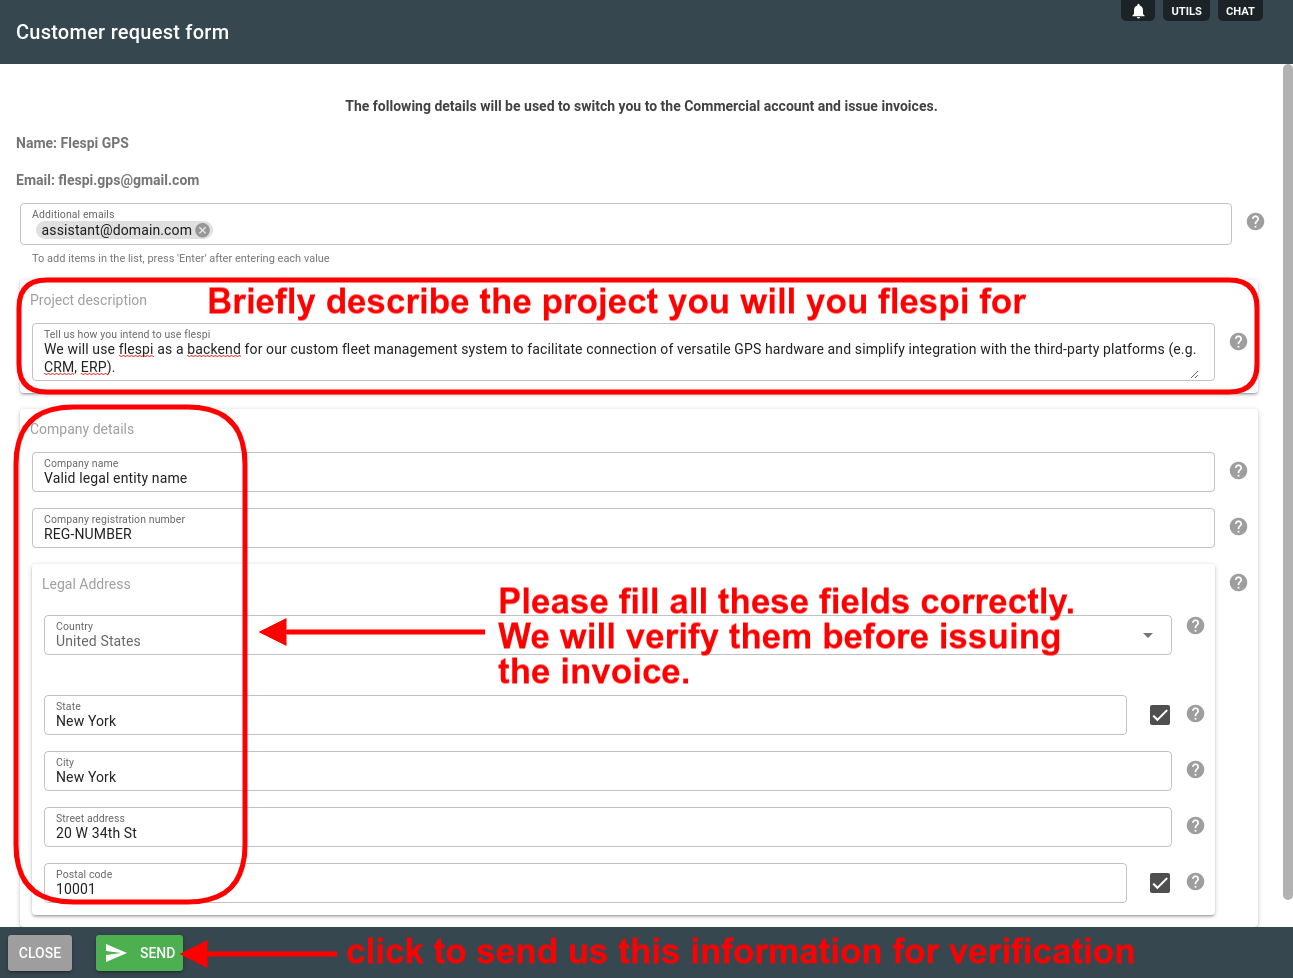
Once you submit the form, we will verify the provided details.
If everything is correct, we issue a payment link for a refundable deposit (the deposit is paid back to you when you decide to terminate commercial flespi usage).
Once you pay the deposit, your account will upgrade to the Commerical plan automatically.
Now the extended capabilities of flespi are at your service. Enjoy!
Note: your first invoice for the actual use of the flespi services will be issued on the first day of the month following the month in which you upgraded and will be prorated based on the number of days from the day of upgrade till the end of that month (e.g. if you upgraded on September 15, you will pay for half of a month).
Where do I find the billing information and invoices?
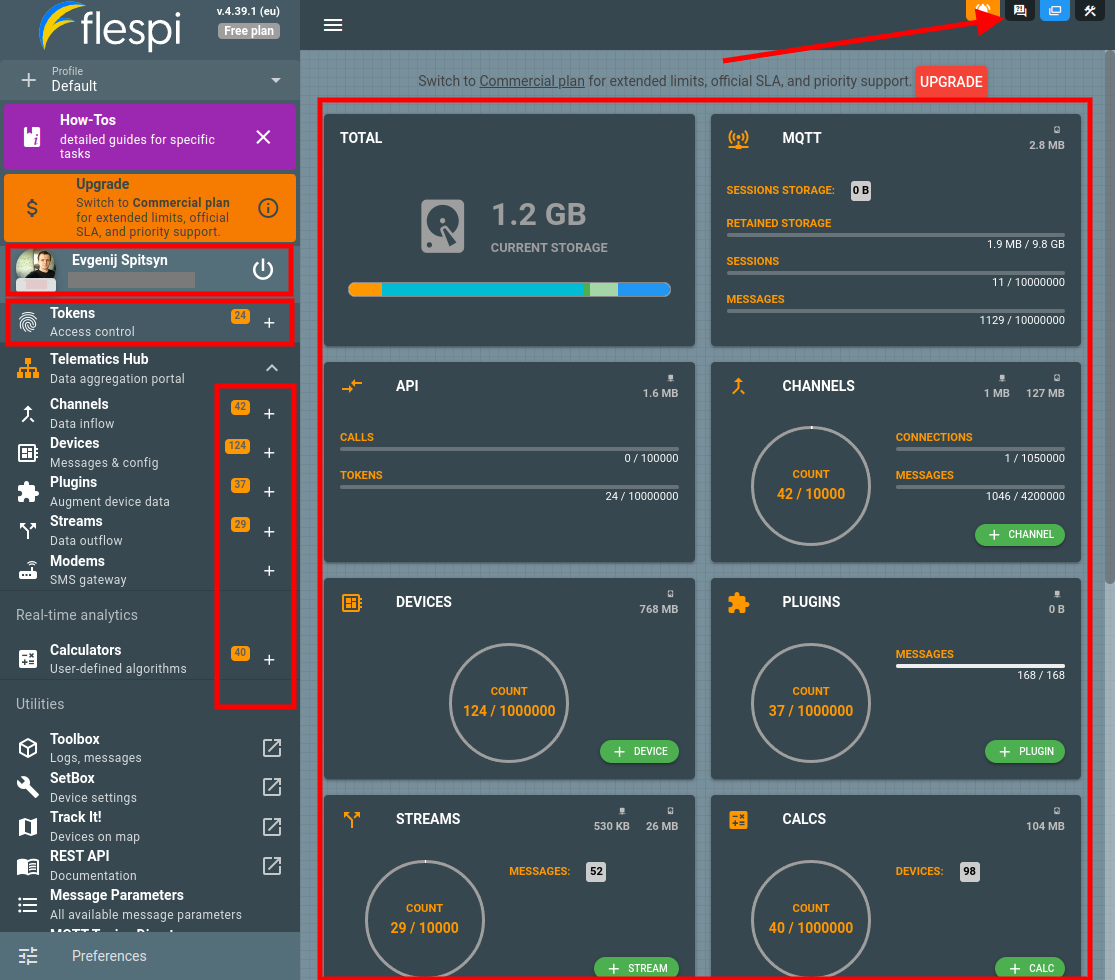
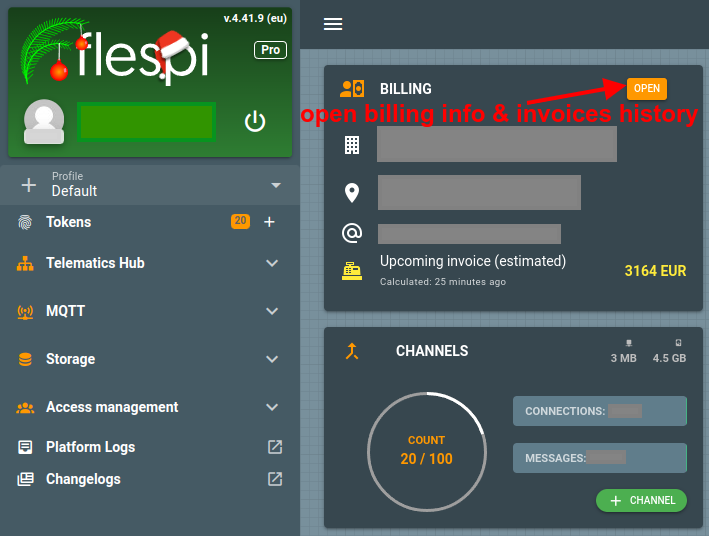
You can easily see and change the billing information by clicking on the Open button on the Billing tile of the flespi panel dashboard:
Opening Preferences -> Billing tab will lead you to the same spot.
On the billing screen, you can change the payment method, enable auto-payment (to never be late to pay and avoid account blockage), add/remove billing emails, see the invoices history, download invoice PDFs, see the forecast of the next invoice amount, and more:

There you can find all issued invoices with detailed information inside each. Click on the invoice's card to access detailed information for what you've been billed in this period and under Statistics block you may compare the growth dynamics of your flespi account relative to previously issued invoice.
For each invoice you may download its PDF representation.
For each not yet paid invoice you also see a payment link and a button with which you can directly perform the charge according to configured payment method. This button is equivalent of flespi automatic charge that happens on the second day of each month and is a convenient way to test if automatic invoice charge is configured correctly for you. On any error you may adjust a payment method with an icon in the top-right corner of Billing section and try invoice charge again.
Upgrade, blocking, and deletion
If you are about to exceed the restrictions of the Free account, you can upgrade to one of the Commercial plans at any time.
If you fail to pay for the Commercial account in time, it will be partially blocked.
Free accounts are automatically removed after two months of inactivity. In this case, you can create a new account with the same email.
Account limits can be checked inside the flespi panel or via API.
Why can my account be blocked?
The only reason is failure to pay in time.
You have plenty of time to pay your bill — 20 days to be exact (the invoice is issued on the 1st day of the month following the billable month, and you have until the 20th to pay).
Secondly, you can enable autopayment and never miss a deadline.
If you fail to pay, your Commercial account will be downgraded to the Free account with the respective reduction in the number of available entities (channels, devices, streams) and platform resources (API calls, traffic, storage, etc.). The entities exceeding the Free account limitations will be blocked, not deleted. You will also see the following indication in the flespi panel:

Yes, you will lose the data for the period of blockage. Channels and devices will stop receiving new messages, streams will stop forwarding data to target platforms, etc.
The storage for channels, devices, and streams will also be reduced, so any stored data exceeding the Free plan limitations will be deleted.
Important: you will not know exactly which specific entities will fall beyond the Free account limitations and will consequently be blocked.
Once you pay the bill, all items in your account will be unblocked automatically.
If you decide to remain on the Free plan after the downgrade, you should follow the proper downgrade procedure.
How to change to another plan?
If you want to change commercial plan for your flespi account you can request it via Helpbox. Usually this happens when you hit some limits.
- Upgrade to a higher level plan you can request any time.
- The monthly plan fee on your bill will not be prorated from the date of change. No matter what day in a month you upgraded to a higher plan, in the monthly invoice you will see the full charge for this plan. That's why we recommend to upgrade your plan to a higher level in the beginning of the month.
- Downgrade to a lower level plan you can request only after staying minimum amount of time on your current plan.
- For Pro plan the minimum subscription period is 1 month.
- For Enterprise plan the minimum subscription period is 6 months.
- For Ultimate plan the minimum subscription period is 12 months.
How to downgrade an account to a Free plan?
- Pay the debts. Please pay all outstanding debts for the previous periods. If you decide to downgrade in the middle of the month, please wait until the end of the month, pay for it, and only then request a downgrade.
- Request downgrade. Please request a downgrade in Helpbox within the first ten (10) days of the month following the last paid month. This seems fair since we are not going to charge you for these days.
- Get downgraded. Once we get your downgrade request, we will switch your account to the Free plan, and you can continue using flespi for testing and development purposes.
Note that all items exceeding the Free limits will be blocked.
If you paid a refundable deposit upon upgrade, you will get it back.
How to control account limitations?
Both free and commercial accounts have usage restrictions. Exceeding these limits can lead to the suspension of the platform instances or skipping of new incoming messages. There are several ways to control the limits.
UI indicators
The flespi panel features a dashboard with gauges and bars showing the use of each platform element.
When you open any instance in the flespi panel, it will display limits at the top. A disabled instance is lighted in red:

You may also use Grafana to visualize account's statistics.
API tools
Limits control can be automated with flespi API GET statistics request.
The same info can be received via MQTT on the subscription to the topic (can be visualized in MQTT Board) flespi/state/platform/customer/counters/#.
Each time the usage values change, the MQTT client will receive an appropriate message. See the full specs of possible topics in flespi/state in the table below:
module-name/ | instance-type/instance-id/ | property-name/ | |
required | optional | ||
| platform | # | ||
gw | channels | id name commands_ttl configuration enabled messages_ttl protocol_id URI | blocked commands_size connections_count messages_size |
devices | id name device_type_id configuration messages_ttl telemetry | messages_size connected | |
streams | id name configuration enabled queue_ttl | queue_size connected | |
modems | id name configuration enabled priority | ||
storage | containers | id, flags, name | blocked, size |
abques | id, name | blocked, size | |
CDNs | id, name | blocked, size | |
Useful tips
To reduce the total amount of storage, consider lowering the messages_ttl parameter as devices have the biggest amount of data for the longest possible period available. The device messages buffer is tuned to be automatically cleared once per 24 hours (so once the messages_ttl parameter has been lowered, one should expect the total amount of storage to be reduced in the upcoming 24 hours period).