The "msg-webhook" plugin type sends POST requests with an array of messages before they are registered with the device. The plugin then merges the response with the original message set.
Click on the "+" button in the Telematics Hub -> Plugins section to create a new plugin:

Pick “msg-webhook” in the configuration drop-down and specify something like http://your-server:port/post as a URI parameter.
Deploy your custom processing script on your server or VPS. Configure your example to listen on your-server:port network endpoint and to handle a /post URI.
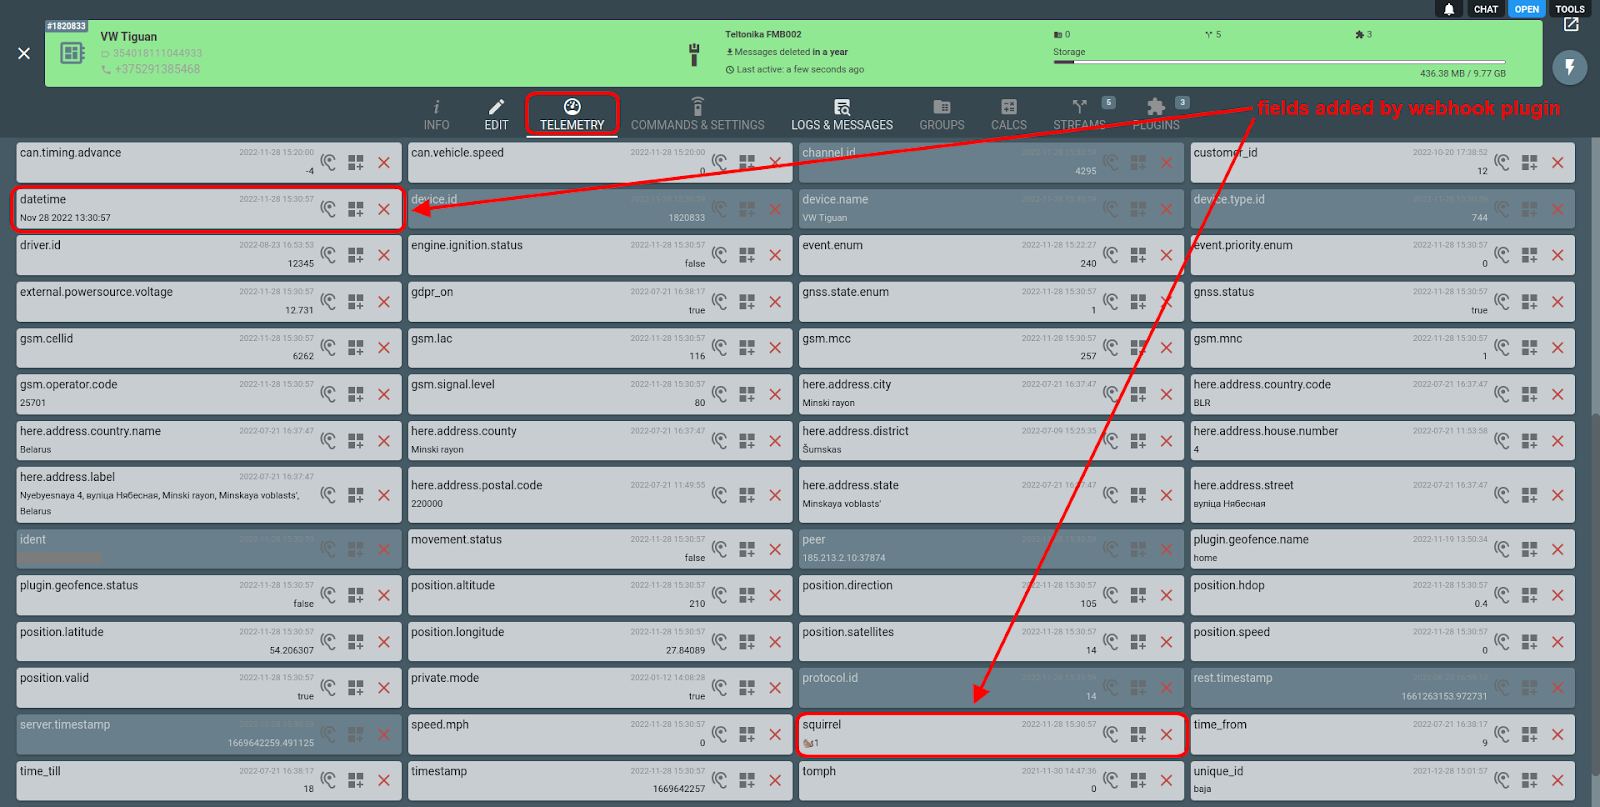
Hint: to give this plugin a quick try, you can deploy our example (Node.JS, PHP) on your server and then modify it to your needs (our example adds a "datetime" and "squirrel" parameters with human-readable date and a 🐿️ (squirrel) respectively to each message).
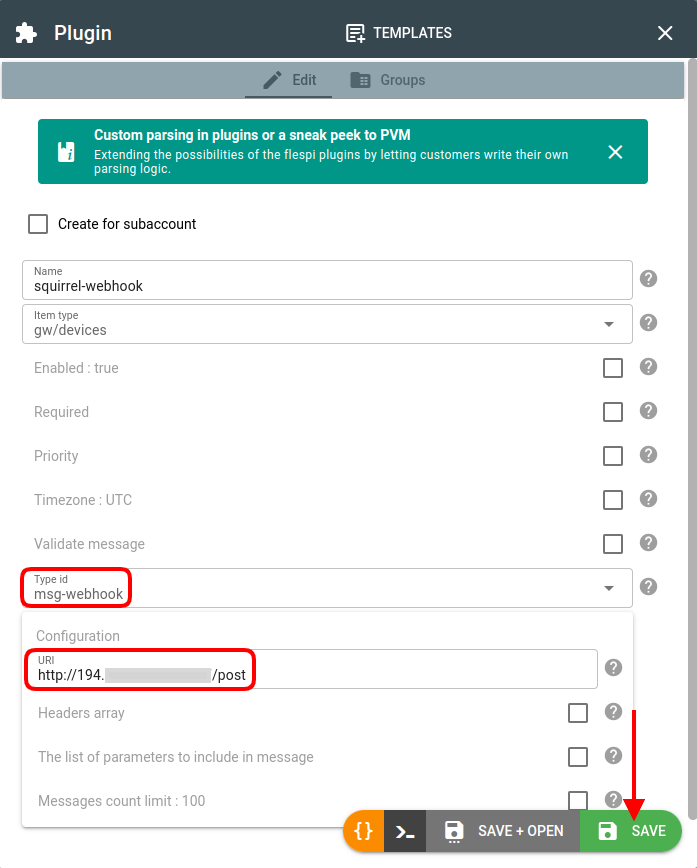
You can also specify the list of parameters to include in the message if you don’t need all of them.
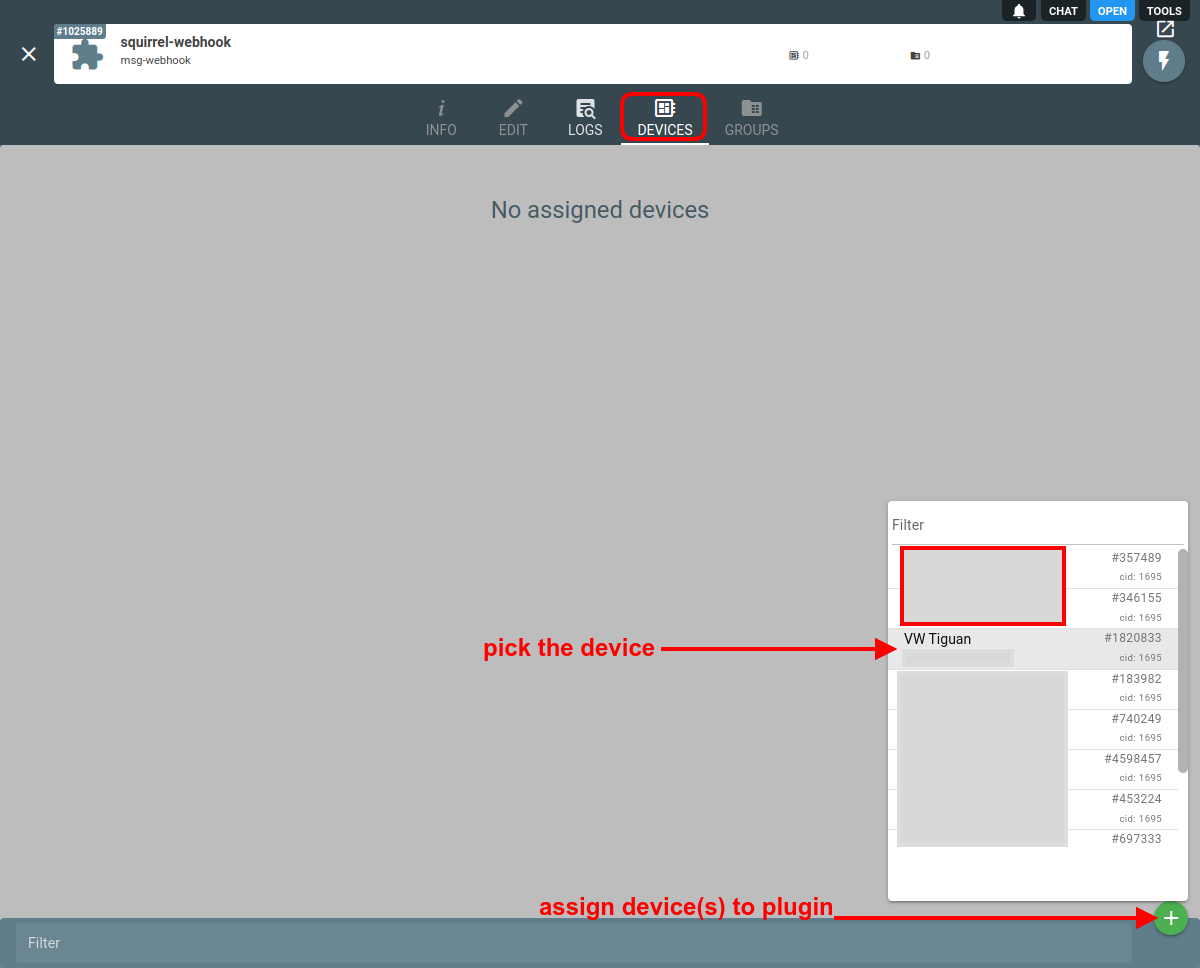
Then we need to assign this plugin to the right devices. Open the created plugin and go to the Devices tab. Then click the "+" button to assign devices:
Save the plugin and flespi platform will constantly deliver a batch of messages to your deployment. Then go to the Telemetry tab for the given device to check if the date and the squirrel appeared among the device parameters:
Done.
Change log
Subscribe to the msg-webhook fields plugin change log to stay in sync with any updates.
More plugin types
Find a comprehensive list of available plugins types here.