You might be aware that we in flespi contribute to the development of MQTT infrastructure quite a bit — so far we have offered a cloud MQTT 5.0 broker, an MQTT 5.0-ready MQTT.js client library, a developer-friendly MQTT playground called MQTT Board.
Now we are adding MQTT Tiles to the list.
MQTT Tiles is a highly customizable IoT dashboard getting data for visualization from MQTT topics. On top of that, it's open-source.
Managing switches, monitoring dynamic values on a scale, adding action buttons, embedding videos, and more — just arrange the widgets on the board, set up source MQTT topics, and enjoy a good-looking and value-bringing picture.
Let’s see what it takes to create a new IoT dashboard.
Connections
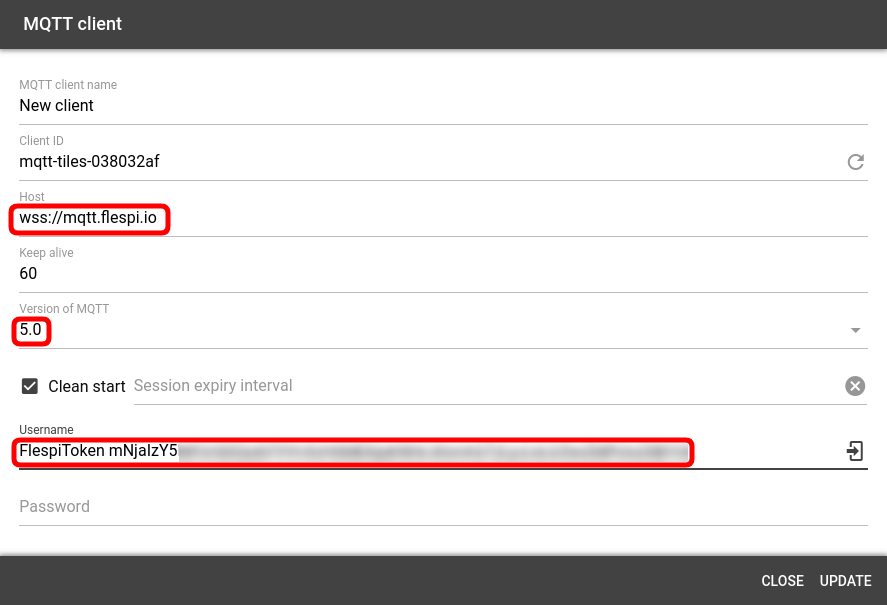
Since dashboards in MQTT Tiles rely on subscriptions to MQTT topics to get data for visualization, we need to establish a connection to an MQTT broker first. Click on the plus icon in My connections pane on the left.
By default, you are prompted to connect to the flespi MQTT broker via MQTT 5.0 using your flespi token.
Note: there is a handy Login icon to the right of the Username textbox that will offer you to pick one of the existing flespi tokens (if any).
Obviously, you are not limited to the flespi MQTT broker and can go with any other option on the market supporting WSS protocol. Just specify the correct Host and credentials, and pick the proper MQTT version (very few brokers these days have the complete support of MQTT 5.0 that flespi offers).
Notice that once you create a new connection, you should click on it to enable (it will turn green).
Now that you have a connection to the broker, we can start putting together your first board.
Boards
Boards are collections of widgets that serve as masks for the data obtained through connections. You can “apply” the same board to multiple connections to see (and compare) the same set of parameters or values coming from different sources (e.g. development and production environments).
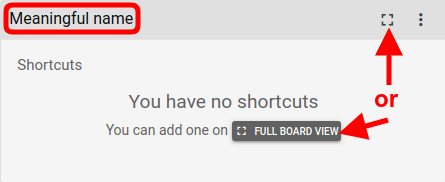
To create a new board, click on the plus icon in the bottom right corner. Give it a meaningful name and start stuffing it with widgets.
Click Full board view icon on the board card to open the current board for editing.
Variables
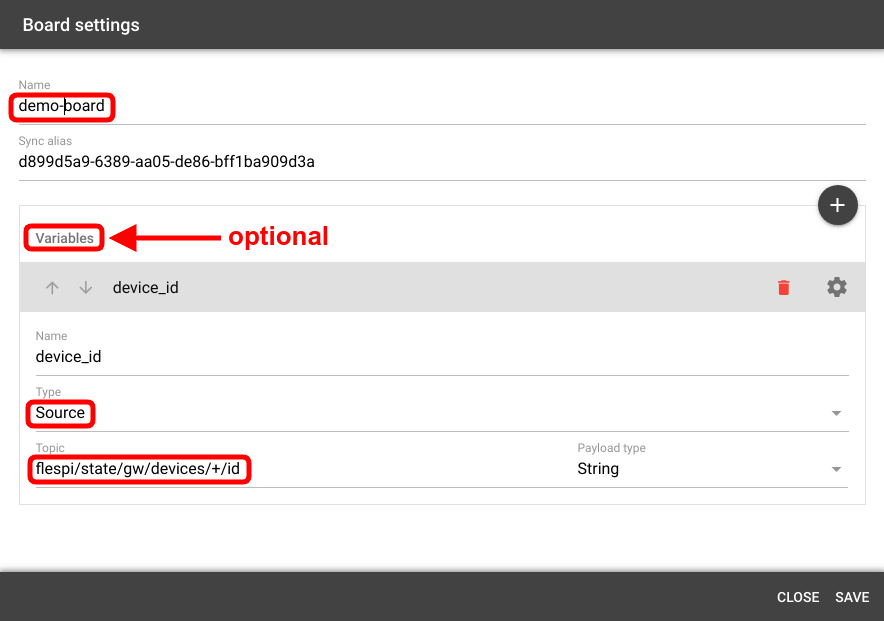
Variables define lists of elements of the same type from which one can pick to make widgets reflect the data for the given element.
Say, we want to be able to pick a device from the ones registered in the flespi account and see its specific parameters. You can do so by creating a variable (device_id below) and indicating the Source topic to generate the list from:
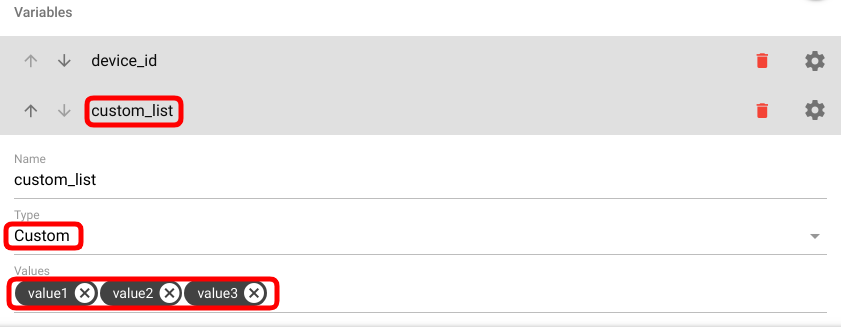
If you need a custom list, pick the Custom type and specify the items manually:
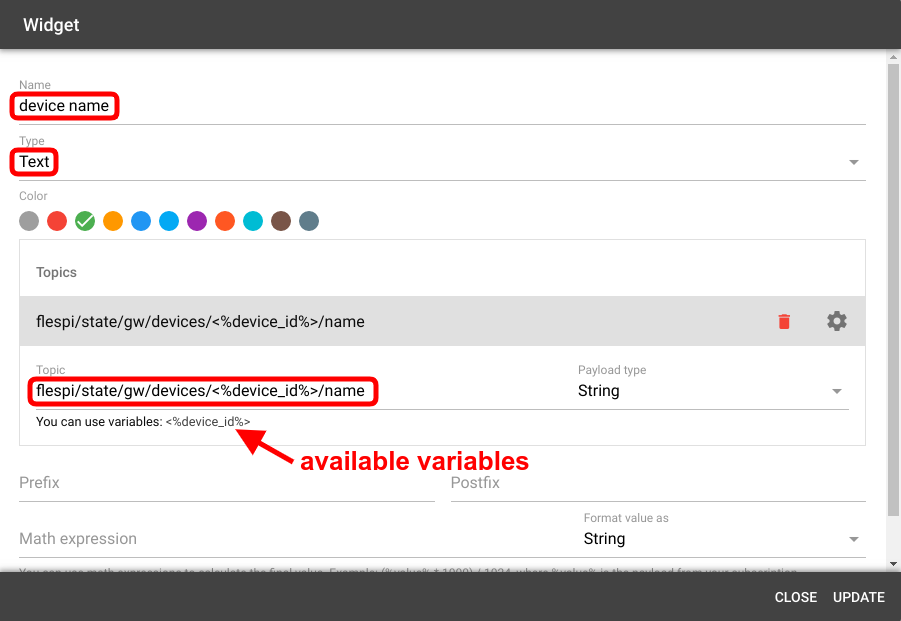
When you add a widget, you will be able to insert variables into the source topic to make the widget dependent on the selected value:
Topic flespi/state/gw/devices/<%device_id%>/name on the screenshot above will substitute variable placeholder with selected device_id value during the subscription, e.g: flespi/state/gw/devices/1234/name. When you change device, the widget will resubscribe to a new topic.
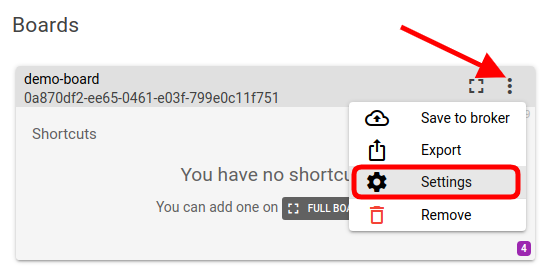
You can always change the list of variables available for the board by opening the board settings:
Shortcuts
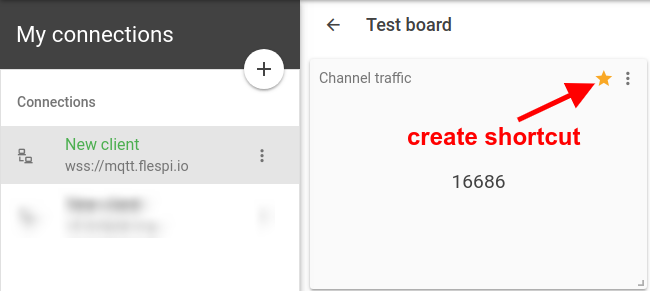
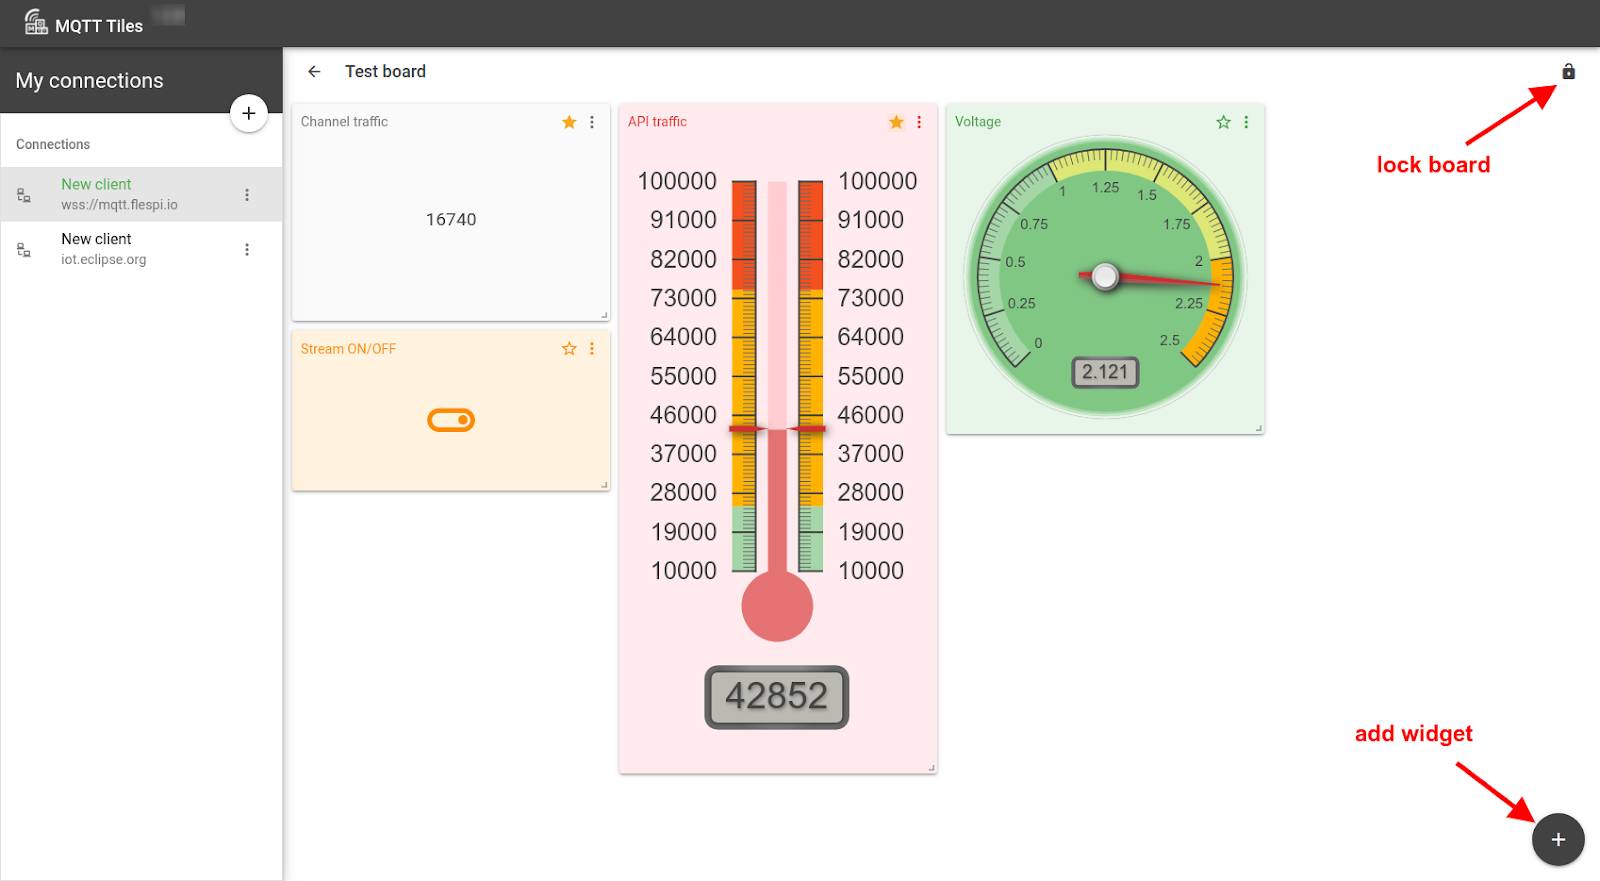
By clicking on the star icon in the top right corner of the widget you are attaching this widget to the tile board view:
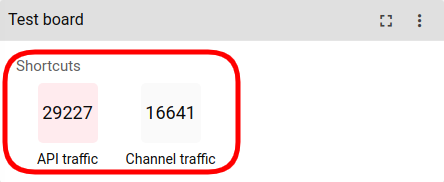
This feature enables you to consult some key values without opening the board.
View-only mode
If you want to prevent accidental board editing, you may lock it by clicking the lock icon in the top right corner of the full board view:
Widgets
Widgets are the flesh and bones of a dashboard — they make the board visually attractive and informative. Since MQTT Tiles is at the active stage of development, we have a basic set of widgets implemented to date. But we’ll be constantly adding new ones (your suggestions are highly appreciated).
Here’s what we have for now:
Text widgets:
- Text — a block of textual information
- Multi text — similar to Text but allows displaying data from several topics in a single widget
- Static text — displays hardcoded text explicitly typed into it
- Text area — input area to type the text into
Indicators:
- Radial gauge — a speedometer-like scale
- Linear gauge — a thermometer-like scale
- Status indicator — allows setting color and an icon to display as a notification
Action widgets:
- Toggle — a common ON/OFF switch
- Button — action switch
- Slider — a slider scale to pick the value from a range
- Radio button — multiposition switch
Map widgets:
- Map (location) — shows the location marker on the map
- Map (route) — shows the route line on the map
Advanced:
- Multiplier — allows generating a set of similar widgets based on the wildcard topic
- Complex — configurable block that can include data of different types
- Formula — allows consuming data from multiple topics, assigning variables, and creating an HTTP template for the resulting message
- Iframe — displays the content from a link in the payload
- Color — allows picking color from the palette.
To make a widget operable, you need to specify the MQTT topic or topics it should subscribe to and get the data from.
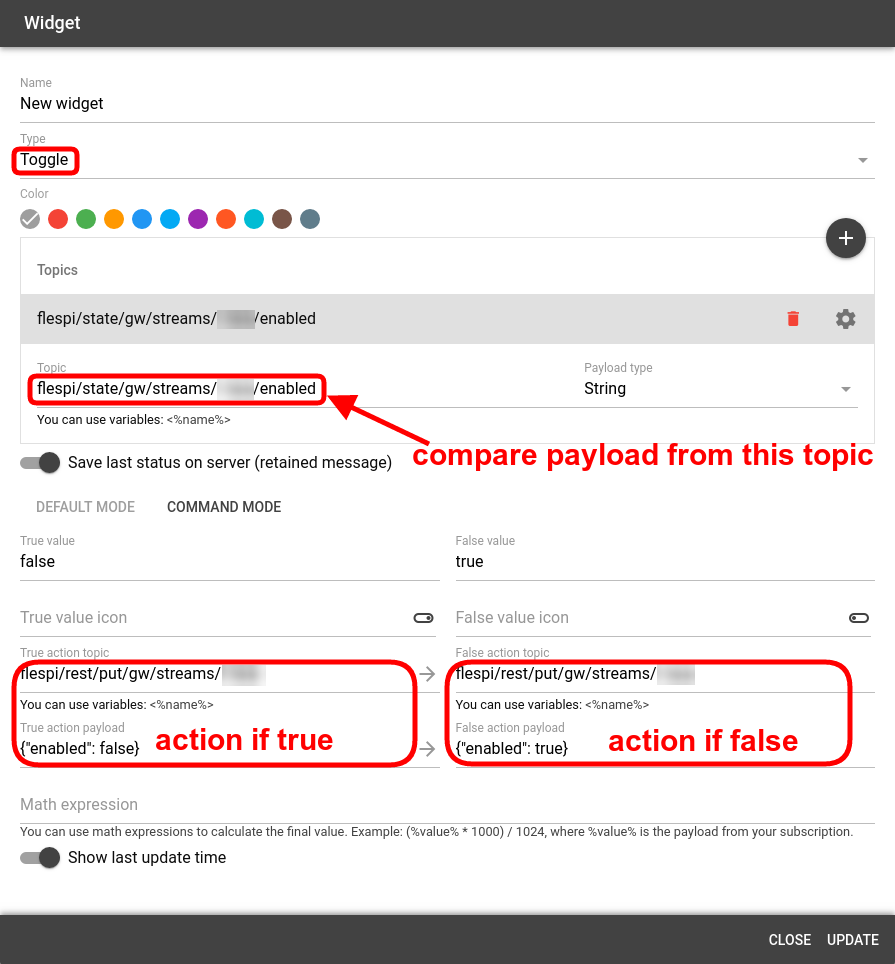
Action widgets, such as toggles and buttons, also require the action topics to be specified to publish into them when triggered:
Widgets are easily resizable — just drag the bottom right corner of the widget to reshape it.
Also, note the Math expression field available for most widgets. This advanced feature allows implementing all the mathematical functionality of the math.js library upon the topic payload. The %value% variable contains the original value of the topic payload.
Dashboard sharing
Creating dashboards is ultimately done to facilitate the perception of information that you consult regularly by presenting it in the visual form. Creating and editing dashboards is a much less frequent action.
Here’s what you can do to make your board usable by more than one person or from more than one place.
Saving to broker
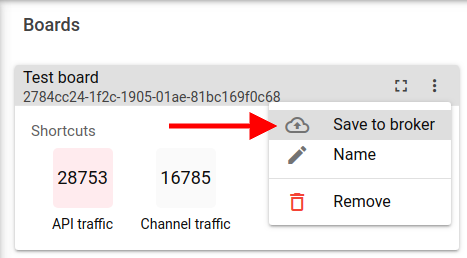
You can save the board configuration to the broker to be able to use or share it later. Click on the three-dots icon and pick the Save to broker option.
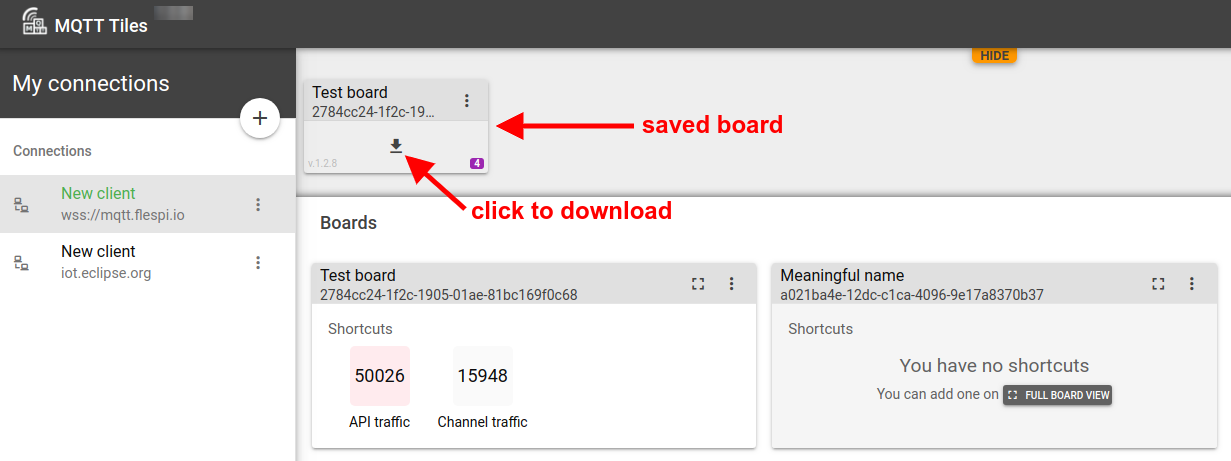
The saved boards are available in a separate collapsible pane on top:
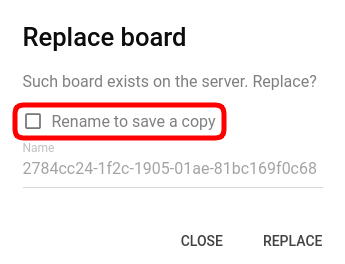
If you choose to download the saved board (by clicking the Download icon), you will be prompted to replace the existing one with the same name (if one exists) or save this board with a different name:
Sharing link
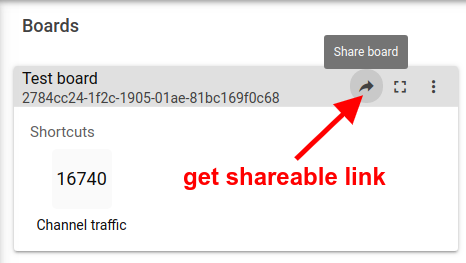
If you want to share the link to the board with someone, click on the Share icon on the board tile:
The link will be copied to the clipboard. Send to the interested parties to let them view the dashboard and interact with the action widgets. Board editing will not be allowed.
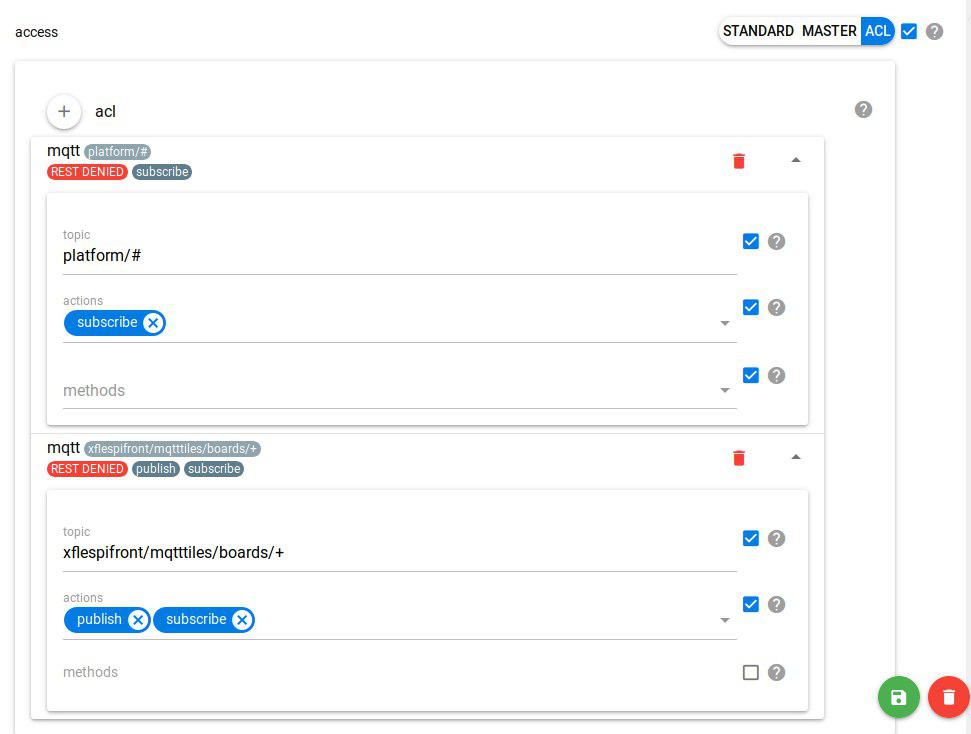
Note: To be able to share the board you have to be logged in with a Standard or ACL token — sharing is not allowed for Master tokens. The ACL for the mqtt topic xflespifront/mqtttiles/boards/+ should be explicitly created with publish/subscribe allowed to make sharing work.
You will also most likely need another ACL(s) to specific MQTT topics to be able to get the data or publish updates. For example, the token with the following ACLs allows access to the flespi platform counters:
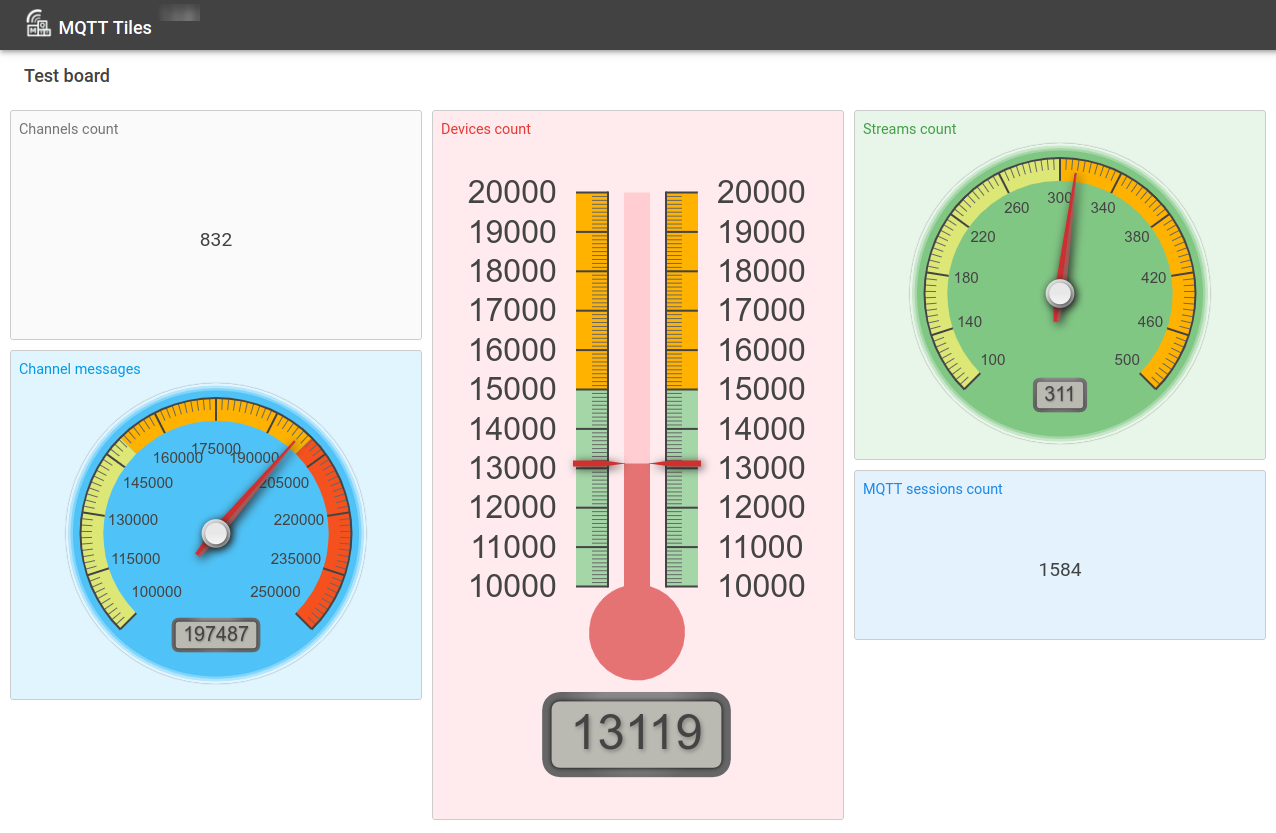
This is a link to the sample dashboard constructed using the above token:
Voila.
Import/Export
Sometimes you don’t want to show your specific board but want to save and/or share the board configuration and layout for use by others or in other projects.
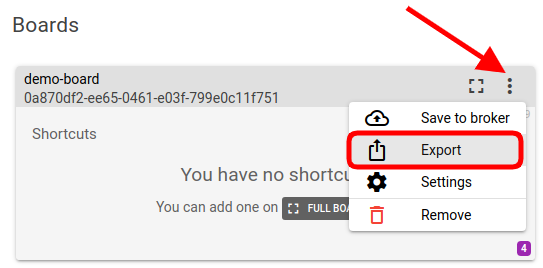
In such a case what you need is export the board as string or file (whichever is handier) by picking the Export option from the board menu and then either copying the config as a string to the clipboard or downloading the config file:
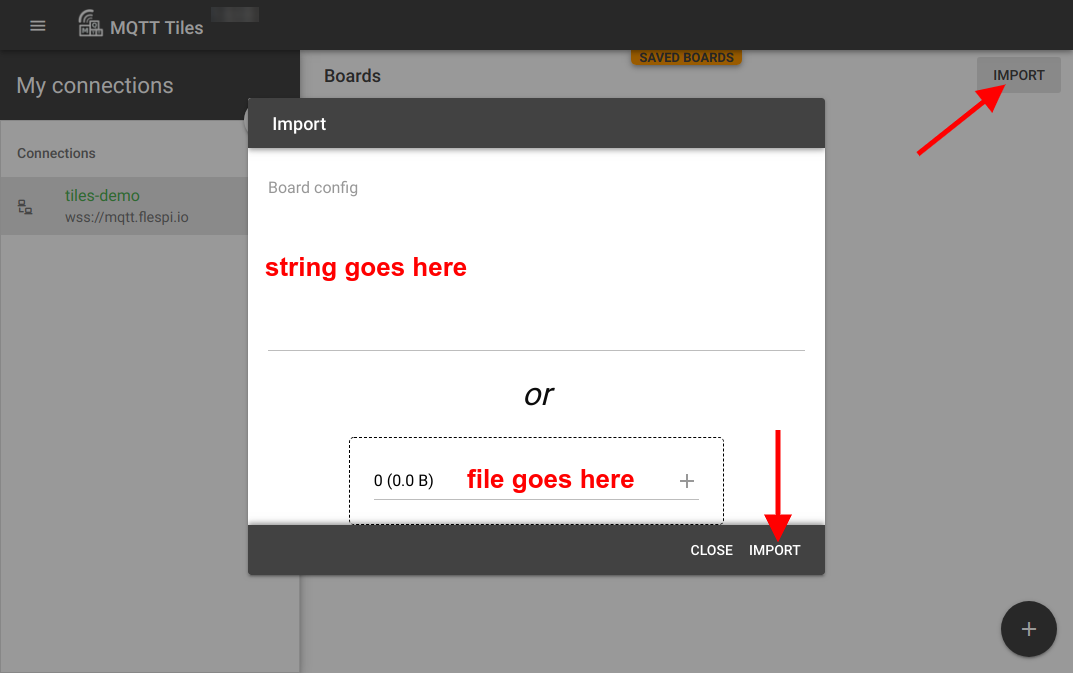
Now you have the board and widgets configuration saved on your device. Once you need to roll out such board somewhere else, you should click the Import button on the Boards pane and paste the string/point to the file with configuration:
***
MQTT Tiles is a flexible tool empowering easy visualization of data from MQTT topics. Use it to grasp the data in a more convenient form, manage actionable elements to trigger changes, and share the views with the world.
We’d be glad to hear your feedback and stories about the needs you are trying to cover with the tool.
And we also released a small demo video for MQTT Tiles:
P.S. MQTT Tiles project is developing and transforming at a high pace. To stay in sync with the latest changes, subscribe to the MQTT Tiles changelog on our forum.
