Microsoft Azure offers an extensive infrastructure for IoT projects while flespi can effortlessly perform parsing of incoming data from 1000+ telematics & IoT device types. In this guide, we will complement one with another to be able to forward the unified messages from the flespi platform into Azure IoT.
Prerequisites
Flespi channel working over the appropriate protocol to collect the data from your IoT/telematics hardware.
Flespi device to have a virtual representation of each physical device in the flespi platform with dedicated long-term storage, access to telemetry, real-time analytics capabilities, and more.
Registered account with Azure IoT to set up the receiving side.
Create Azure IoT Hub
Azure has a very detailed guide on how to create the IoT Hub.
We’ll need the Hostname from this page later when configuring the flespi stream.
Create Azure IoT device
Once the new IoT hub is created, create the IoT device in it.
After you've created the IoT device, copy its device_id — you will need it later when configuring the stream.
Find a device policy key
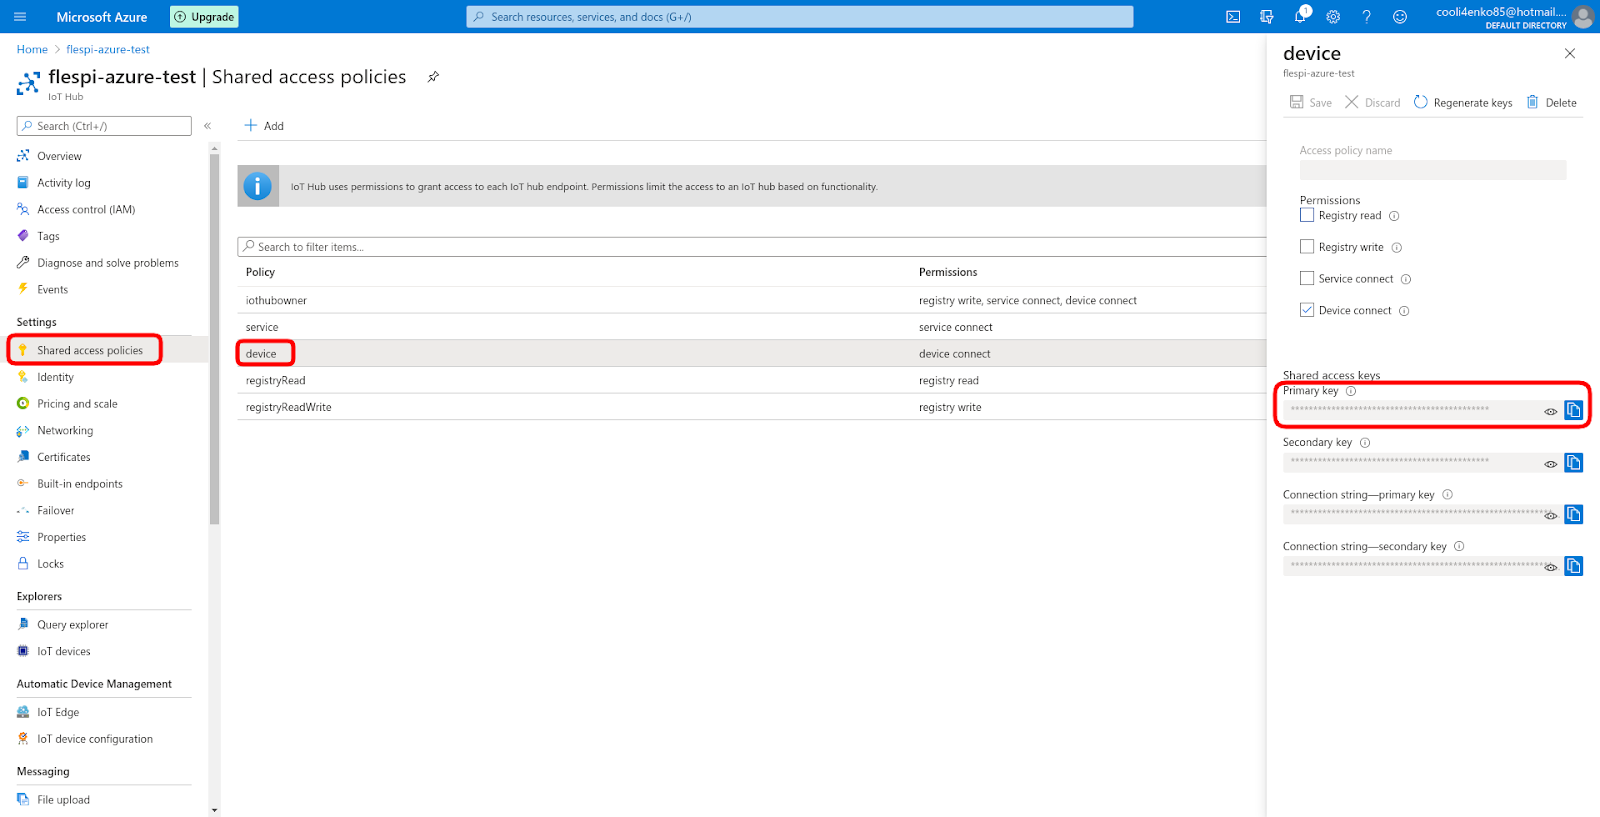
You will need the device policy key on the next step - when creating a flespi stream. Open the Shared access policies section for the IoT hub, pick the device policy and find the Primary key in the sliding pane on the right:
Note: be sure to pick the Primary key from the Shared access policies section for your IoT hub. Don’t confuse it with the Primary key for the created IoT device.
Create flespi stream to Azure IoT device
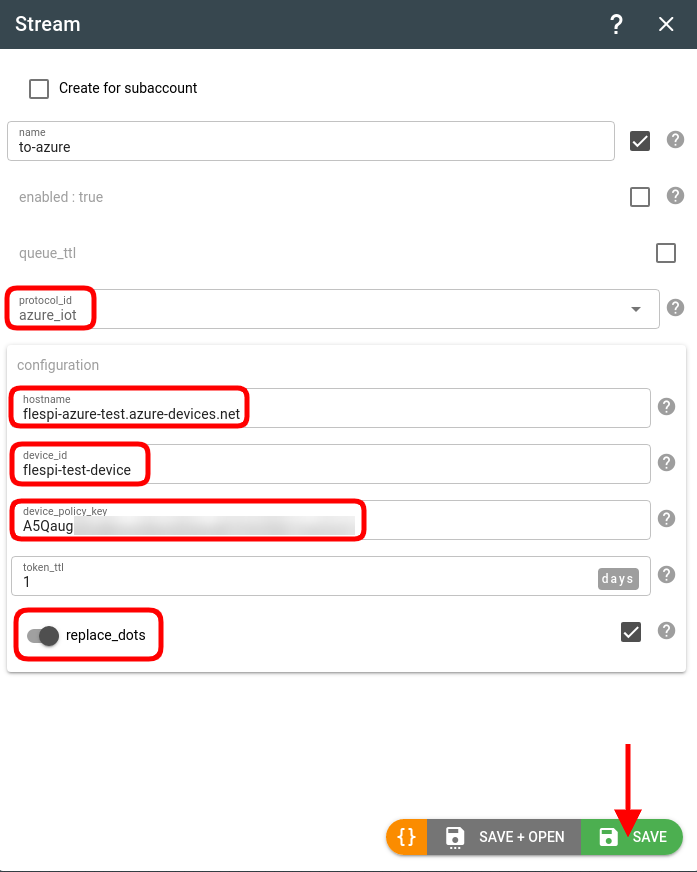
From the flespi panel navigate to Telematics hub -> Streams -> “+” button to create an outgoing stream to Azure IoT. Pick the azure_iot protocol and fill in the required fields (hostname, device_id, and device_policy_key) with the values highlighted on the previous screenshots:
Note: if you intend to use message routing in Azure, activate "Convert message" with the "replace dots" option. When enabled, the azure_iot stream will replace dots in message parameters with underscores (e.g. "battery.low.alarm" will become "battery_low_alarm") or convert them into CamelCase. This will prevent incorrect routing due to the fact that dots in Azure signify access inside the given object.
Subscribe the stream to channel messages
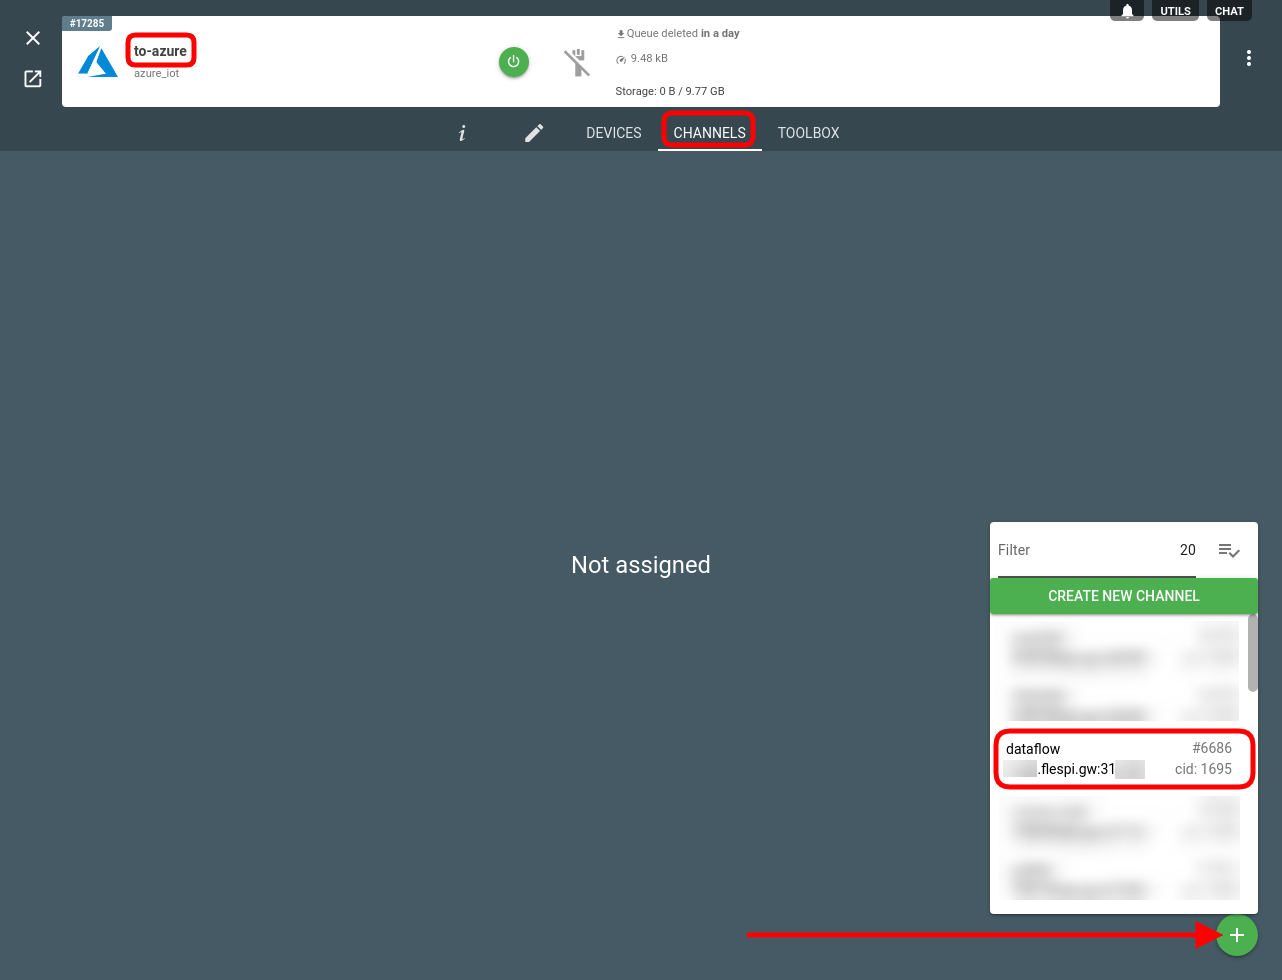
Now, for the stream to start forwarding messages, we need to tell where to take the messages from. Open the stream settings, navigate to the Channels tab and click the “+” button to add the channel to subscribe to.
Note: you can also subscribe to a specific device in the Devices tab (the process is identical).
Once enabled the stream will send telemetry messages into messages/events endpoint of the specified Azure IoT device.
See parsed messages in Azure IoT
Once the stream starts forwarding messages, you can check that they appear in your Azure IoT hub properly. You can do so in two ways:
Open Cloud Shell (more on CLI here) directly from Azure portal and execute the following command
az iot hub monitor-events --output table --hub-name flespi-azure-test
where “flespi-azure-test” must be replaced with your Azure IoT hub name:
You should start getting the messages coming from the stream. If you don’t, check the stream configuration.
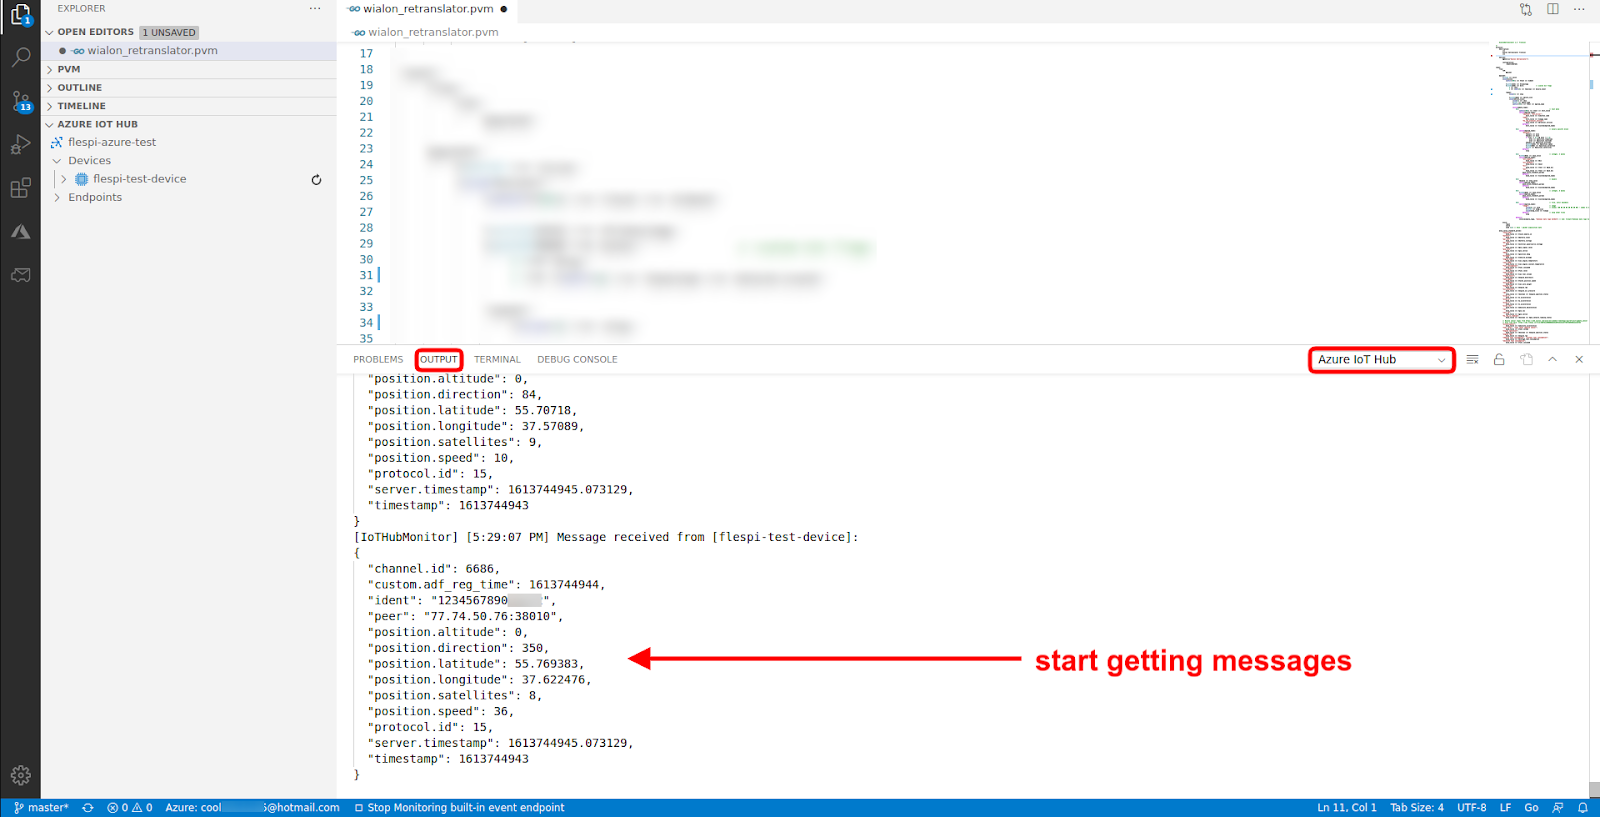
Alternatively, you can install a special extension for Visual Studio Code and see the messages from flespi directly in your development environment:
That’s it. Now that you have parsed messages from your IoT or telematics devices in the Microsoft Azure ecosystem, you have countless ways to handle them.
To deliver only certain messages, parameters in it or convert message parameter names into different notation read generic stream configuration.


