Forwarding the data from telematics/IoT devices into the Google IoT Core is a common task which, when complete, opens immense opportunities for handling the data in the Google Cloud ecosystem. Once the data from your device(s) appears in flespi, sending it to Google services is fast and straightforward.
Please take into account that Google IoT Core is marked by Google as deprecated with end of service date in August 2023. We recommend to use Google Pub/Sub stream instead.
Prerequisites
Flespi channel working over the appropriate protocol to collect the data from your IoT/telematics hardware.
Flespi device to have a virtual representation of each physical device in the flespi platform with dedicated long-term storage, access to telemetry, real-time analytics capabilities, and more.
Registered Google Could account to set up the receiving side.

1. Set Up a Google Cloud IoT Core instance
Сreate a Google Cloud IoT Core device registry and register a device (if stuck, follow this quickstart).
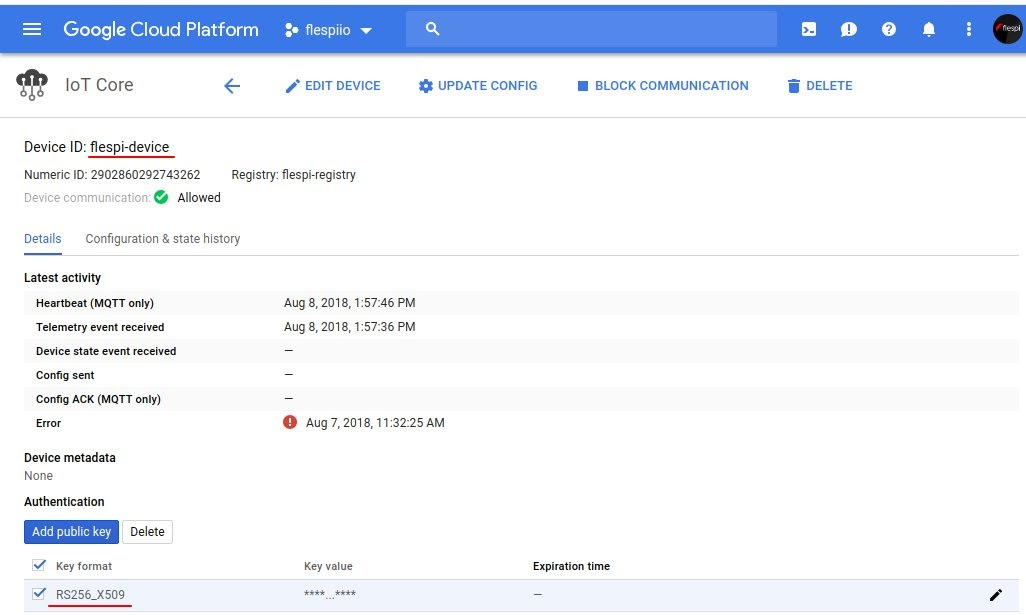
Note: you should choose the RS256 key for device authentication because ES256 keys are not supported in the google_iot stream.
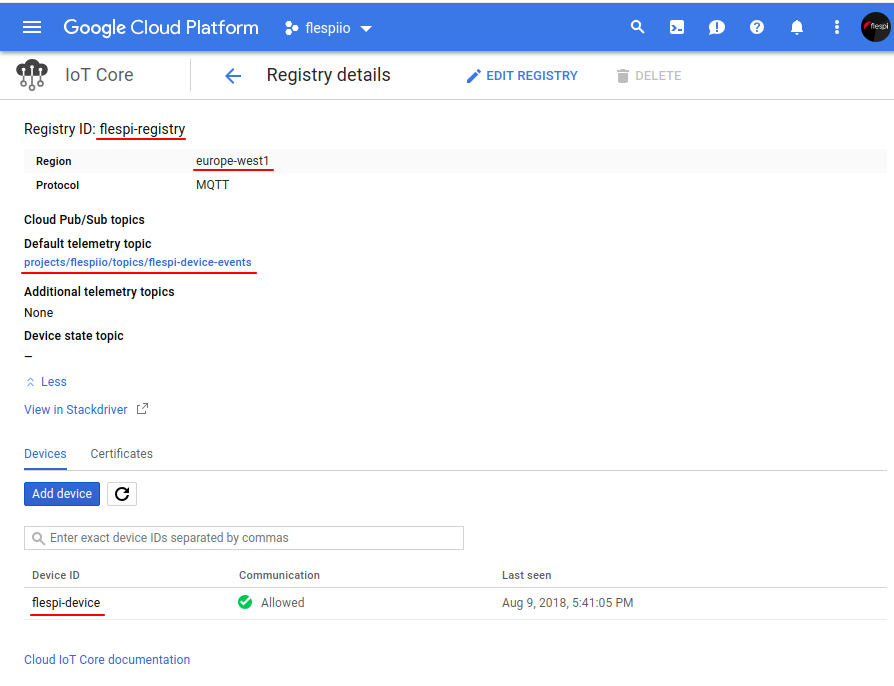
Create a device:
2. Set Up a Google Cloud Function
Cloud Function is supposed to run each time a device message from Google Cloud Pub/Sub comes.
Create a function.
Select the ‘Cloud Pub/Sub’ option for the Trigger field.
Select a default telemetry topic (the one that you entered when creating the registry) for the Topic field. Choose other options at your discretion.

Below is an example code (for node.js) to be used for Runtime:
package.json
{
  "name": "flespi-function-example",
  "version": "0.0.0",
  "private": true,
  "dependencies": {
    "@google-cloud/bigtable": "^0.10.2"
  }
}
index.js
'use strict';


const bigtable = require('@google-cloud/bigtable');
const bigtableClient = bigtable();
const instance = bigtableClient.instance('flespi-bigtable'); // (!) Bigtable instance name
const table = instance.table('flespi-devices-timeseries');// (!) Bigtable table name


exports.flespiBigtable = (event, callback) => {
  const pubsubMessage = event.data;
  const messageString = Buffer.from("" + pubsubMessage, 'base64').toString();
  console.log(messageString);
  const messageObject = JSON.parse(messageString);
  let ident = messageObject.ident;
  let timestamp = messageObject.timestamp;


  if (!ident || !timestamp) {
    throw new Error('Message must contain ident and timestamp properties!');
  }

  if (ident.indexOf(':') !== -1) {
    ident = ident.split(":")[0]; // skip password, if any
  }
  timestamp = parseInt(timestamp);
  let msg = {
    method: 'insert',
    key: `${ident}:${timestamp}`,
    data: {
      ["msgs"]: {// (!) column family name
        ["msg"]: messageString,
      },
    },
  }


  return Promise.resolve()
    .then(() => console.log('starting...'))
    .then(() => table.mutate(msg))
    .catch((error) => {
      if (error.name === 'PartialFailureError') {
        console.warn('Partial Error Detected');
        error.errors.forEach((error) => {
          console.error(error.message);
        });
      } else {
        console.error('Something went wrong:', error);
      }
    })
    .then(() => console.log('done!'))
    .then(callback);
};
Note: the package.json file declares and the index.js file uses one dependency: @google-cloud/bigtable. This is the node.js client library for Google Cloud Bigtable that provides methods to operate Bigtable's entities.
3. Set Up a Google Cloud Bigtable
Google Cloud Bigtable is a high-performance NoSQL database that works great for storing large amounts of time-series data.
Follow this guide to create a Bigtable instance and connect to it with the cbt CLI-tool.
Create a table and add a column family to it.
Note: Use the same names for Bigtable instance, table and column family, as in the Cloud Function code:
~ $ cbt -project flespiio -instance flespi-bigtable createtable flespi-devices-timeseries
~ $ cbt -project flespiio -instance flespi-bigtable ls flespi-devices-timeseries
~ $ cbt -project flespiio -instance flespi-bigtable createfamily flespi-devices-timeseries msgs
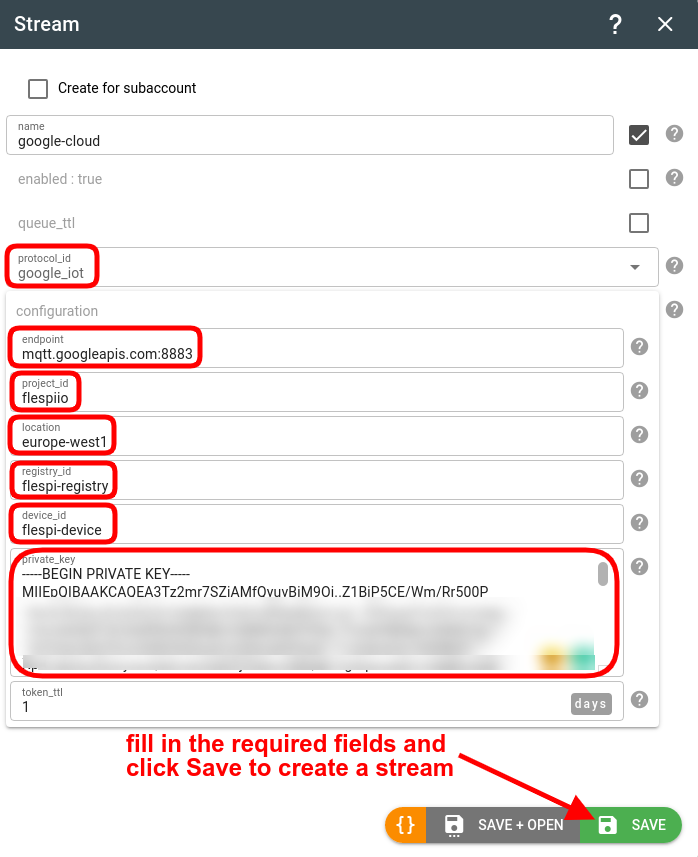
4. Configure a google_iot stream in flespi
Once the Google Cloud setup is completed, it’s time to set up a flespi google_iot stream.
The stream configuration is pretty intuitive and most of the required settings can be found in the Google Cloud Platform Console. In the https://cloud.google.com/bigtable field insert the contents of the rsa_private.pem file generated for device authentication. Here is how my stream configuration looks:
Checking the data flow
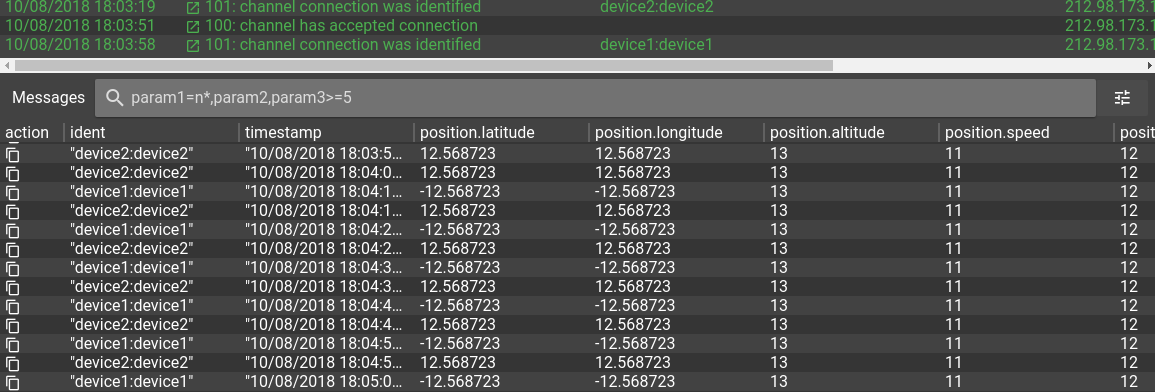
Finally, the goole_iot stream is created and subscribed to a flespi channel. It’s time to start data feeding and follow the data lifecycle in the logs. Like a river flows surely to the sea, the data from GPS trackers will flow to the Bigtable database.
Messages from GPS trackers in the flespi channel:
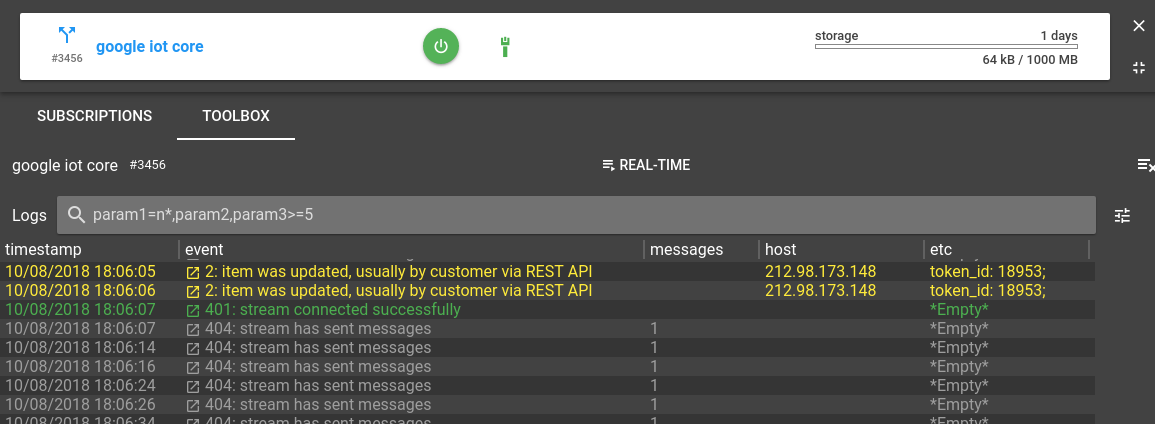
Messages are streamed to Google Cloud IoT Core:
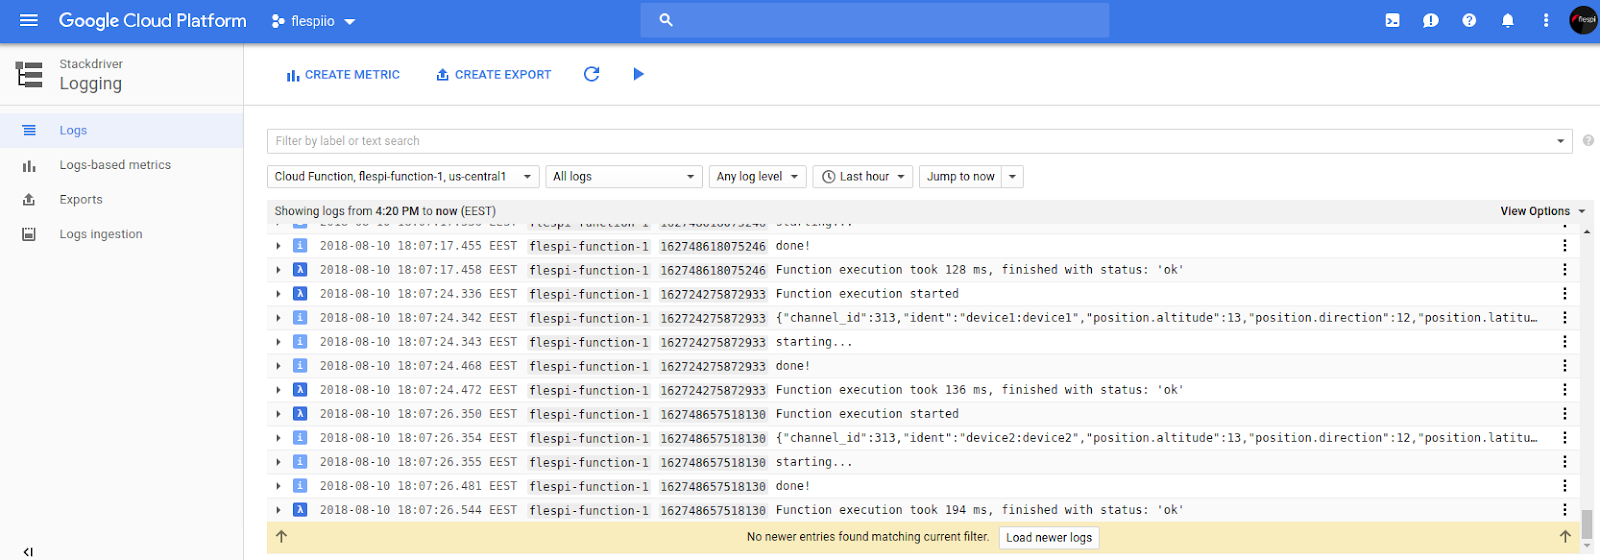
Messages are processed by the Google Cloud Function:
Messages are stored in a Bigtable instance:
~ $ cbt -project flespiio -instance flespi-bigtable read flespi-devices-timeseries
device1:1533910878
  msgs:msg                                 @ 2018/08/10-17:22:09.385000
    "{\"channel_id\":313,\"ident\":\"device1:device1\",\"position.altitude\":13,\"position.direction\":12,\"position.latitude\":12.568723,\"position.longitude\":12.568723,\"position.satellites\":14,\"position.speed\":11,\"timestamp\":1533910878.71726}"
----------------------------------------
device1:1533910888
  msgs:msg                                 @ 2018/08/10-17:22:10.298000
    "{\"channel_id\":313,\"ident\":\"device1:device1\",\"position.altitude\":13,\"position.direction\":12,\"position.latitude\":12.568723,\"position.longitude\":12.568723,\"position.satellites\":14,\"position.speed\":11,\"timestamp\":1533910888.712281}"
----------------------------------------
device1:1533910898
  msgs:msg                                 @ 2018/08/10-17:22:09.538000
    "{\"channel_id\":313,\"ident\":\"device1:device1\",\"position.altitude\":13,\"position.direction\":12,\"position.latitude\":12.568723,\"position.longitude\":12.568723,\"position.satellites\":14,\"position.speed\":11,\"timestamp\":1533910898.713156}"


...


----------------------------------------
device2:1533913835
  msgs:msg                                 @ 2018/08/10-18:10:36.477000
    "{\"channel_id\":313,\"ident\":\"device2:device2\",\"position.altitude\":13,\"position.direction\":12,\"position.latitude\":12.568723,\"position.longitude\":12.568723,\"position.satellites\":14,\"position.speed\":11,\"timestamp\":1533913835.608710}"
----------------------------------------
device2:1533913845
  msgs:msg                                 @ 2018/08/10-18:10:46.546000
    "{\"channel_id\":313,\"ident\":\"device2:device2\",\"position.altitude\":13,\"position.direction\":12,\"position.latitude\":12.568723,\"position.longitude\":12.568723,\"position.satellites\":14,\"position.speed\":11,\"timestamp\":1533913845.60867}"
Note: Bigtable stores data sorted by the row key. We used ‘ident:timestamp’ as a row key for messages, so for each device messages are sorted by timestamp. It makes the time range queries to the database highly efficient.
P.S. Read the original article about flespi and Google Cloud communication here.