Setting the scene
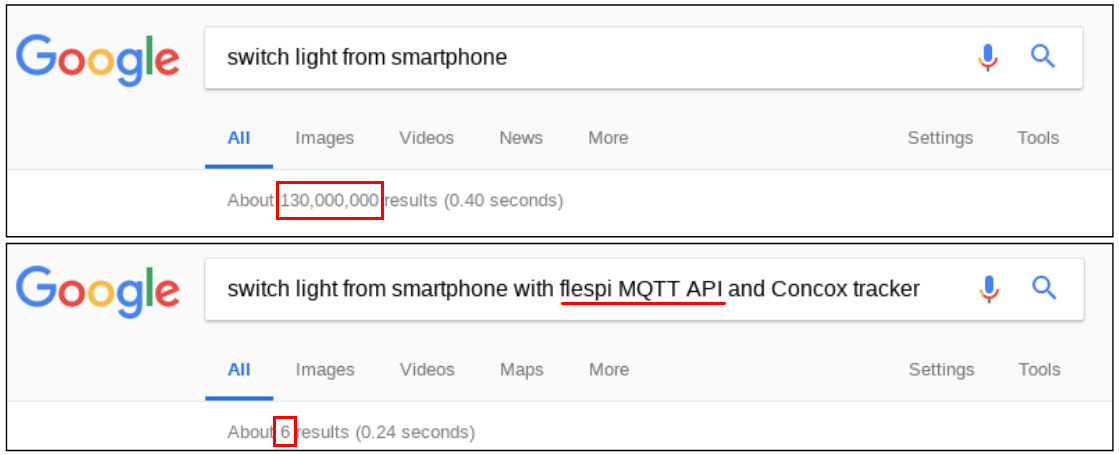
How many software engineers does it take to change a light bulb? - None, it’s a hardware problem :) However, if you are working in the IoT field, problems cannot be classified in terms of software and hardware. IoT projects aim to digitize the reality which means that developer has to keep in mind the entire chain of abstraction layers: idea -> model -> software -> hardware -> real-world -> user. The most obvious example here is to control the lights from a smartphone. Indeed, this is the simplest example of the human-thing interaction through the Internet, so this task is kinda “Hello world” for any IoT project. And if you try to find the solution for “switching on the light from a smartphone” you will be overwhelmed by the number of different approaches. But adding flespi to the search phrase slashes all the results :)
Someone needs to fill this gap. In this article, I will show you how to build a rather complex control system without stepping into the software development. Following is the model to implement:
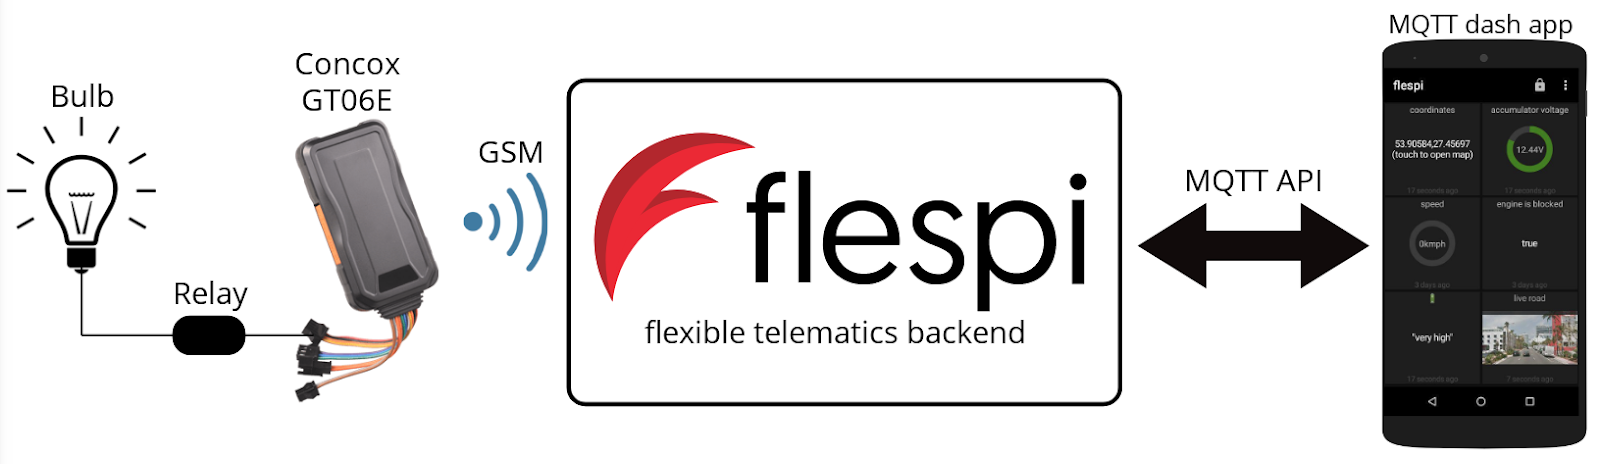
Hardware is a Concox GT06E tracker with some lights controlled by an external relay. The backend tasks are done by flespi and the number of internal technologies involved in this solution is massive:
connection to the Concox tracker is operated over flespi PVM technology
the relay is triggered by sending settings via device configurator tool
the command to device configurator is sent through MQTT API
the state of a command to be executed is controlled by logging for the events bus
the actual device state is taken from the telemetry module
On the user-facing side, we have MQTT dash Android app which allows to set up dashboards and control panels operated via MQTT protocol. Let’s do it!
Preparing the hardware
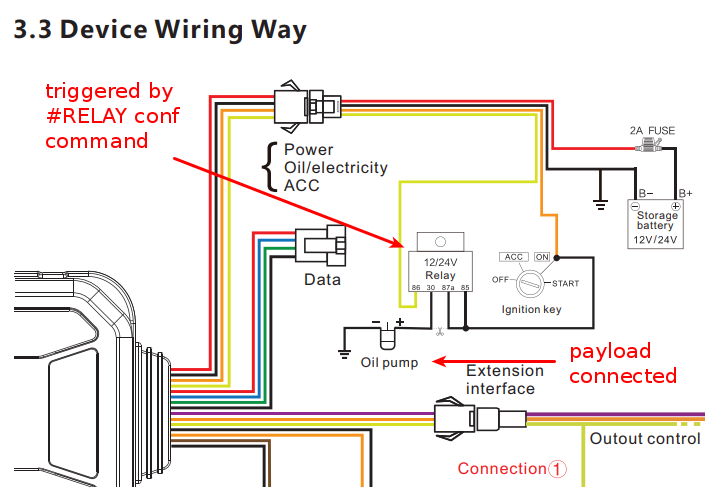
The light will be controlled by a relay triggered by GT06E external output responsible for engine cut off. The connection scheme can be found in the GT06E user manual and looks like:
Connecting the tracker to flespi
We covered the process of connecting a Concox tracker to flespi in Connectivity section of this article. It’s pretty straightforward:
create a channel operated by Concox protocol (see video manual here)
create a device of type Concox GT06E (see video manual here)
go to the new device Settings section, navigate to the Connectivity tab and set up Server and GPRS settings by sending SMS to device right from the flespi platform
check Toolbox to make sure device has successfully connected (give the device some time to connect to the 3G network and find GPS satellites)
navigate to Actions tab in Settings and play with Petrol/Electricity Control command to check that relay switches.
Setting up MQTT dash app
Hint: if you don’t want to reproduce the settings manually and just want to see how it works, you can scroll to the end of the article: there is a way to import the configuration to your app.
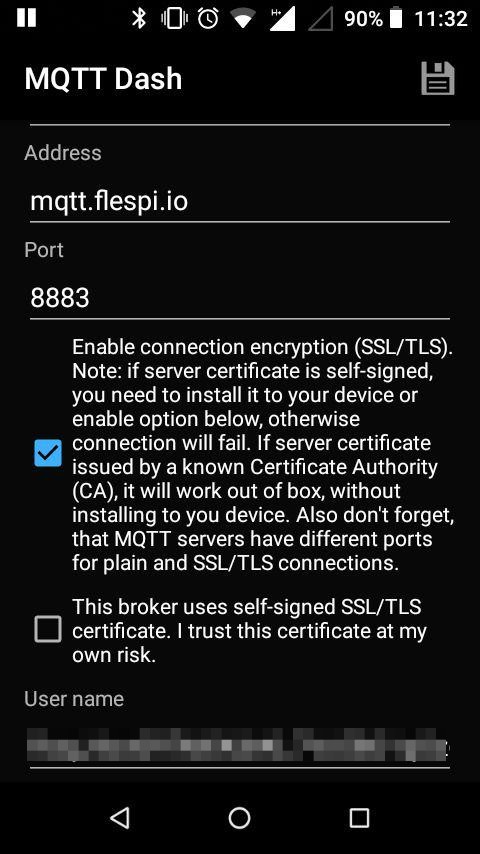
The first step in configuring MQTT dash is to set an MQTT connection profile. As specified in flespi MQTT broker configuration table, we need to specify mqtt.flespi.io as a broker address, use port 1883 for plain MQTT or 8883 for MQTT over SSL and use flespiToken as a username.
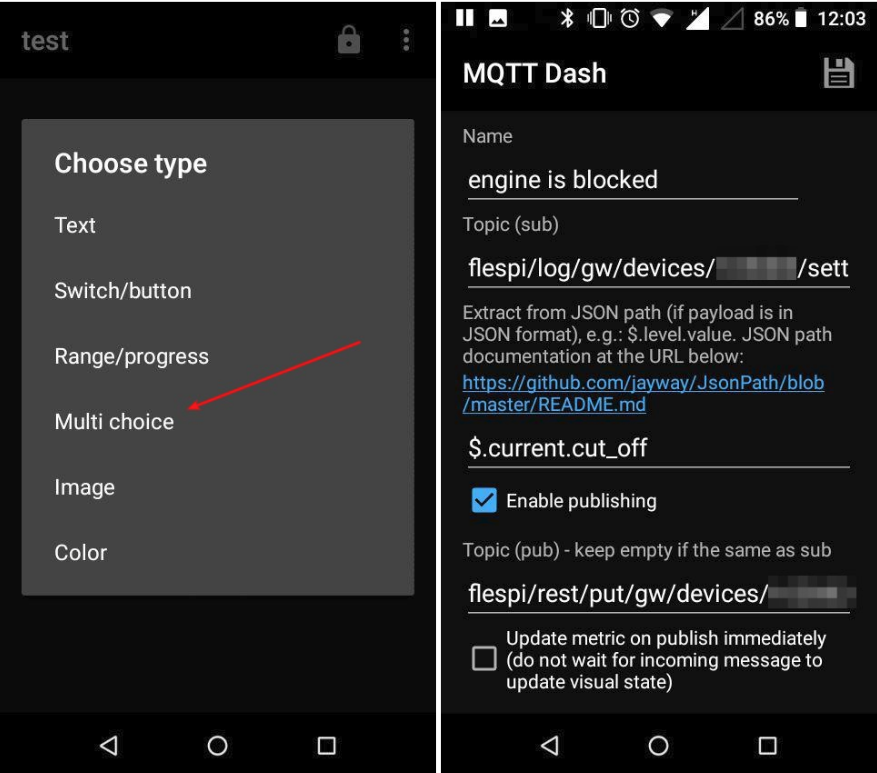
As soon as the connection to MQTT broker is established you can navigate to the dashboard and start creating visualizations. For our task, we need to create a multi-choice button. The button’s logic will be the following:
To switch the relay the button publishes MQTT API PUT call /gw/devices/settings/relay
full topic to publish is flespi/rest/put/gw/devices/{device-id}/settings/name=relay
payload to publish is taken from options that need to be added manually
payload is a JSON value
{
   “address”:”connection”,
   ”properties”:{
      “cut_off”:true/false
   }
}
To receive a message that the relay has changed its state the button subscribes to the log topic /gw/devices/settings/relay/accepted
the full topic to subscribe is: flespi/log/gw/devices/{device-id}/settings/relay/accepted
to extract the boolean value from the JSON payload received we use a special JSON path: $.current.cut_off
Note that by tuning the button in this manner you will not only send the control signal to the tracker but also see if that signal was delivered or not. Once you press the button, the signal will be sent over MQTT API and the button state will be updated only when the appropriate log record will be received. So if something goes wrong, you will know about it.
And that’s it! You have a nice cover for sending MQTT API calls and receiving a response from the logging system. You can see how it works in real life in this Youtube video:
However, this is not the end. MQTT dash provides many more interesting features so let’s see what else we can do with the data from a Concox tracker!
Building a custom visualization
In addition to a multi-choice button, MQTT dash provides a few tools to build custom visualizations with interactions. Let’s look at them from the telematics point of view.
Showing the location on the map
No, there is no “map”-widget in MQTT dash but there is something even more exciting: customizable Javascript handlers for each widget called on three different events:
on receive
on display
on tap
Javascript allows to do any data modification, publish processed data to different topics, store intermediate data between handler calls, and even open other applications with specified parameters! The most obvious way to use it is to subscribe to the device location and see the pin in Google maps as soon as the user touches the widget. Here is how you do it:
create a simple “text” widget and subscribe it to the topic flespi/state/gw/devices/{device-id}/telemetry/position (each time the position updates “On Receive” handler will be called)
the code to paste in “On Receive” handler editor field is the following:
if (!event.data) { event.data = {};}
var payload = JSON.parse(event.payload);
event.data['location'] = payload['latitude']+","+payload['longitude'];
event.payload = event.data['location']+'\n(touch to open map)';
In this code the newly received JSON payload is parsed, latitude and longitude are stored in an internal storage and the text displayed to the user is edited to show the tip.
the code to paste in “On Tap” handler editor field is the following:
app.openUri("geo:"+event.data['location']+"?q="+event.data['location']+"(IMEI:"+event.data['ident']+")");Visualizing the telemetry
Some useful tips to build a pretty looking dashboard by putting together important telemetry parameters:
add Range/Progress bar to show gauge data. E.g. subscribe to flespi/state/gw/devices/{device-id}/telemetry/external.powersource.voltage and set up the min/max range values between 0 and 15 with “V” postfix to see tracker’s live power supply voltage value
add Text widget subscribed to flespi/state/gw/devices/{device-id}/telemetry/battery.level.enum to see the internal battery state in human-friendly way.
moreover, you can create a device that captures images, stores them in flespi storage CDN and publishes the link to a file in a certain topic. Then you want to subscribe the Image-widget to this topic and see the image captured right from your dashboard with live updates!
Replicating the MQTT dashboard
Once the dashboard is created you can share it by publishing to a certain topic as a retained message. The full configuration of your current dashboard will be published to MQTT broker and once you “Subscribe and wait for metrics” on another empty dashboard, it will be received and applied:
I created a limited token iPLyok0qEmYq1h6IzcOx7dchRscZ0Rv7w4vIclWGvJVmORVcRxzOAAUfSW2IBmFV that you can use to download the dashboard. This token allows only to subscribe to metrics/exchange and demo/cdn/image topic to see how config replication works. And then you need to tune the configuration to your needs.
Conclusion
You see, you don’t need to be a great programmer to create a good-looking and functional IoT app. E.g., tracking device connectivity job is done by flespi, and MQTT dash can be used as a simple mobile application with a dashboard and a control panel.