Forwarding the data from telematics/IoT devices into the Amazon AWS IoT Core is a common task that, when complete, opens immense opportunities for handling the data in the Amazon ecosystem. Once the data from your device(s) appears in flespi, sending it to AWS is fast and straightforward.
In this blog post, we describe an alternative way to send data to AWS SQS queue via AWS Lambda using the HTTP stream.
Prerequisites
Flespi channel working over the appropriate protocol to collect the data from your IoT/telematics hardware.
Flespi device to have a virtual representation of each physical device in the flespi platform with dedicated long-term storage, access to telemetry, real-time analytics capabilities, and more.
Registered account with Amazon AWS IoT Core to set up the receiving side.
AWS IoT thing configuration
Note: you can follow the original guide from AWS here or our steps below.
On the Amazon side, we start from the AWS Management Console:
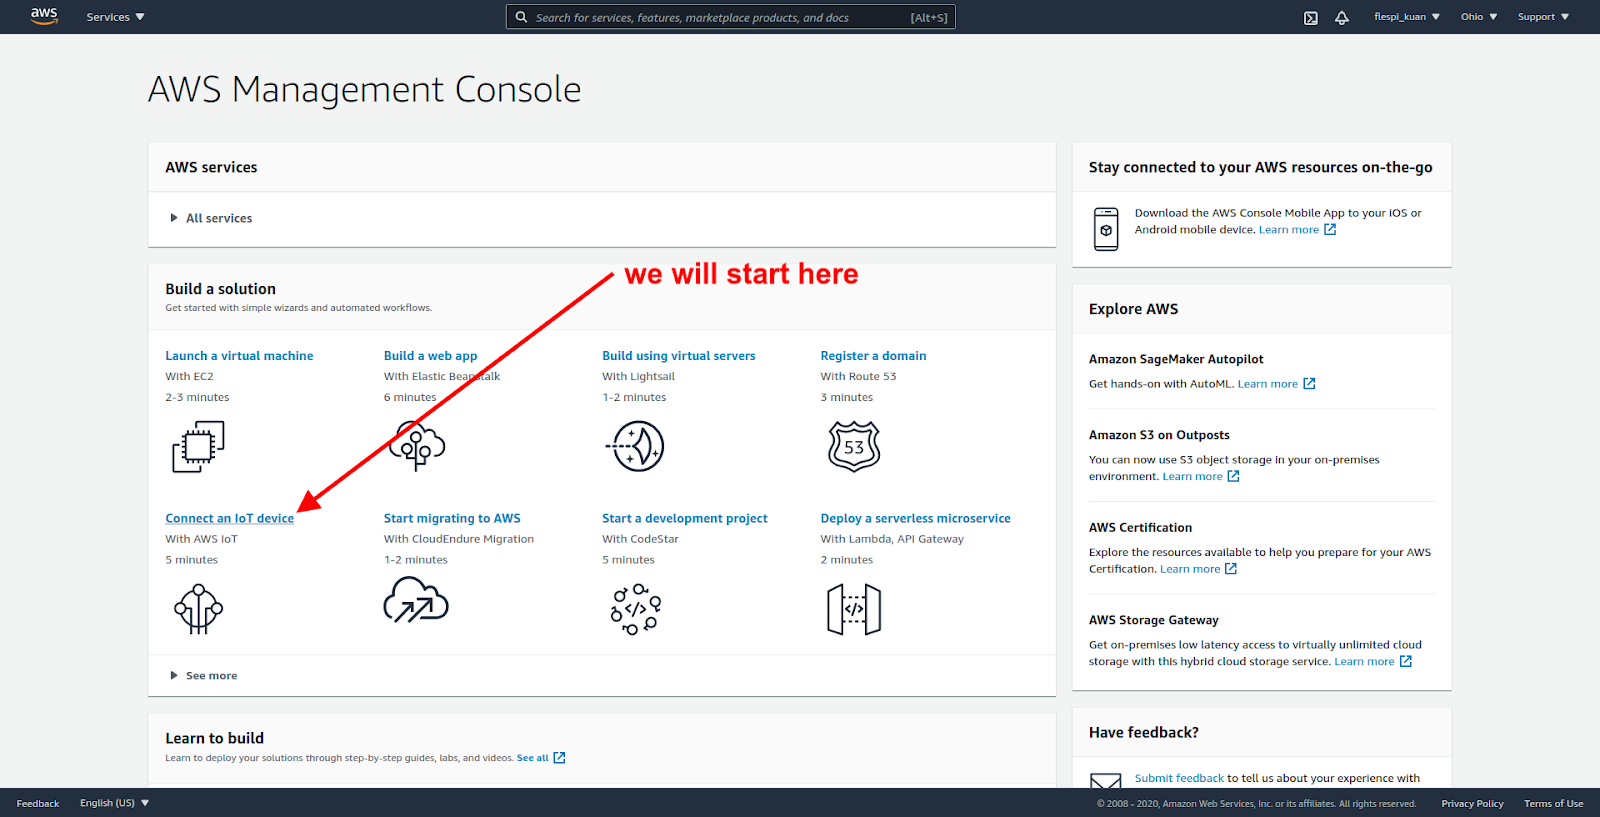
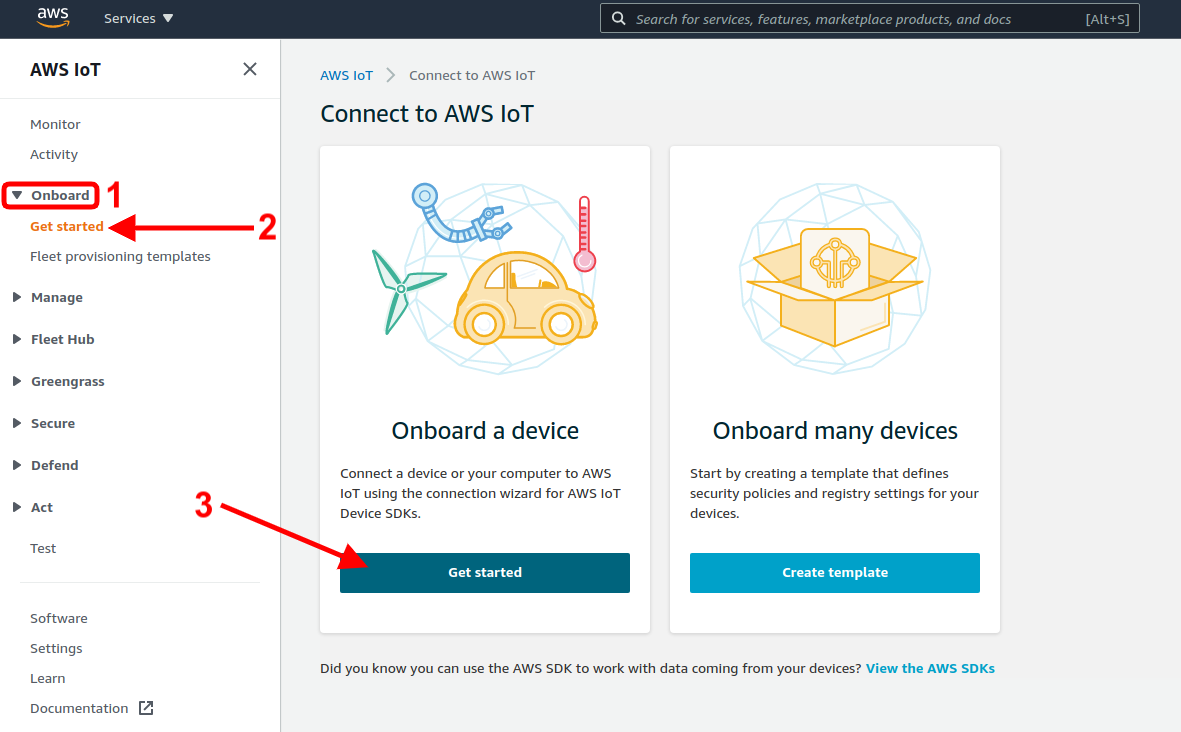
Go to the Connect an IoT device section.
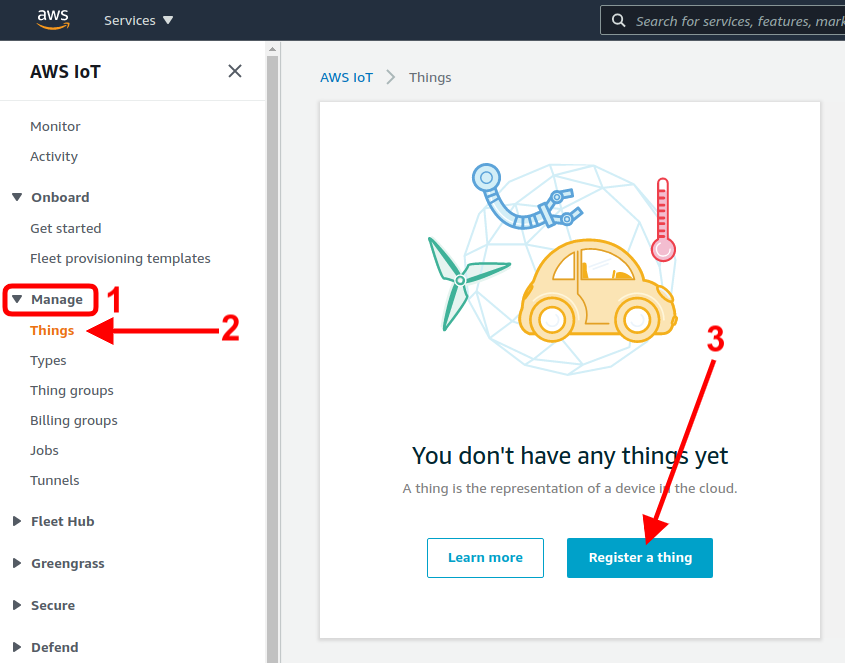
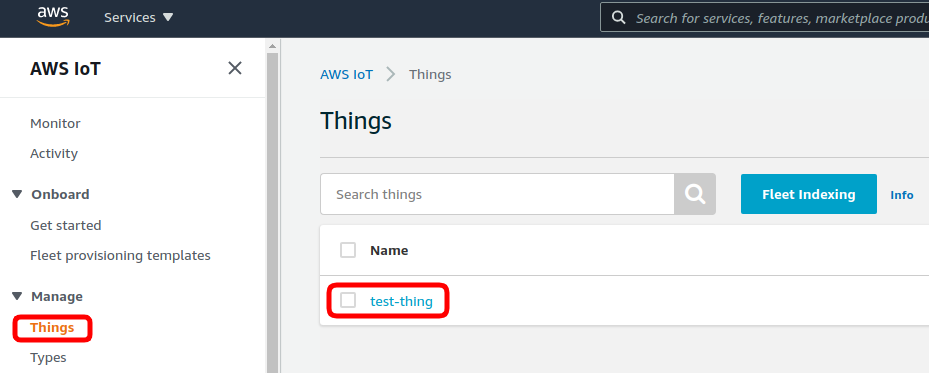
Once in the AWS IoT section, unfold the Manage left-side menu and select the Things item. Click on the Register a thing button.
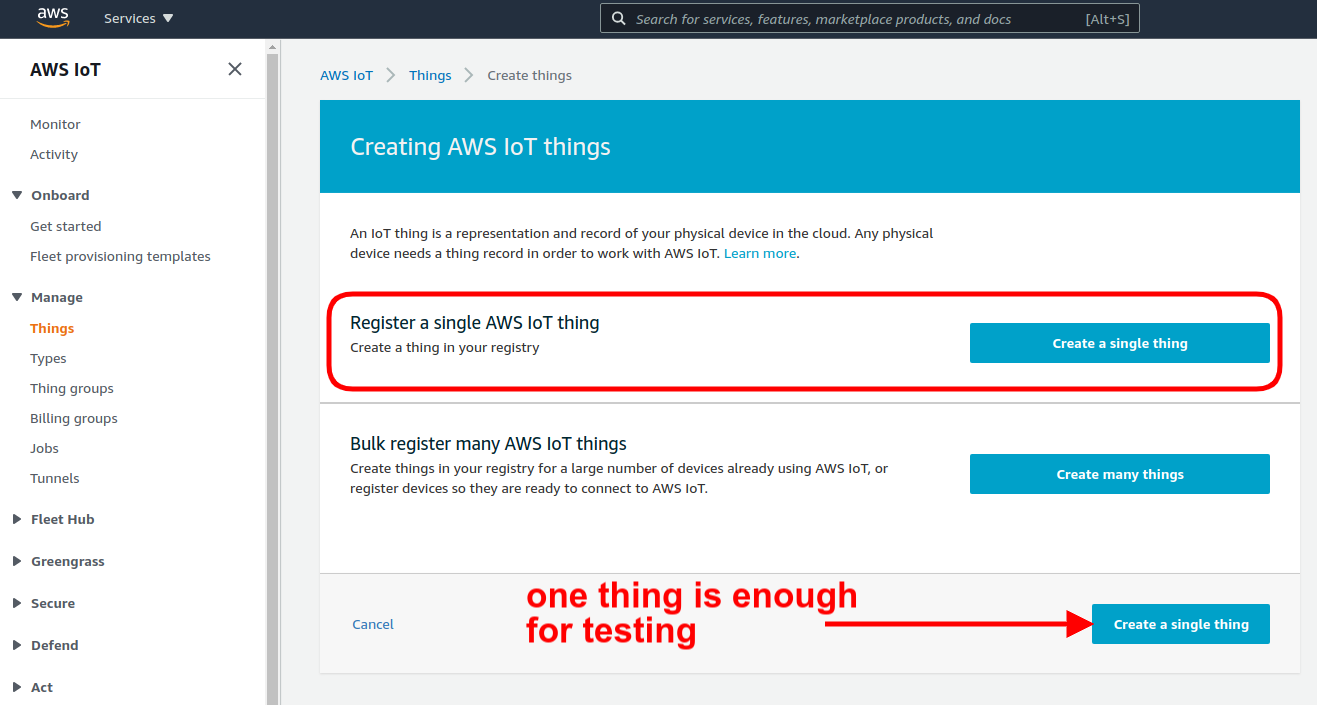
Then you decide whether you want to create one thing or several things in bulk. For demonstration purposes we create one thing:
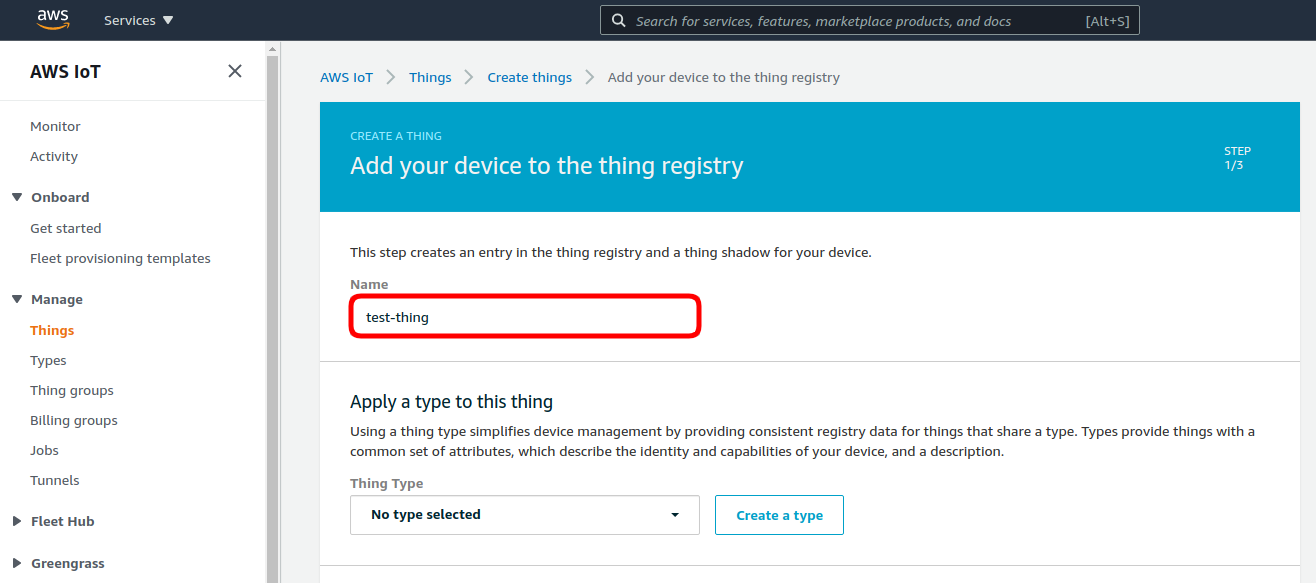
The minimum information you should provide to create a thing is its name:
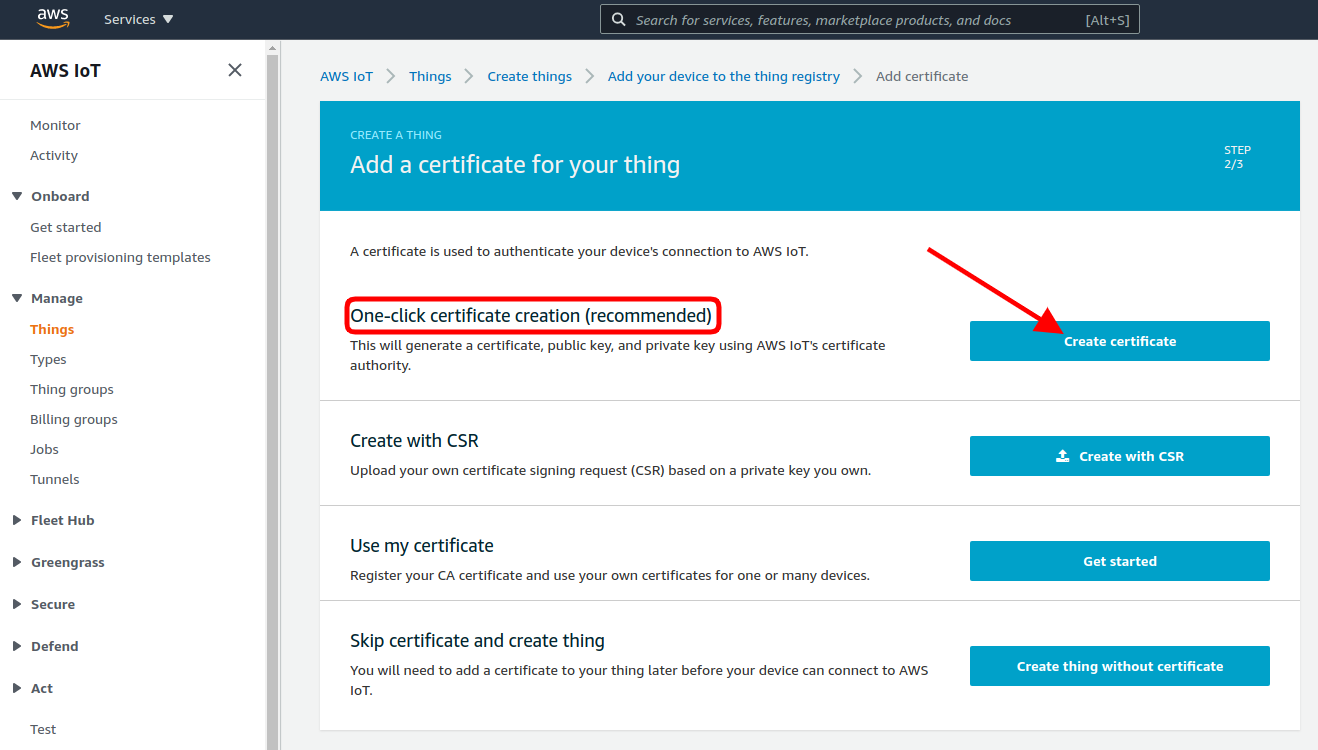
On the next step of the thing creation, you should generate a certificate to authenticate your device's connection to AWS IoT:
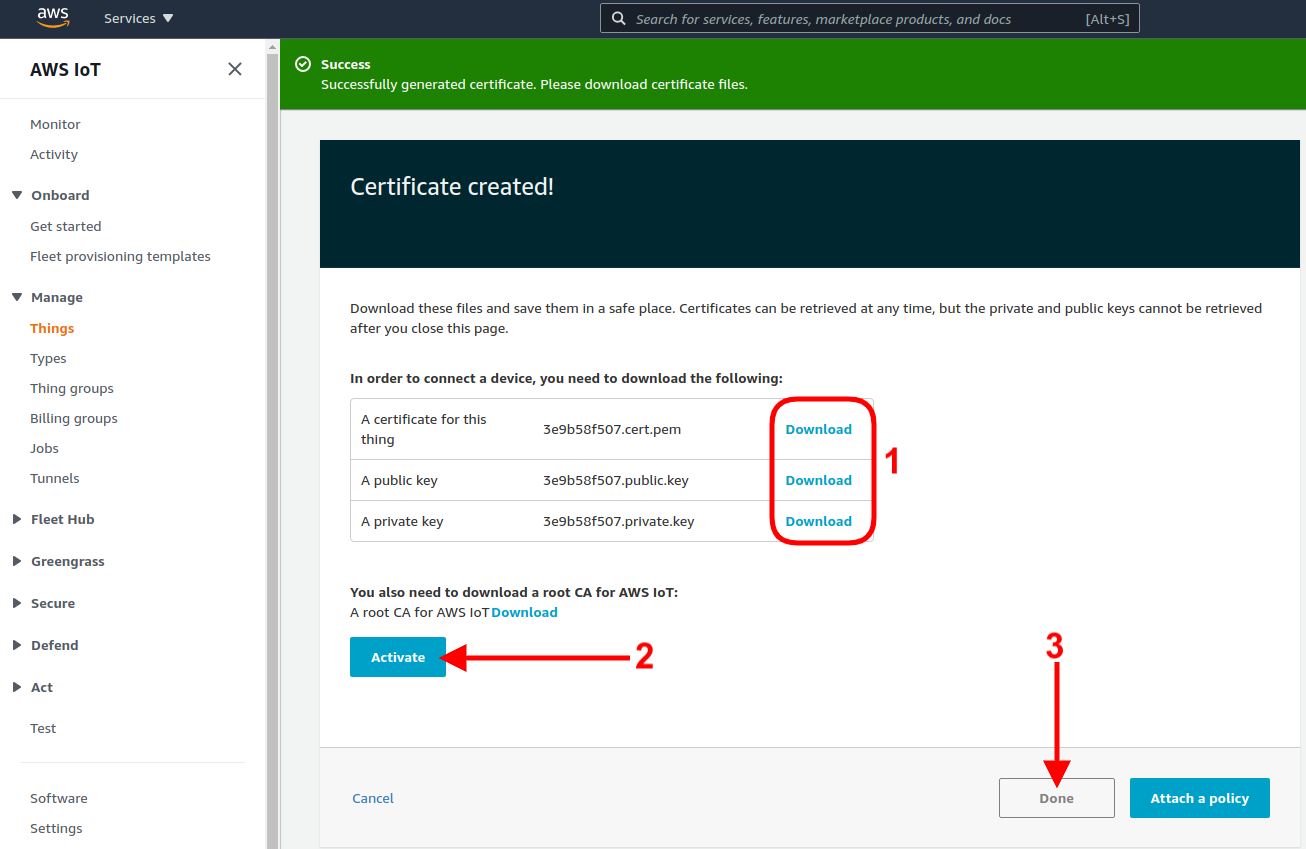
Download all generated files and store them in a safe place. You will need XXXXXXXX-certificate.pem.crt and XXXXXXXX-private.pem.key certificates to configure the aws_iot stream in flespi.
Then click the Activate button to activate the certificate.
Click Done to finalize the thing creation.
This is our newly created thing:
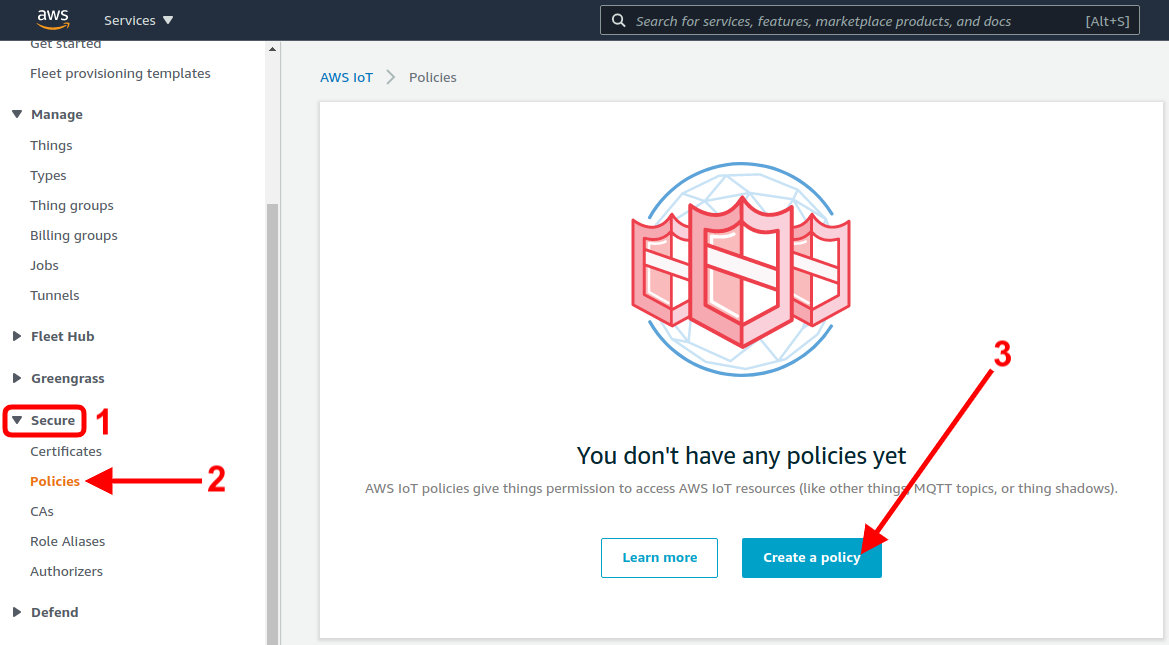
Next, we need to create a policy (see AWS docs here) to define things permission to access AWS IoT resources. Go to Secure -> Policies -> Create a policy:
For ease of demonstration we can simply grant full access:
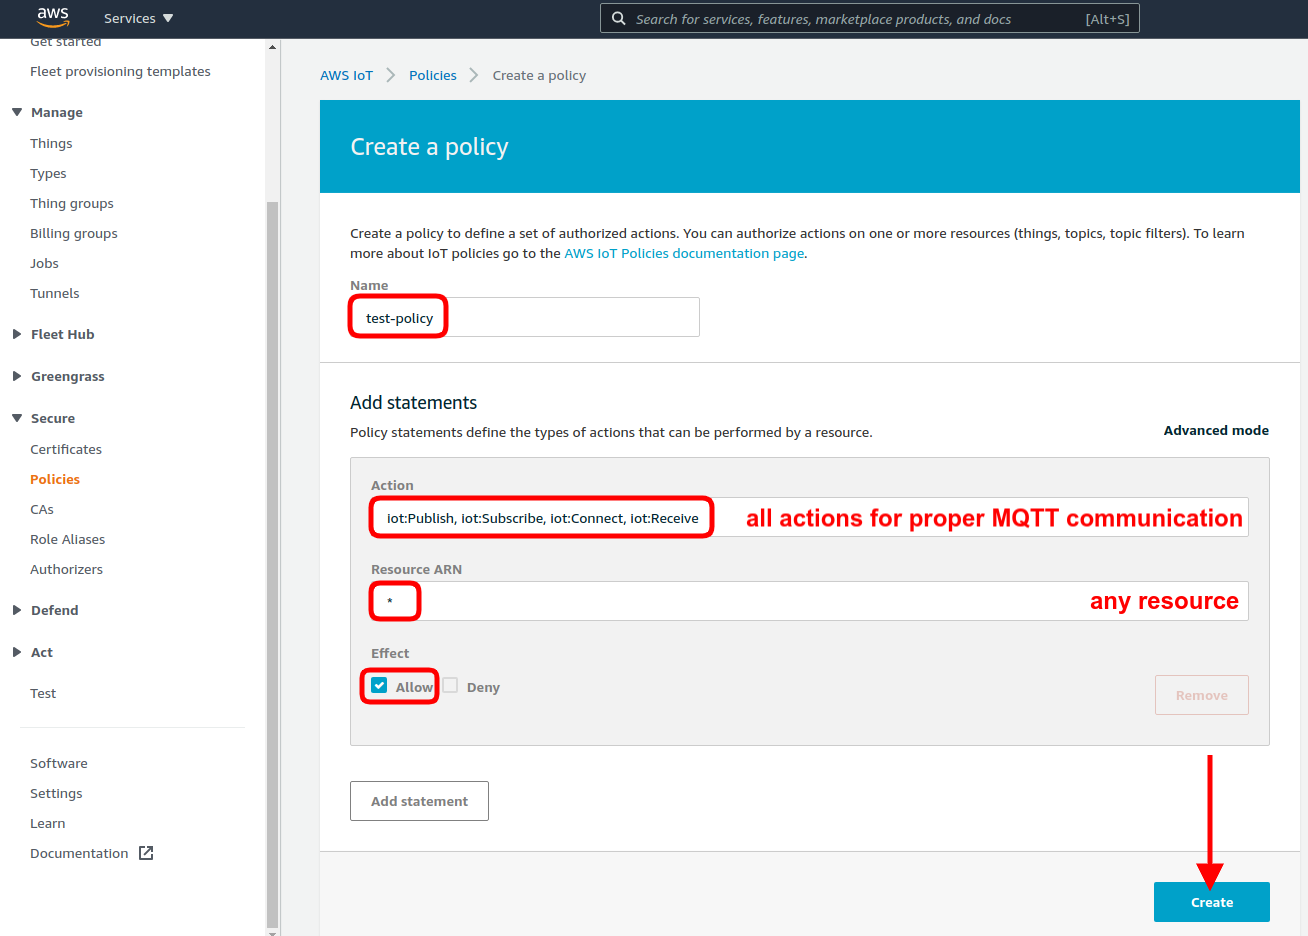
And here’s our policy

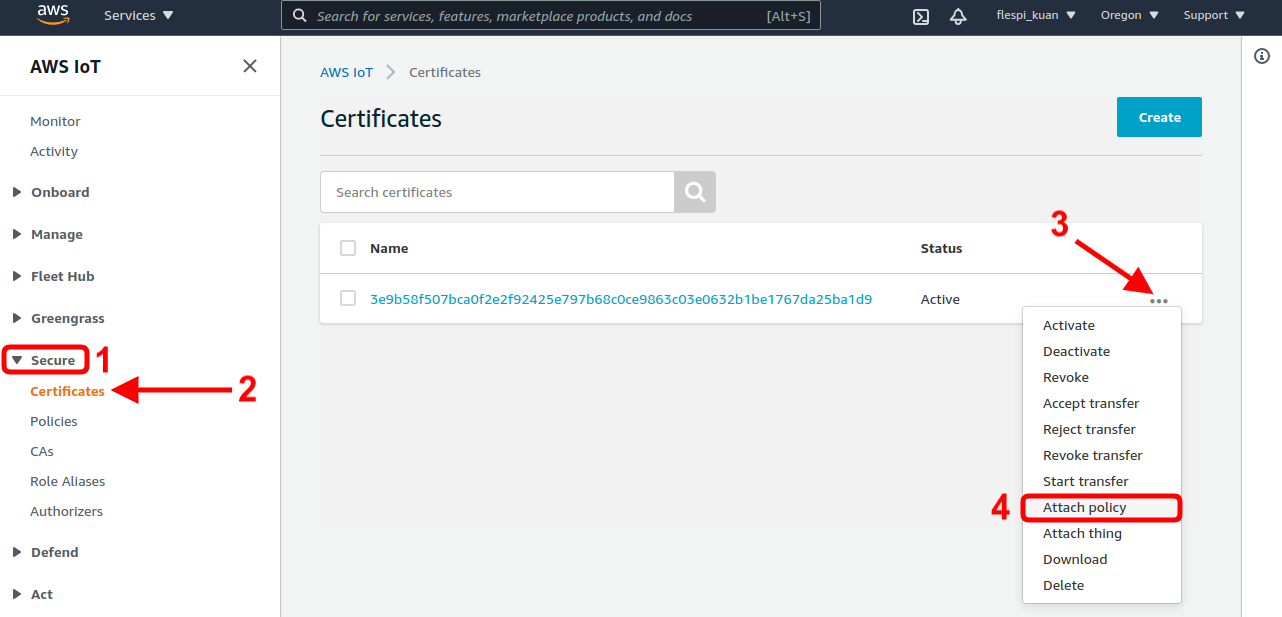
Now we need to attach the policy and the thing to the certificate.
Open Secure -> Certificates. Click on the three dots for the certificate and select Attach policy:
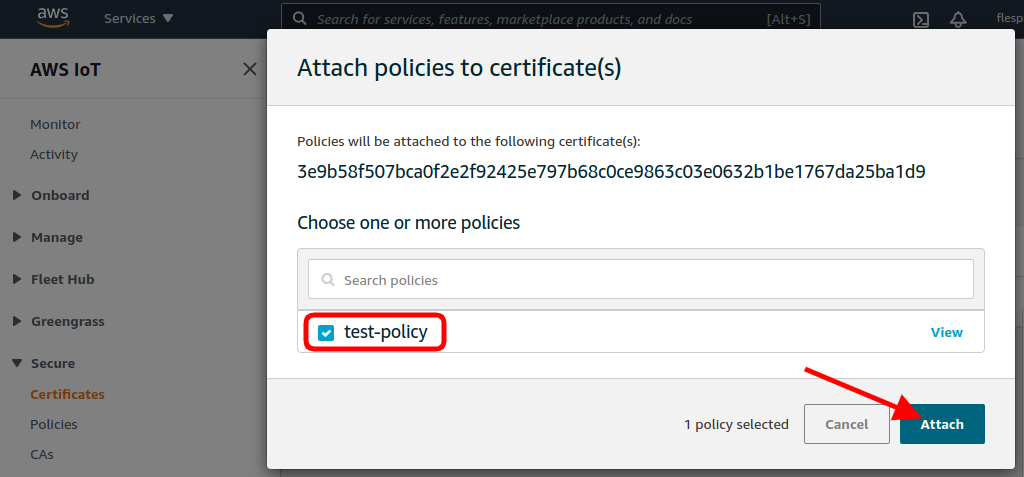
Pick the policy we’ve created and click Attach:
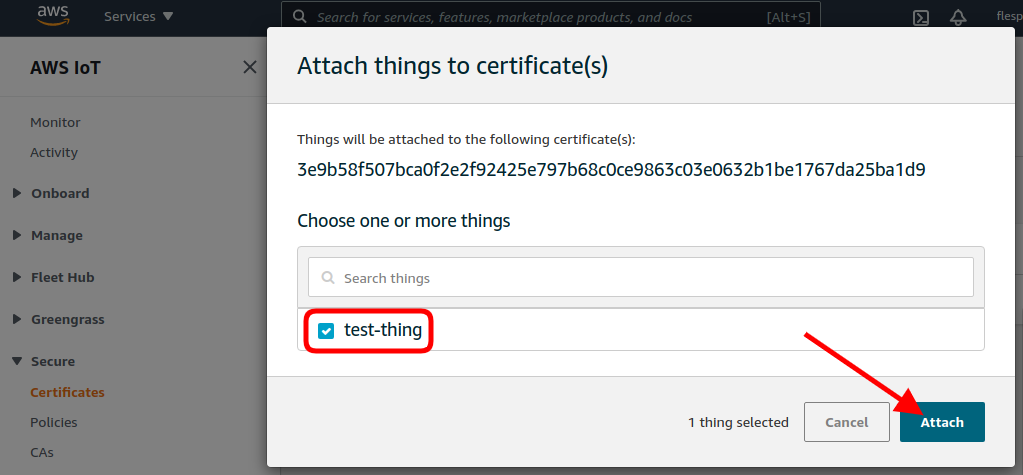
Then we follow a similar process to attach a thing - click on the three dots for the certificate and select Attach thing:
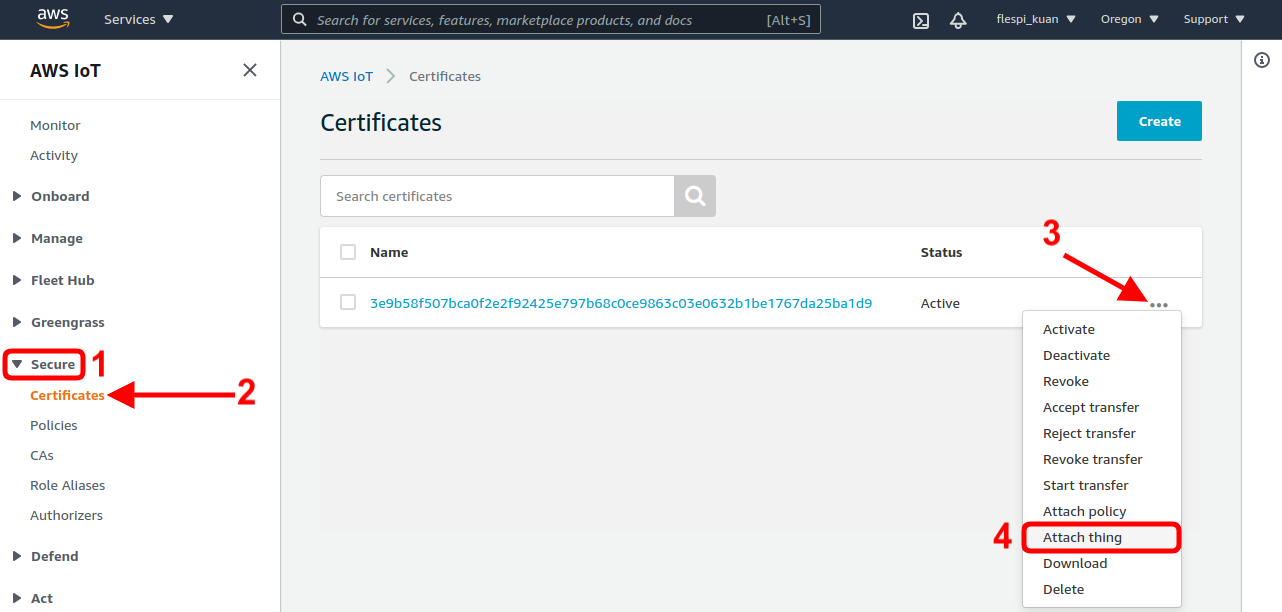
Pick the thing we’ve created and click Attach:
Fast-forward way to configure a thing
Once in the AWS IoT section, unfold the Onboard left-side menu and select the Get started item. Click on the Get started button for the Onboard a device option.
Note: on the AWS side we are using the following API: https://docs.aws.amazon.com/iot/latest/developerguide/device-shadow-mqtt.html#update-pub-sub-topic.
Flespi AWS stream configuration
Back to flespi now. We are ready to create an aws_iot stream.
Go to Telematics hub -> Streams -> green “+” button.
Give your stream a name.
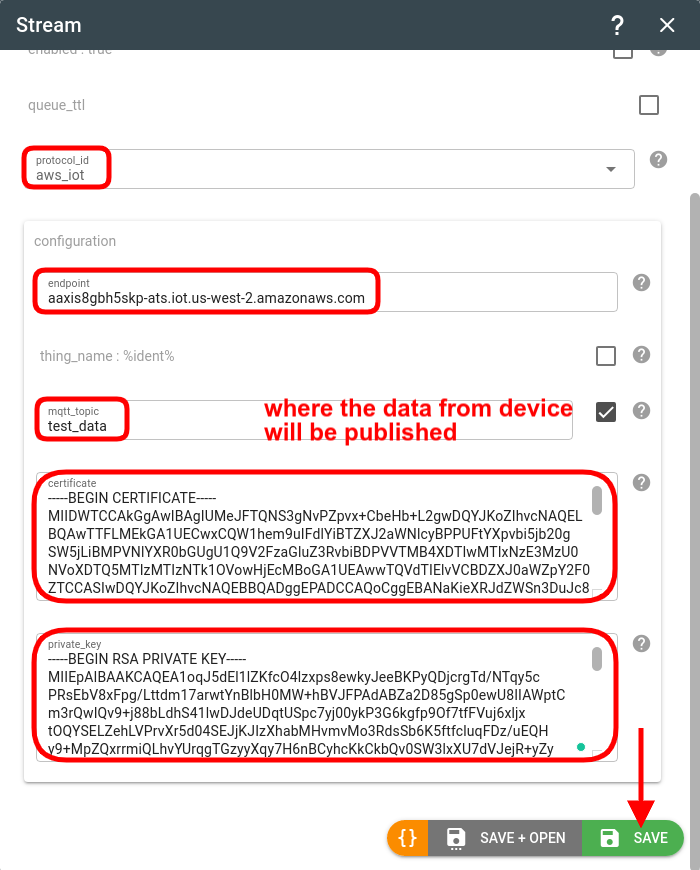
Pick the “aws_iot” protocol ID.
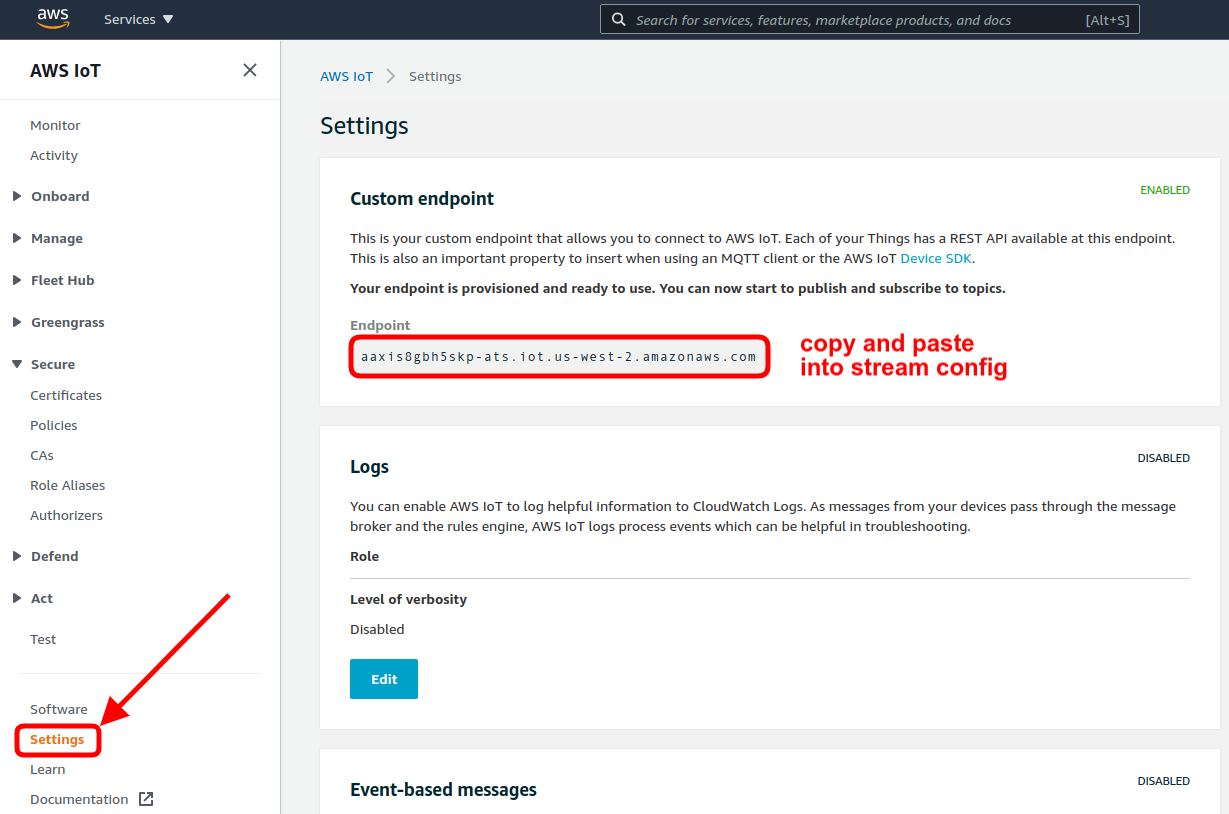
Find the Endpoint in the AWS IoT Console -> Settings.
Copy and paste the content of the previously downloaded XXXXXXXX-certificate.pem.crt and XXXXXXXX-private.pem.key files into the certificate and private key fields respectively.
Click Save and the new stream will appear in the streams list. It should turn green shortly.
Click on the newly created stream and go to the Logs tab:
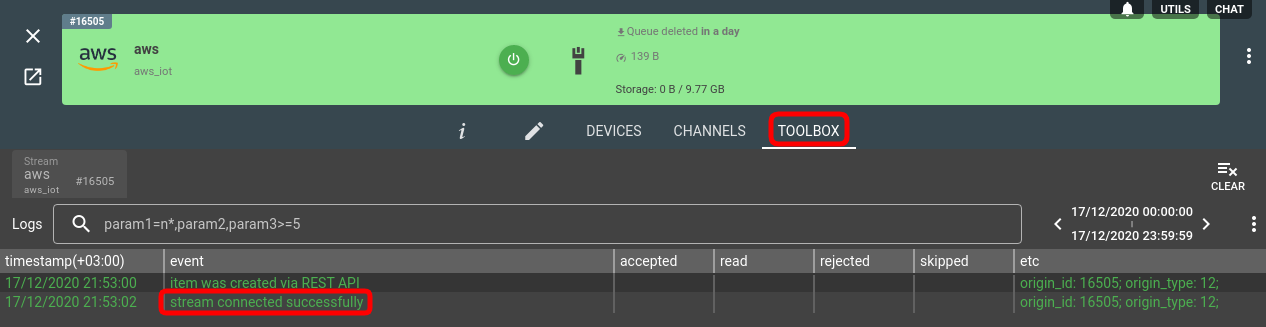
You should see the “stream connected successfully” log record that means the connection with AWS was established and the stream is ready to send messages. If you see any red line you may check the raw traffic and analyze responses from AWS side for more details but the most common problem is the authorization and incorrectly configured device policy.
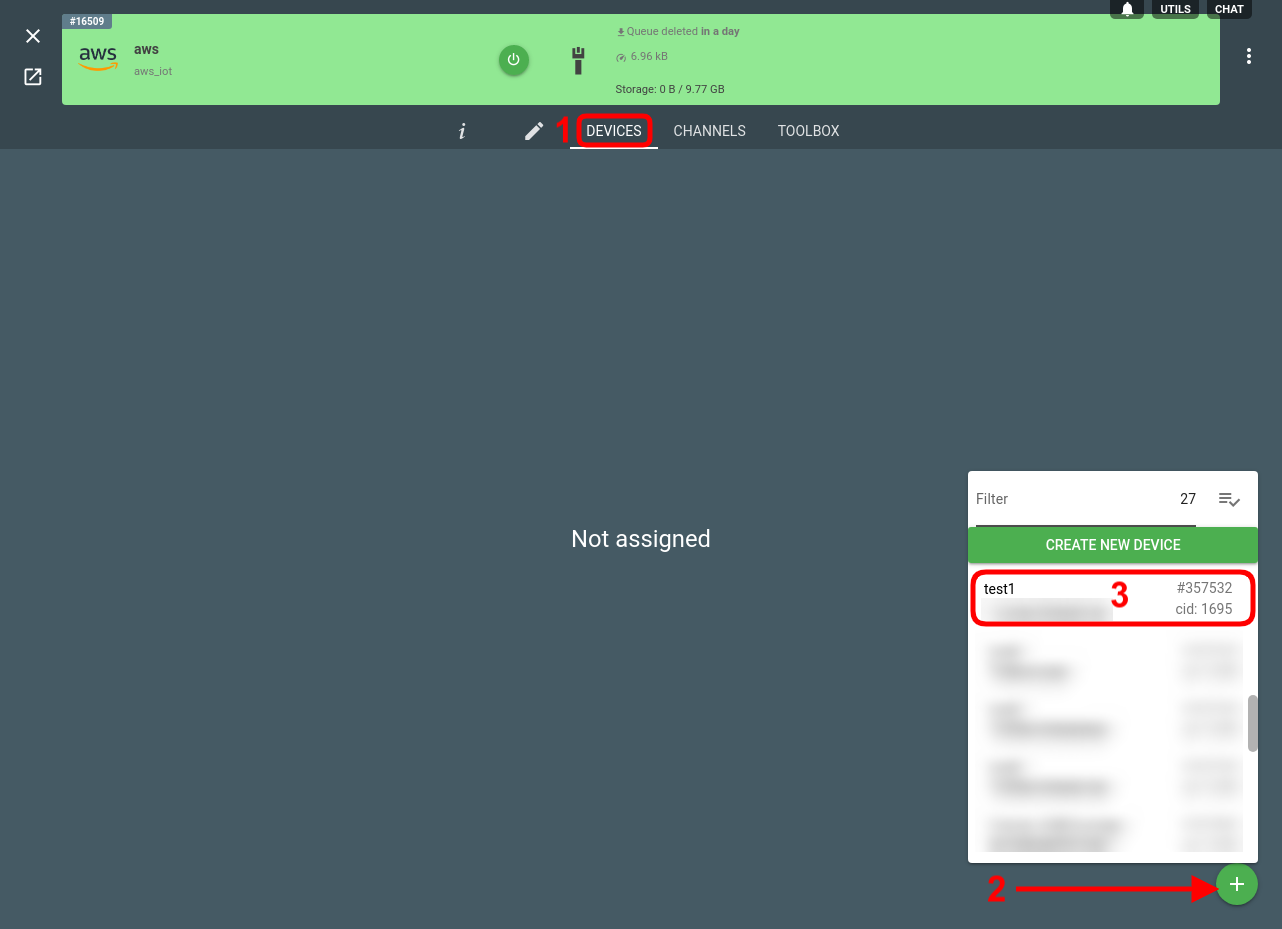
Now we can assign a device to the stream to start sending messages.
Switch to the Devices tab, click the green “+” button and pick the device you need:
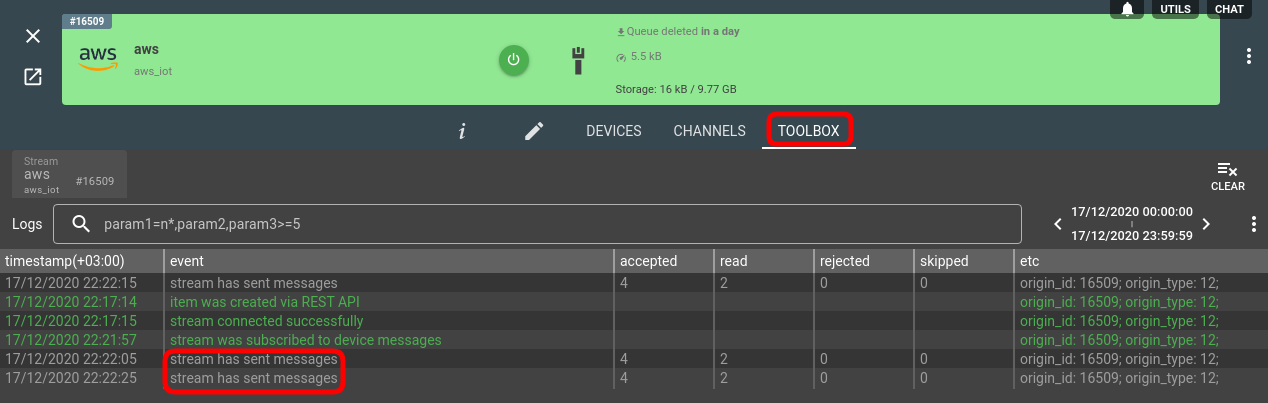
If you switch back to the Logs tab after that, you should see the confirmation that the messages are dispatching to AWS:
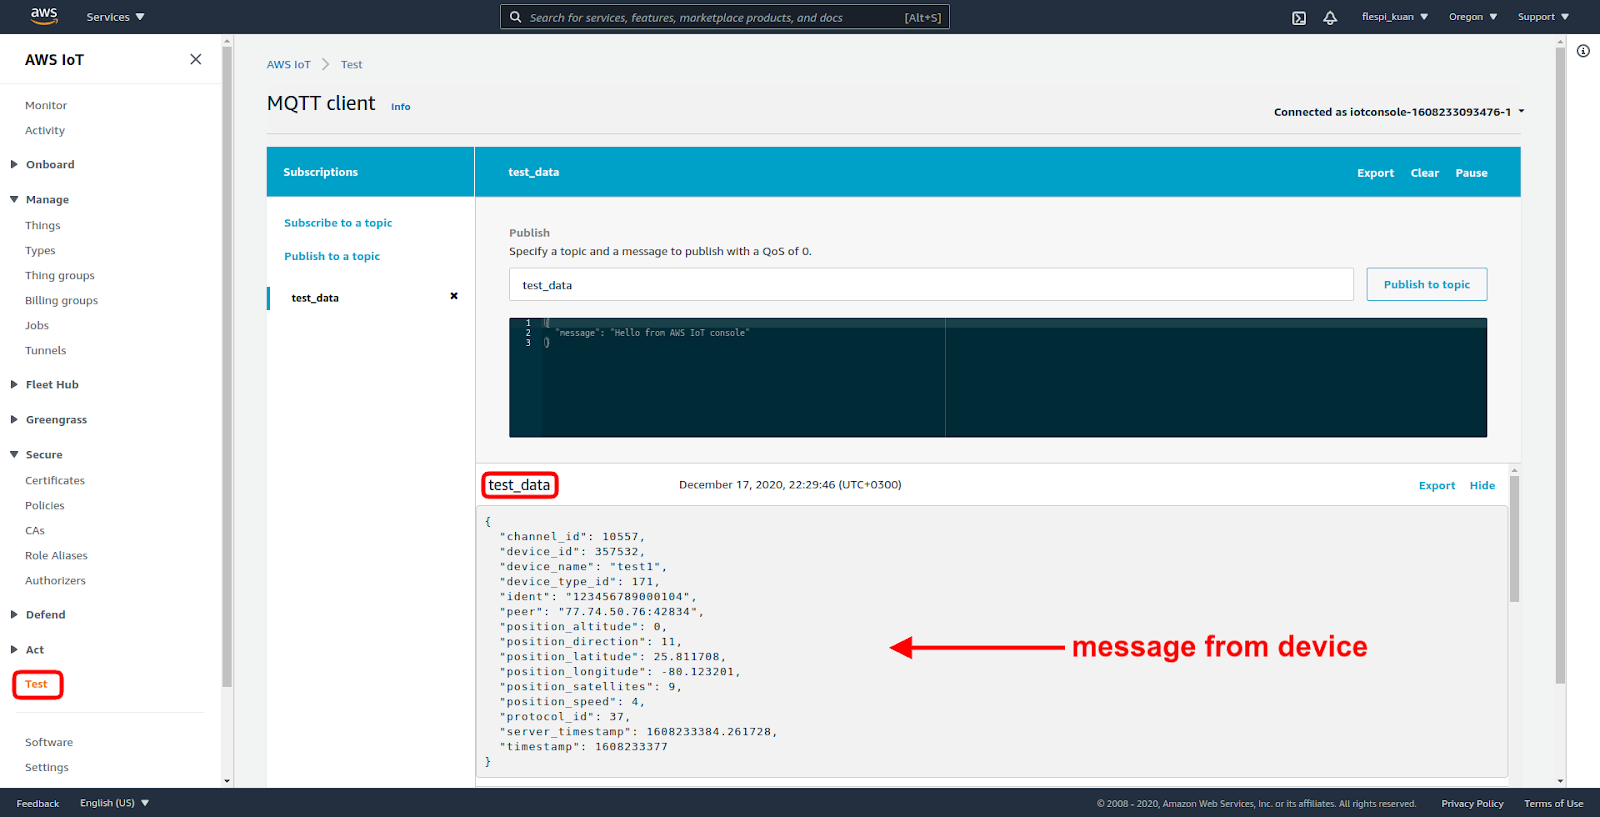
What’s in AWS?
Go to the Test section, type the MQTT topic we specified in the “aws_iot” stream configuration (we used “test_data”) and click Subscribe to topic:
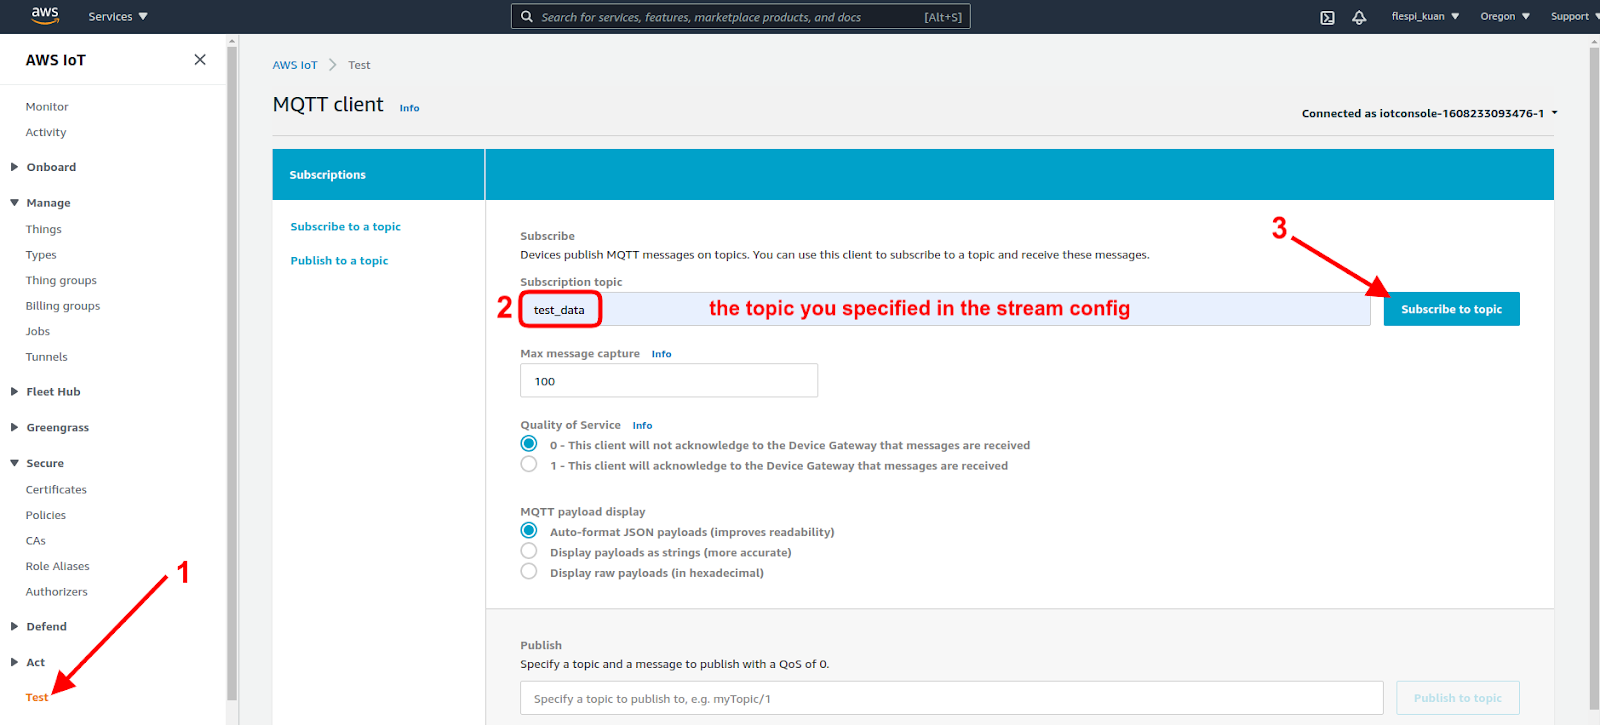
AWS stream automatically publishes to the topic to update the shadow. The topic has a format '$aws/things/{thing-name}/shadow/update' and payload format is '{"reported":{...}}'.
If your device is actively sending new messages, you should shortly see them here:
Troubleshooting
If the Logs tab for the AWS stream shows successful connects followed by disconnects repeatedly, the problem is most likely with the configuration of the AWS policies:

Be aware that the MQTT Broker served by AWS has quite a lot of unusual limitations and non-standard behavior which we discovered in practice. For example, when the message size exceeds 128KB or the frequency of messages exceeds your AWS IoT Core plan limits, the AWS MQTT Broker stops responding, which violates the MQTT specification. Our stream implementation has such safety belts built in - we skip delivery of messages above 128KB and automatically resend messages if the AWS MQTT Broker doesn't acknowledge them within a certain timeout.
Should you experience any other difficulties when establishing communication with AWS, tell us about the issue in the Helpbox chat.
***
Now that the device data is in the AWS thing, you can apply all the vast capabilities of the Amazon AWS IoT Core ecosystem to process and handle it as per your business needs.
To deliver only certain messages, parameters in it or convert message parameter names into different notation read generic stream configuration.