Scooter sharing companies across the globe choose flespi to accelerate the development of their solutions and focus on crafting an appealing business offering rather than on the internal technicalities. flespi will readily integrate new popular e-scooter brands and models upon request from the Commercial users.
We already covered the general scenario to follow when creating a new scooter sharing application. In this article, we will focus more on the technical aspects of e-scooter management and show how to accomplish some of the basic tasks inherent to this business.
Let’s take a specialized e-scooter GPS tracker — Teltonika TST100 and see how to set it up using flespi.
Scooter configuration
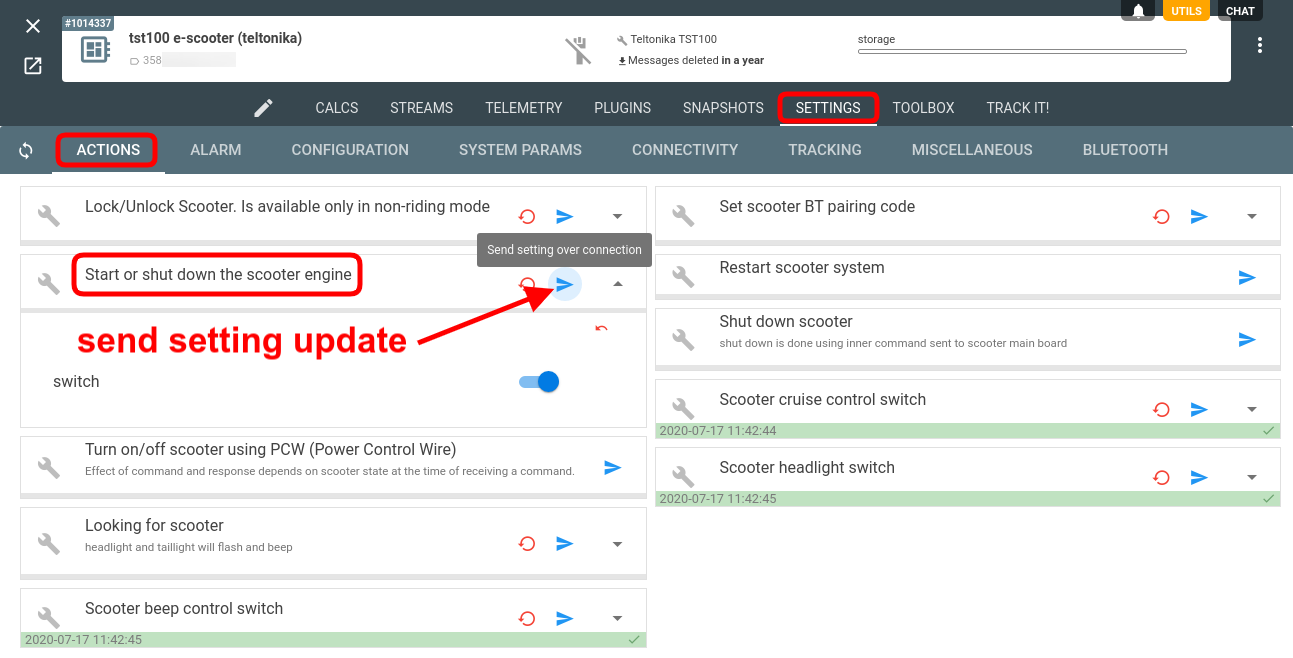
The Settings tab for the registered Teltonika device contains a variety of parameters that can be set based on your project needs:

Actions tab allows changing scooter behavior, e.g. managing light modes, restarting the scooter, turning it on and off, setting Bluetooth pairing, and more.
Alarm tab allows configuring various alarms to notify about important events.
Configuration tab hosts a number of parameters for enabling/disabling various scooter functions, specifying phone numbers for calls and text messages, etc.
System params tab allows configuring motion detection source, static navigation mode, sleep mode settings, and more.
Connectivity tab is all about GPRS server configuration.
Tracking tab allows configuring how often the tracker will report the scooter position when in different modes.
Miscellaneous tab includes green driving options, overspeeding and jamming scenarios.
Bluetooth tab is aggregating settings related to connecting the BLE beacons to the tracker and establishing their communication.
Now let’s see what we can do with the data we get from the tracker.
Trips & stops info
Since we are talking about tracking devices here, let’s first look at how we can process the incoming location data to get the basic information about the trips and stops.
For this purpose, we will create calculators (a central notion of the flespi analytics engine).
Note: calculators work with devices, so we assume that you have the virtual device created for your Teltonika tracker and see the messages accumulating in flespi.
Let’s see what configuration will let us aggregate the original messages into intervals (trips/stops) based on the relevant sets of criteria.
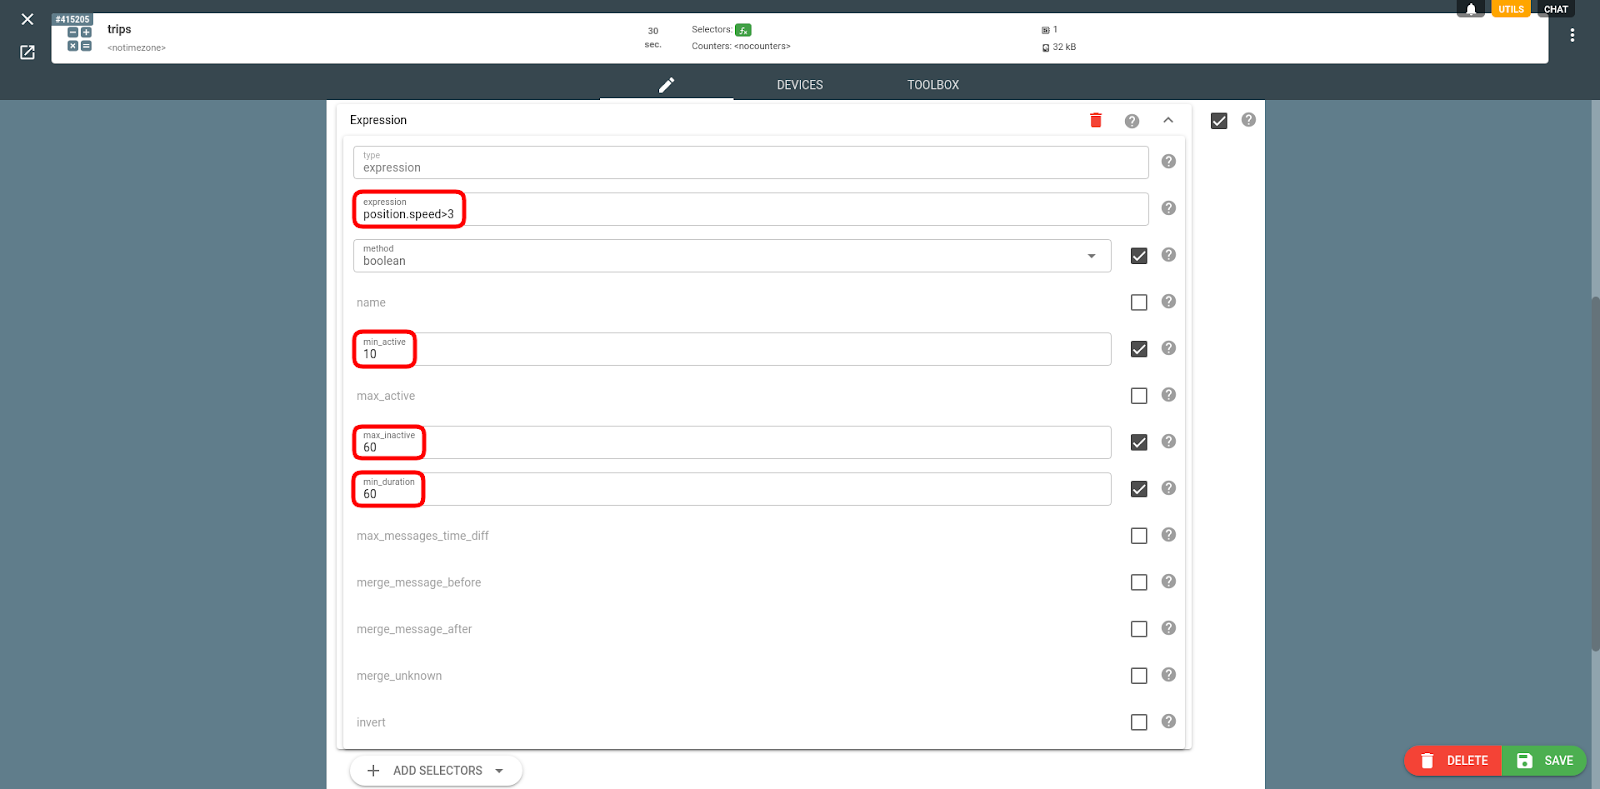
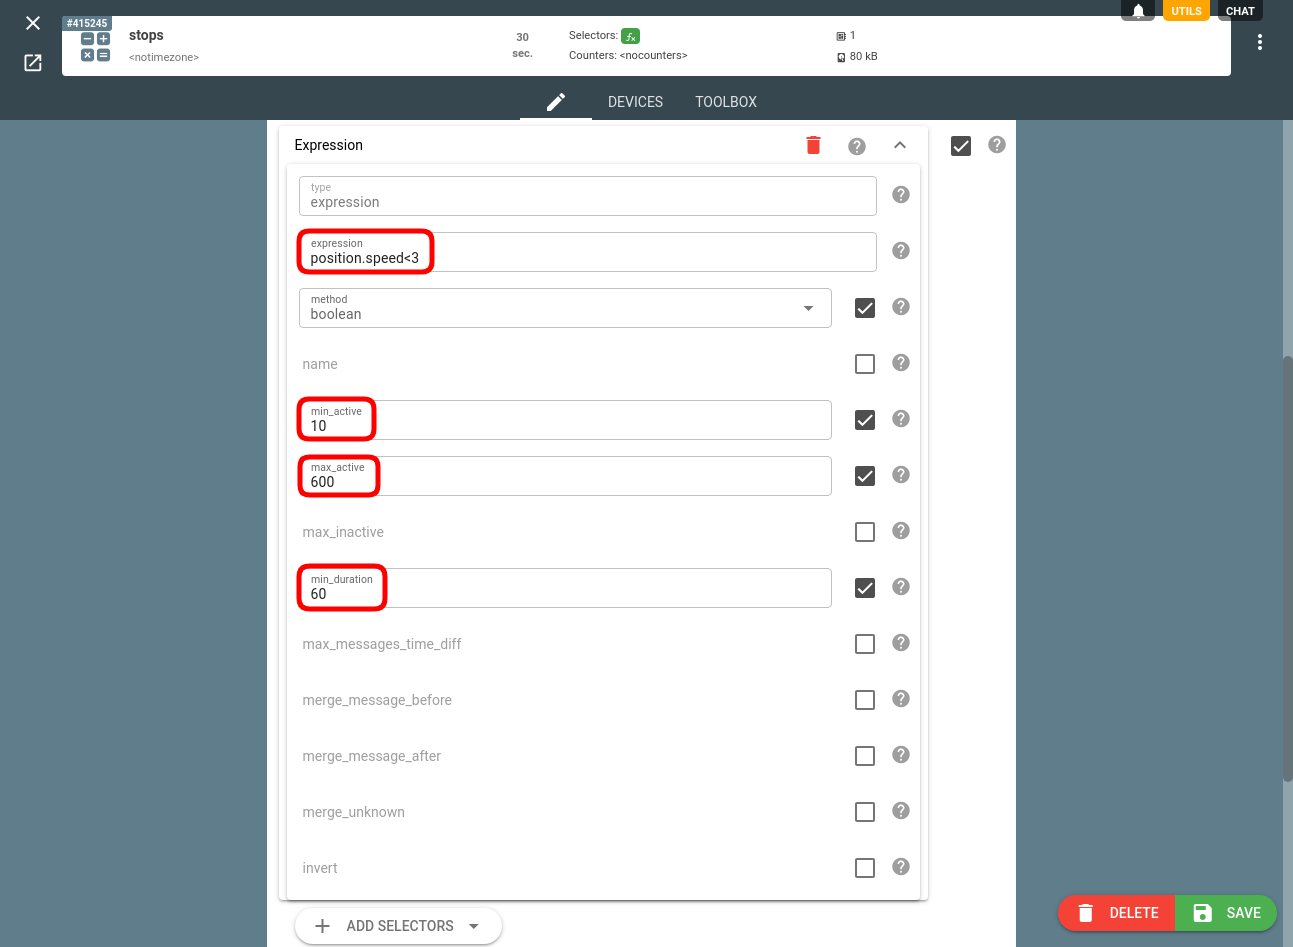
Say, we will call it a trip when:
The scooter moves with the speed higher than 3kmh (see, the expression on the screenshot below)
The minimal trip segment is no shorter than 10 seconds (min_active parameter)
The minimal total trip duration is no shorter than 60 seconds (min_duration parameter)
Short stops of less than a minute during the trip will be disregarded (max_inactive parameter).
Log in to the flespi panel, and navigate to Telematics hub -> Calculators -> “+” button:
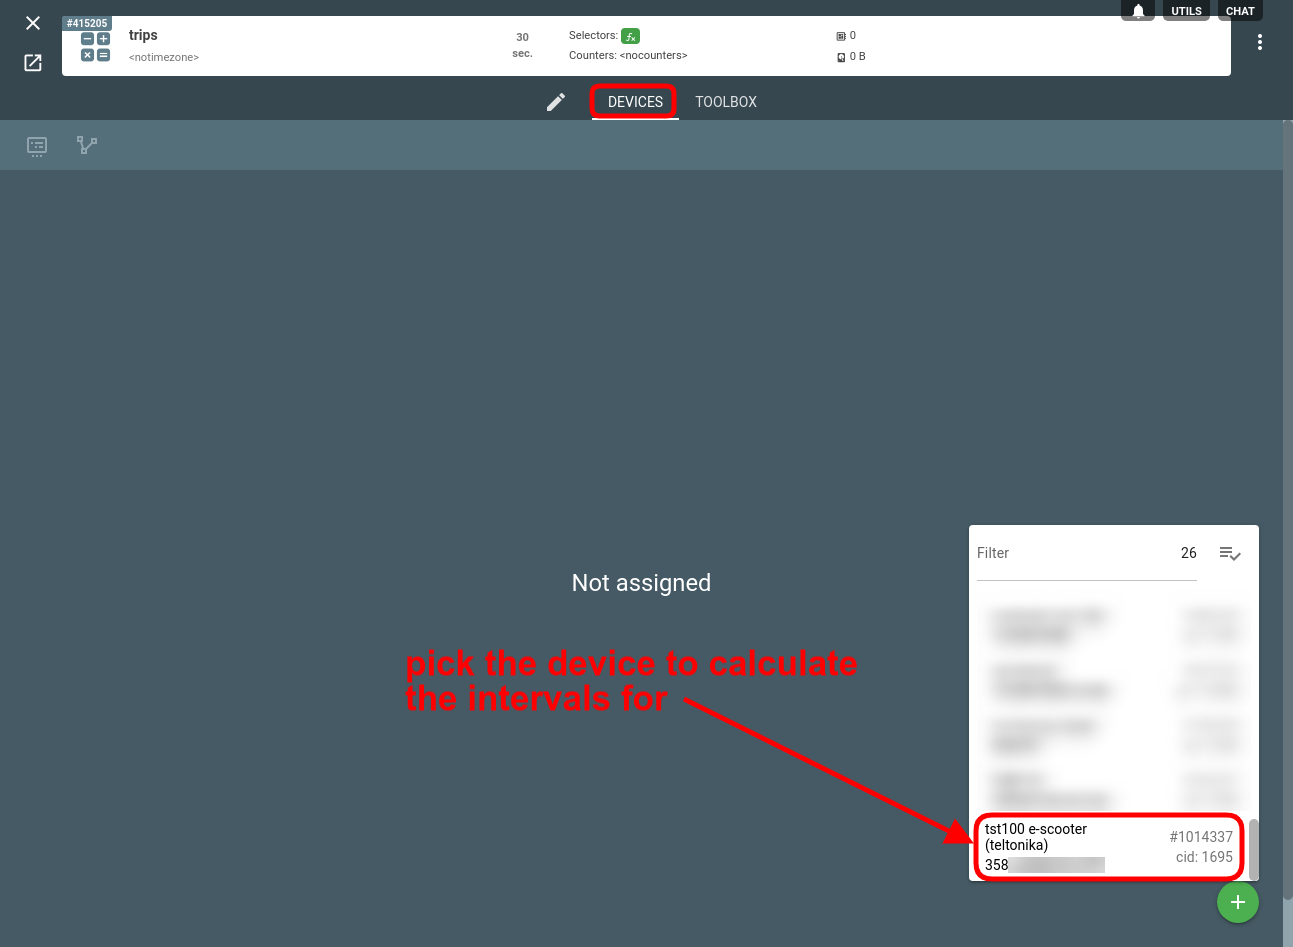
Once we save the calculator configuration, it’s ready to be assigned to the specific device to calculate the intervals for it. We do it on the Devices tab here in the calculator:
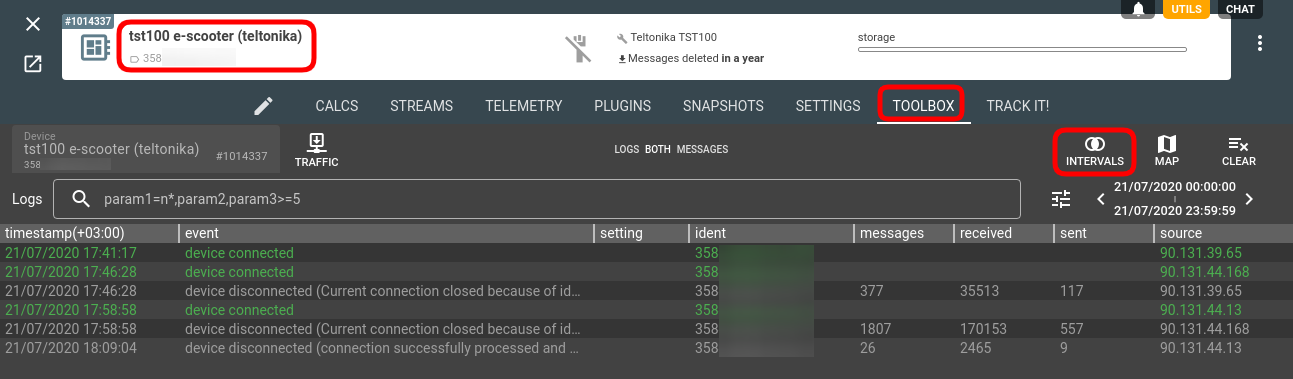
Now if we go to the Toolbox tab for our assigned device and navigate to the Intervals section
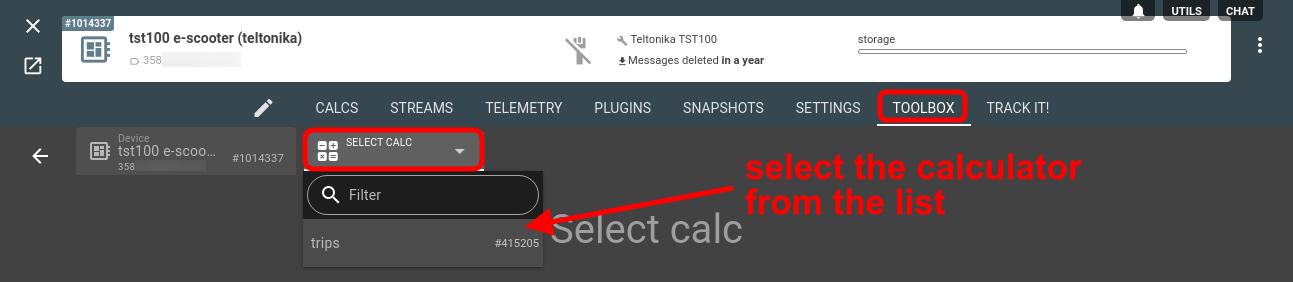
then pick the “trips” calculator from the drop-down selector
we will immediately see all detected intervals:
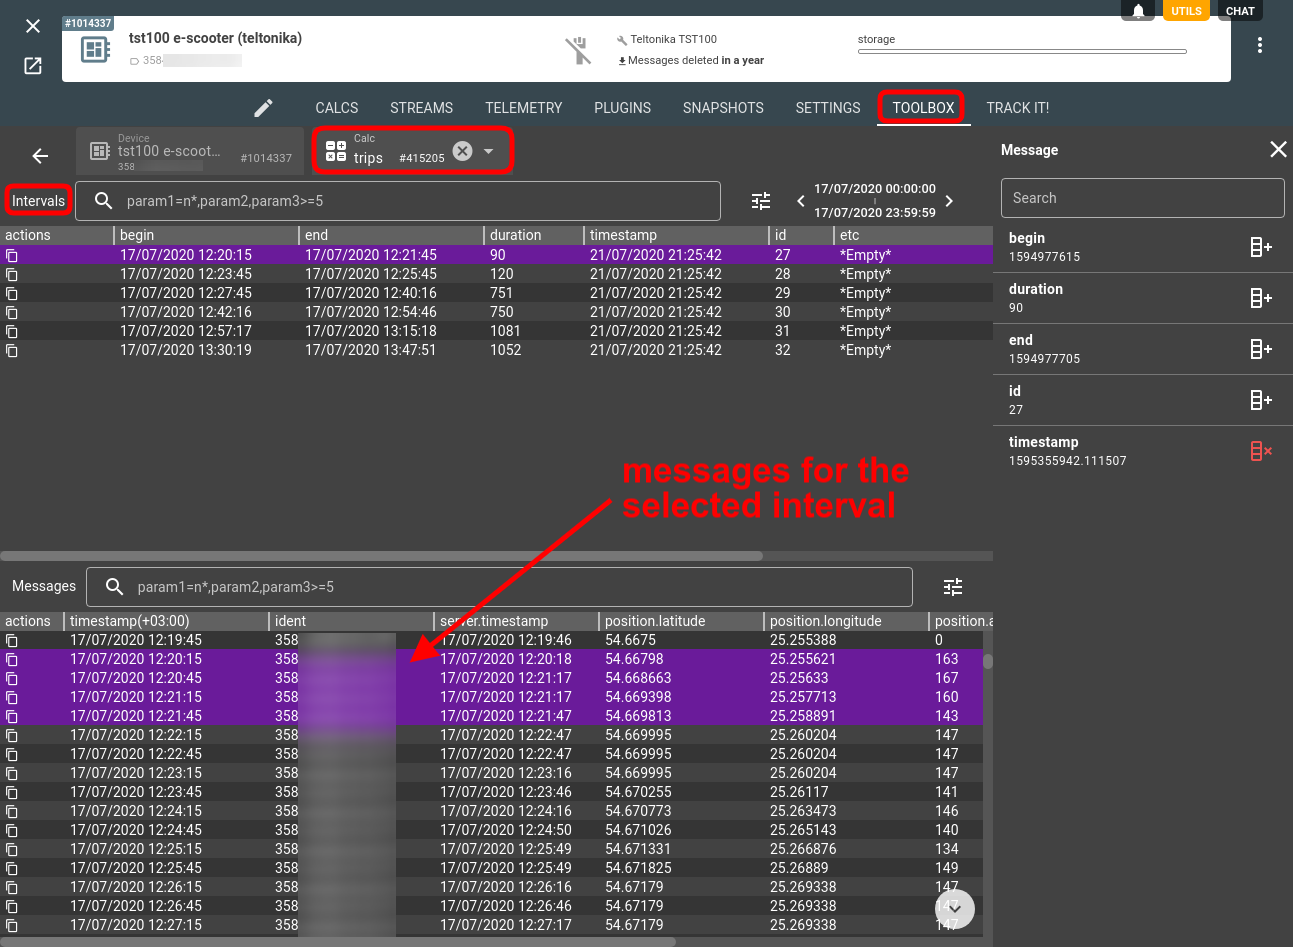
The intervals look valid — all are longer than 60 seconds (see duration column). That’s good news, so we can move on.
The next step is to get some extra information about each interval, for instance, its route, and average speed. We need to add two counters into the calculator to accomplish that:
The route is a simple one — you simply pick the “route” type for the counter.
For average speed, we need an expression that will take the parameter position.speed and apply the method “average” to all its values within the interval.

Now, if we go back to the Toolbox tab for the device, we’ll see the calculated values:
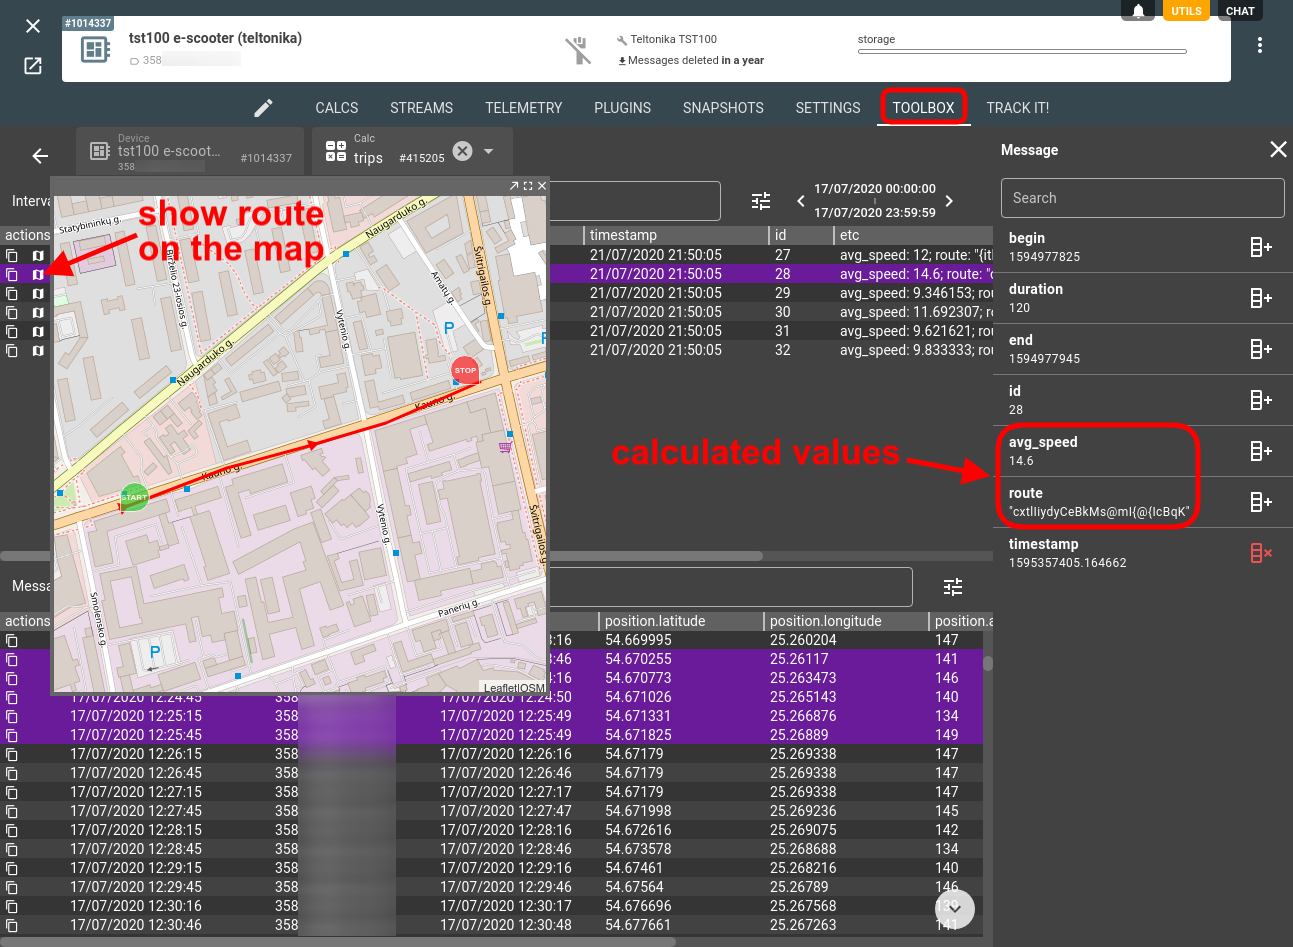
Note: whenever you create a “route” type counter, a tiny map icon will appear in the “actions” column for each interval — click it to see the interval on the map.
Now let’s move on to stops. I suggest a simple criterium for a stop — a period of idleness (speed lower than 3kmh) of more than 60 seconds and fewer than 600 seconds (to exclude long standings). Also, we will register the location of each stop using counters.
The intervals selector will look like this:
And here’s the counter for the stop location:
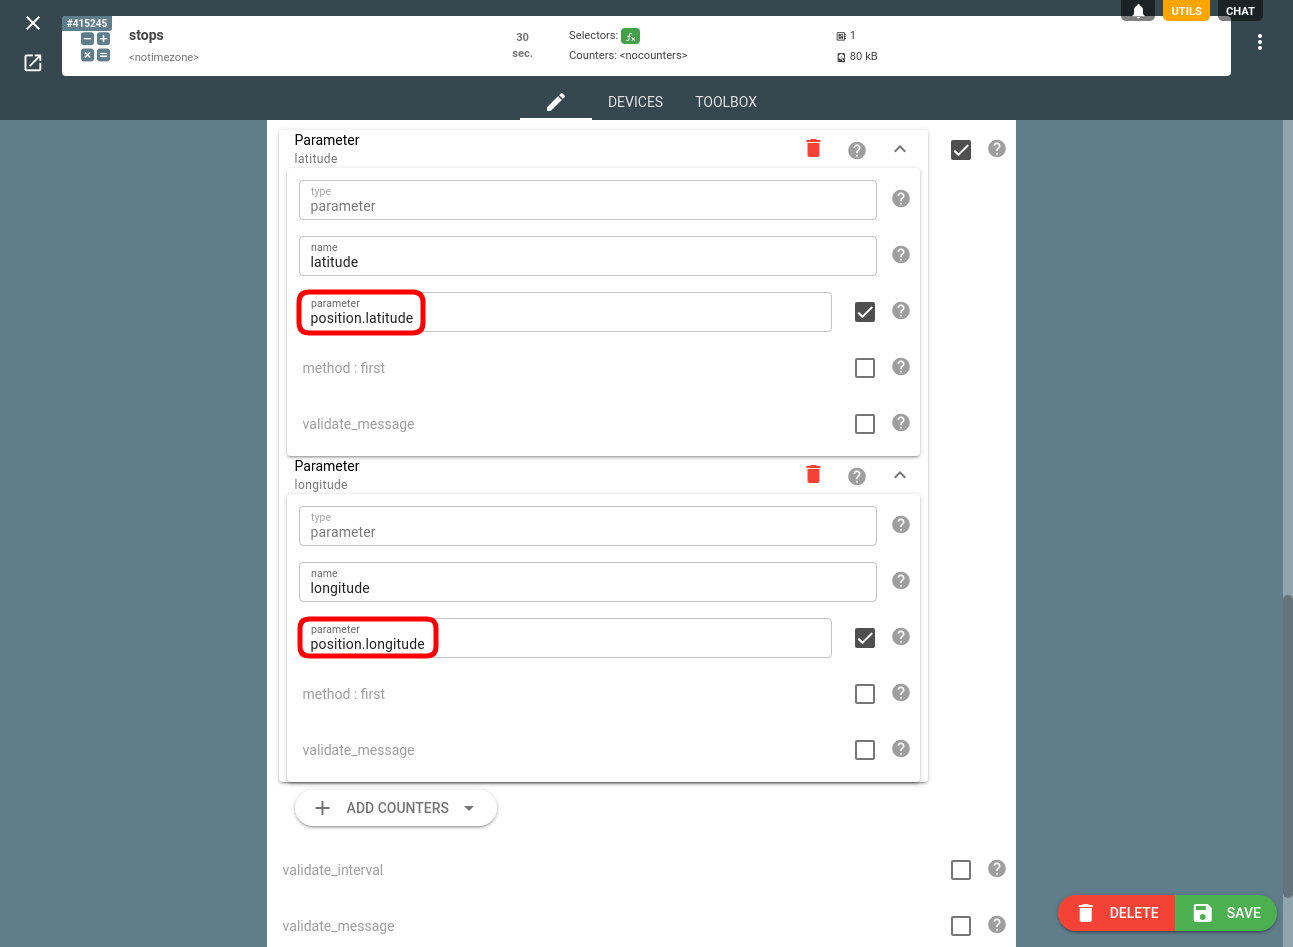
Now we can check the detected stops and their location in the Toolbox tab for our device. Remember to pick the right calculator — “stops”:
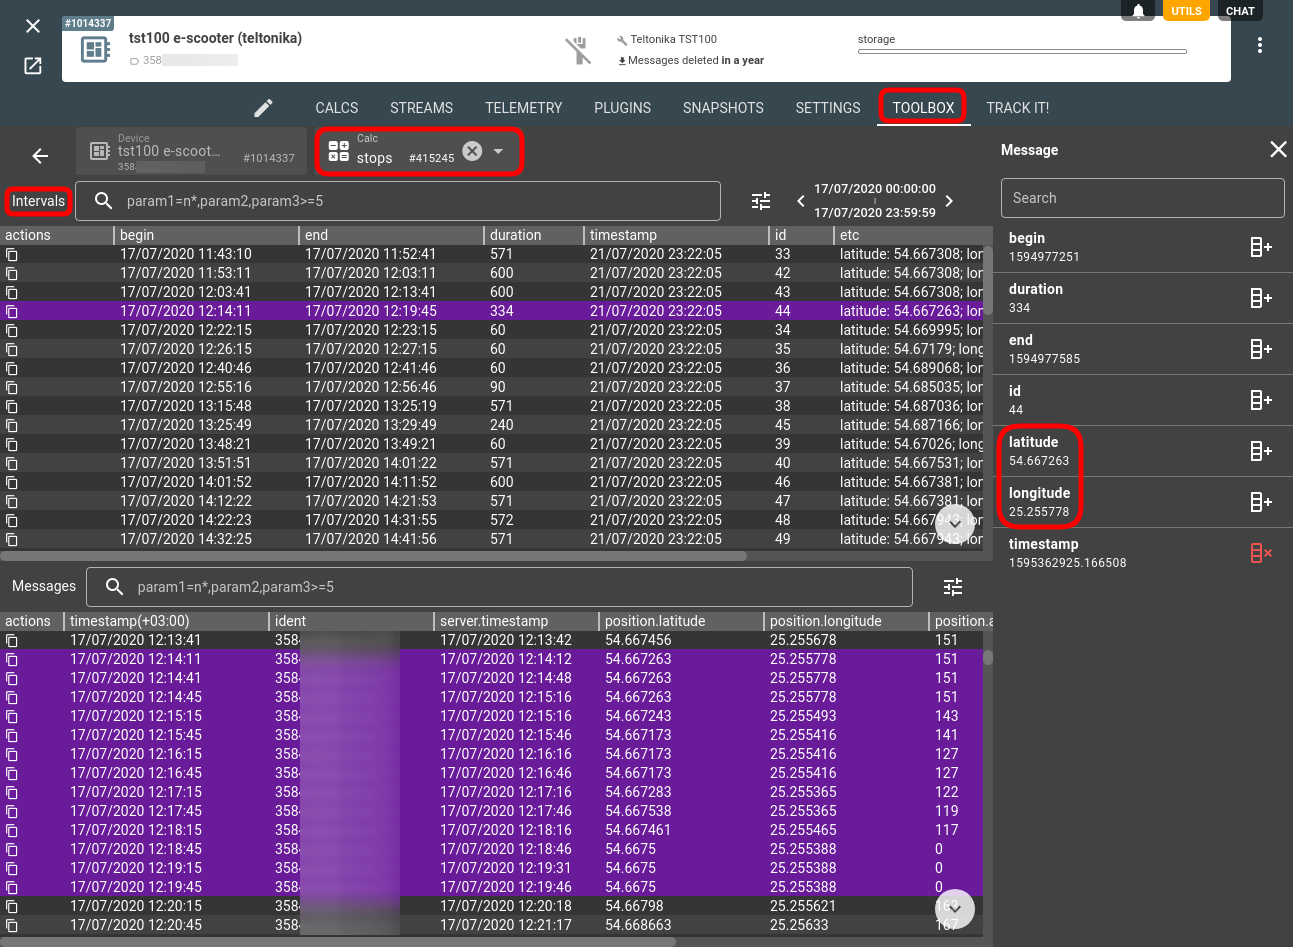
Looks just fine — the duration is within the specified range and the latitude and longitude parameters are there.
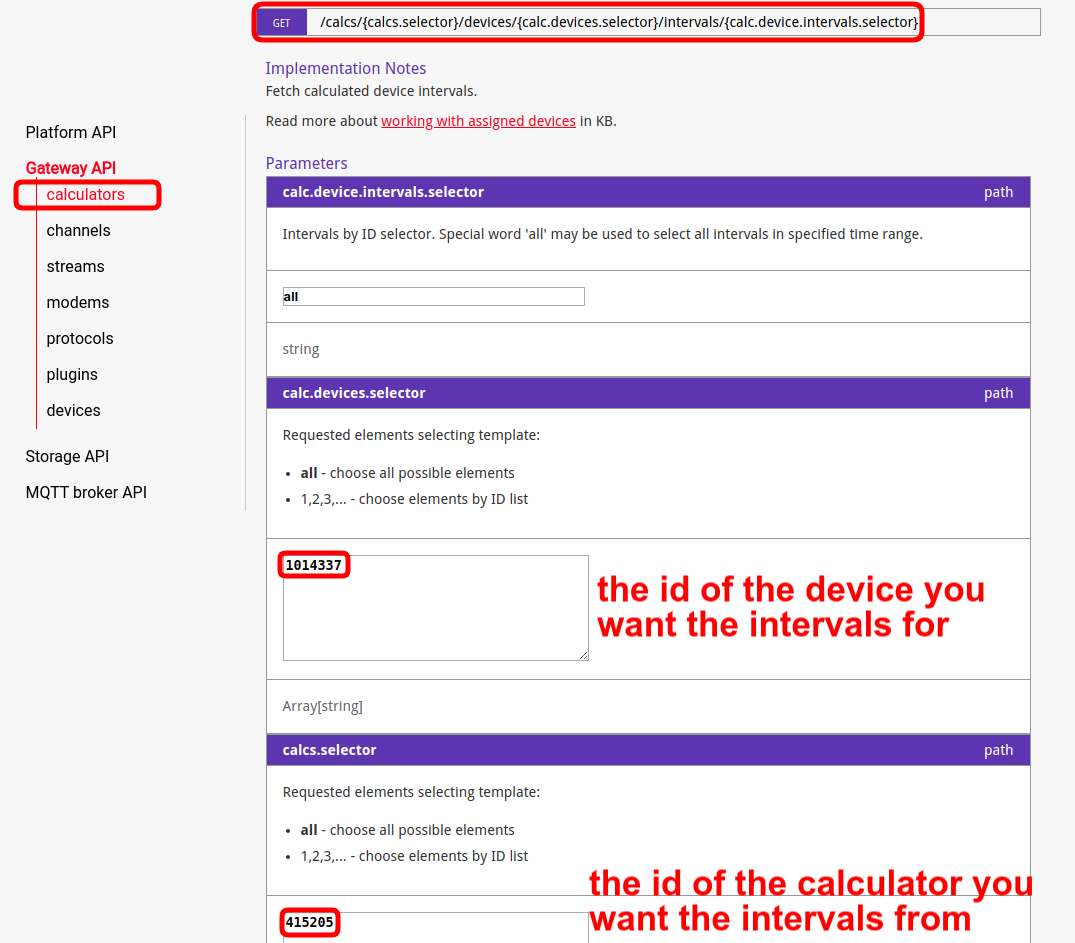
Now you might be wondering how to get all this precious data in your application. API is the answer.
Use flexible REST API to pull the generated intervals — you can play around with our interactive documentation here.
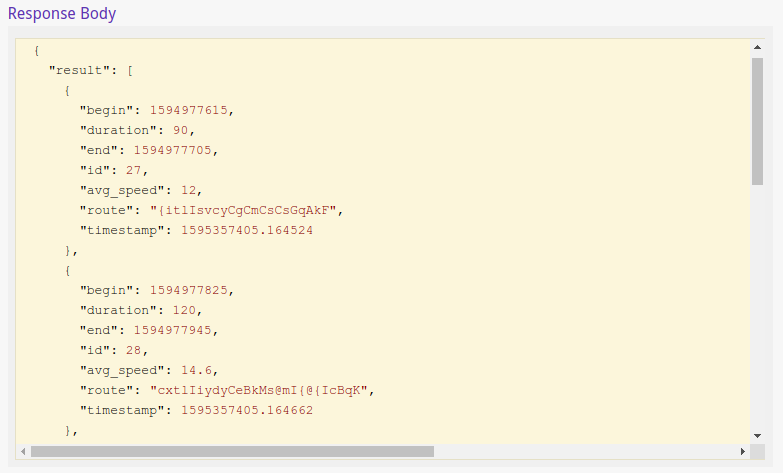
And here’s the JSON output you can accommodate in your solution in the way you need:
Geofence out event
Your scooter sharing service obviously has certain boundaries within which it operates. When the scooter crosses the boundary you want to receive a notification, right? Let’s implement such functionality in flespi.
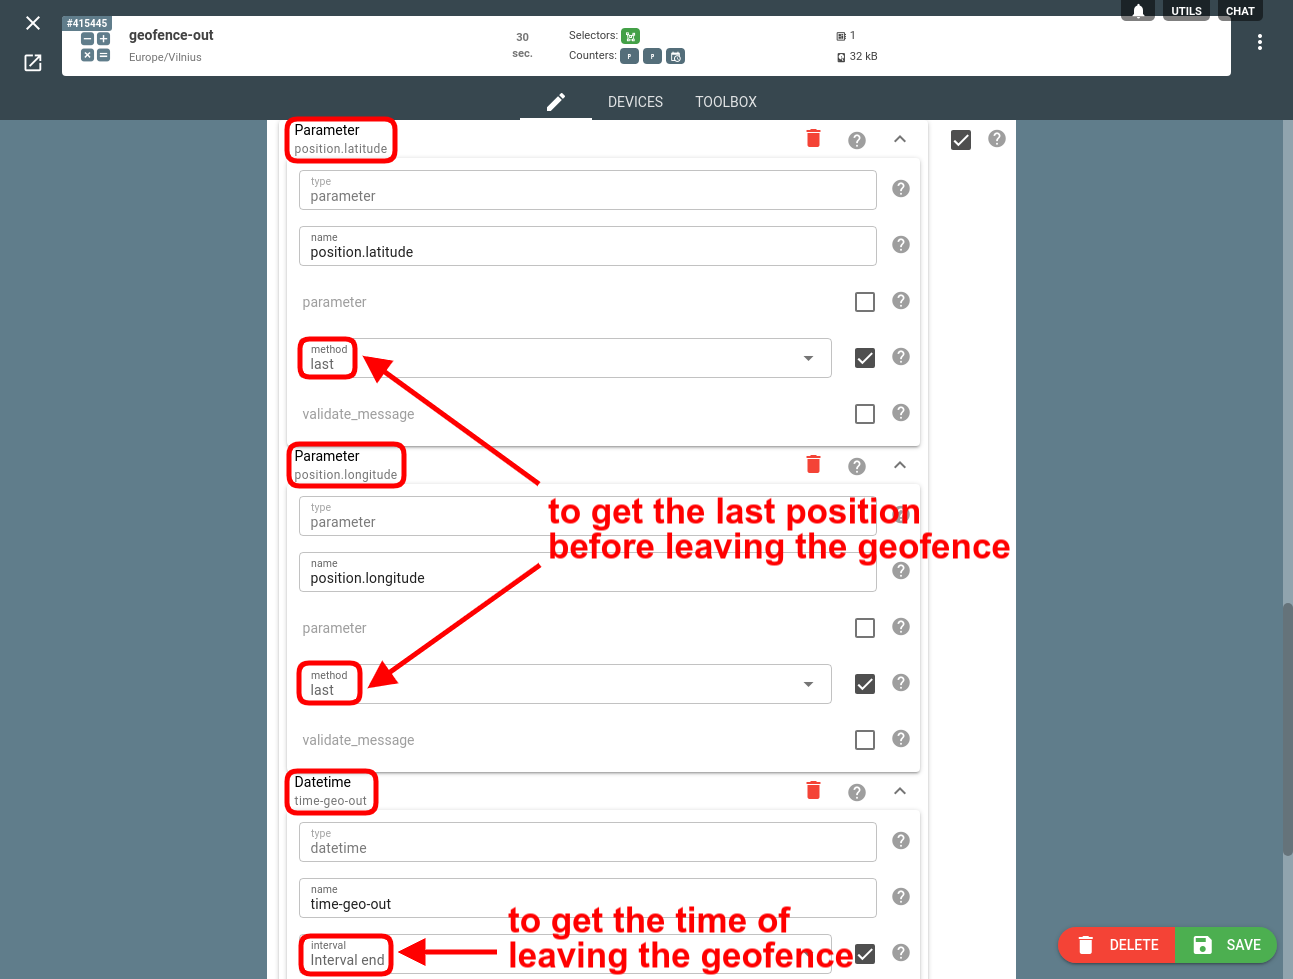
First, we will create a calculator and define a geofence selector:
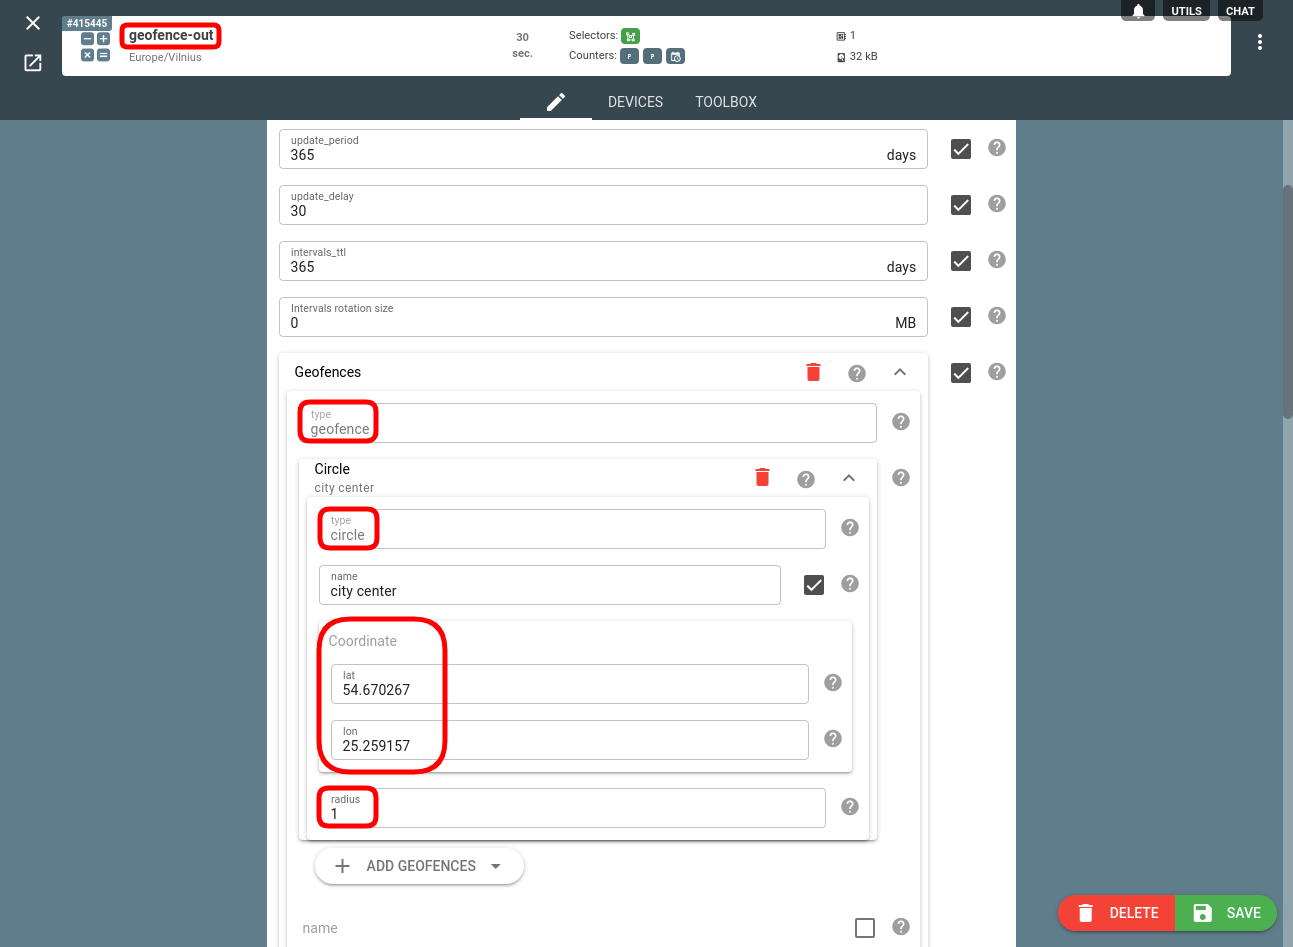
Also, let’s add some useful info (using the proper counters): where (coordinates) and when (time) the scooter left the allowed region:
Then we assign our TST100 to this calculator, open its Toolbox tab, and see:
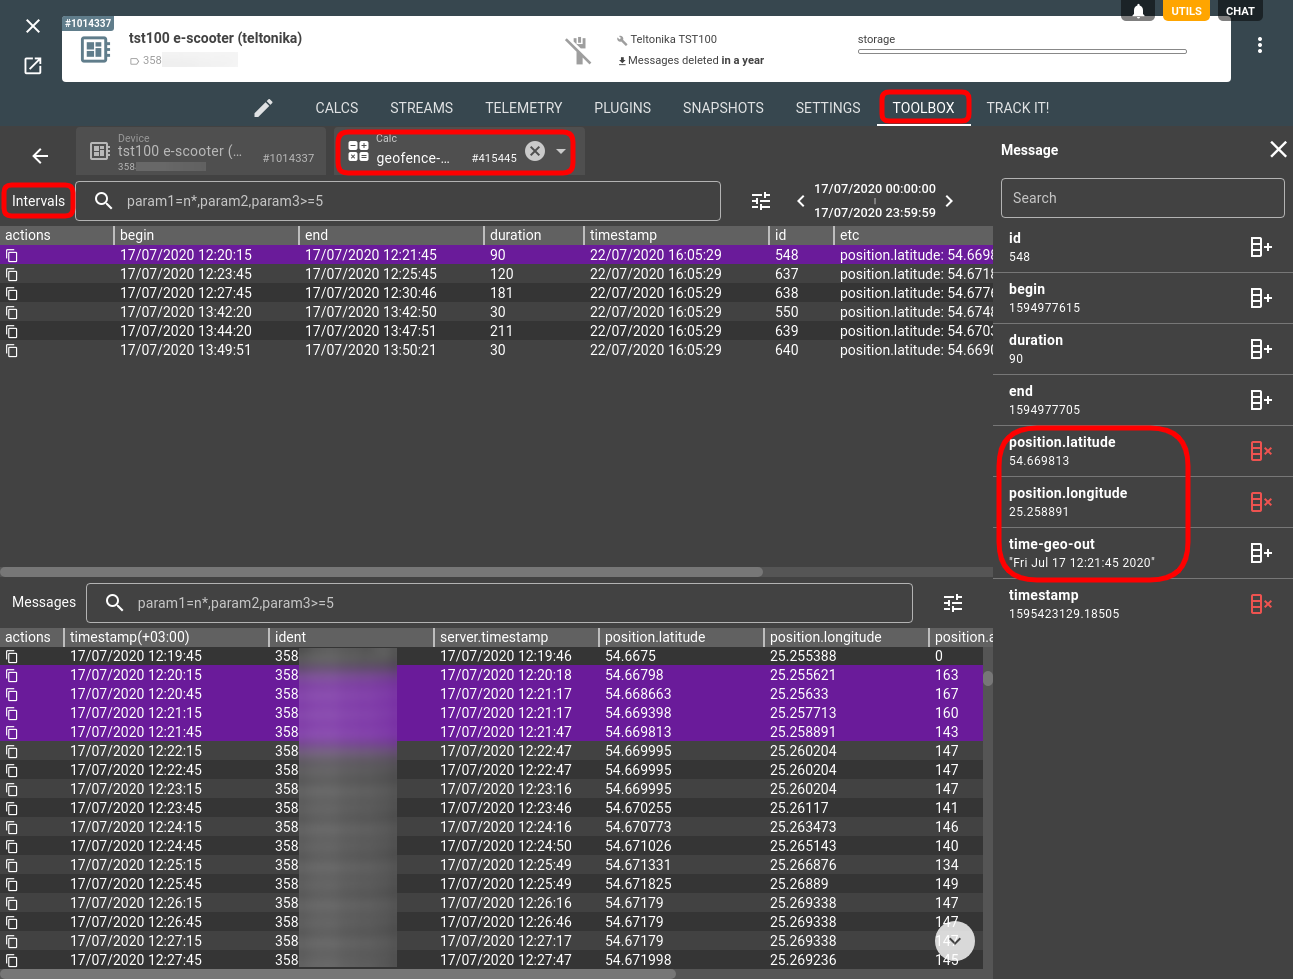
There we have it — intervals with the information about when and where the scooter left the geofence.
You can use the following MQTT topic flespi/state/gw/calcs/{calc_id}/devices/{device_id}/last to check the state of the last created interval in the given calculator and perform a certain action on state change. Learn more about useful MQTT topics here.
Low battery notification
Say we want to be informed when the scooter battery level drops below 20%. We can catch this event by monitoring the battery.level parameter and checking when the new interval for such a calculator is created:
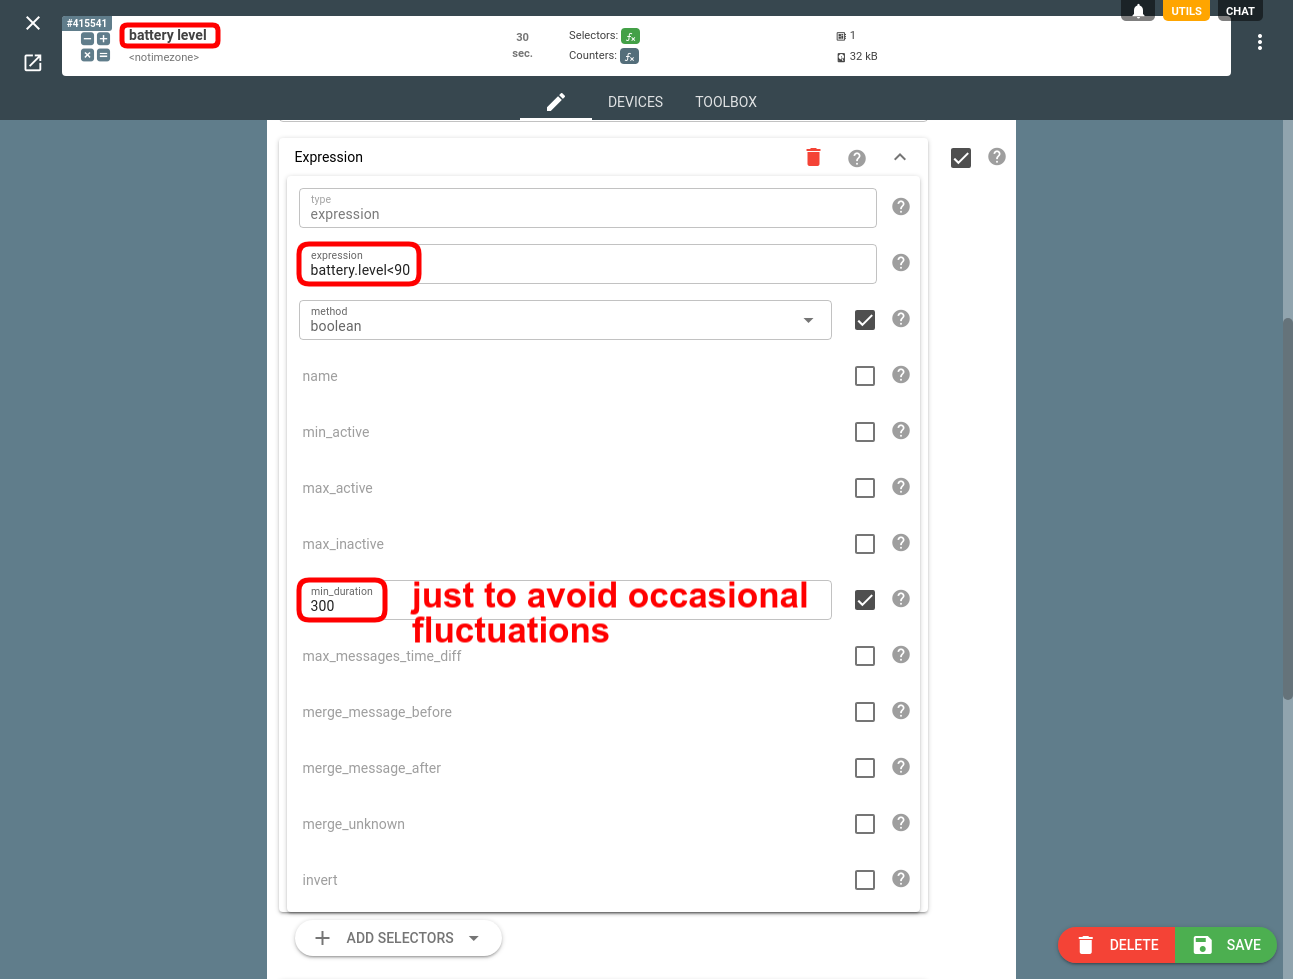
Note: I couldn’t wait for the tracker battery to drain to 20%, so I performed the test with the level of 90% but you can adjust the number as you need.
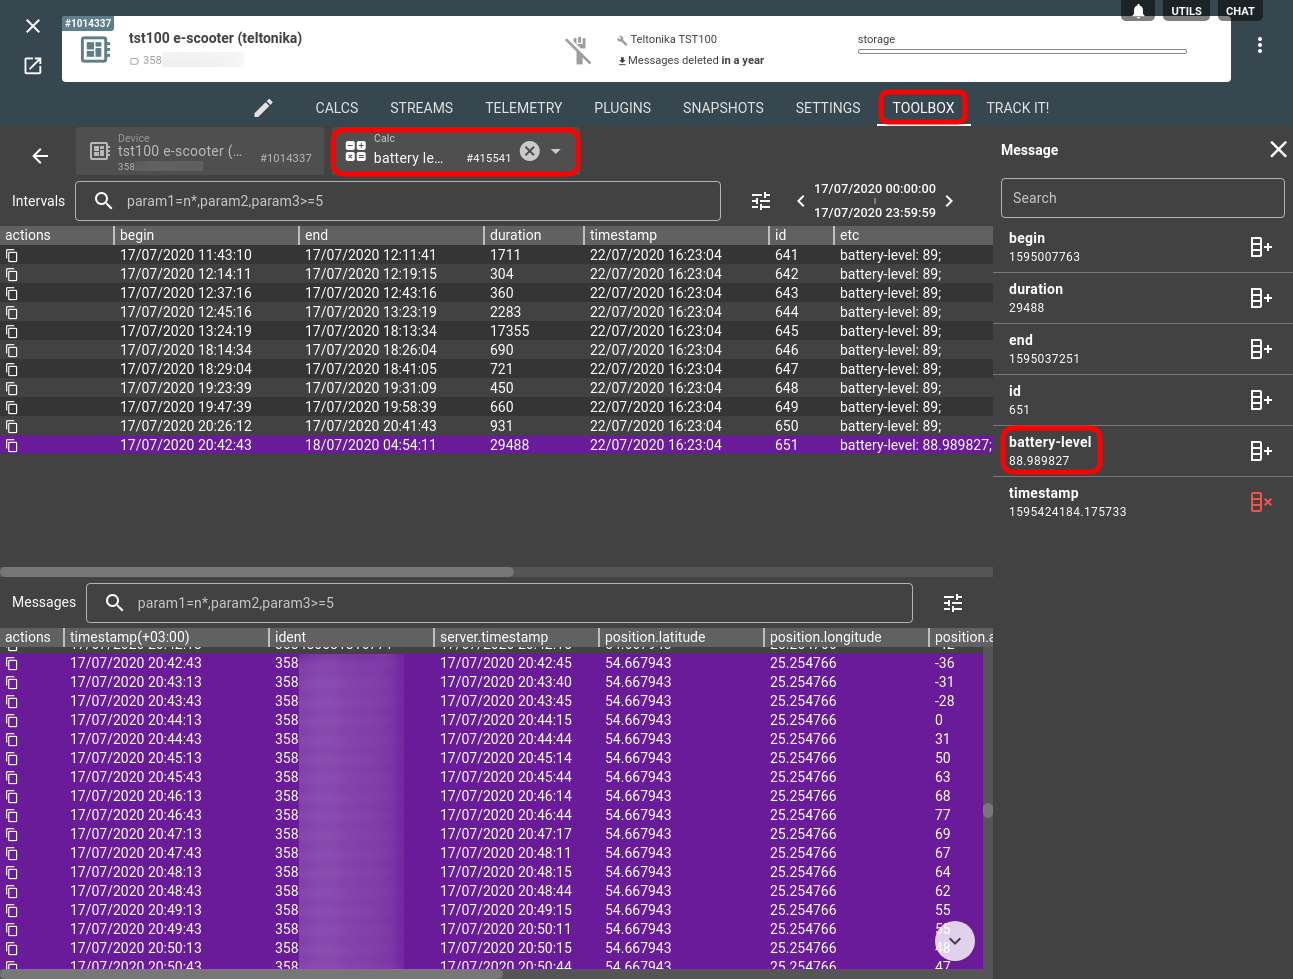
Subscribe to the following topic with any MQTT client library to catch the moment when the new interval is created and, consequently, when the battery level drops below the specified value: flespi/interval/gw/calcs/{calc_id}/devices/{device_id}/created
Engine off command
Sending setting updates to a tracker can be done in several ways:
From the Settings tab on the device card:
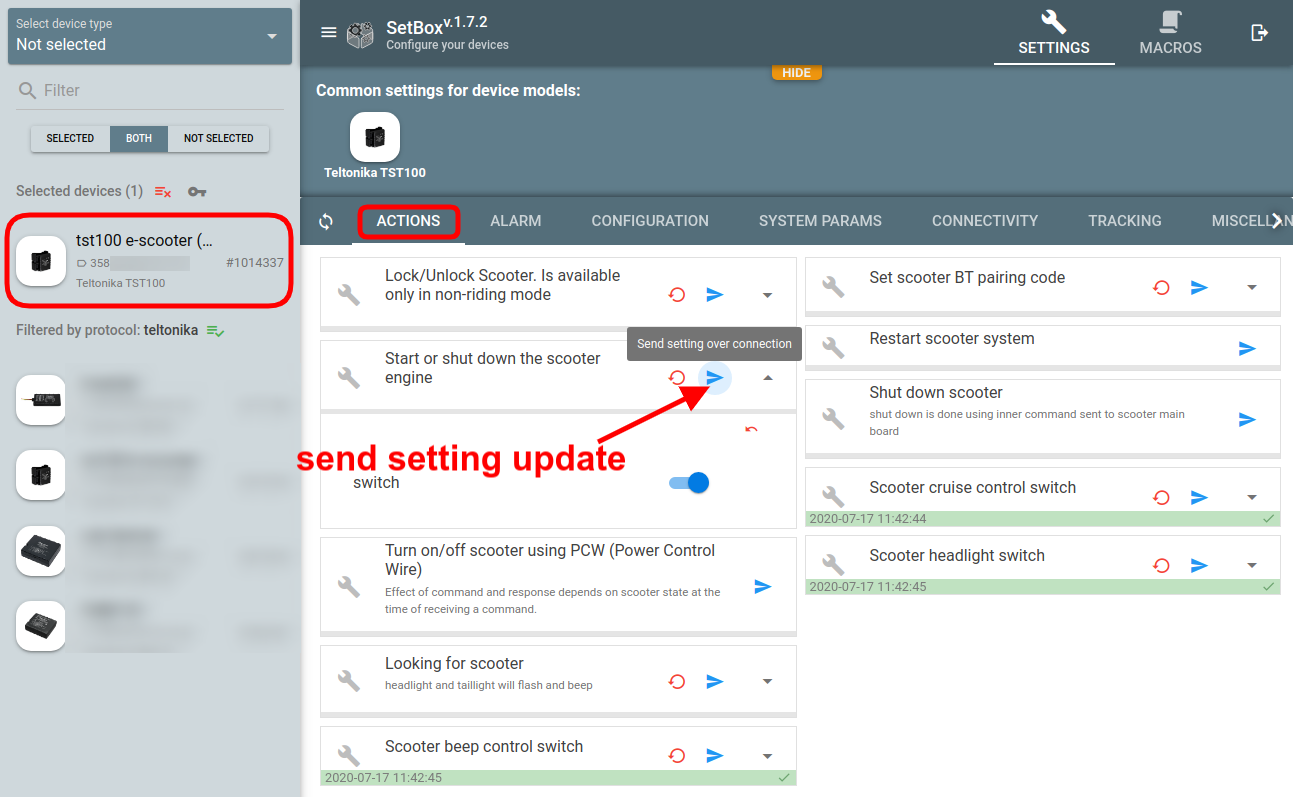
From a dedicated Setbox tool:
Via REST API:
curl -X PUT --header 'Authorization: FlespiToken XXX' -d '{"address":"connection","properties":{"mode":true}}' 'https://flespi.io/gw/devices/<device_id>/settings/name=scenginectrl'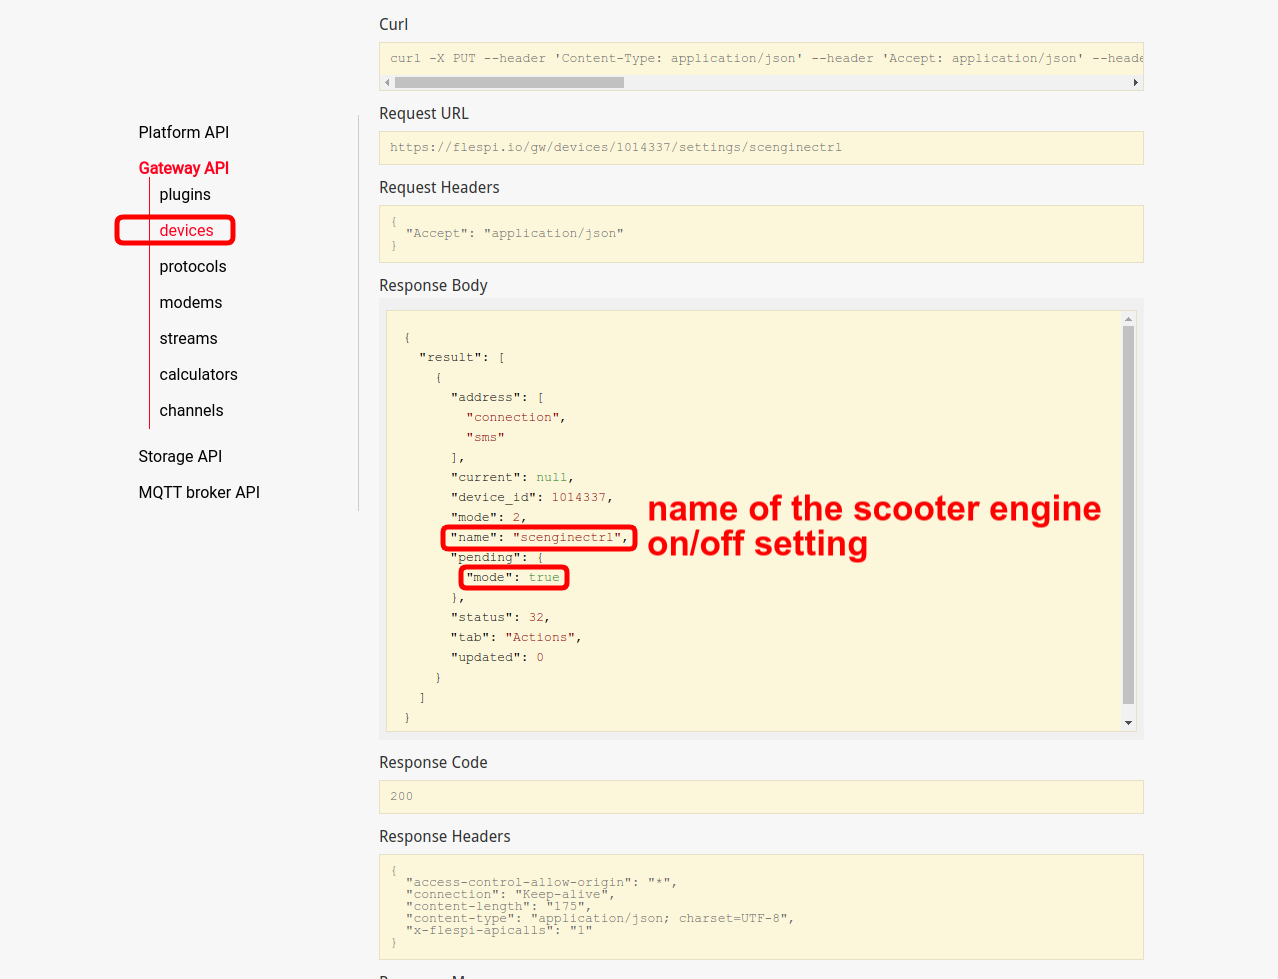
Use the following PUT request: https://flespi.io/docs/#/gw/!/devices/put_devices_dev_selector_settings_sett_selector
More on using the REST API to automate settings management.
Note: the same approach can be applied to other settings, which TST100 has plenty of.
***
As you see, flespi has a lot to offer to the development teams intending to develop scooter sharing or similar platforms. In particular, flespi analytics gives vast possibilities of controlling different location-based events as well as catching relevant parameter changes. Also, flespi allows easy communication with the trackers via the API to manage their behavior.
We talked about several basic situations, so if you have any other staple cases in mind that you want to implement using flespi, just tell us about them in the chat.