- Essentials
- How webhooks work
- Common trigger topics
- How to create a webhook?
- How to disable a webhook?
- Chained requests
- Webhooks API
- Troubleshooting
Essentials
Webhooks are used to catch events generated in the MQTT bus of your account and execute HTTP calls to some endpoint per each received and validated MQTT message.
Endpoint can be your custom lambda in the Internet or standard flespi REST API endpoint to fully automate any action directly withing flespi. In the second case webhook is provided with master-level token type authorization level and can call any API call under flespi account it created in.
Actions in webhook can be chained to perform multiple actions for a single trigger - for example to gather all required information and perform resulting action with combined data from multiple endpoints.
Here are a few cases of how webhooks can be used:
- If the vehicle exits the allowed geofence, send an email notifying the operator (requires a third-party service).
- If the device disconnects from flespi, add a record about that into this device messages (internal call to the flespi platform).
Webhooks are part of Platform API and can automate any kind of API call in your account. In order to access them via API or flespi.io panel you have to use master tokens.
How webhooks work
There are triggers, filters, and actions.
The trigger for the webhook is an MQTT message received by the flespi MQTT broker. In flespi all user-initiated and system actions generate specific MQTT events in corresponding topics. You can find a list of the most important MQTT topics in the MQTT Topics Directory section of the flespi panel, or in this MQTT topics guide. Some topics most commonly used as triggers are listed below. You can have up to 3 triggers for the webhook. If several triggers are specified, they will be joined using OR logic.
The filter lets you narrow down the trigger by specifying the specific values for topics, content, and other message fields.
The action is an HTTP request, either internal — to perform something inside flespi itself (post a message, create a device, assign a plugin, etc.) or external — to execute something on a third-party service (send email or SMS, generate a report, etc.).
Before execution, the HTTP request can be flexibly configured, including URI, headers, and request body. Also you can configure a delay before sending the request. This can be helpful in cases where the peer is not ready to process the request immediately.
Webhooks are executed in a first-in-first-out order. Messages are processed sequentially (one at a time), not in parallel. Each message waits for the previous one to complete processing before it begins. This means that if many messages trigger a webhook in a short period or you configured requests with non-zero delay, a processing queue forms.
Webhook processes each MQTT message independently and thus it can not compare current(latest) MQTT message payload to previous. If you want to detect state change in device message and react to it with webhook you should assign device to msg-expression or msg-pvm-code plugin that will register state change into message parameter before the message is registered into device. To handle even more complex state changing conditions you may use calculators and catch with webhook events from calculators.
The maximum HTTP response size that a webhook can handle is 8 MB. If one of the HTTP requests in the chain returns more than 8 MB, the webhook will immediately fail with event code 1103.
Common trigger topics
Below is a list of some (not all) MQTT topics that are commonly used as triggers in the webhook configuration:
| Topic | Meaning |
| flespi/message/gw/devices/+ | new message from device ("+" means any item, you can specify the item ID to be more specific) |
| flespi/state/gw/devices/+/connected | device went online |
| flespi/state/gw/channels/+/idents/+ | device connected to channel |
| flespi/interval/gw/calcs/+/devices/+/activated | calculator interval activated |
| flespi/interval/gw/calcs/+/devices/+/deactivated | calculator interval deactivated |
How to create a webhook?
- Log in to the flespi panel using master token.
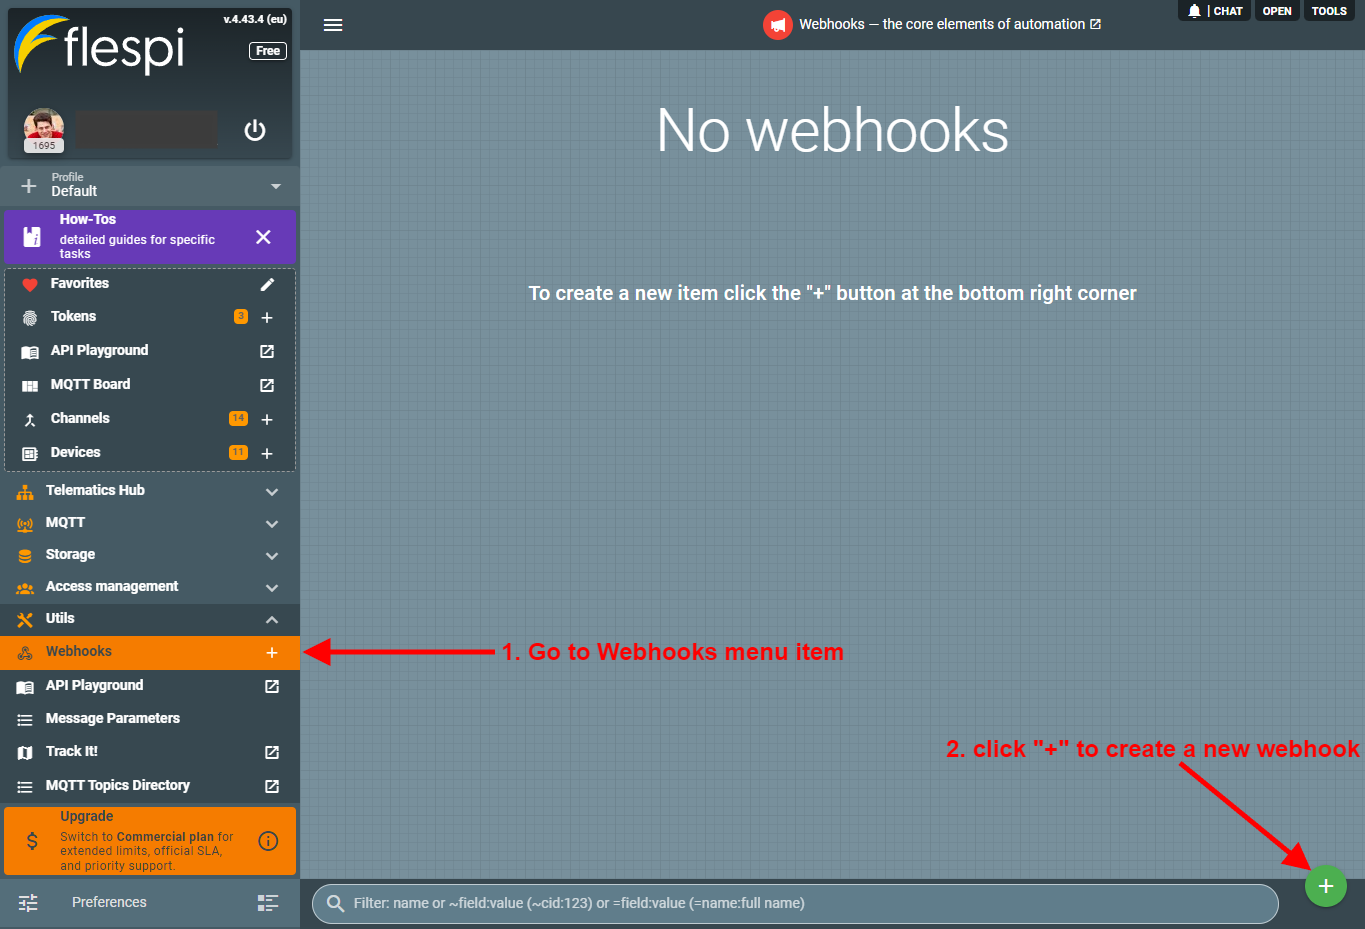
- Navigate to Webhooks in the left-side menu and click the "+" button in the bottom right corner to add a new webhook:
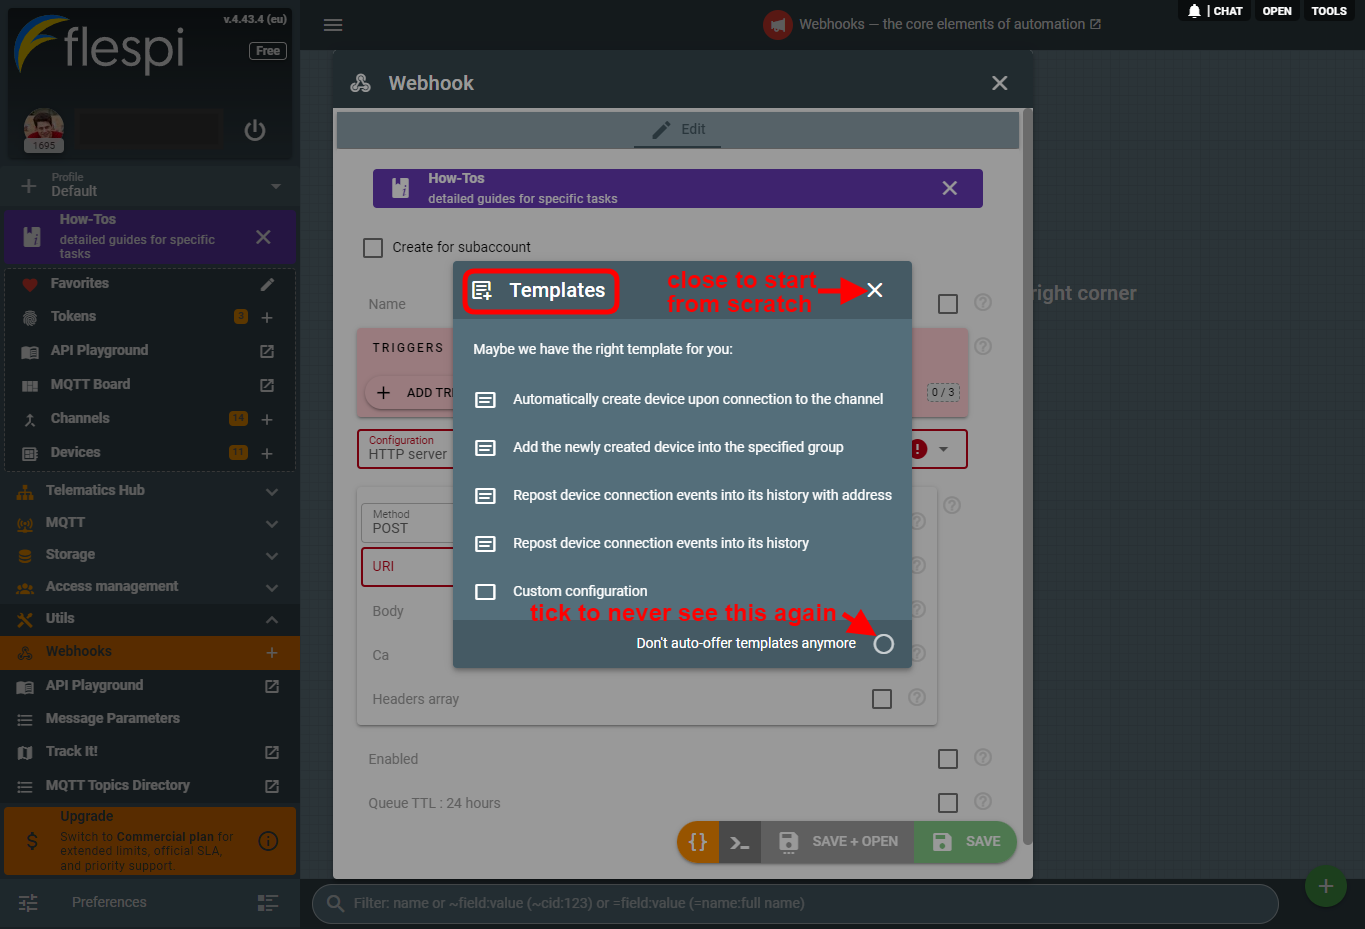
- You will be offered to use a template to create your webhook, so if you want to create it from scratch, just close this dialog:
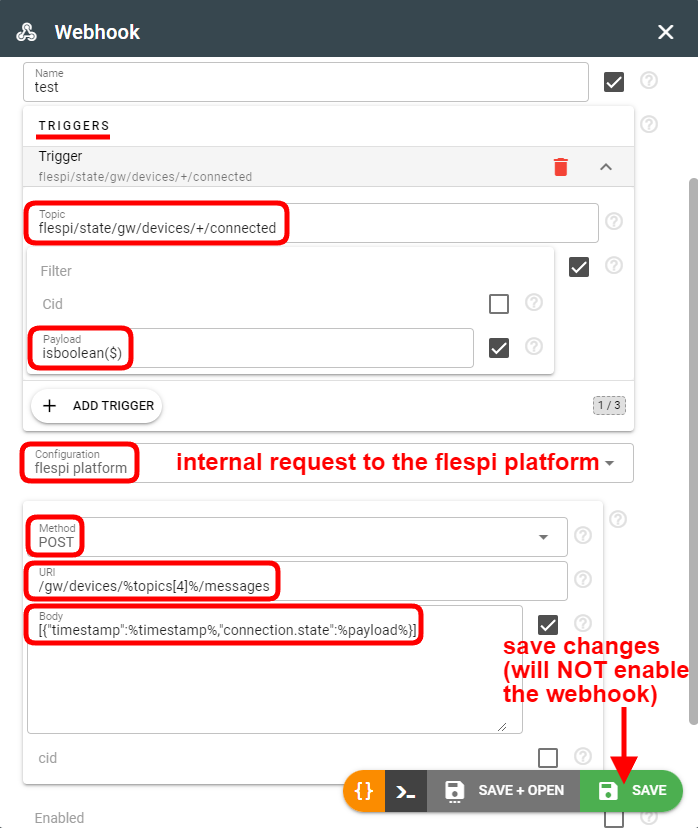
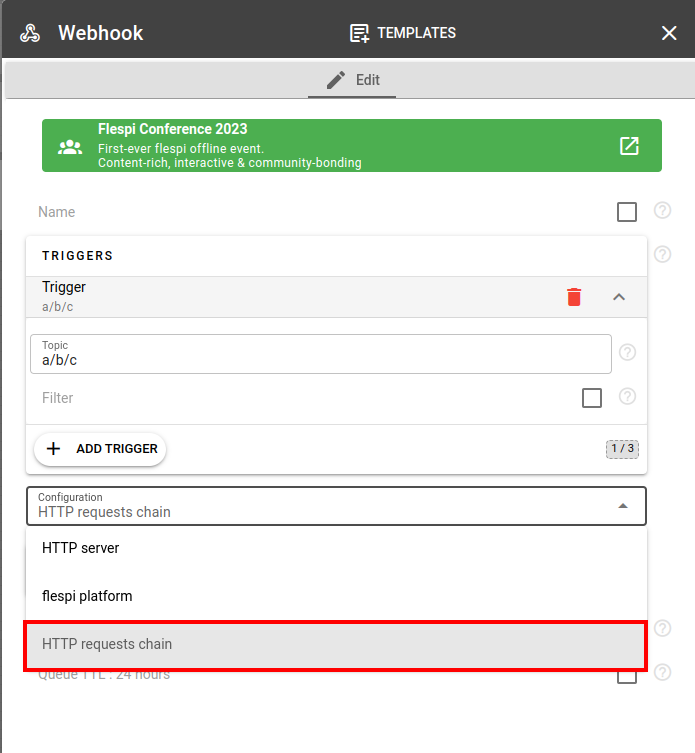
- Configure the webhook by specifying the trigger(s), filters (if needed), and the HTTP call details:
The URL, BODY, and HEADERS fields contain static text with the injected values from the message. The injected values must be enclosed in the % and % marks:timestamp — timestamp of the message, e.g. 1680680536.527043:
cid — account ID the message appeared on, e.g. 123;
token_id — token ID from which this message was published (N/A for MQTT messages generated by flespi itself);
topic — exact text of topic messages was posted to, e.g. flespi/state/gw/devices/123/connected;
topics[x] — array of words, e.g. [flespi, state, gw, devices, 123, connected]. Zero-based index, to access device-id use topics[4] in the expression;
payload — message payload data. In case payload is a JSON object, you can access sub-fields as payload['device_id'] or its equivalent of json(payload, 'device_id') and so on. If payload is complex object or array, use json(payload, '{path}') notation e.g. json(payload, '/ble.beacons/0/id') to access id property of first beacon inside ble.beacons array. Maximum nesting level for webhook message JSON payloads is limited to 16 levels and 256MB.
user_properties.x — refers to a specific user property, where "x" is the property name.
responses[0..x] — access to the response of chained request, where x is the zero-based index of the chain. To access any field inside JSON response format the path to the field inside the brackets. For example use json(responses[0], '/result/0/name') to access the name of first element in result field returned by first webhook in the chain.
response_codes[0..x] — array with received response codes
Note: To escape the % symbol in flespi webhook expressions, you should add curly braces around the expression inside %. For example, to format time output, use the following expression template: %{strftime(timestamp, '%h:%m:%s')}%. If you just want to add % to the formatted text outside of expression use double percent marks: '%%'.
You can use rich expressions syntax to preprocess the fields values (except for the previous() function because webhook operates on current message only).
- Click Save to create the webhook.
How to disable a webhook?
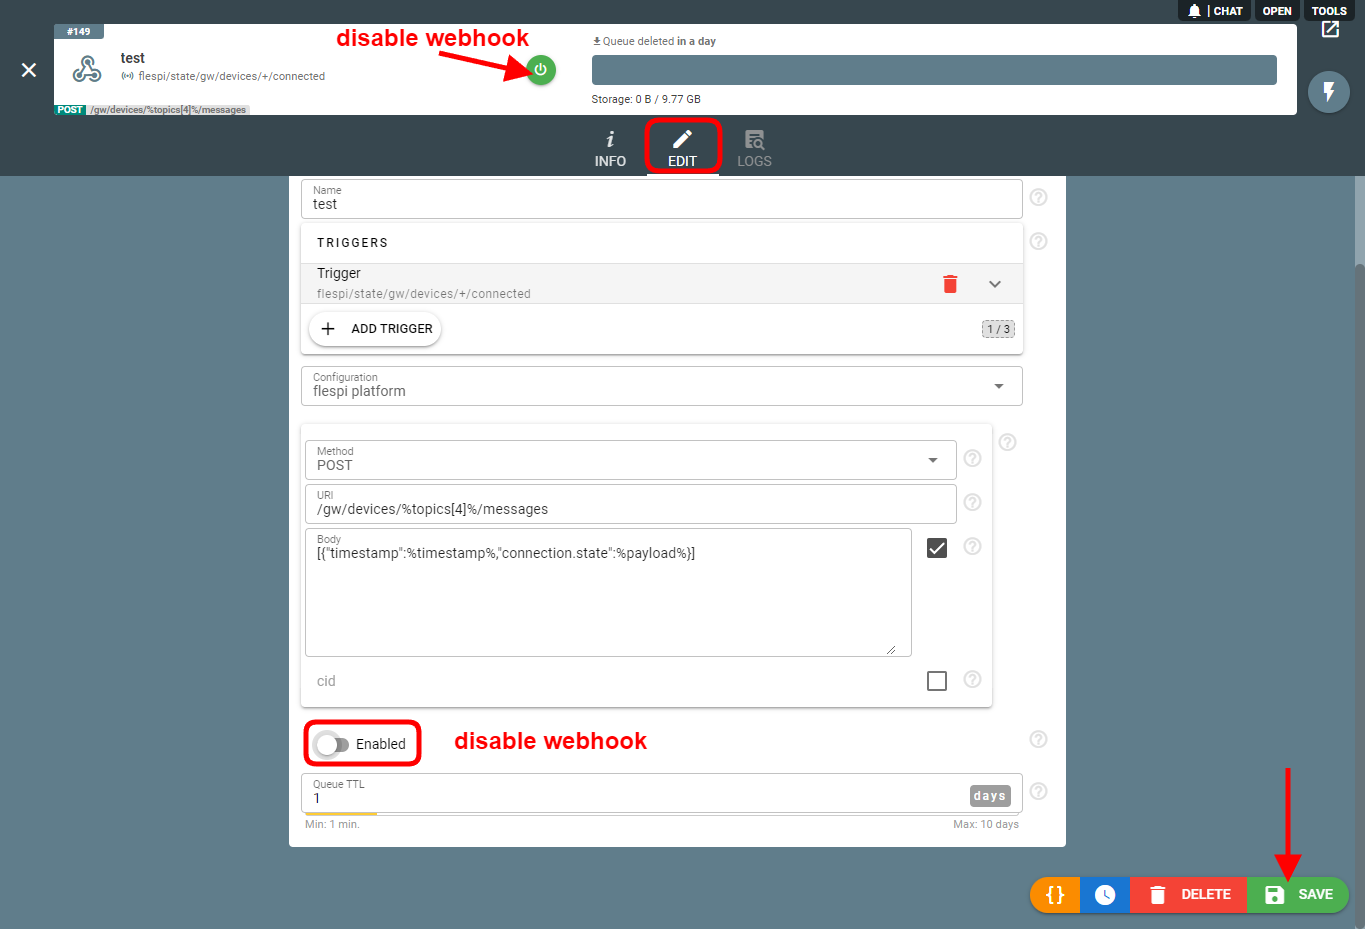
Once you click Save to create a webhook, it is automatically enabled. To disable it, uncheck the "Enabled" property in the webhook configuration and click Save or click the "Disable" button on the interface:
Chained requests
Webhook can be configured to perform one action or chain of actions (up to 5 sequential HTTP requests). Chained HTTP requests are good method to perform several actions on the same trigger. In each subsequent chained request you have access to the response data from previous request on this trigger.
For example, with a single chained webhook you can catch event about a new connection to a channel that from a tracker that has no registered device associated and automatically create device as a first chained action and provision it to multiple groups, set its initial metadata as further subsequent actions.
Responses received for the previous requests are available for the subsequent requests in responses[0..x] array.
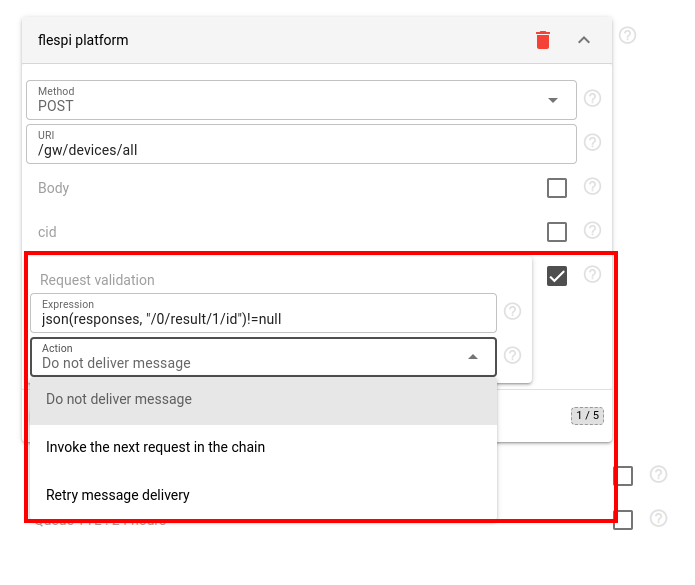
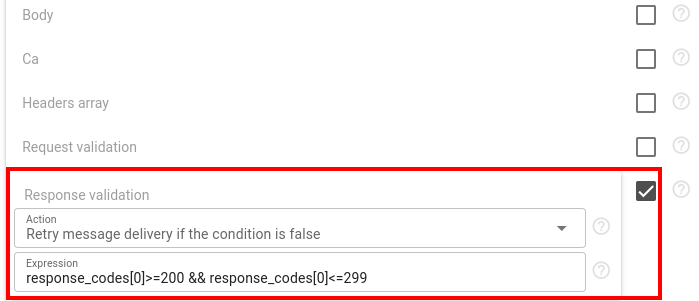
Webhooks provide two ways to validate requests. The first allows validation before the request is sent, and the second is applied after the response is received. Both validators could be applied together. If validation fails, it is possible to select what to do:
- Do not deliver message
- Invoke the next request in the chain
- Retry message delivery (request will be send again until successful execution or until it is cleared from queue by TTL. Request timeout is 5 minutes)
Webhooks API
To perform any operations with the webhooks, use the webhooks API.
Troubleshooting
You can find all log records related to the webhook in the Logs tab on the webhook screen:
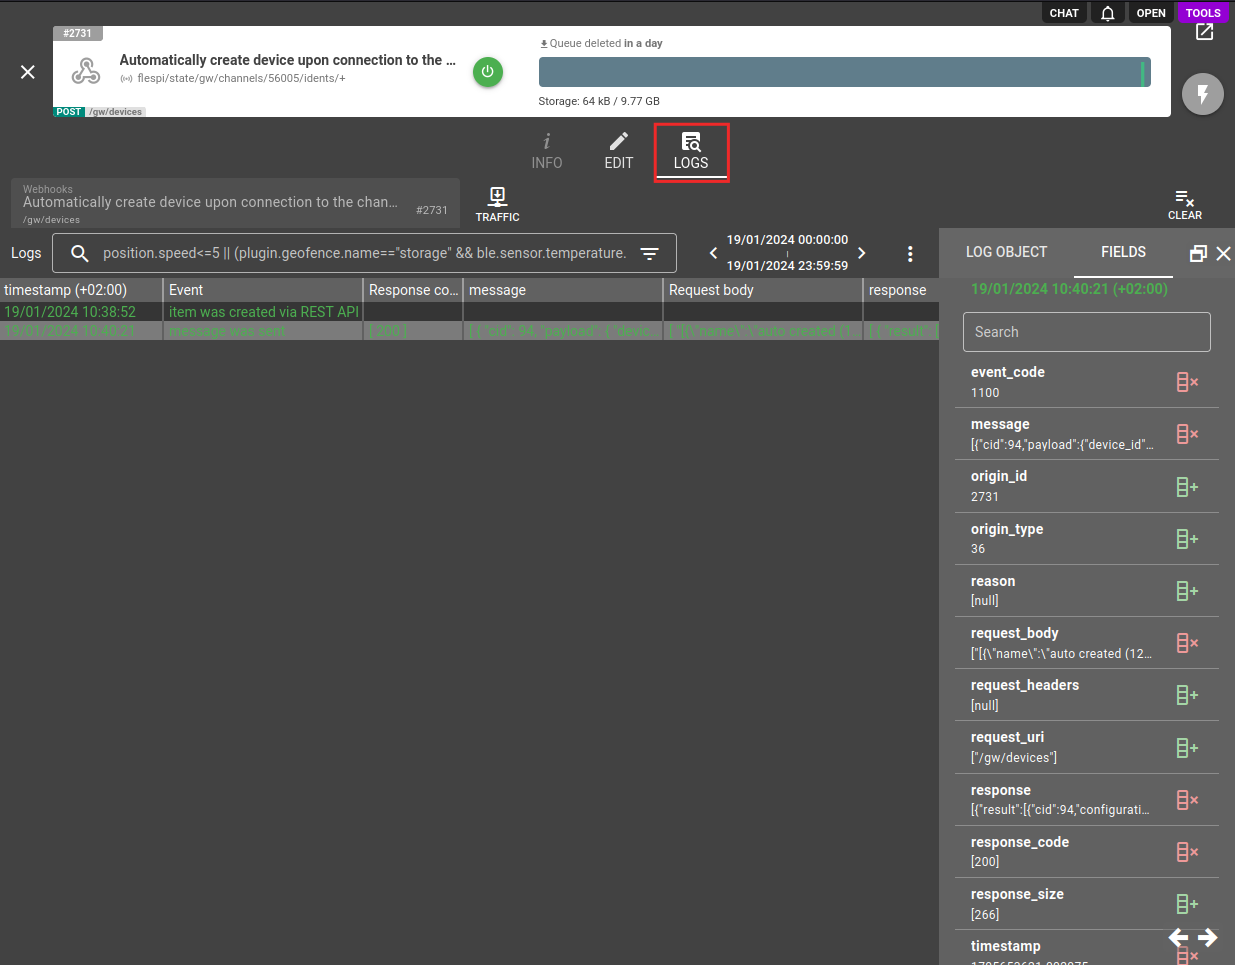
The log message consists of these important fields:
- message - MQTT message that triggered webhook with information about its topic, payload, user_properties, etc;
- request_uri - URI where webhook request was sent;
- request_headers - HTTP headers that were used during webhook request;
- request_body - HTTP body that was used during webhook request;
- response_code - HTTP response code that was returned in response to a webhook request;
- response - HTTP body that was returned in response to a webhook request;
- reason - additional diagnostic information and the reason of webhook processing failure;
Each such field represents a JSON array. Each element in the array represents an input or output data of a HTTP request that was triggered for each request in the chain. You can check these fields to understand which MQTT message triggered the webhook and how it formatted the URL, headers and body for each request. In case of any failure especially related with expressions-based templating take attention to a reason field which will contain information on what field has failed to format and what was the error.
If you do not see logs for triggered messages ensure that webhook is located in the right subaccount. Webhooks respect subaccounts hierarchy and can only receive MQTT messages from the same flespi account they are located or down to it subaccounts hierarchy. If you need to apply webhook for events from item that is located in unrelated subaccount consider providing access to the item with grants.
When working with calculator interval events, you may need to find specific webhook log records related to a particular interval. For example, if your webhook delivers calculator events to your server and you want to investigate when a specific interval was sent and what your server responded, you can filter log records using this expression: "json(message, '/topics/6') == 123 && json(message, '/payload/id') == 456". Replace 123 with your actual device ID and 456 with the interval ID you're investigating. This filter extracts the device ID from the MQTT topic (at position 6) and the interval ID from the payload, allowing you to precisely locate the webhook delivery for that specific interval.
If you observe significant delays between when a message is generated and when the webhook processes it (especially during high message volume periods), this is likely due to the sequential processing behavior and accumulated delay from previously queued messages. Consider reducing the delay parameter or implementing alternative processing methods for high-throughput scenarios.
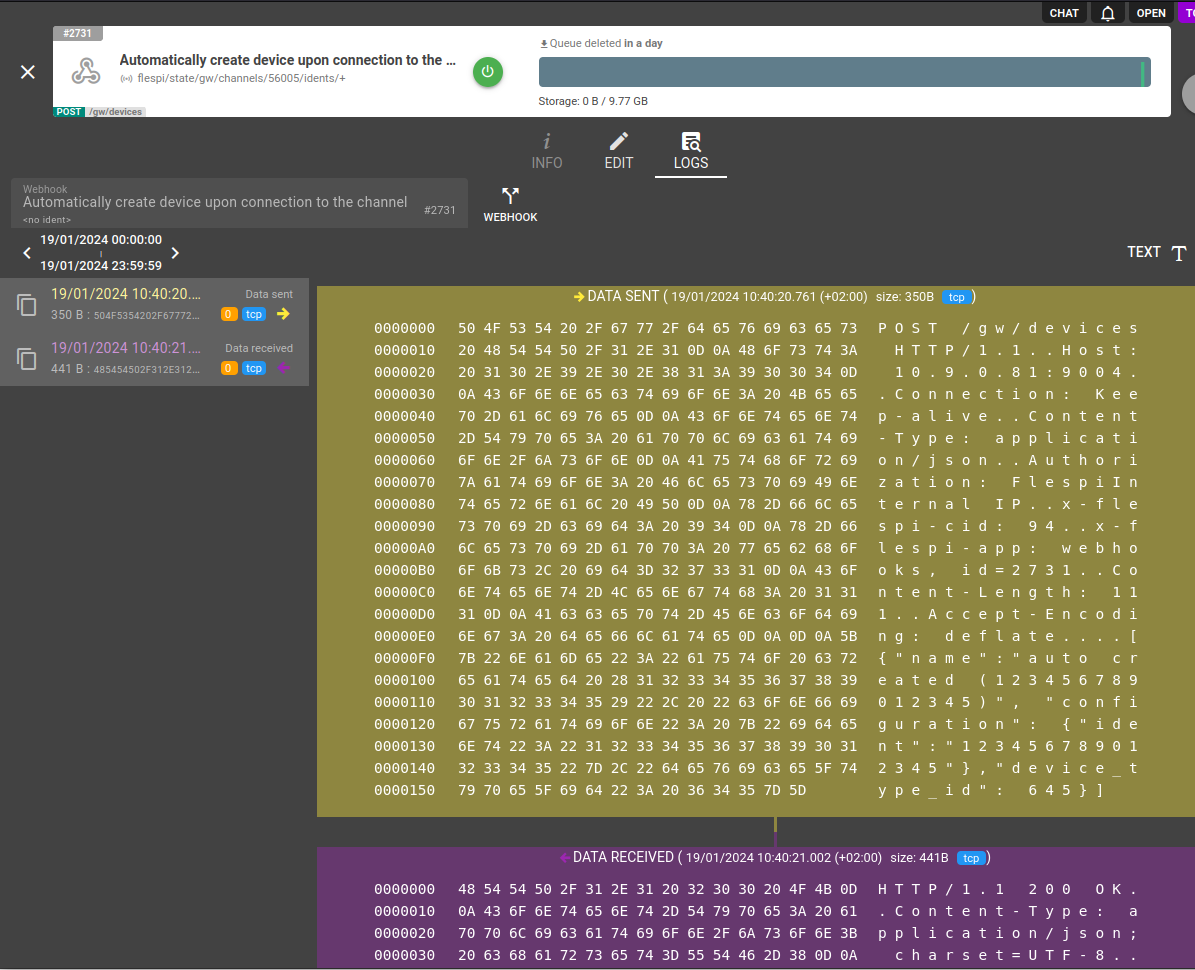
For detailed troubleshooting the raw traffic generated by the webhook is available under Traffic button.
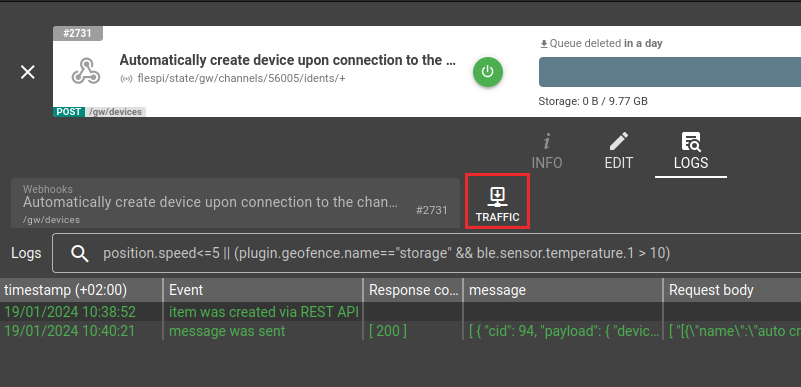
There you may see exact bytes of HTTP request sent by the webhook and the response replied by the server.
You can quickly navigate to a raw traffic associated with certain webhook event by right clicking on a log message and selecting "Show Traffic" in context menu. This action will switch the view to traffic view and navigate to the corresponding traffic generated by the webhook and related to this event (log message).