You can obtain telematics data from any Jimi IoT (Concox) device in 6 easy steps:
Create a free account on flespi.io.
Set up the Concox channel in your flespi.io interface.
Point a Jimi IoT device to your flespi account using the device configurator from Jimi IoT or by sending an SMS command to the device.
Confirm that the device data is being received and parsed.
Access Jimi IoT device data via API.
- Create a flespi device to access telemetry, apply plugins and analytics, and use long-term message storage.
1. Create a free flespi account
Go to www.flespi.io and click on 'LOGIN / REGISTER':
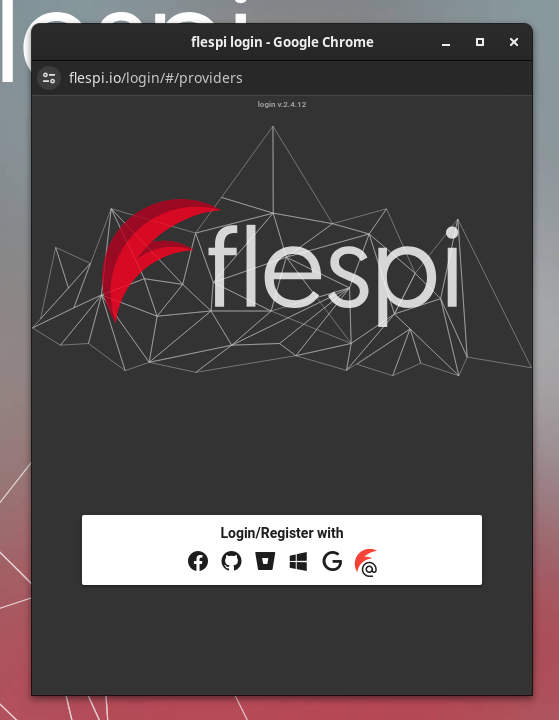
You can choose from a number of third-party service accounts to log in under or the right-most option @ to register with your name and email address.
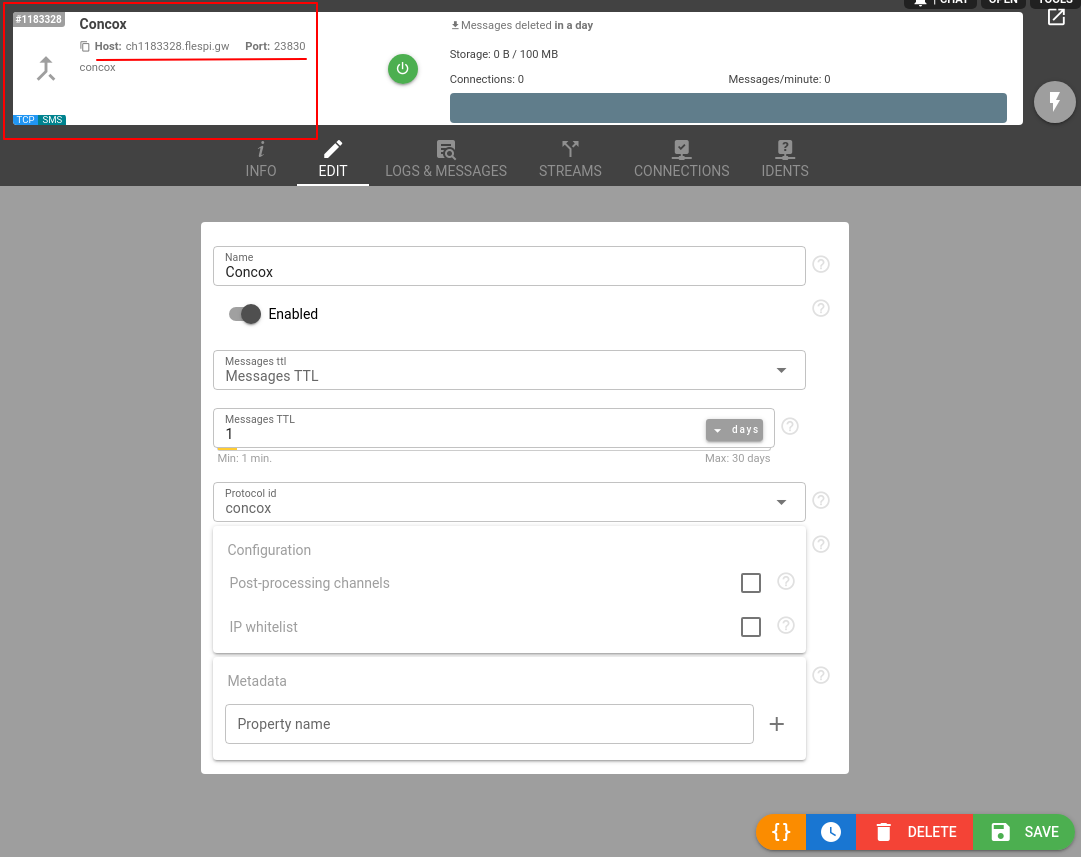
2. Set up the Concox channel in flespi.io
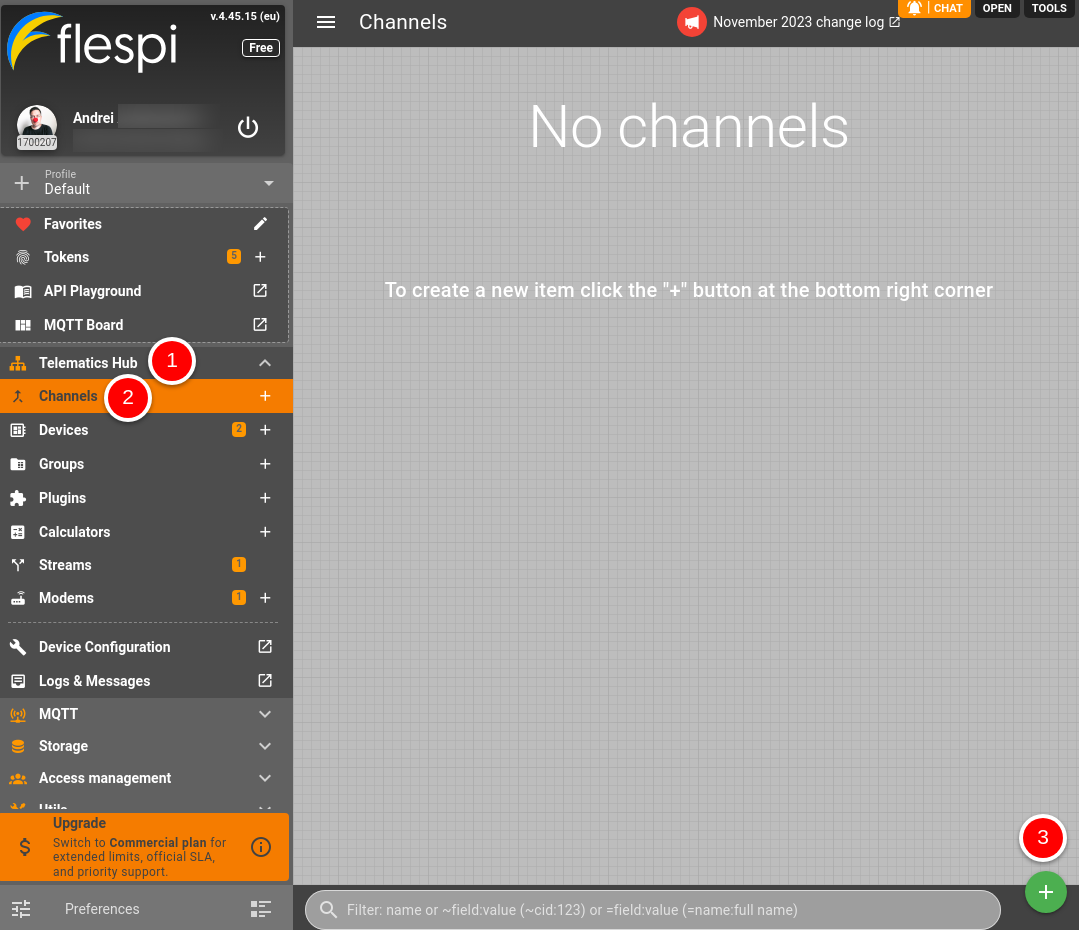
Click on Telematics Hub, then on Channels, then on the '+' button in the lower right corner of the screen.
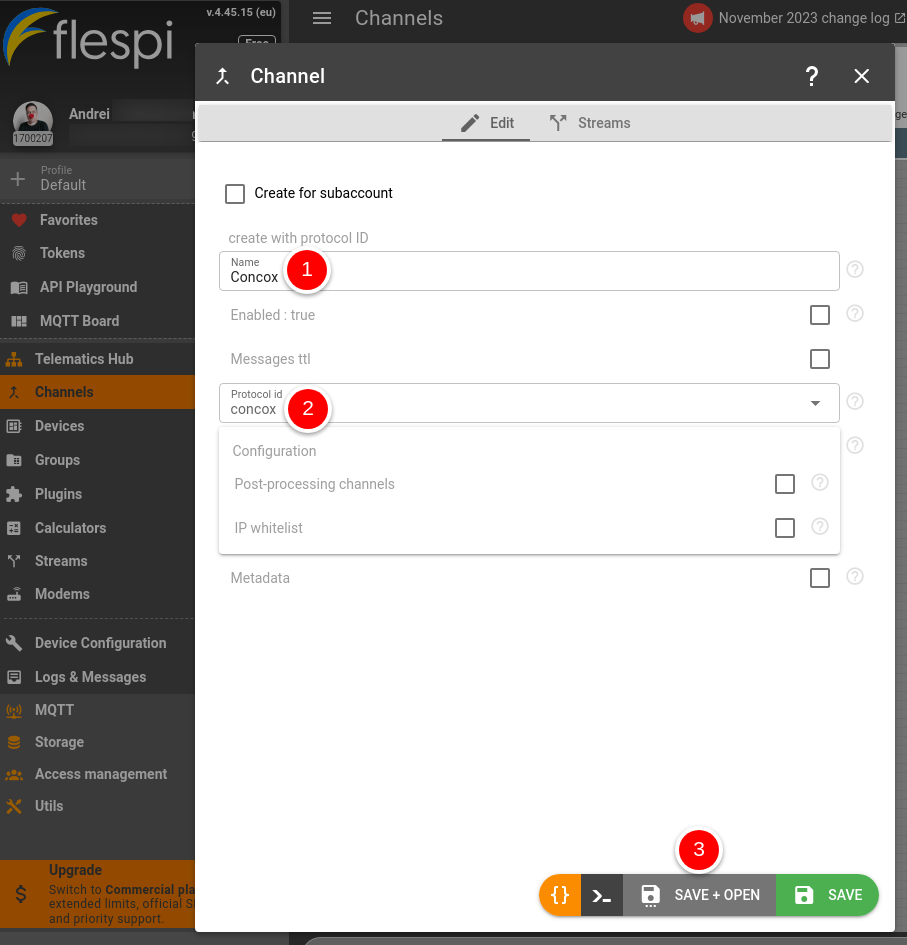
The Channel dialogue box will show up. Enter the name for the channel (any text will suffice), select “concox” in the protocol_id drop-down menu, click 'SAVE + OPEN'.
You're forwarded to the "Channel" details box. Make a note of the domain name and port that you should point your device to. IMPORTANT: The image below indicates where to find the info and is NOT an actual domain/port for you to use (in flespi each channel created by you has its own IP and port).
3. Point your Jimi IoT device to your flespi channel
You can do it with the Jimi IoT device configurator tool or by sending an SMS command to the device. The domain name and port to point to are located in the channel box.
The syntax of the SMS command is as follows:
server,1,<domain>,<port>,0#
4. Confirm that the device data is being received and parsed
While in the Channel dialogue box, click on the "Logs and Messages" tab. Inspect log records to confirm that your device has successfully connected to flespi. The presence of messages in the lower half of the screen will confirm that the incoming data is parsed. Please keep in mind that in as Logs section runs in realtime it will reflect any connection attempt. Hint: you can right-click on a message or log to show corresponding raw traffic.
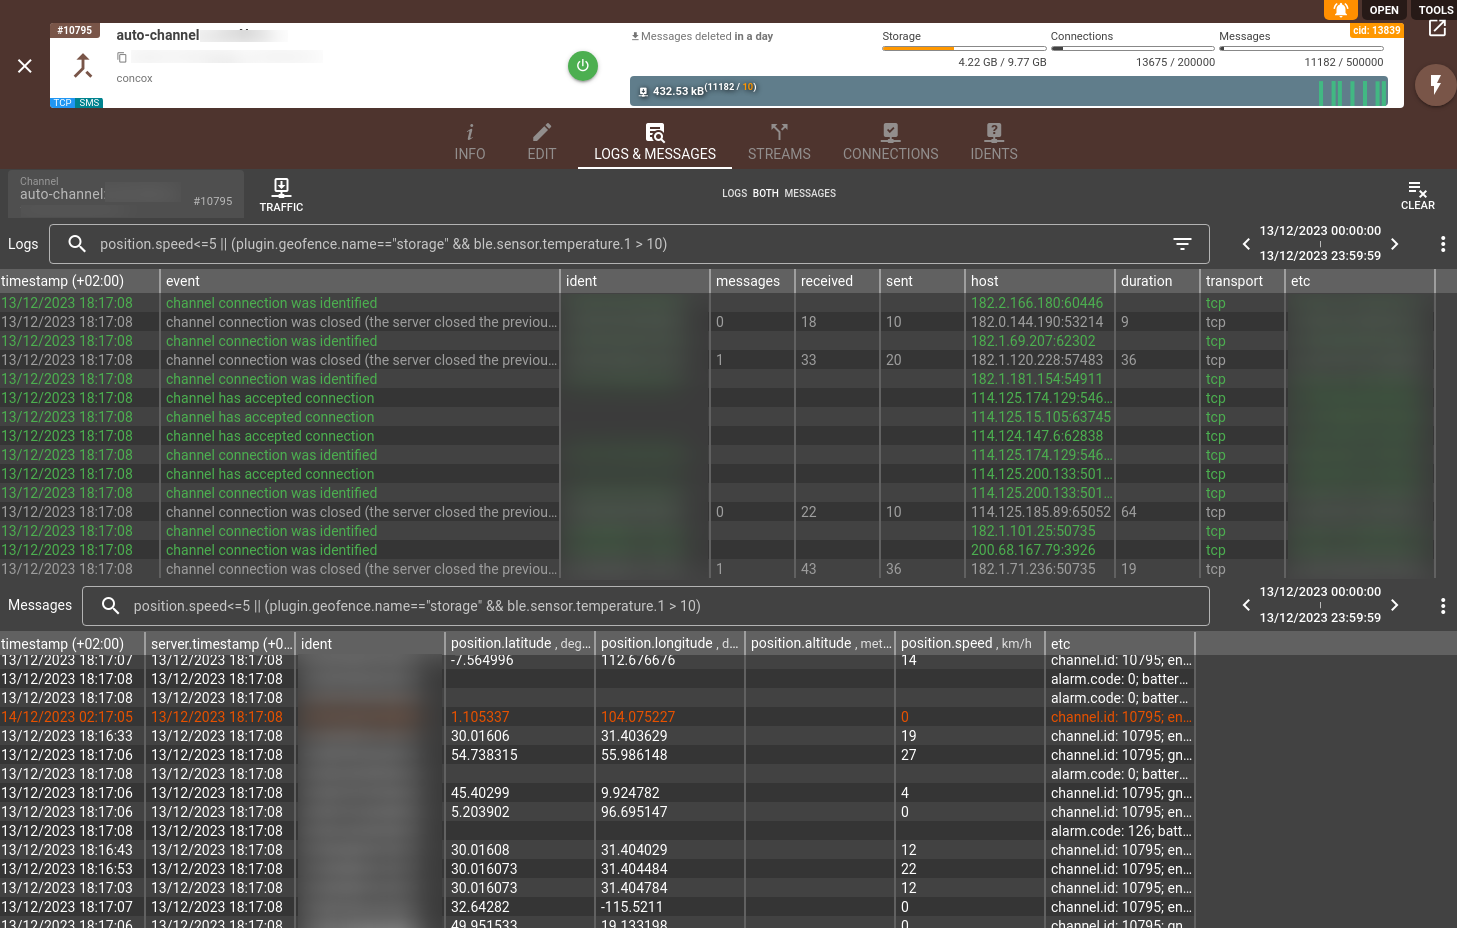
In case of any issues, check our troubleshooting checklist.
5. Access Jimi IoT device data via API
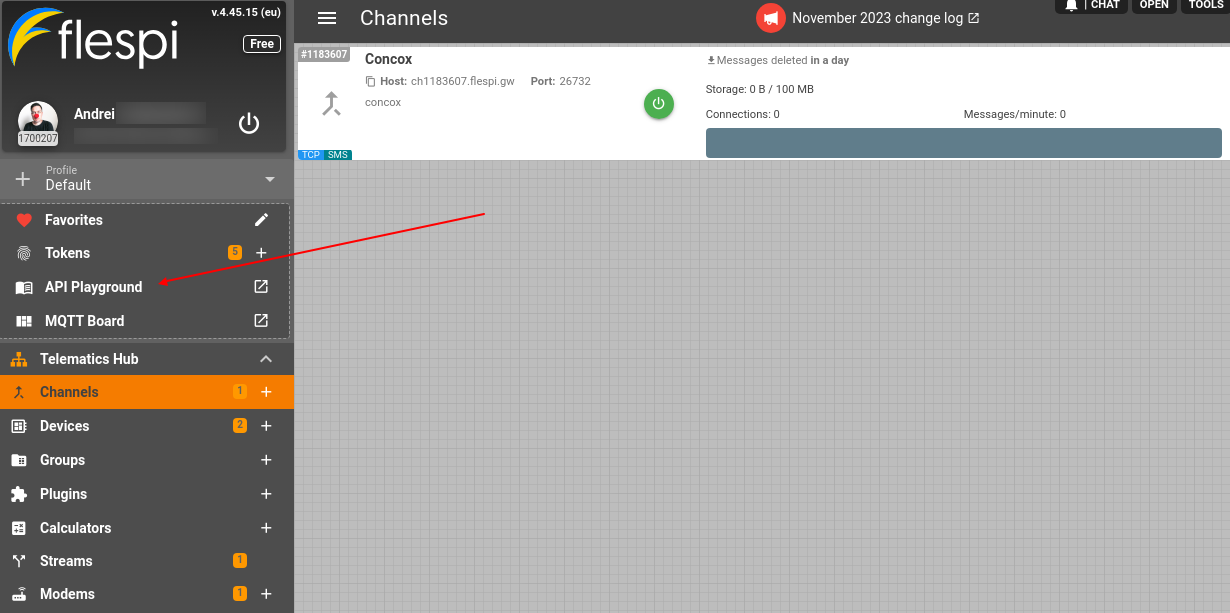
Make a note of what your Channel ID is:

Click on API Playground menu item in the lower left corner:
In the menu on the left under Gateway API click on channels. Scroll down until you see GET /channels/{1-ch-selector}/messages request. Click on it to reveal additional fields.
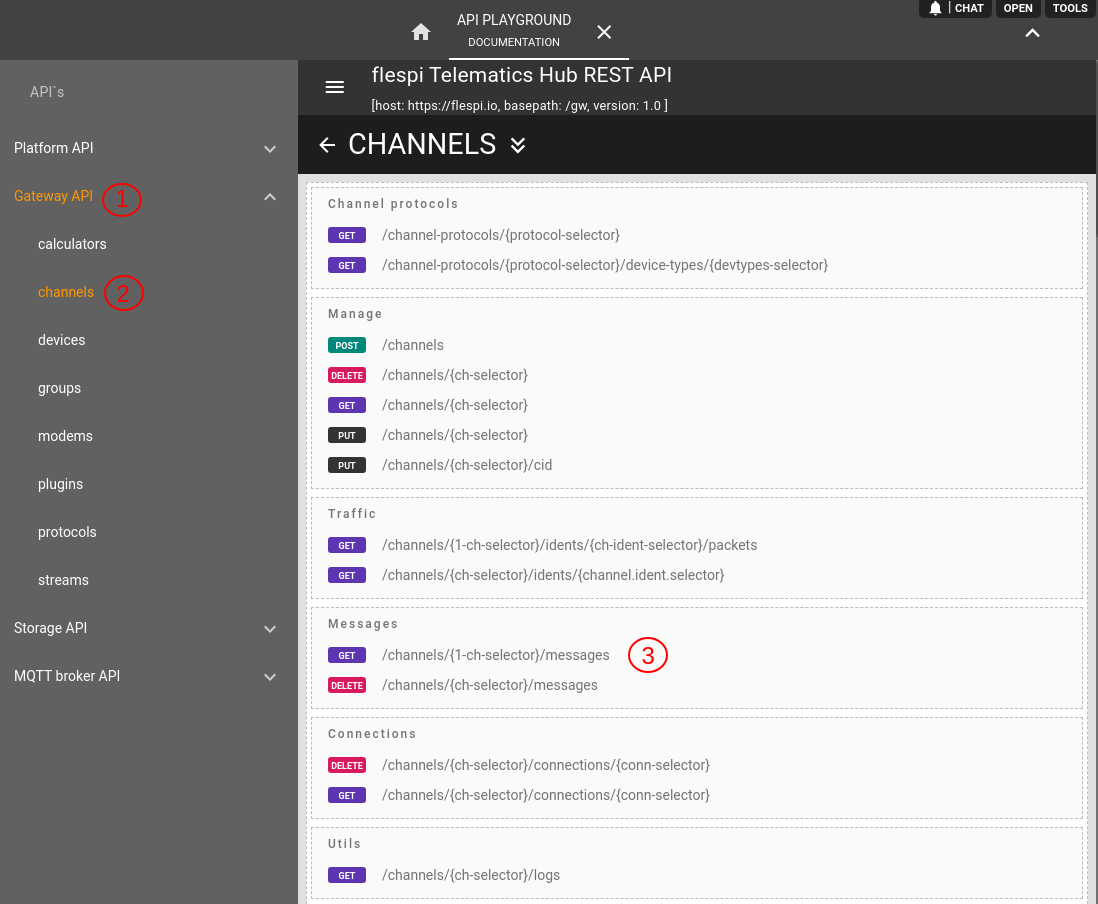
Fill in your channel ID in the 1-ch-selector field. Scroll a little lower until you see 'eye' button and click on it.
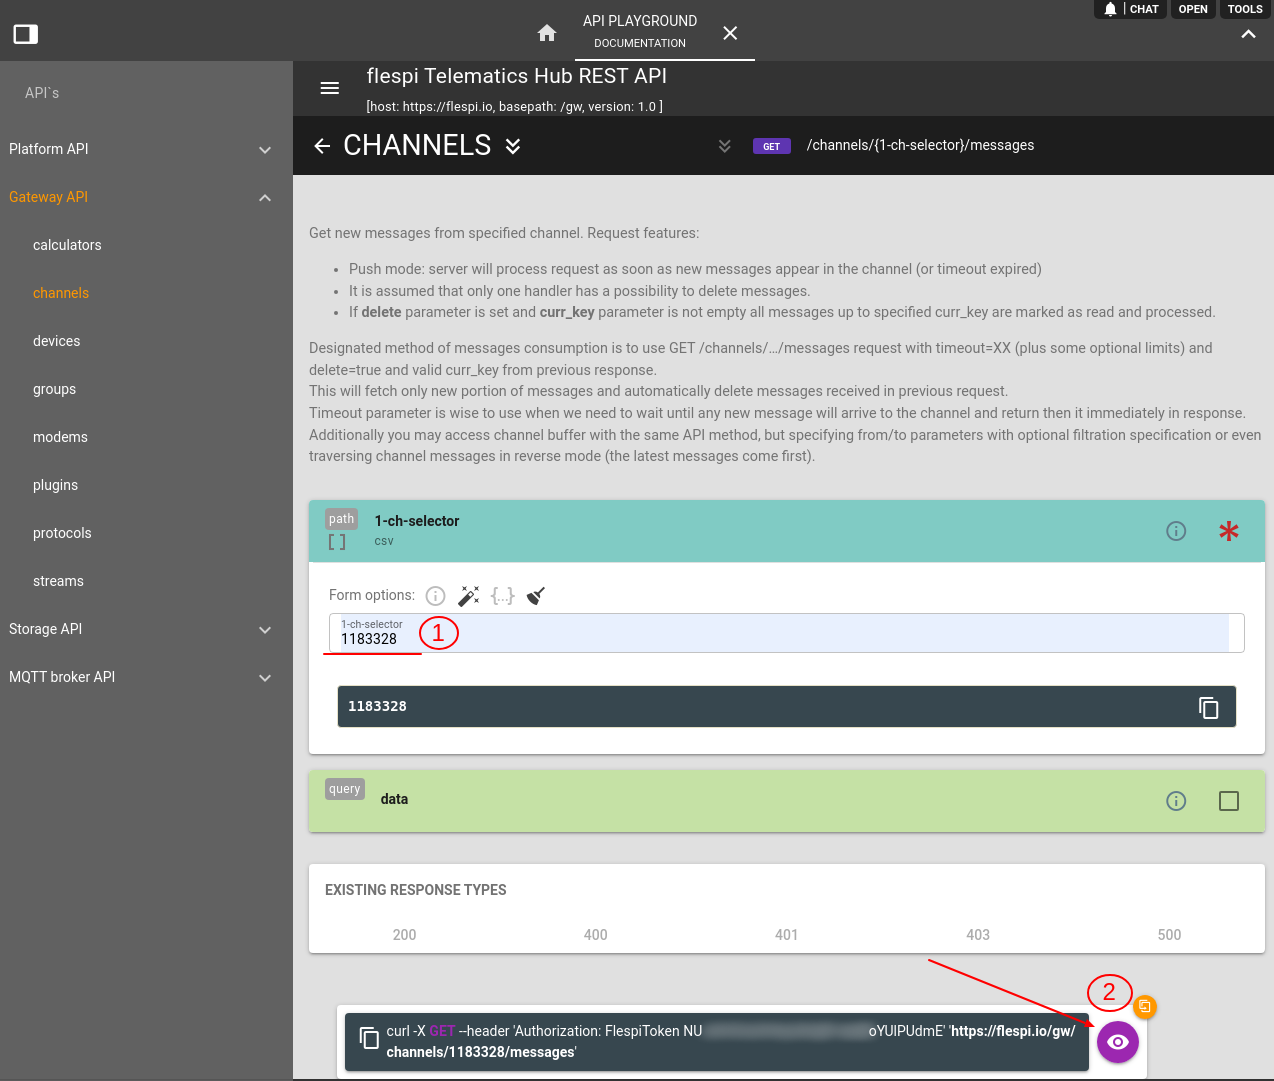
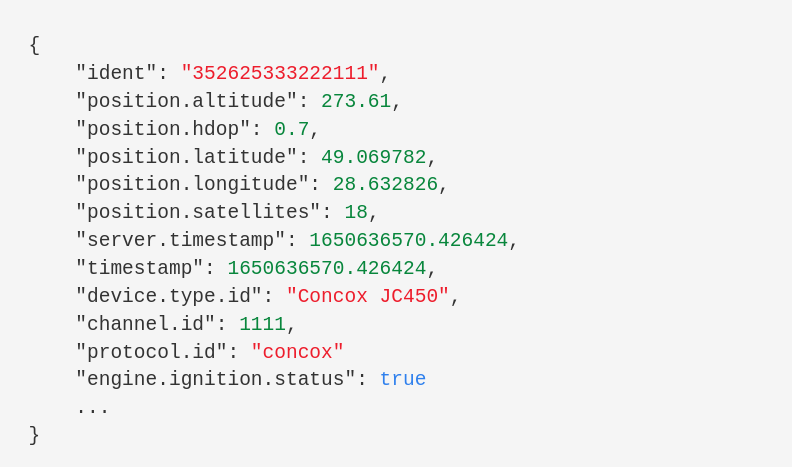
And here you have it - device messages in an easy-to-read JSON format.
6. Create a flespi device
This step takes interaction with your device on a qualitatively new level — get access to device telemetry, easily send configuration commands, configure post-processing using plugins, aggregate messages into intervals, benefit from extended message storage.
Click on Telematics Hub, then on Devices, then '+' button in the lower right corner. You need to choose the proper device type ID and specify the device configuration. Hit Save when you're ready.
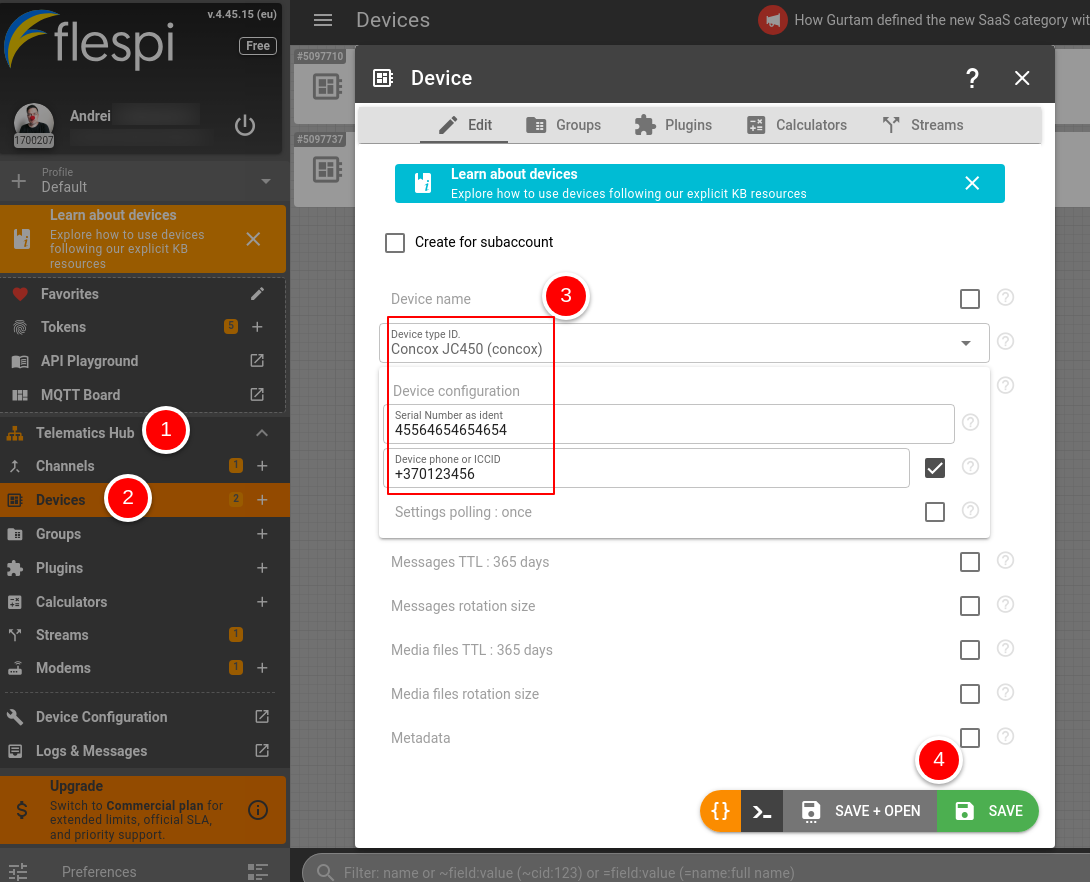
Now you can use the device API to access device data, send commands, and a lot more, or explore the numerous tabs on the device card.
Got questions? We're just one click away to assist you in the chat. :)
What's next?
- Take a look at our API basics.
- Explore a variety of data access options.
- Manage device settings and control outputs remotely via a universal web-based configuration tool or directly via API.
- Push the data to Amazon AWS IoT, Google IoT Cloud, Microsoft Azure IoT, or your own server.
- Calculate trips and stops, mileage, tracks, motor hours, and sensor values based on messages data.
- Get a better understanding of the flespi potential with a wide range of real-life use cases.