Queclink camera products integrate high-definition video/audio capture with advanced telematics features. These cameras use LTE connectivity for fast video uploads, and with front and rear cameras to record, they are ideal for insurance claims, driver training, passenger monitoring, and accident reporting. Here's how you can obtain video telematics data from Queclink devices in 6 easy steps:
Create a free account on flespi.io
Create a device in flespi
Manage your media in the dashboard
Access your media via API
1. Create a free account on flespi.io
First open flespi.io and create a free account or login with your credentials (you can proceed with your Google account for a quick sign-in).
2. Set up a Queclink channel
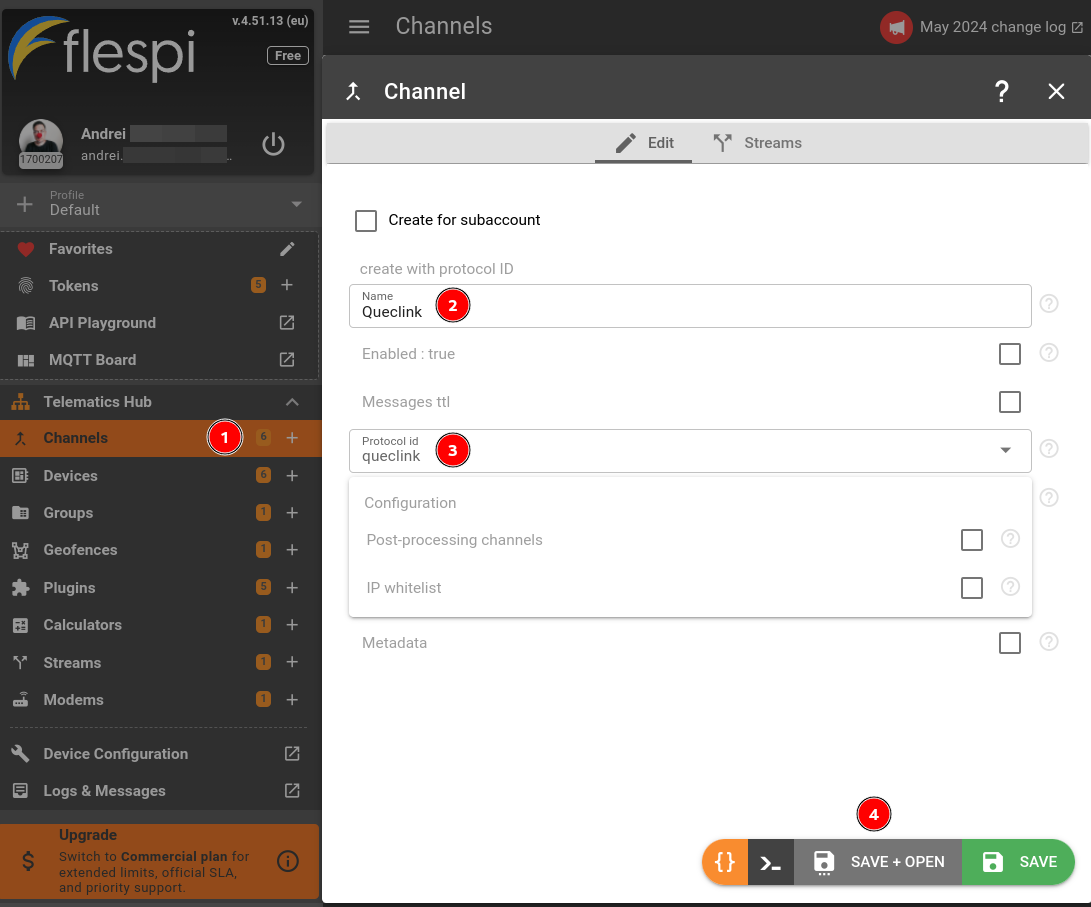
In the dashboard, you need to create a channel first. Follow to the Telematics Hub > Channels and click the '+' button. Name your channel and select ‘queclink’ as the ‘Protocol id’, then click on 'SAVE + OPEN'.
3. Point your device to Queclink channel
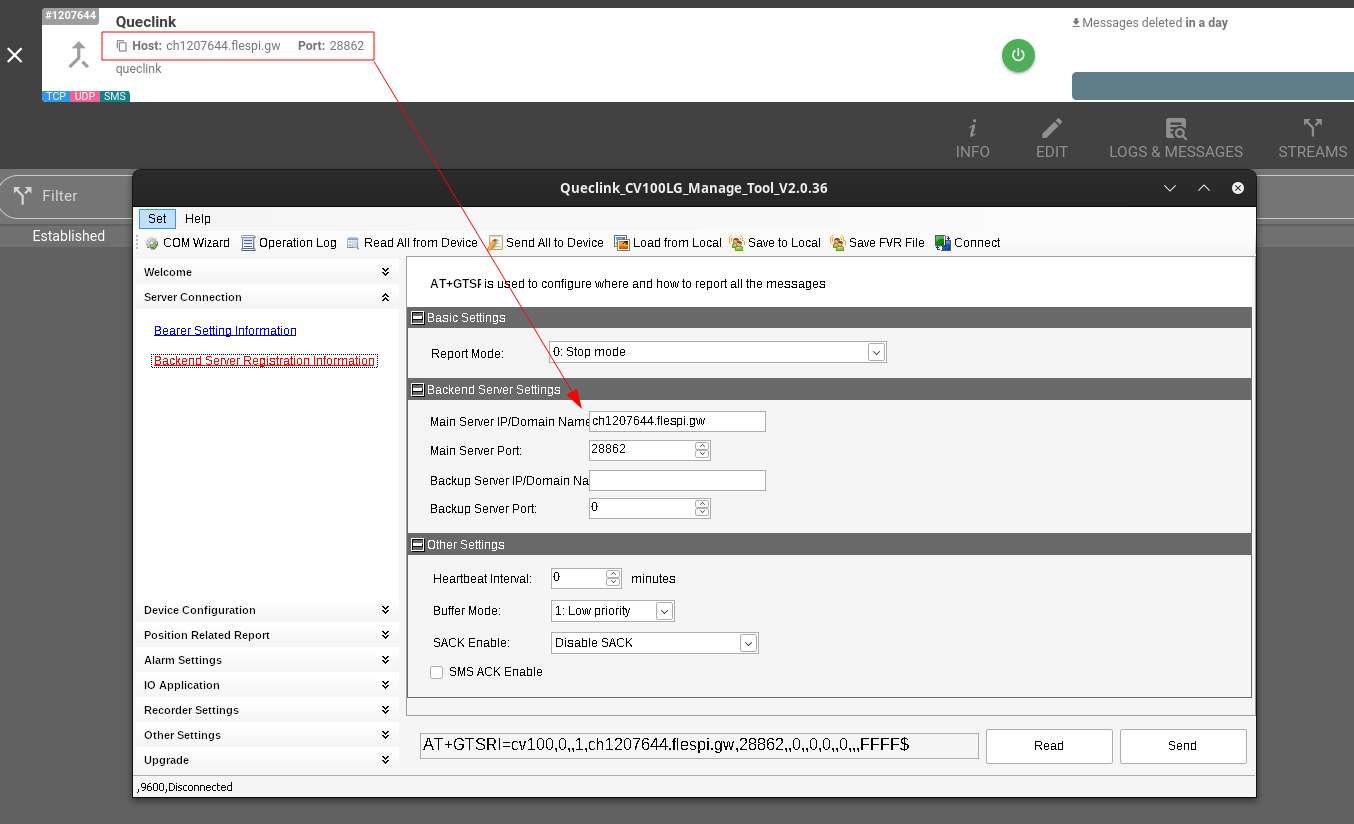
Queclink provides a dedicated configurator tool to assist with device setup. Open it and navigate to Server Connection > Backend Server Registration Information. Fill in the 'Main Server IP/Domain Name' and 'Main Server Port' fields with flespi channel 'Host' and 'Port' values respectively, then click the 'Send' button.
Important: the image below indicates where to find the info and is NOT an actual domain/port for you to use (in flespi each channel created by you has its own IP address and port).
If you changed the Backend Server settings by any other means — either with the GTSRI command, or SMS, or with the standalone configurator — please don't forget to reread the setting from the tracker in order to synchronize the configuration of the tracker with flespi device.
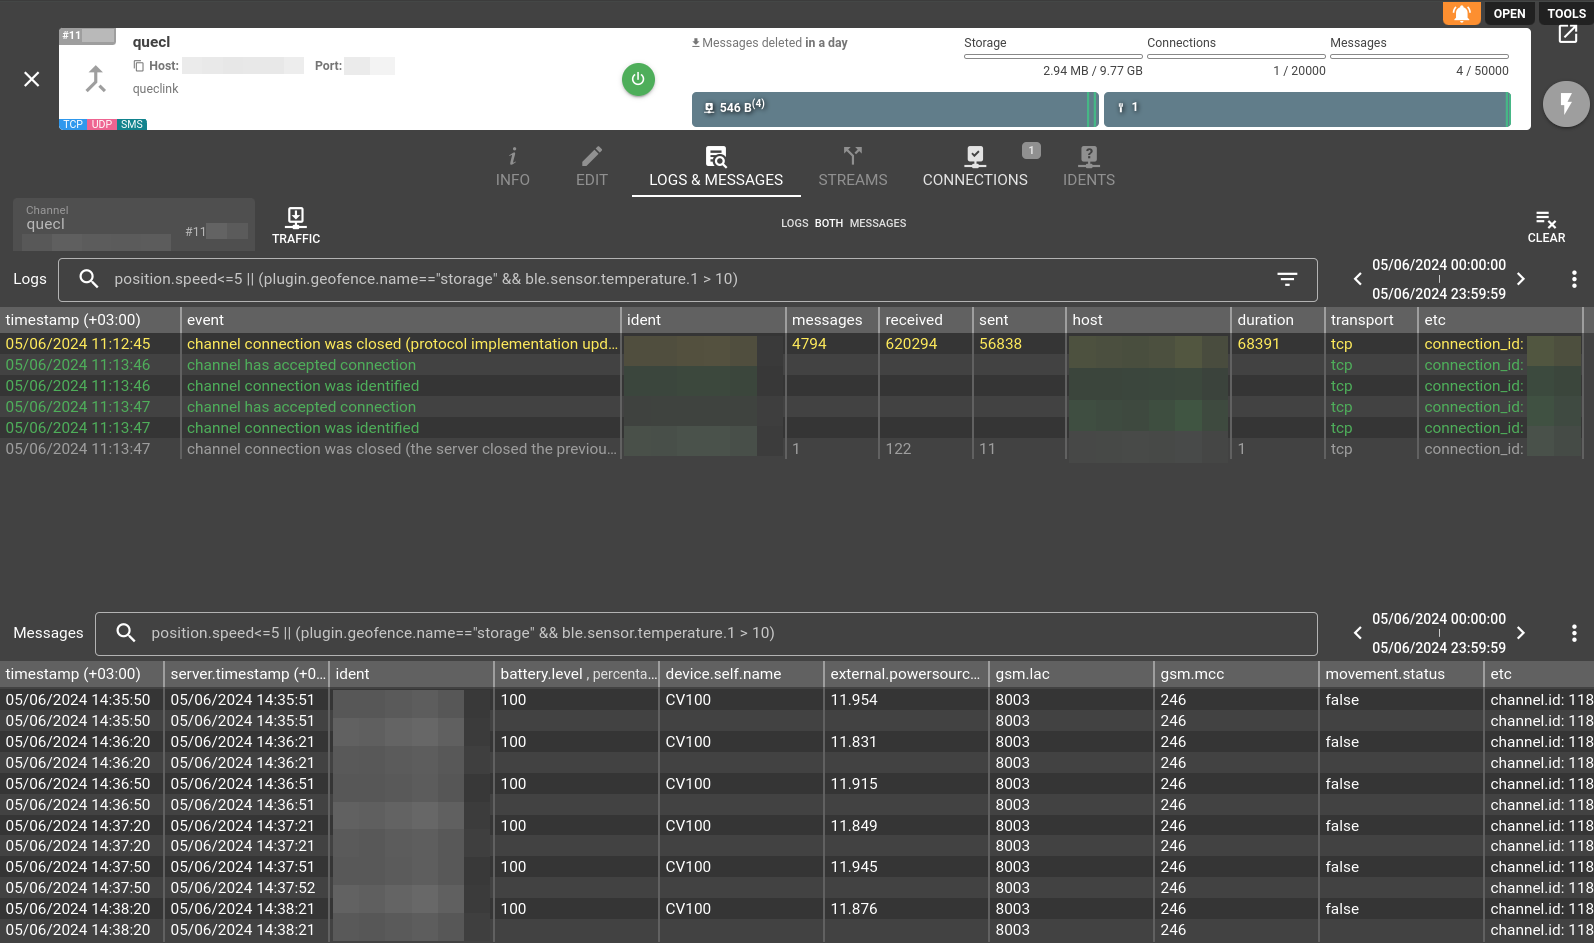
Now, open the Logs & Messages tab for your channel to see if messages are coming in.
4. Create a device in flespi
Flespi is a device-centric platform. It means that most of the platform functionality is available on the device level. To add a new device you need to open the flespi panel and follow through Telematics Hub > Devices, then click on the '+' button.
Choose the device model, and use the device IMEI for 'IMEI as ident' field (you can look up in the channel's Logs & Messages). As we’re setting up a video device you’ll see the Cameras section. 'FTP Password' field is not mandatory.
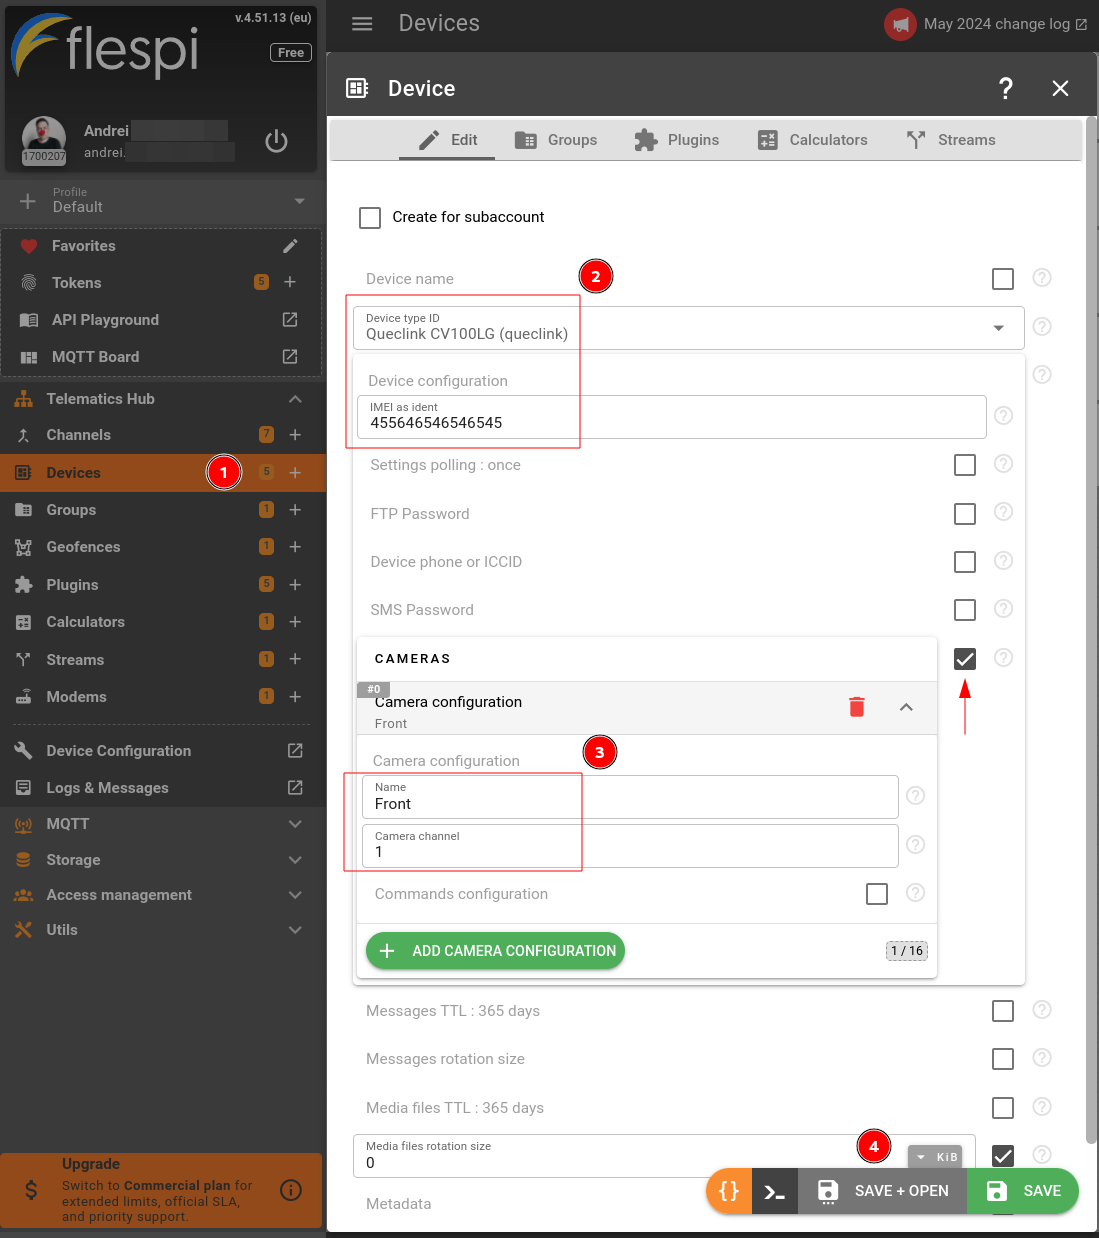
You can add only one camera or use them both. Click ‘SAVE + OPEN’ when you’re ready.
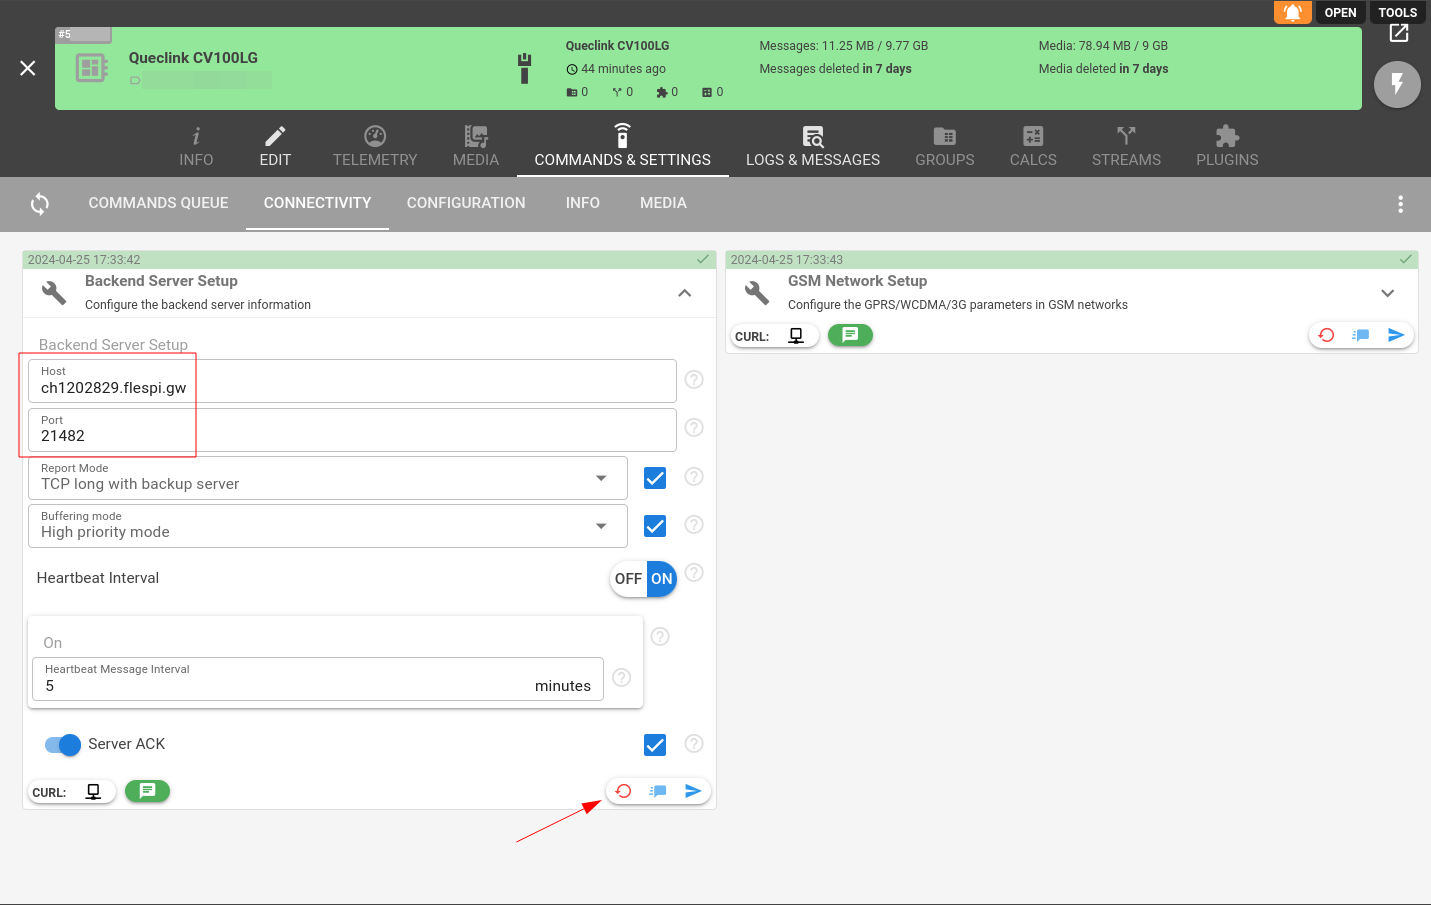
The Queclink CV100LG and CV200 devices use the FTP protocol to send videos and photos to the server. FTP settings can be configured under the Commands & Settings > Media > Server for Transferring Files tab. When a new device is created, the fields are empty. As soon as the device connects, the corresponding settings will be synced with the actual device configuration.
NOTE: Primarily, when you send your first video command, we configure your device to connect to the flespi FTP server and will update the Server for Transferring Files settings to ensure video functionality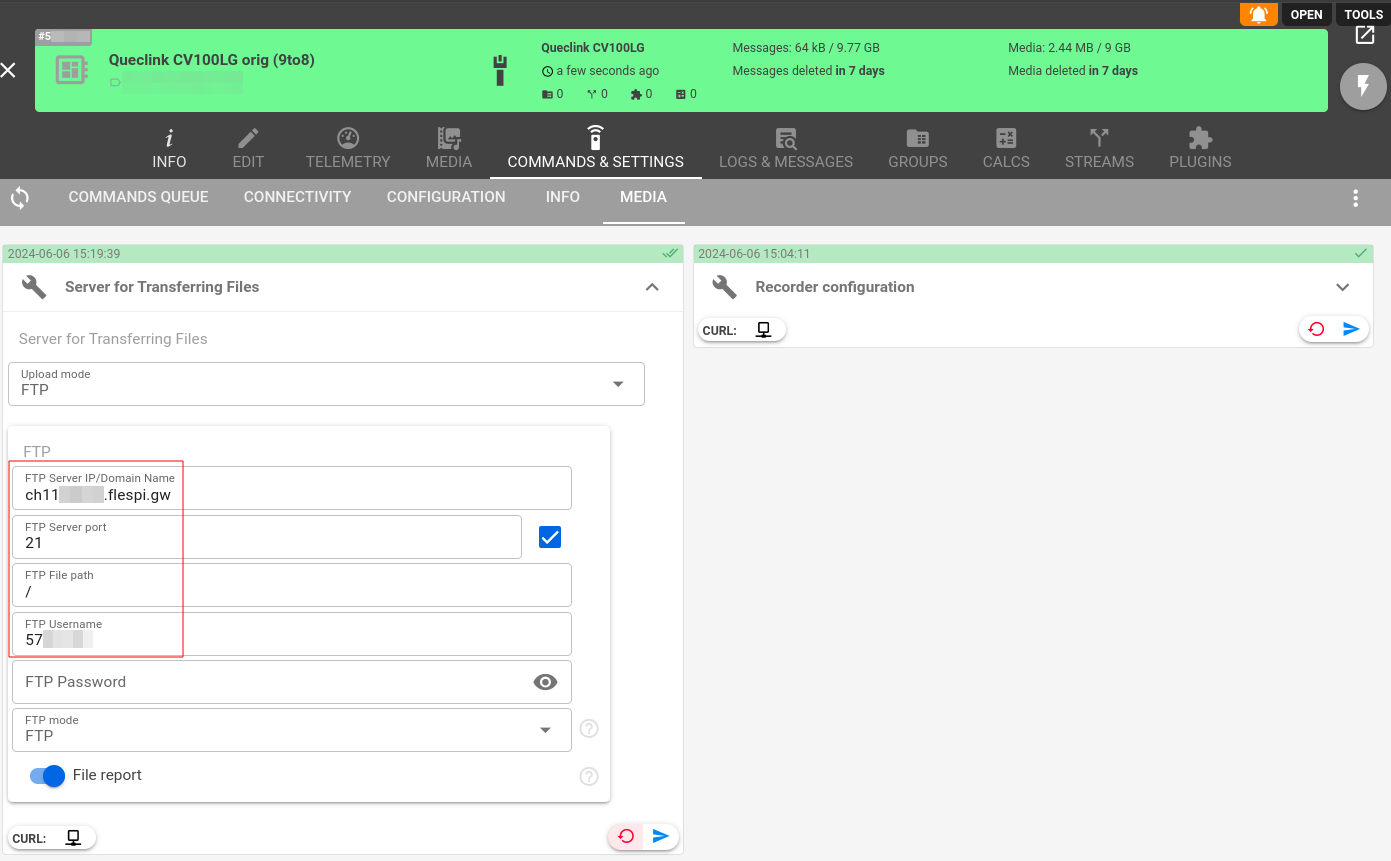
5. Manage your media in the dashboard
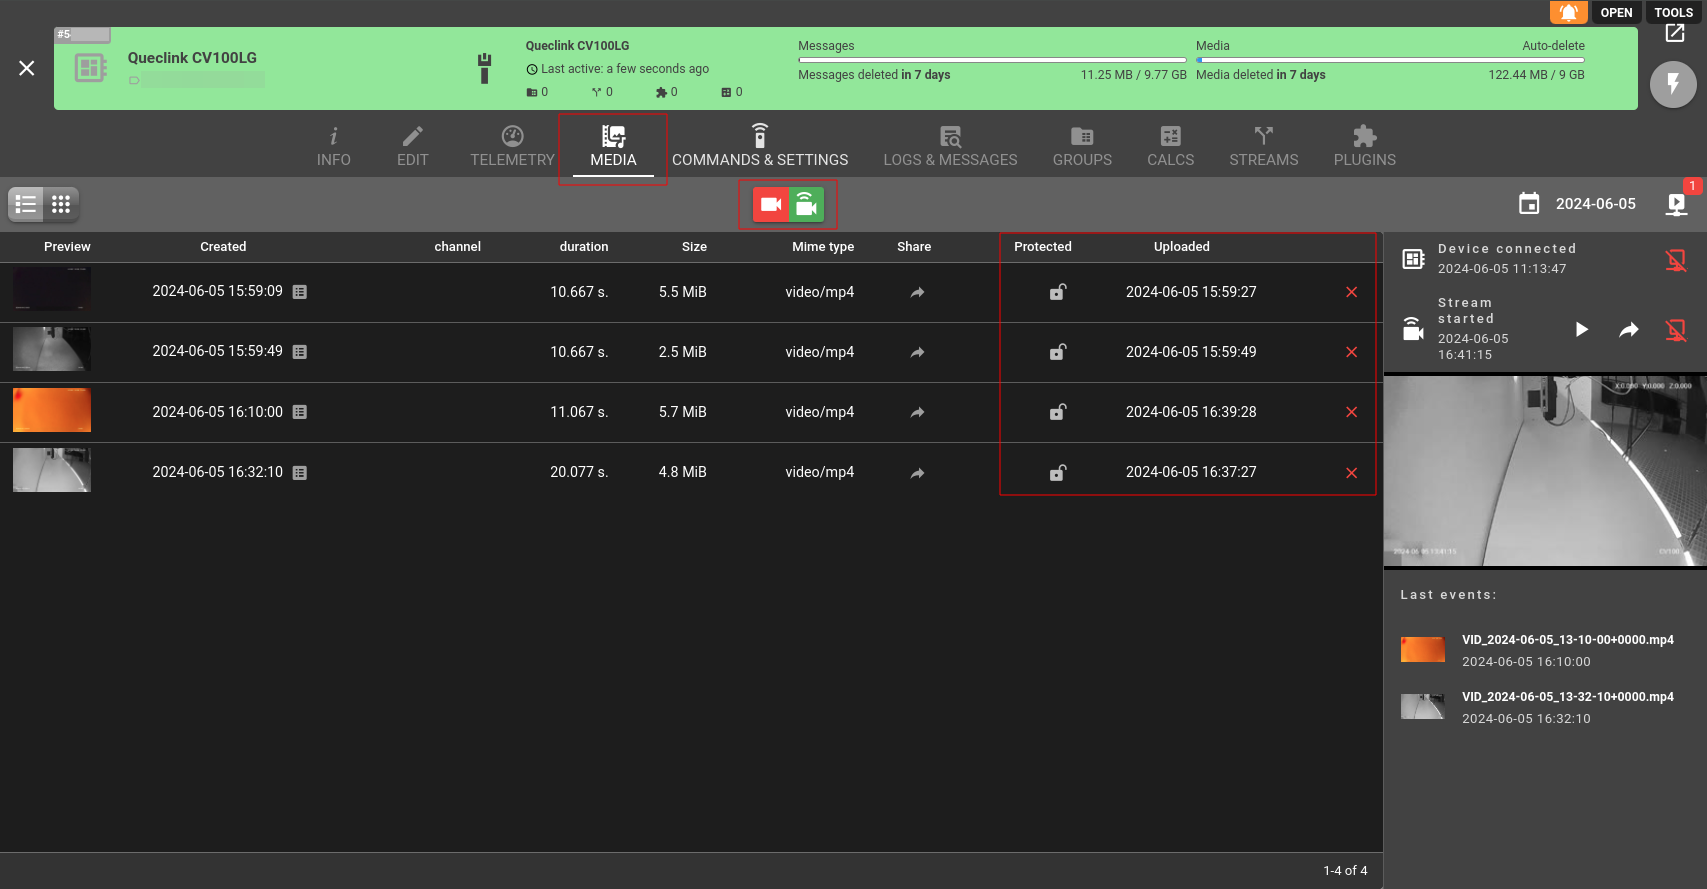
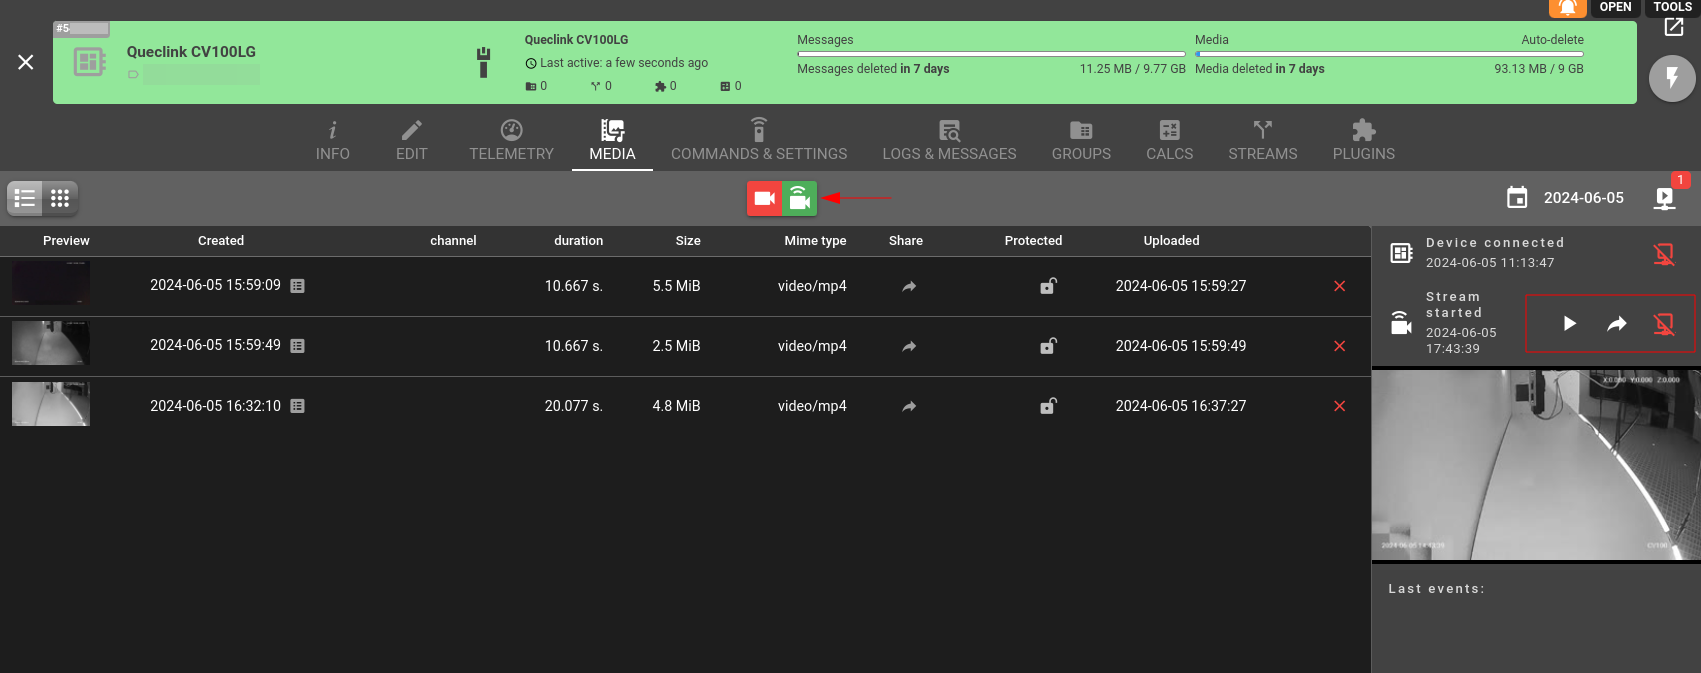
To capture a video, or start a live stream you can use the Mediabox UI tool with its intuitive control interface or run specific commands on the Commands & Settings tab. Also, in Mediabox you can easily access and manage all the files stored (preview snapshots, playback recorded video, protect files from automatic deletion, share them, etc.).
5.1. How to request a video
To request a video you need to click on a red camera icon on the Media tab and the following dialog box will show up:
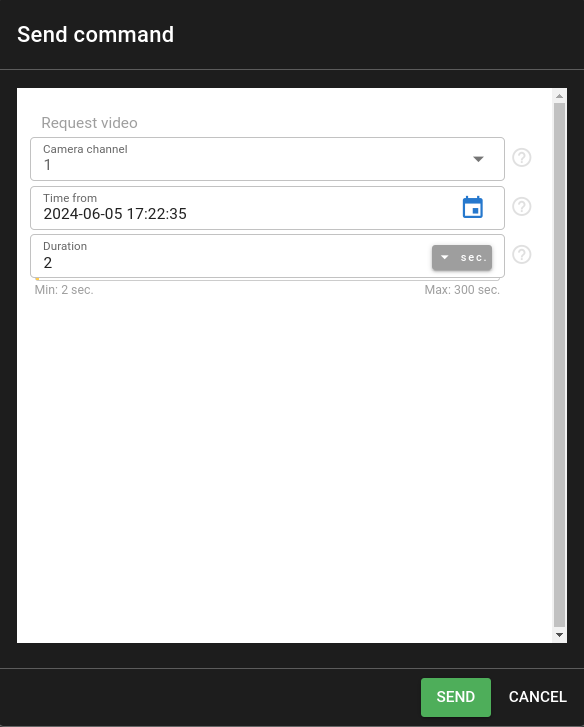
Select the Camera channel, and specify Time from, and Duration. When the command is sent to the device successfully you’ll see a recorded file appear on the list and the Last events pane.
Also, you can use the standard command named 'request_video' on the Commands & Settings tab. This command may contain manufacturer-specific options, providing fine-tuning capabilities when necessary, but always includes three required options:
- camera channel index ("channel" property),
- video recording time ("from" property),
- clip duration ("duration" property).
The request will look like the following:
curl -X POST --header 'Authorization: FlespiToken XXXX' -d '[{"name":"request_video","properties":{"channel":1,"duration":10,"from":1706006460},"ttl":86400}]' 'https://flespi.io/gw/devices/YYYY/commands-queue'- With this call, you instruct flespi to download video from device YYYY recorded at 1706006460 (in GMT this is January 23, 2024, 10:41:00) and duration of 10 seconds.
- This command will stay in the command queue for up to 1 day (86400 seconds) waiting for the device to be connected and be able to serve this command.
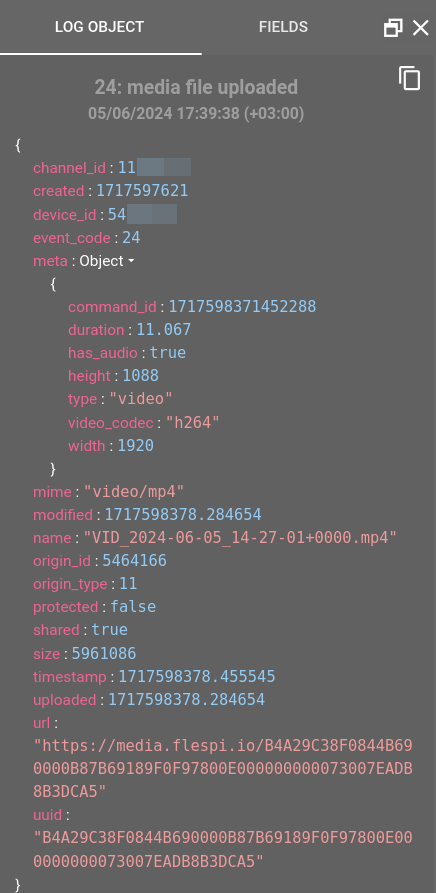
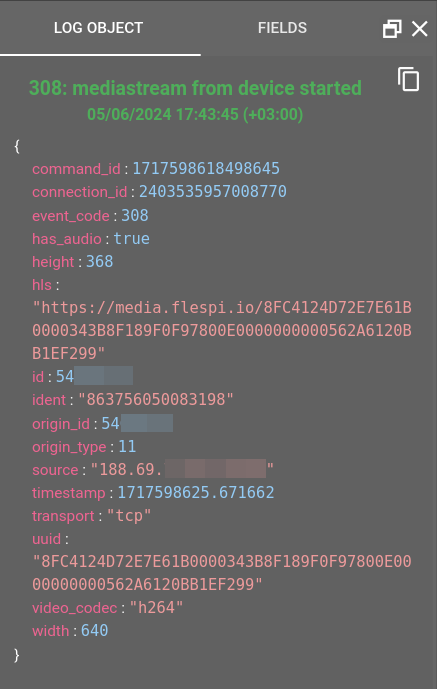
- Once the command is executed you get full information about the video clip with UUID and a direct link.
You can find more info about commands and how to use them in flespi here.
5.2. How to start a live stream
On the Media tab click on the green camera icon. The following dialog box lets you choose the camera channel.
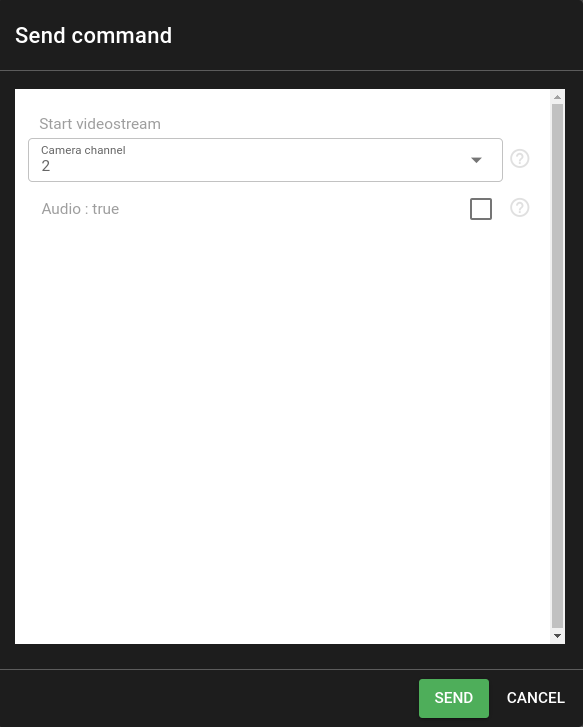
As the video stream becomes available, you’ll notice a preview window on the Last events pane. As the stream is not recorded, you won’t see a corresponding file added to the bottom of the file list.
You can also instruct the device to start streaming with the ‘start_videostream’ command on the Commands & Settings tab where the most important option is to select the channel number. The request will look as follows:
curl -X POST --header 'Authorization: FlespiToken XXXX -d '[{"name":"start_videostream","properties":{"channel":1,"mediastream":"hls"},"timeout":10}]' 'https://flespi.io/gw/devices/YYYY/commands'As the command is executed, you'll see the response with a .m3u8 link to load it into a media player::
Important: The live stream will be automatically stopped after 10 minutes if there's no active browser session or other HLS-compatible client connected. To control your traffic you can stop a stream in these ways:
- click on a particular display-crossed icon on the Media tab,
- make a request, where YYYY is your 'device_id', and ZZZZ - 'connection_id', that can be found in the initial 'start_videostream' message:
curl -X DELETE --header 'Authorization: FlespiToken XXXX''https://flespi.io/gw/devices/YYYY/connections/ZZZZ'
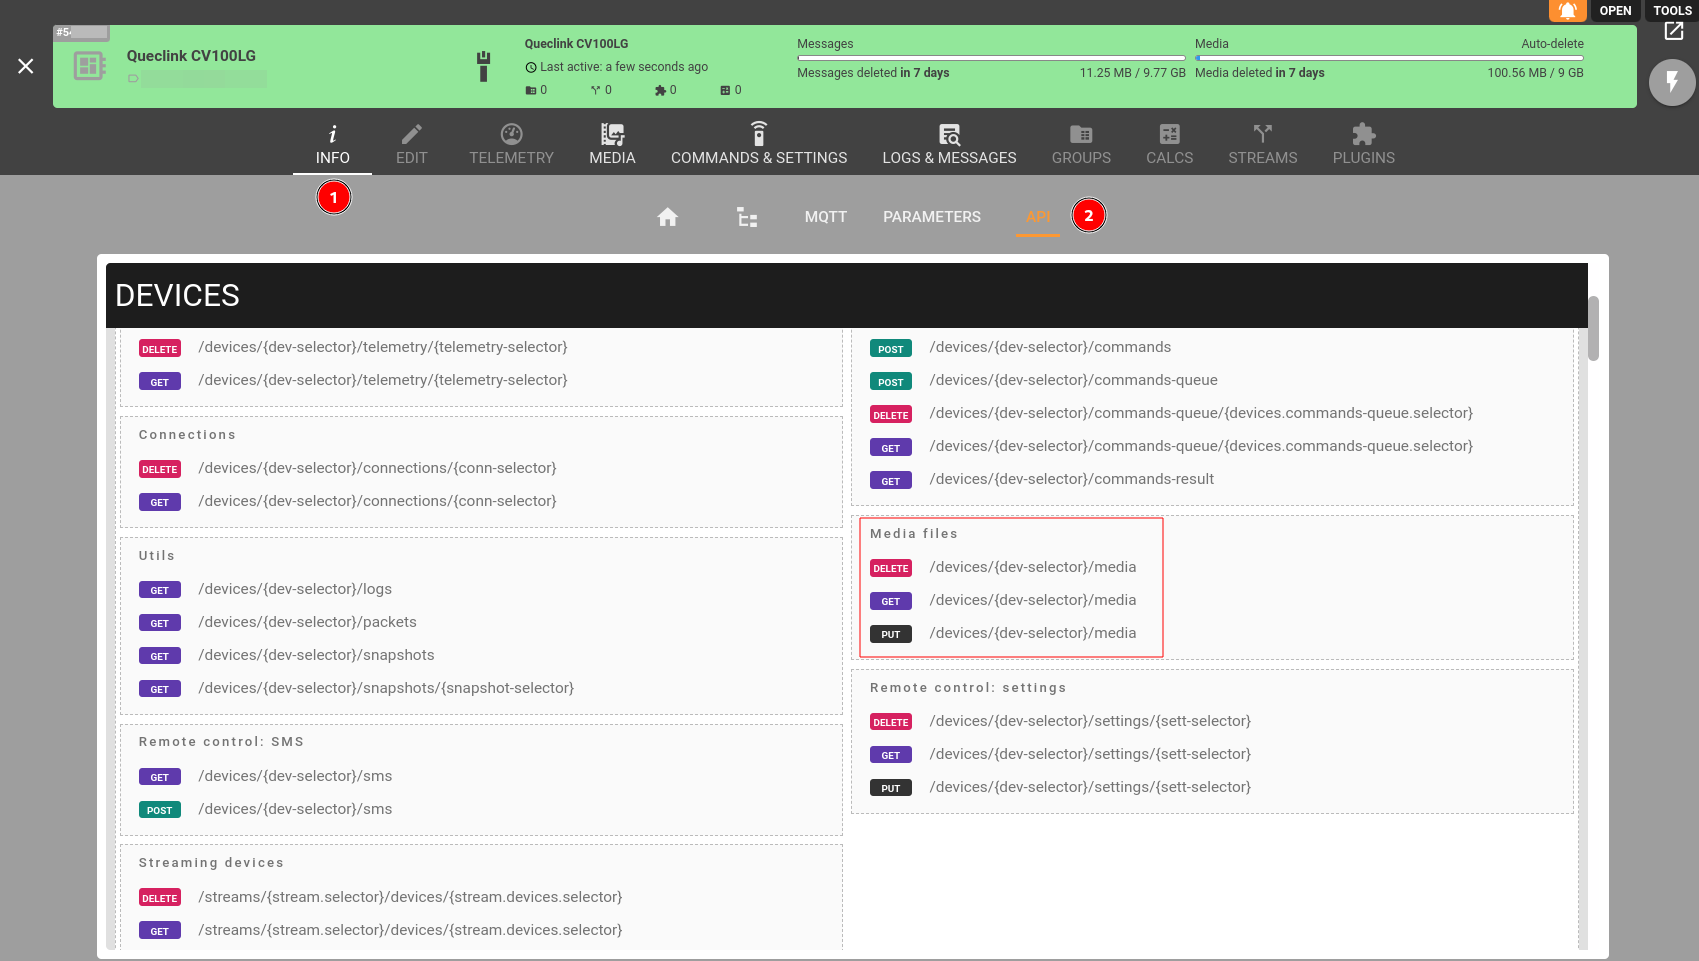
6. Access your media via API
In the main menu follow Telematics Hub > Devices > 'Your Queclink Device' > Info > API. The following operations are available for each media device:
- Delete all or specific files.
- Search for some files or list all files.
- Add your own set of properties to a file, or protect/unprotect it from being deleted automatically.
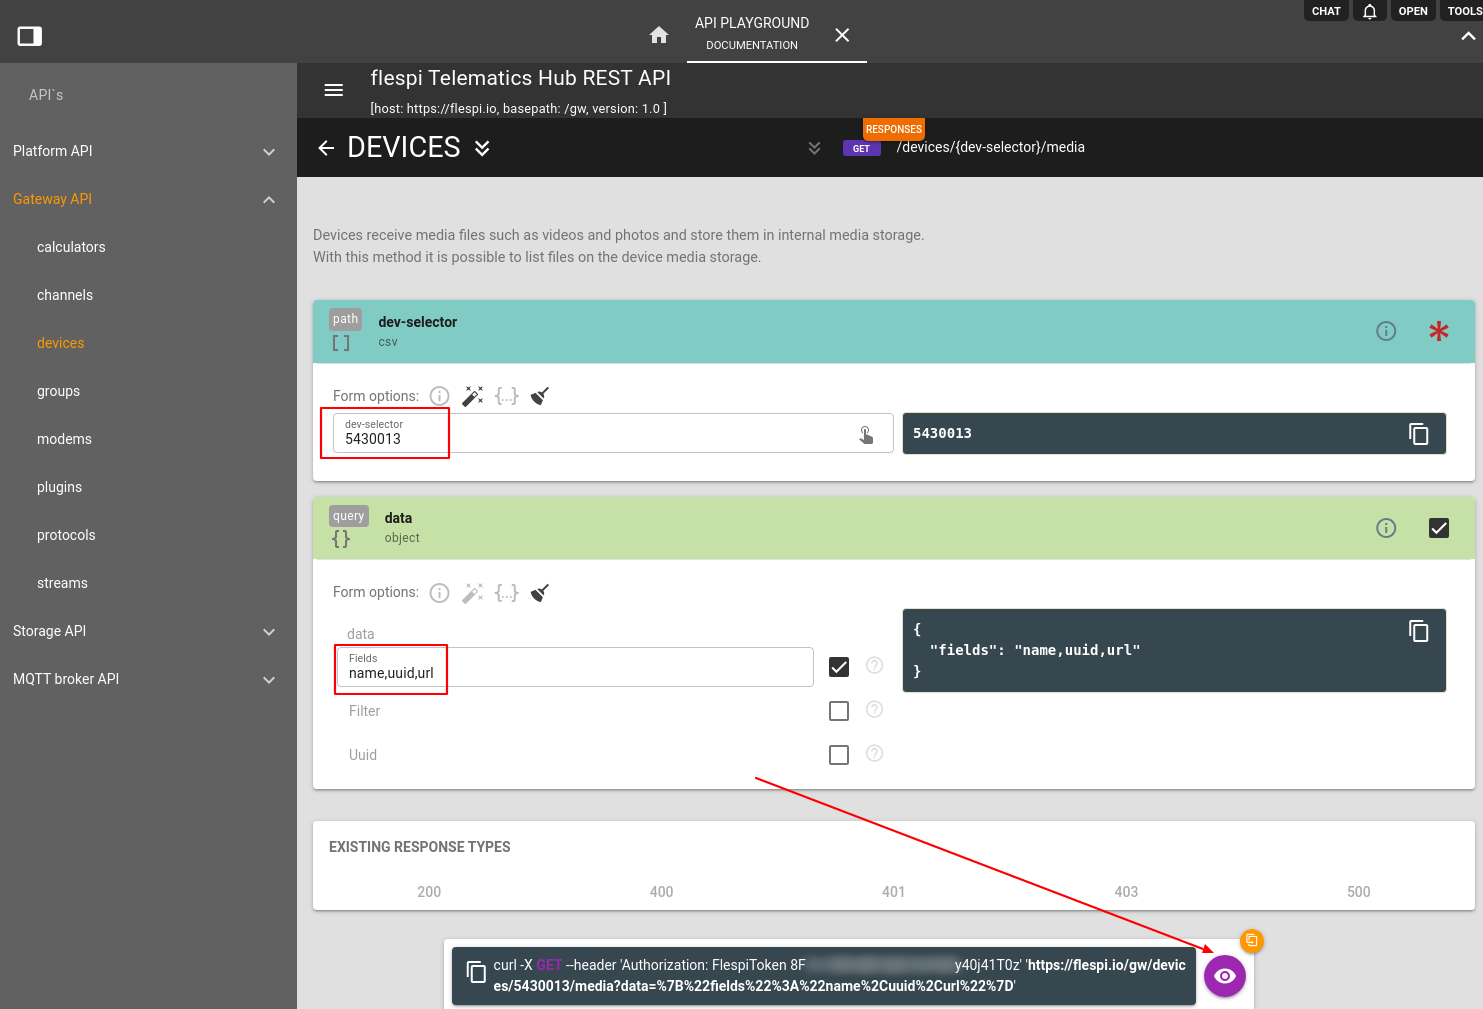
For example, you need to get the list of all media files stored in the device with their URLs and UUIDs.
Use GET /devices/{dev-selector}/media request. Fill in 'dev-selector' with your 'device_id', add 'name,uuid,url' to the 'data' field, and perform the request by clicking on the 'eye' icon.
The response will look as follows:
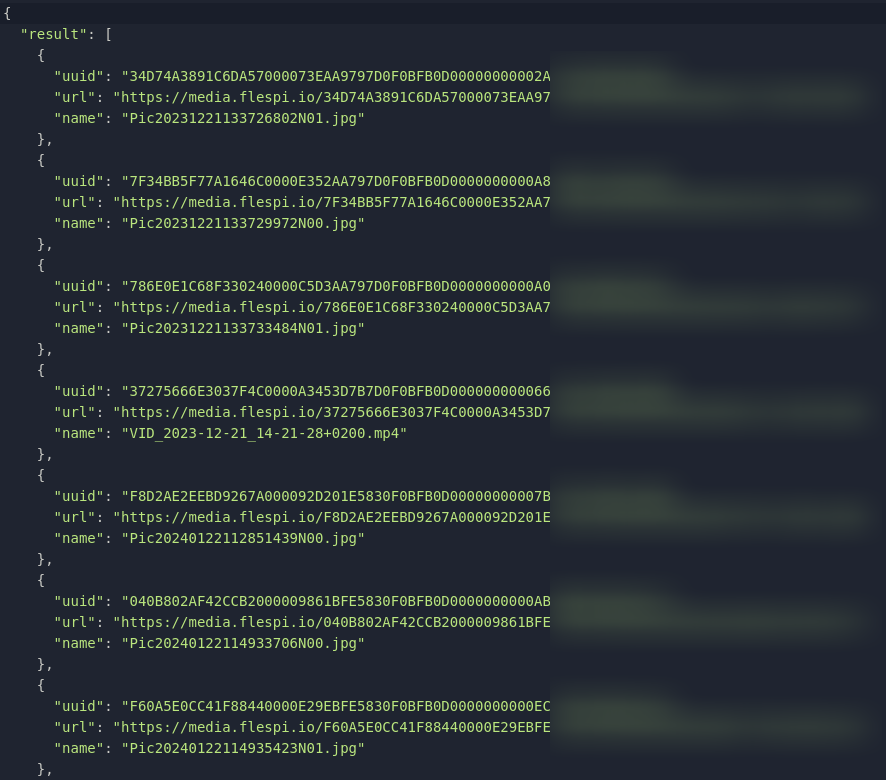
Hint: as all files have a unique UUID property, which is used to identify the file, there's no need to use tokens for authorization — you just use it as is.
That's it. :) Got questions? We're just one click away to assist you in the chat.
What's next?
- Take a look at our API basics.
- Explore a variety of data access options.
- Learn how to integrate video telematics into your application.
- Manage device settings and control outputs remotely via a universal web-based configuration tool or directly via API.
- Push the data to Amazon AWS IoT, Google IoT Cloud, Microsoft Azure IoT, or your own server.